I want you to take better landscape photos! Here's how...
Hello Steemians!
Are you someone who has a camera but isn't quite sure on how to use it? You might be a traveller with a new camera or someone who just loves photography? Either way, I'm happy to say I have accumulated some landscape photography knowledge over the years, which you might find helpful.
My goal by the end of this post is to help you take better landscapes here on steemit!
Disclaimer.
I opted not to take any reward from this post. If you find the information helpful please upvote and resteem so others can benefit from the knowledge.
If you want to learn more feel free to follow me at @myday :)
A General Guide to the Best Settings
ISO
ISO is your imaging sensors sensitivity to light. It comes from the days of film photography. If you purchase a roll of film today, you will notice it will say 100, 200, 400, 800 or even 1600 on the box. These numbers indicate how sensitive the film is to light. The higher the number, the more sensitive and the more coarse the film grain can appear.
The same measurement system applies to digital. As a general rule landscape photographers will always try and use the lowest ISO possible to avoid any ‘noise’ that appears in their photos. Noise is basically the same as film grain. The higher the ISO the more digital noise appears.

Canon EOS 1D MK III - EF16-35mm f2.8L - Multiple Image Stitch at ISO 100.
An important point to mention when using lower ISO’s is make sure your camera can shoot in RAW mode at ISO 100. Some cameras will only shoot in Jpeg at this ISO setting. ISO 200 would be the lowest to shoot RAW in this case.
Below are some common scenarios (that expand beyond landscape photography) where you may find yourself using different ISO’s.
★ ISO 100 - 400
Photographing in a bright sunny environment with an aperture around f2.8 - f11. Use this setting for the least amount of digital noise to appear in your photo.
Canon EOS 1D MK III - EF17-40mm f4 - 1/500 - f5.6 - ISO 400.
★ ISO 400
Photographing in a shady environment with an aperture around f2.8 - f4. This ISO is also popular for sports and wildlife photography.
★ ISO 800
Photographing in an indoor environment with no natural light with an aperture around f2.8 - f4. This ISO is also popular for sports and wildlife photography.
★ ISO 1600
Photographing in an indoor environment with no natural light with an aperture around f5.6. Can also be use for astrophotography for a shorter exposure time.
★ ISO 6400 and above
Photographing in candle light with an aperture of f1.2 - f2.8. Higher ISO like these are used very rarely and as technology gets better, noise will reduce allowing for more creative freedom.
Shutter Speed
Shutter speed is the amount of time your camera’s shutter is open. This can often be measured in a fraction of a second. Shutter speeds on your camera will typically range from 30 seconds through to 1/4000th (displayed as 1/4000) of a second. Professional cameras can extend to 1/8000th of a second or even faster (1/32000) if they have an electronic shutter. On the other end of the time frame using a Bulb mode found on your camera will allow you to leave your camera’s shutter open for as long as you want.
The appearance or exposure of your photo will depend on the amount of time you have the camera’s shutter open. For instance, if you mount your camera on a tripod and manually set the shutter speed to 1 whole second on bright sunny day, the photo will appear over exposed because there is too much light entering the camera.
If you turn your camera’s mode to ‘P’ for Program Automatic you may notice the shutter speed reading to appear anywhere from 1/250th second or higher (faster) as the metering system automatically reads the exposure of the scene. Compared to 1 second, 1/250th is going to be faster allowing for the perfect exposure to be recorded.
Below is a quick guide to some general shutter speeds and the effects they can lead to. These results will vary depending on what aperture and ISO you have set.
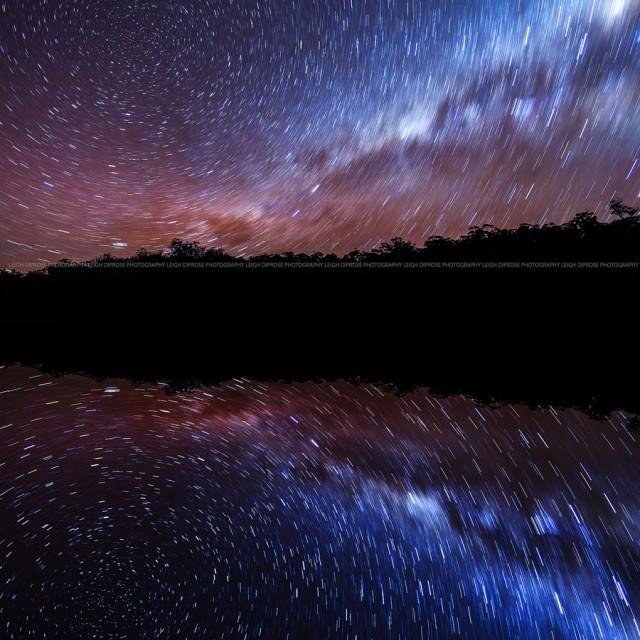
★ 15 Seconds to 30 Seconds + ‘Bulb’
Set your shutter speed to 30 seconds or bulb to get some interesting long exposures when there is very little light. Anything moving in the scene will appear as a blur, so landscape photographers will typically use a longer time for star trails, moving clouds or night scenes.
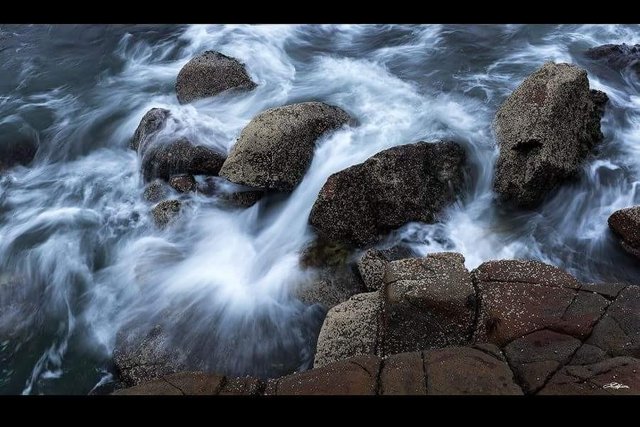
★ 1 Second to 5 Seconds
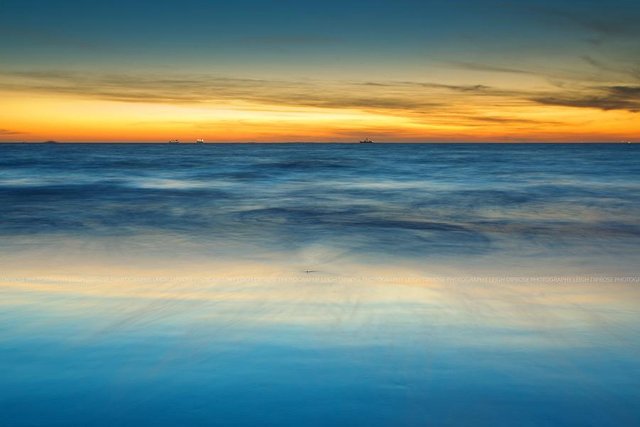
This exposure time is great for photographing water falls, the afterglow of a sunrise or sunset.
★ 1/250 Second- 1/500 Second
Perfect for daylight shooting.
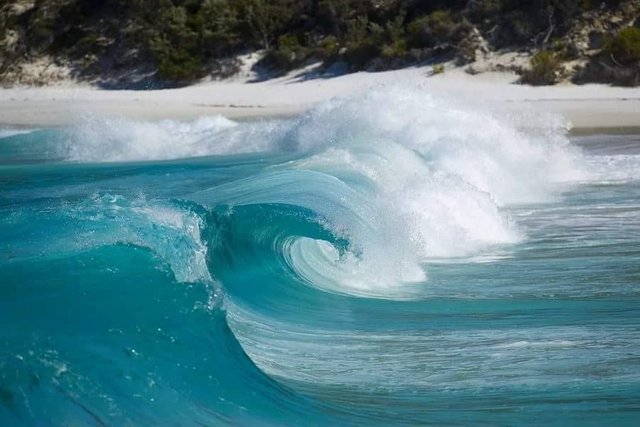
★ 1/1000 Second - 1/4000 Second
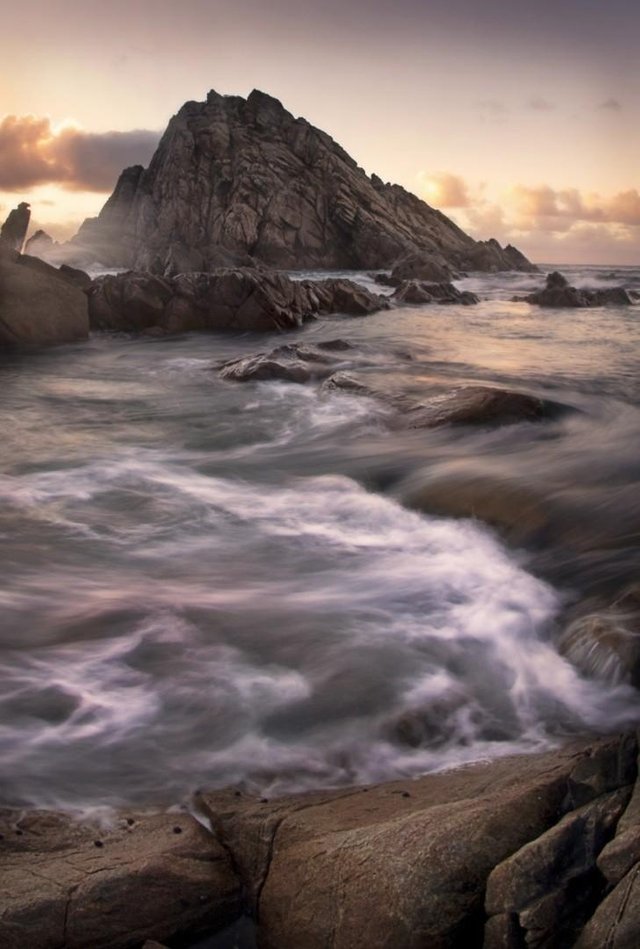
1/1000 is best for freezing the action in time. Great for photographing fast moving water like a wave. You can also use this range of shutter speeds to create some great silhouettes against the sun. Wildlife and sports photographers will use fast shutter speeds like these to obtain great images.
Aperture
Aperture is essentially the amount of subject in focus. It relates to the size of the round opening called an aperture, which is found the lens. The measurement of the hole can be listed as an f stop (or f number). For example f2.8. That number probably doesn’t make sense to most people, so let’s explore what it means.
The larger the round circle the more light gets through to the sensor. The measurement of apertures can be confusing, because the system appears to be opposite. For instance, if you have a large round hole in the lens it may have a value of f2.8. Whereas, if you have a small hole in the lens it will appear as a large number f22.
These numbers are simple when you understand what effect they have to your picture.
The simplest way to explain it is:
f2.8 will make your subject in focus with the background blurred. This is referred to as a shallow depth of field.
f22 will make everything appear sharp within your photo. The foreground will be in focus and the background will also appear to be in focus.
Landscape photographers will typically use one aperture for the majority of their wide angle photos. The aperture of f8 is the preferred setting as it will produce the sharpest imaging results. The downfall of using smaller apertures like f22 is sometime the edges of the frame may appear slightly ‘soft’ when compared to the centre of the frame.
Shooting in RAW
The RAW file format found on your camera produces the most ‘information’ in the photo when compared to the jpeg setting. Information is the summary term for dynamic range, a reference to who much information is able to be recorded in the shadow areas, midtones and highlight in a single image. Put simply if you compare the RAW setting to jpeg the general saying is, for every three pixels capture in RAW, jpeg only keeps one of them.
So if you are a landscape photographer and want to capture the most amount of light information as possible, then RAW is the best setting to use.
When you capture RAW there is some post processing workflow that must take place. You will essentially have to edit your RAW file and recover or enhance the information within the photo. An example of this could be changing the exposure in the sky, increasing the saturation or sharpening of your image or simply changing the contrast of your photo.
If you tried to do the same edit with a jpeg image there wouldn’t be the range of information recorded to obtain the same results. Put simply, if you want to capture the best sunsets, with the most amount of colors, then RAW is the best setting for you. It is the first step in turning your amerture photos into professional looking ones!

When to Photograph - Four Main Times in a 24 hour period.
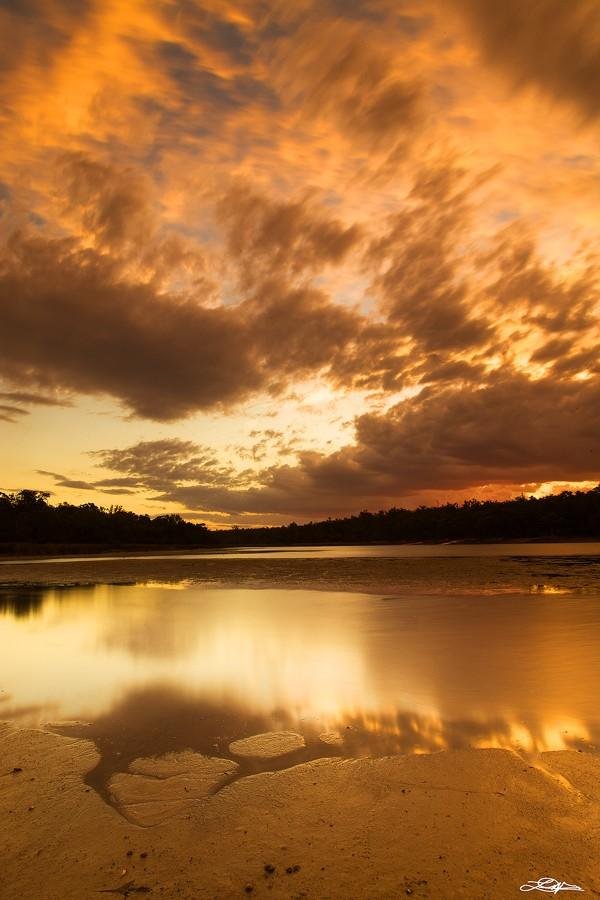
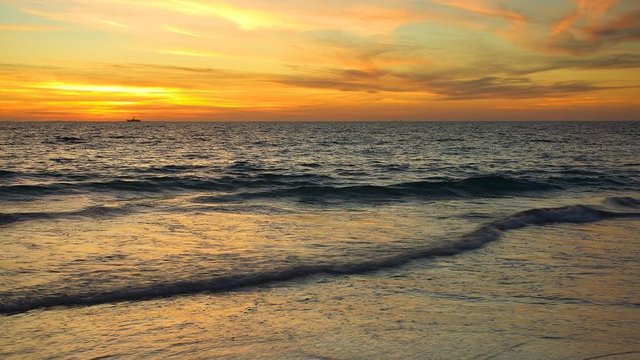
Photographing at Sunrise and Sunset
The light is always going to be the best during these two times. If you have done your research beforehand make sure you get to your location at least an hour early. This allows adequate time to set up your camera ensuring you get the best photos before the light falls.
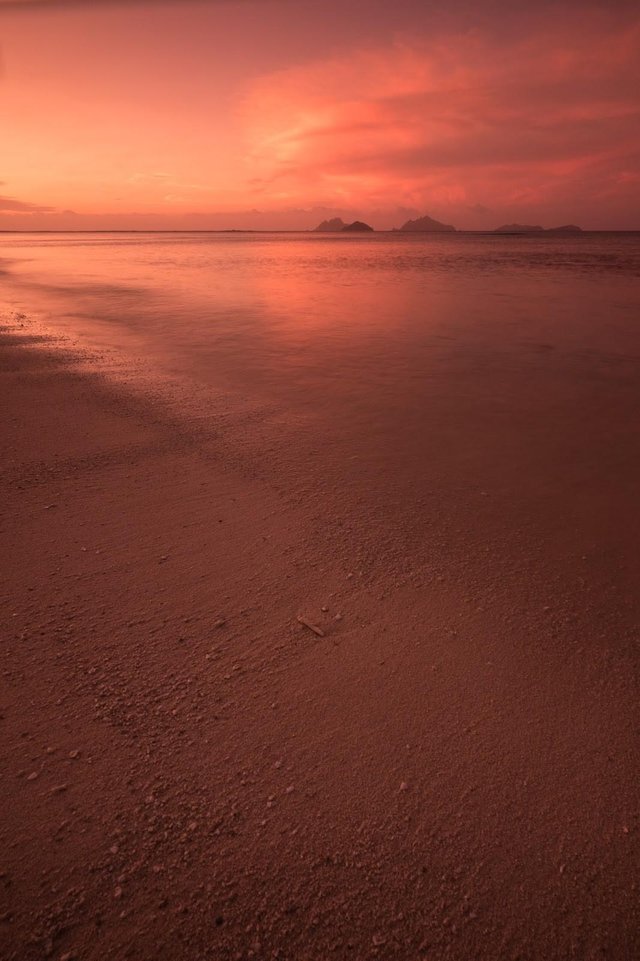
The best light will only last for around 10-15 minutes before the sunrises over the horizon and after the sunsets below the horizon. Tip > Ensure you bringing along your back up camera to take photos while your main camera is capturing long exposures.
Photographing During The Day
Photographing at this time can be a landscape photographer's worst nightmare. The light is harsh and can make exposing for your scene very difficult. If you want to capture great images during the day, obtain a ND filter that cuts out 8 or 10 stops of light as the results can be quite spectacular.
If you are photographing stock images or photos for a client sometimes images in the middle of the day is a necessity. Unfortunately for the uneducated public, blue skies sell more than sunsets!
Photographing at Night
Take your trusty head torch along for this trip as you may find changing your camera's settings in the dark to be quite frustrating!
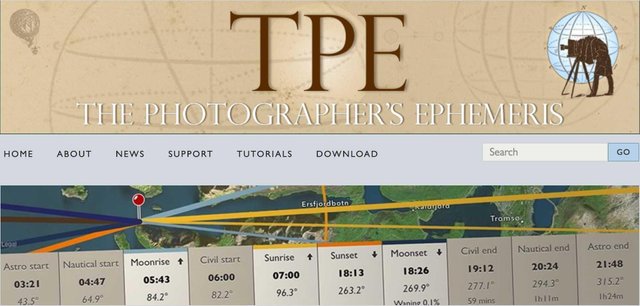
Photographing once the moon is out can lead to some great results especially if your aperture is wide open. If you are photographing the stars, make sure you are out when there is no moon on a clear night. It’s common sense like this and planning with tools like TPE (see above) that will always lead to the best astrophotography.
Lastly, if you do bring along that head torch, you should try your hand at light painting at night. If you are unsure what light painting is, it’s essentially means wherever you ‘paint’ the light while your camera’s shutter is open it will appear in the end photo. This can be super handy if you want to create some foreground interest by painting a tree against a star filled backdrop.
Research
The first thing you should always do before going out to photograph landscapes is research. Many photographers don’t do this simple step and when they arrive to their location, their imagination doesn’t match the location and this can lead to problems and missed opportunities!
Arriving at the location only to find you have brought the wrong equipment or worse, ending up lost, running out of supplies is definitely something you want to avoid.
It’s recommended that you at least look at some of the following tools that to help plan ahead and ensure you get the best photo possible.
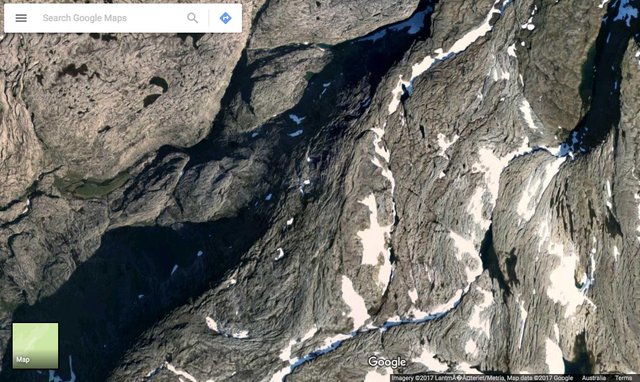
Google Maps
Google Maps and Google Earth should always be used to look at the terrain and it’s location to landmarks from your drop off point. Whether you are travelling to your location by road or on foot, knowing what’s around can really make or break your photos.
For instance, if you only arrive at the car park and walk to the specific signed location, you may find that there’s a better scene just around the corner by looking at Google Earth. Make sure you get your money’s worth by capitalising on the multiple scenes in the one location.
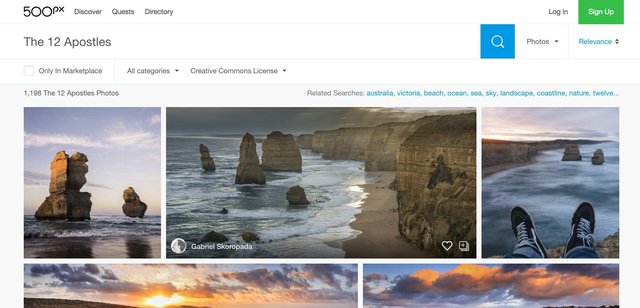
500px
500px.com can be a great source of what a location would look like through another photographer’s eyes. Simply type in the search bar what location you are planning on visiting and you will quickly see another photographer has most likely been there already.
You should be encouraged by the photographs you see, but most importantly you should never take the exact same shot! Make sure you use your creativity and take a better one! There’s nothing worse than seeing identical images from the one location.
Photography Apps
There are many photography apps that will assist your landscape photography, however there is really only one app to rule them all - The Photographer’s Ephemeris.
TPE for short, is a brilliantly designed app that will show you exactly where the light will fall at any given moment in the future. Whether you are planning on photographing the sun, moon or Milky Way, TPE makes it easy to visually see these essential details. Simply choose your location, the future date and time and the app will show you the rest.
Ask a Local
Now, if you successfully researched your trip using any of the apps above there’s one last resort that will always be beneficial! Asking a local for advice on your destination can always offer insight in your location that apps simply can’t tell you. A local can extend to someone who has lived in the area for some time, a local photographer or friend or family member.
Equipment Essentials.
With the research out of the way the next thing you need to plan is your equipment. Understanding what gear and how much stuff to bring is essential.
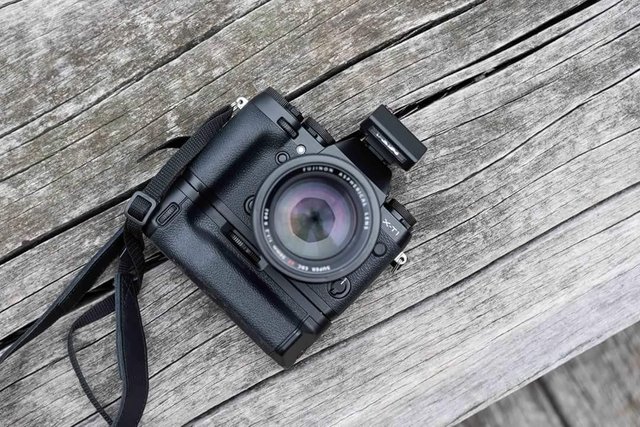
Camera
This is a no brainer, but you should think about what type of camera you want to take. For instance, ask yourself the question, am I travelling to a location where I need to carry around a heavy DSLR or should I maybe take a lighter mirrorless camera?
Once you answer this, keep in mind the type of back-up camera you want to take.
Back up camera
Not all photographers have the luxury of having two cameras, but if you are heading on an overseas trip or travelling abroad, then a back up camera is a necessity.
Mirrorless cameras can offer a huge advantage in size and weight and should be considered for this purpose. Image quality isn’t compromised with the right camera.

If you ask around in forums I’m sure you will get some recommendations on what camera is best. Some important points to look out for may include:
Ensure the camera can shoot in a RAW quality
Make sure you can use a remote release. If there is no remote check to see if it has a self timer.
As a bonus consider a camera that takes the same battery as your main camera so you don’t have to carry around an extra charger.
Tripod
If a dog is a man’s best friend, then a tripod is a man’s most stable friend. Without one of these, you are really going to struggle as a landscape photographer. Typically if you are going to take landscape photos then you are most likely going to be photographing in low light. A tripod will assist you in this endeavour.
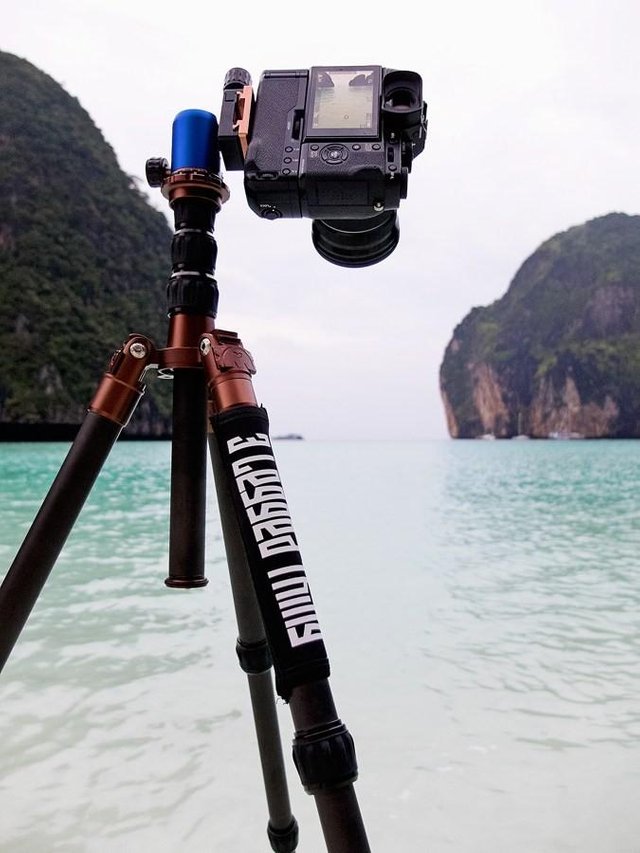
Here are some features you want to make sure your tripod has:
A good height - Make sure you can extend your tripod to at least your shoulder height.
Flexibility - You should be able to move the legs independently from each other.
Pack down small - There are tripods out there that will pack down small enough to fit in your carry on luggage. Don’t get a tripod that is going to be too bulky.
Be lightweight - If your budget allows it try and get a carbon fiber tripod or one that offers a lightweight but sturdy frame.
Level - Most tripods these days have a built in spirit level to help you balance it. Some of the better ones have more than one level.
Mounting - Think about what type of mount you want. The two main methods of mounting your camera on the tripod include; a quick release plate that screws into the base of your camera or an Acra Swiss plate that allows you to slide the camera onto the top of the tripod. If you have an additional grip on your camera check to see if it is Acra Swiss compatible as these are the preferred method.
Filters
Having the ability to cut out light from entering the lens is must for the serious landscape photographer. You may want to cut out haze, increase your exposure to emphasise the effect of flowing water or simply go crazy and take some infrared images. Whatever the case might be consider the following filters as part of the gear.
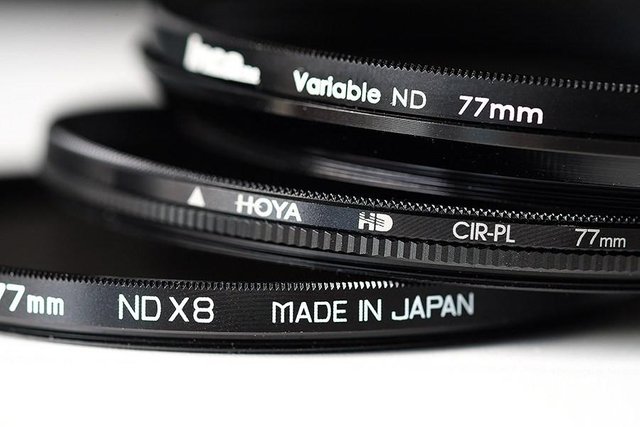
Protection Filter (UV) - These filters will cut out distant haze while protecting the front element of your lens. Here’s a common example: If you accidentally drop your lens it is much, much cheaper to replace your cracked protection filter, than replacing your lens with a new one!
Neutral Density Filters (ND) - ND filters have the ability to cut out light entering the lens. Photographers use these filters so they can have longer exposure times during brighter times, allowing them to create a dramatic effect. This could include emphasising the flow of water or moving clouds and even removing people from a long exposure city scene during the day.
- Graduated Neutral Density Filters (Grad ND) - Like ND filters, these are the same, however they are graduated. What this means is the filter will appear darker on one side of the rectangular filter and gradually become clear toward the other side. This graduated effect allows photographers to make the brighter sky the same exposure as the land, creating a balanced exposure which is more pleasing to the eye.
Remote
Remotes are a landscape photographer's best friend! There are a huge amount of these gadgets available on the market and ever year they are getting smarter and smarter. They allow a photographer to plug a remote into the camera in a ‘Blub Setting’ to lock off the shutter for a set period of time.
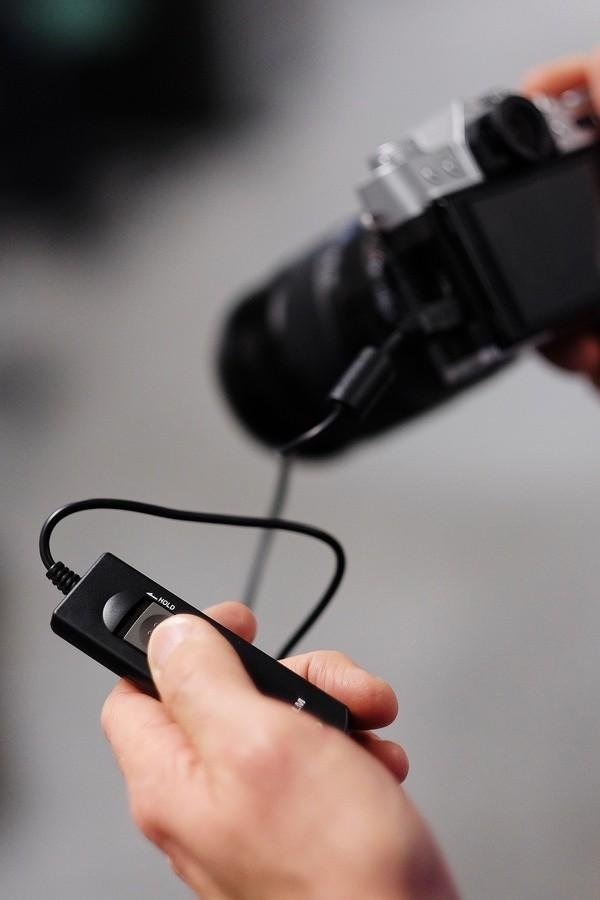
Many astrophotographers will use remotes to create star trails in their photos. Because the camera’s shutter is open for a long The other main benefit for every photographer is, remotes reduces the chance of motion blur from occurring when pressing the shutter button while your camera is mounted on a tripod.
Spare Batteries
These are a no brainer. Make sure you have them in your kit!
The basic rule for the amount of spare batteries you should have is:
DSLR Camera - 1 spare battery for every two days away from power.
Mirrorless Camera - 1 spare battery for every one day away from power.
Memory Cards
Again, an essential piece of equipment. Without these you won’t be doing much shooting! Secure Digital High Capacity or SDHC cards are by far the most popular style of cards used in the majority of cameras out there. Some digital SLRs will use Compact Flash cards, but these are typically the higher professional cameras.
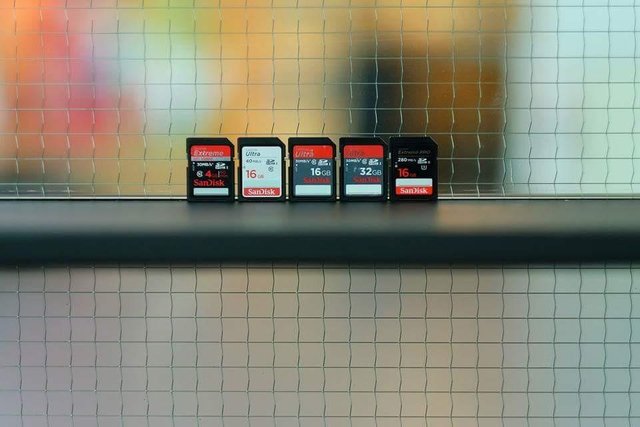
It’s recommended that you at least have a minimum of 16GB capacity in any camera due to the rise in megapixels eating up memory with every photo. Some of the newer cameras will hold dual cards allowing you to store multiple memory cards in the camera. Ensure you have one card in each slot and plan adequate back up memory in the form of more cards if you are travelling. Trust me, you don’t want to get stuck deleting individual photos in order to fit another photo on your full memory card, just as you witness the most epic sunset!
Smartphone (Apps)
Like TPE (see above), there are numerous photography apps within each marketplace. For the best ones use the ranking tool in the app store of your choice to see the most popular ones. For editing though, you can’t really go past ‘Snapseed’ as this app really does let you do it all to obtain the best results.
Also explore apps from your camera manufacturer as some of these will allow you to remotely capture photos and wirelessly navigate and import images found on your memory card. This can be great if you want to share your photos instantly.
To Be Continued in Part Two...
I hope you enjoy part one of this post. I'm heading to bed shortly to get up for the sunrise! In part two of the post, I will be writing about how to best photograph different scenes including, waterfalls, seascapes, forests, snow, desert and so much more. Stay tuned and remember to upvote and resteem.
I'm Leigh, from Sydney Australia and through @steemit I'm seeing what its like to explore @myday. Not in any particular order, or particular time frame but just parts of @myday through my eyes and sometimes the cameras lens.
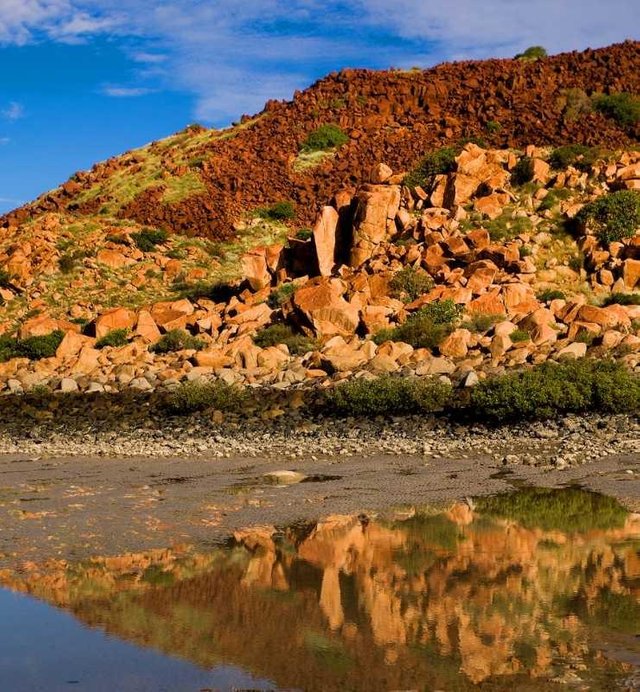
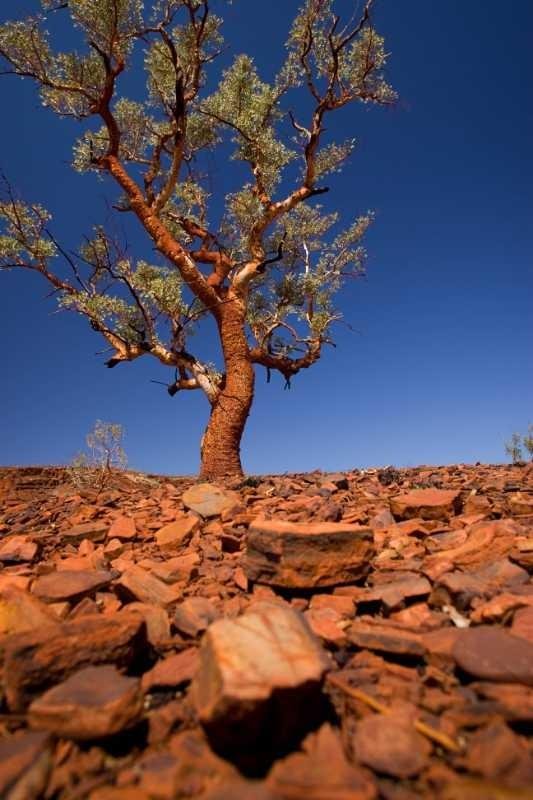
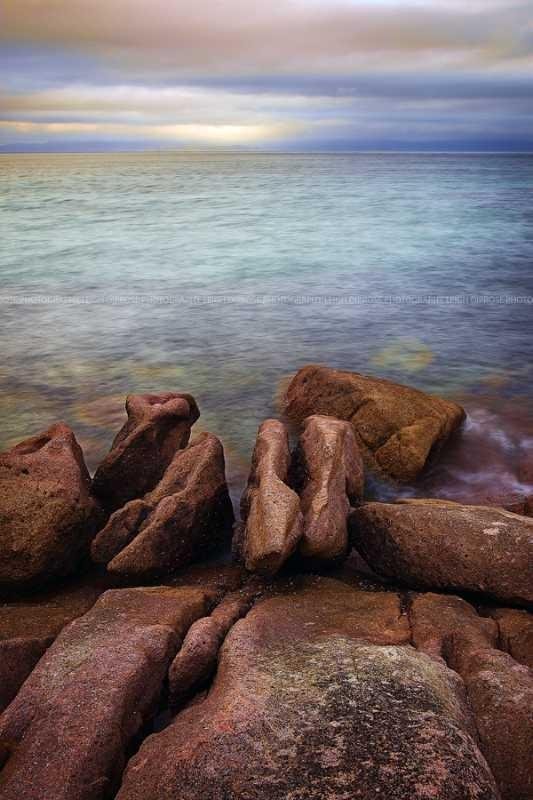
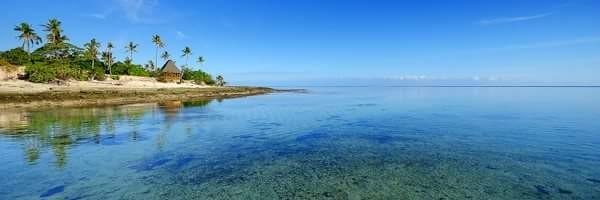
All photographs appearing in this post were taken by me.

Wow, great tips and amazingly detailed explanation. I always wondered how to get those "moving water" shots..thx for sharing
I'm glad you found it useful @steemdoge
wow this is one of the best photography tutorial posts I have seen!
I knew most of it but it is very well done and the photos are gorgeous.
I never heard of that app, sounds cool. I will defiantly check it out sometime.
Thanks for sharing, keep up the great work!
Ah I see you saw this already!
Indeed I did a bit of checking as knowledge is power ;-)>
You are quick of the mark!
Figuring out, learning, adapting are of the utmost importance to me!
Appreciate the recognition!
Nice landscape pictures, detailed instructions. Good job.
Thank you @hynet!
Your welcome
Awesome post! Not sure why you don't want anything for it!
@xaero1 I'm happy to give back to the community where I can
That's very nice .. good on you!! :D
Thanks @xaero1
This is a great post and photos. Appreciate all the info, have only been shooting in raw and full manual for the last month so these tips are very helpful to refine my process. Do you have a favored post processing software?
Hi @andypalooza I'm glad you found the information useful! My favourite software is Photoshop. Lightroom is a close second :) lf you ever have any photography questions let me know as I would be happy to help :)
It's an excellent tutorial @myday, I don't understand why did you choose to refuse rewards. Looking forward to the composition advices. Upvoted, resteemed & DPS.
Thanks @photo-trail. I'm more than happy to give back to the community where I can. If it can help one person take a better landscaoe photo then that's with it for me. I don't need to be rewarded for that.
Great post for anyone interested in landscape photography. Great effort, im sure loads of people will really appreciate this.
@markangeltrueman thanks for taking the time to read and comment. I appreciate it
Wow great advice and beautiful photos here. You put a lot of effort into this for no financial reward.
Thanks you commenting @choogirl. Sometimes it's not about the money, it's about giving back to the community.
I'm going to upgoat your comment for your generosity. Sorry the steem price is shit so it's not worth more.
Thanks very much @choolgirl
This is very helpful for beginners with a lot of details. Thank you.
No problem @travelmagician! Thanks for commenting
Nice shots and i am intrigued by your informative posts.
I'm glad you found it intriguing
Keep posting as i like and many like me likes your posts..good luck.
Thanks
Yes i am waiting for yours next photo posts..
Excellent :(