How to improve your Photography (Wildlife) -Lighting
February of this year is when I got my first DSLR camera. I had a big urge to start taking photos but I didn't know the best way to shoot the things that I could see visualised in my head.
This started out with product photography but I eventually got frustrated with not having the money to buy expensive strobes and equipment (none of which you need by the way, but I was young and full of ADHD) so I eventually started watching videos on wildlife and nature photography.
I fell in love with it as soon as I went down to my first ever bird blind here in Milton Keynes and started getting some pictures of the local birds (mainly Heron's and Geese) and I'm still as hooked as I was in that very short time ago.
In this time I would like to think I've improved with my photography as a whole, for example, this is a picture I took at the very beginning of my short hobbyist career...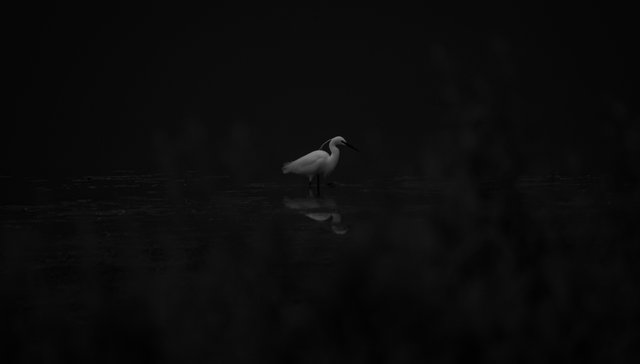
Personally, I love this photo and I think that stylistically it looks quite unique and stands out in the black and white conversion. However, the whole reason that this photo was turned into a black and white image was because...yeah, it wasn't sharp and there was about as much noise as an ACDC concert.
This made me think of why my photos weren't looking as sharp and 'professional' as all of the ones I had been seeing on Instagram and Youtube. The answer is simple, but quite a long one... Let me show you what I mean.
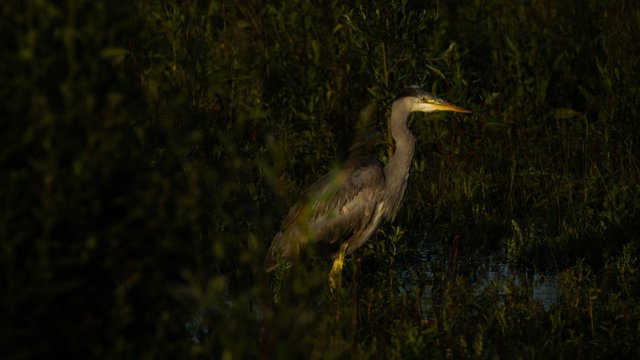
This is during my 'transitional' phase of figuring out what I was doing wrong with my photography. As you can see, there are two main issues with this image, well to me at least, and that would be sharpness and composition. Personally, I think the background is too distracting and there's not enough emphasis on the Heron as the subject of the scene because the reeds are too sharp and not blurred out enough for my liking.
The reason? well, there are a few, first of all, the timing of this photograph could have been A LOT better. This photo was taken at around 8:30 pm on an overcast day which means, the ISO was bumped up to about 12,800, my shutter speed was already cranked up to about 1/640 because I was shooting at a 600mm focal length and the lens that I was using had an aperture of 6.3 once zoomed out to its max (600mm).
The time of day was the main issue because the soft lighting on a bird with a lot of dark feathers which is in a background full of darkly toned foliage is not going to pop and create that really dynamic and contrasty lighting that we want.
Take this next photo for example... 
You can already see a clear difference in quality, quite drastically actually. Did I buy a new camera? maybe a sharper lens? Nope, I just chose my opportunity to shoot at a much better time of day. The deer photo you can see was taken with the same camera, same lens but the whole situation was just thought out so much more and it produced a better quality image.

So much of getting that 'better photo' is down to the lighting in the scene. The two Deer pictures that I've included were taken on a warm Summer's day at around 8 am in the morning when the Deer are most active and the clouds had parted to give me this amazing warm glow and rays of sunshine in the field I was in. The second shot has that blurry background full of colour to offset the brown of the Deer but not distracting at all and compliments the subject instead of takes away from it.
I'm not saying that you have to have these exact 'perfect' conditions to get the photos you want, but looking at a weather forecast, learning when the animal you've chosen to photograph is at its most active and going to a location where you're going to be likely to get within a good distance of subject is such an easy and efficient way of upgrading your current shots.