How to Take a Perfect Photograph With Your Camera Phone in Natural Light
I'm always hesitant to give tutorials, because I believe nobody is an authority on art. If it looks good to you then that's your art and others can like or dislike your creation because it's so subjective.
So please consider the below a list of suggestions rather than rules.
I shoot commercial photography on Canon's new 5d mark iv using all Canon L-series lenses (you know, the ones with the red stripe). But if I'm being totally honest, half of my work would look just as good shooting on my Samsung Galaxy S7. Sure, the focal length isn't as impressive, the image size isn't as big and I can't take long exposures or any of those fancy things. BUT the image quality in natural light is so good that, if you use it properly, most people won't be able to tell. It is the using it PROPERLY part that I will focus (yeah yeah) on here.
I went for a walk this morning and took my camera phone to shoot some examples for you. All images are taken on the Samsung Galaxy S7.
Here are a few points to think about when you're composing your next camera phone image.
BEFORE YOU DO ANYTHING: Wipe your lens. Your phone constantly has your fingers and pocket fluff all over it, so develop a habit of wiping the camera lens before you do anything.
PART A: COMPOSITION (the basics)
1) Scene or Subject?
Decide whether the main idea of your image is the scene or an item within it.
If you want to take a picture of your garden then stand back as far as you need to be to have the right amount of garden in your shot. Use the screen to decide whether the image looks better from head height or perhaps higher, or lower. Hint: The perfect shot is rarely from head height.
If your subject is a flower or insect within your garden, then get close enough to it to ensure the eye is drawn to that item rather than something behind it.
2) Angle
Every time you are about to take a photo, before you press the button ask yourself this question: "Am I standing in the right place?" Sometimes the perfect image is one step from where you already are but you might miss it because you thought this spot was good enough. Before you press the button, step to the right, then back to the left. Step closer and further away. Squat lower, reach higher. See if you like another angle more.
Level is important here too. If you want your image to be level, then ensure it is. We all tend to lean one way or hold slightly higher with one arm than the other, so make sure you correct for this. If you want to take an angled shot, make sure the angle looks deliberate. An angle that's off by a couple of degrees really just looks like a mistake.
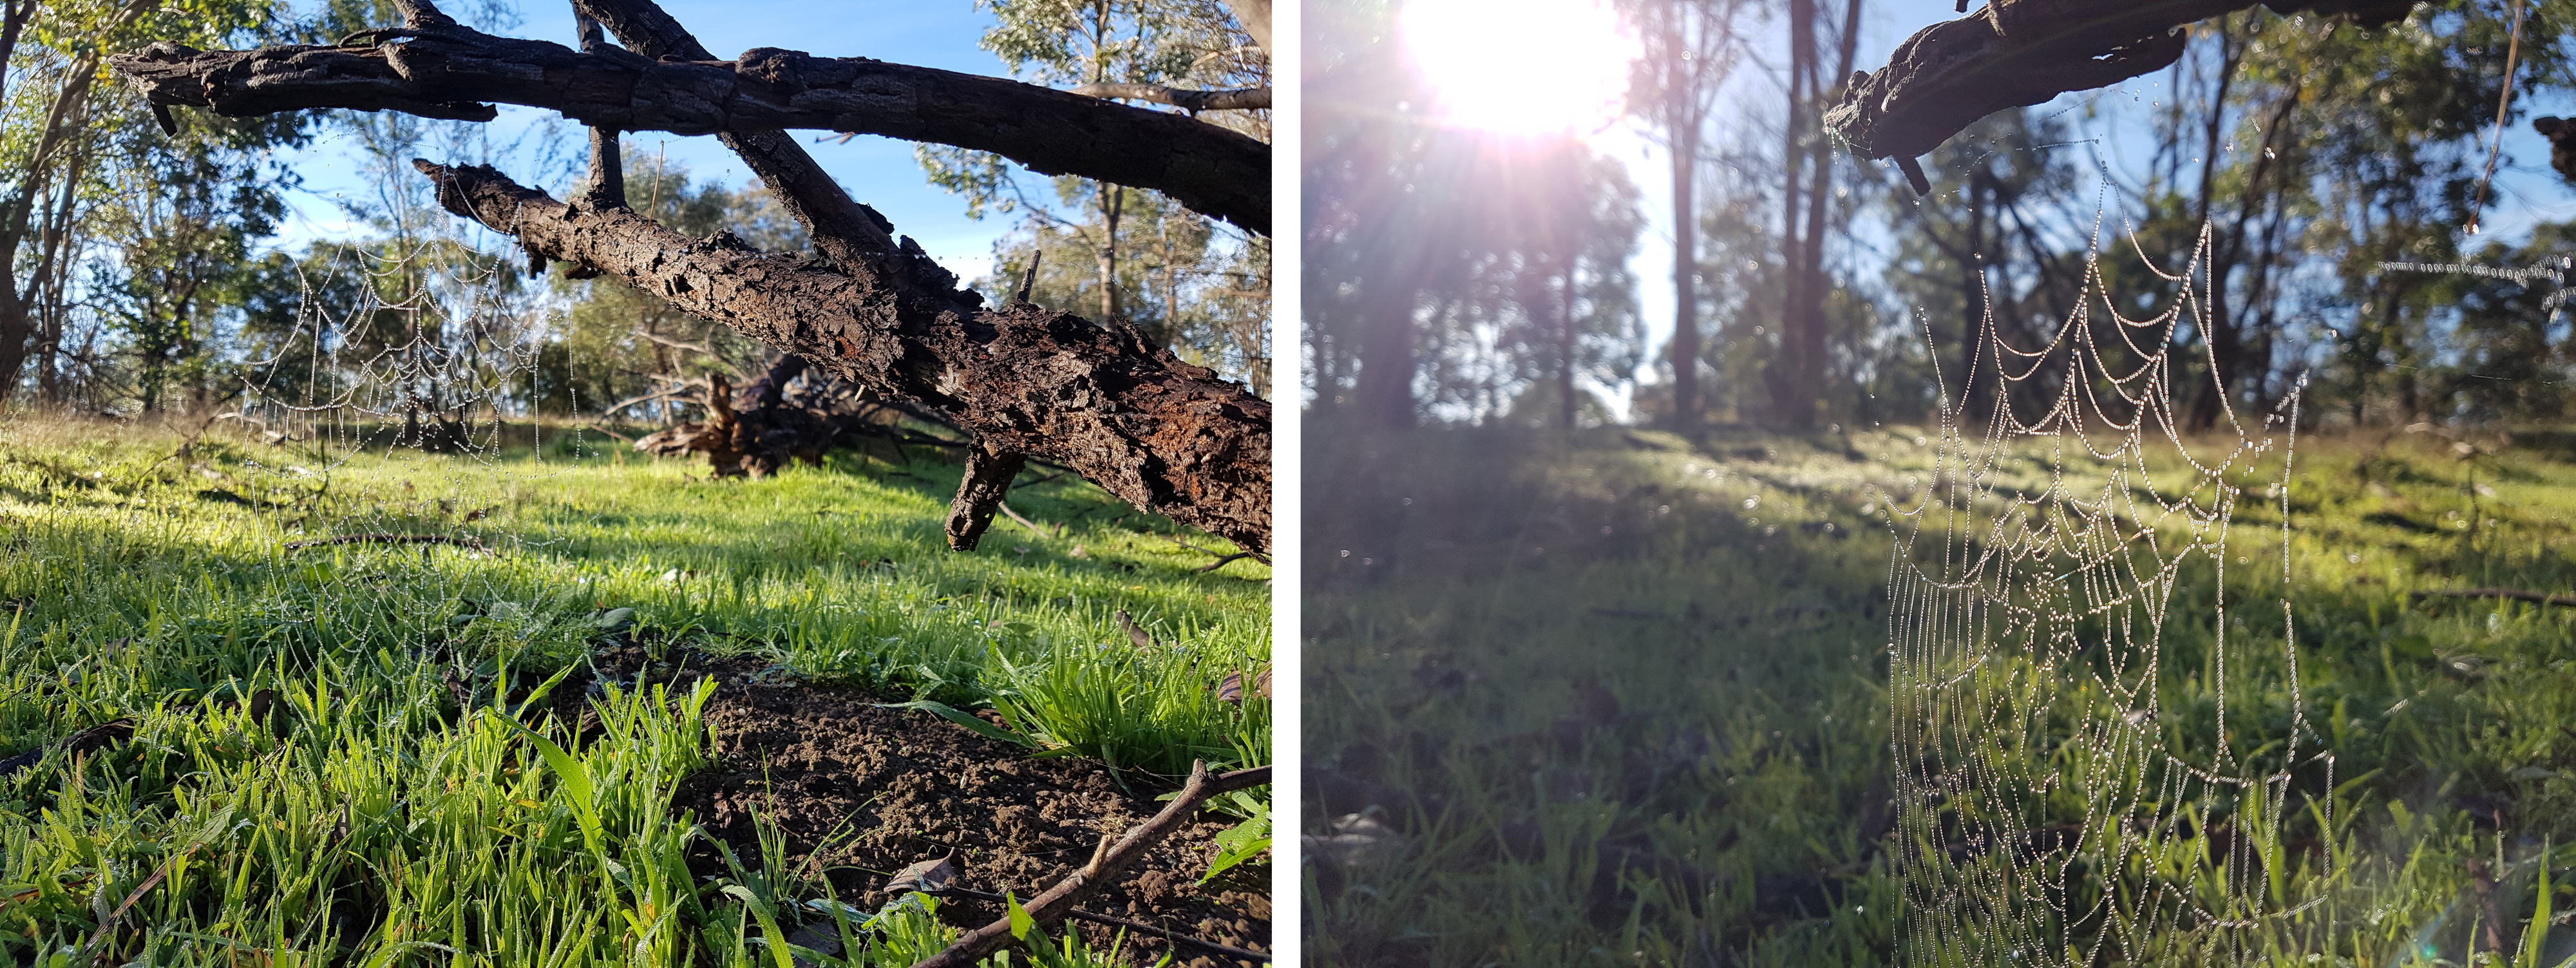
There's only 30cm difference (1ft) in camera position for these two images.
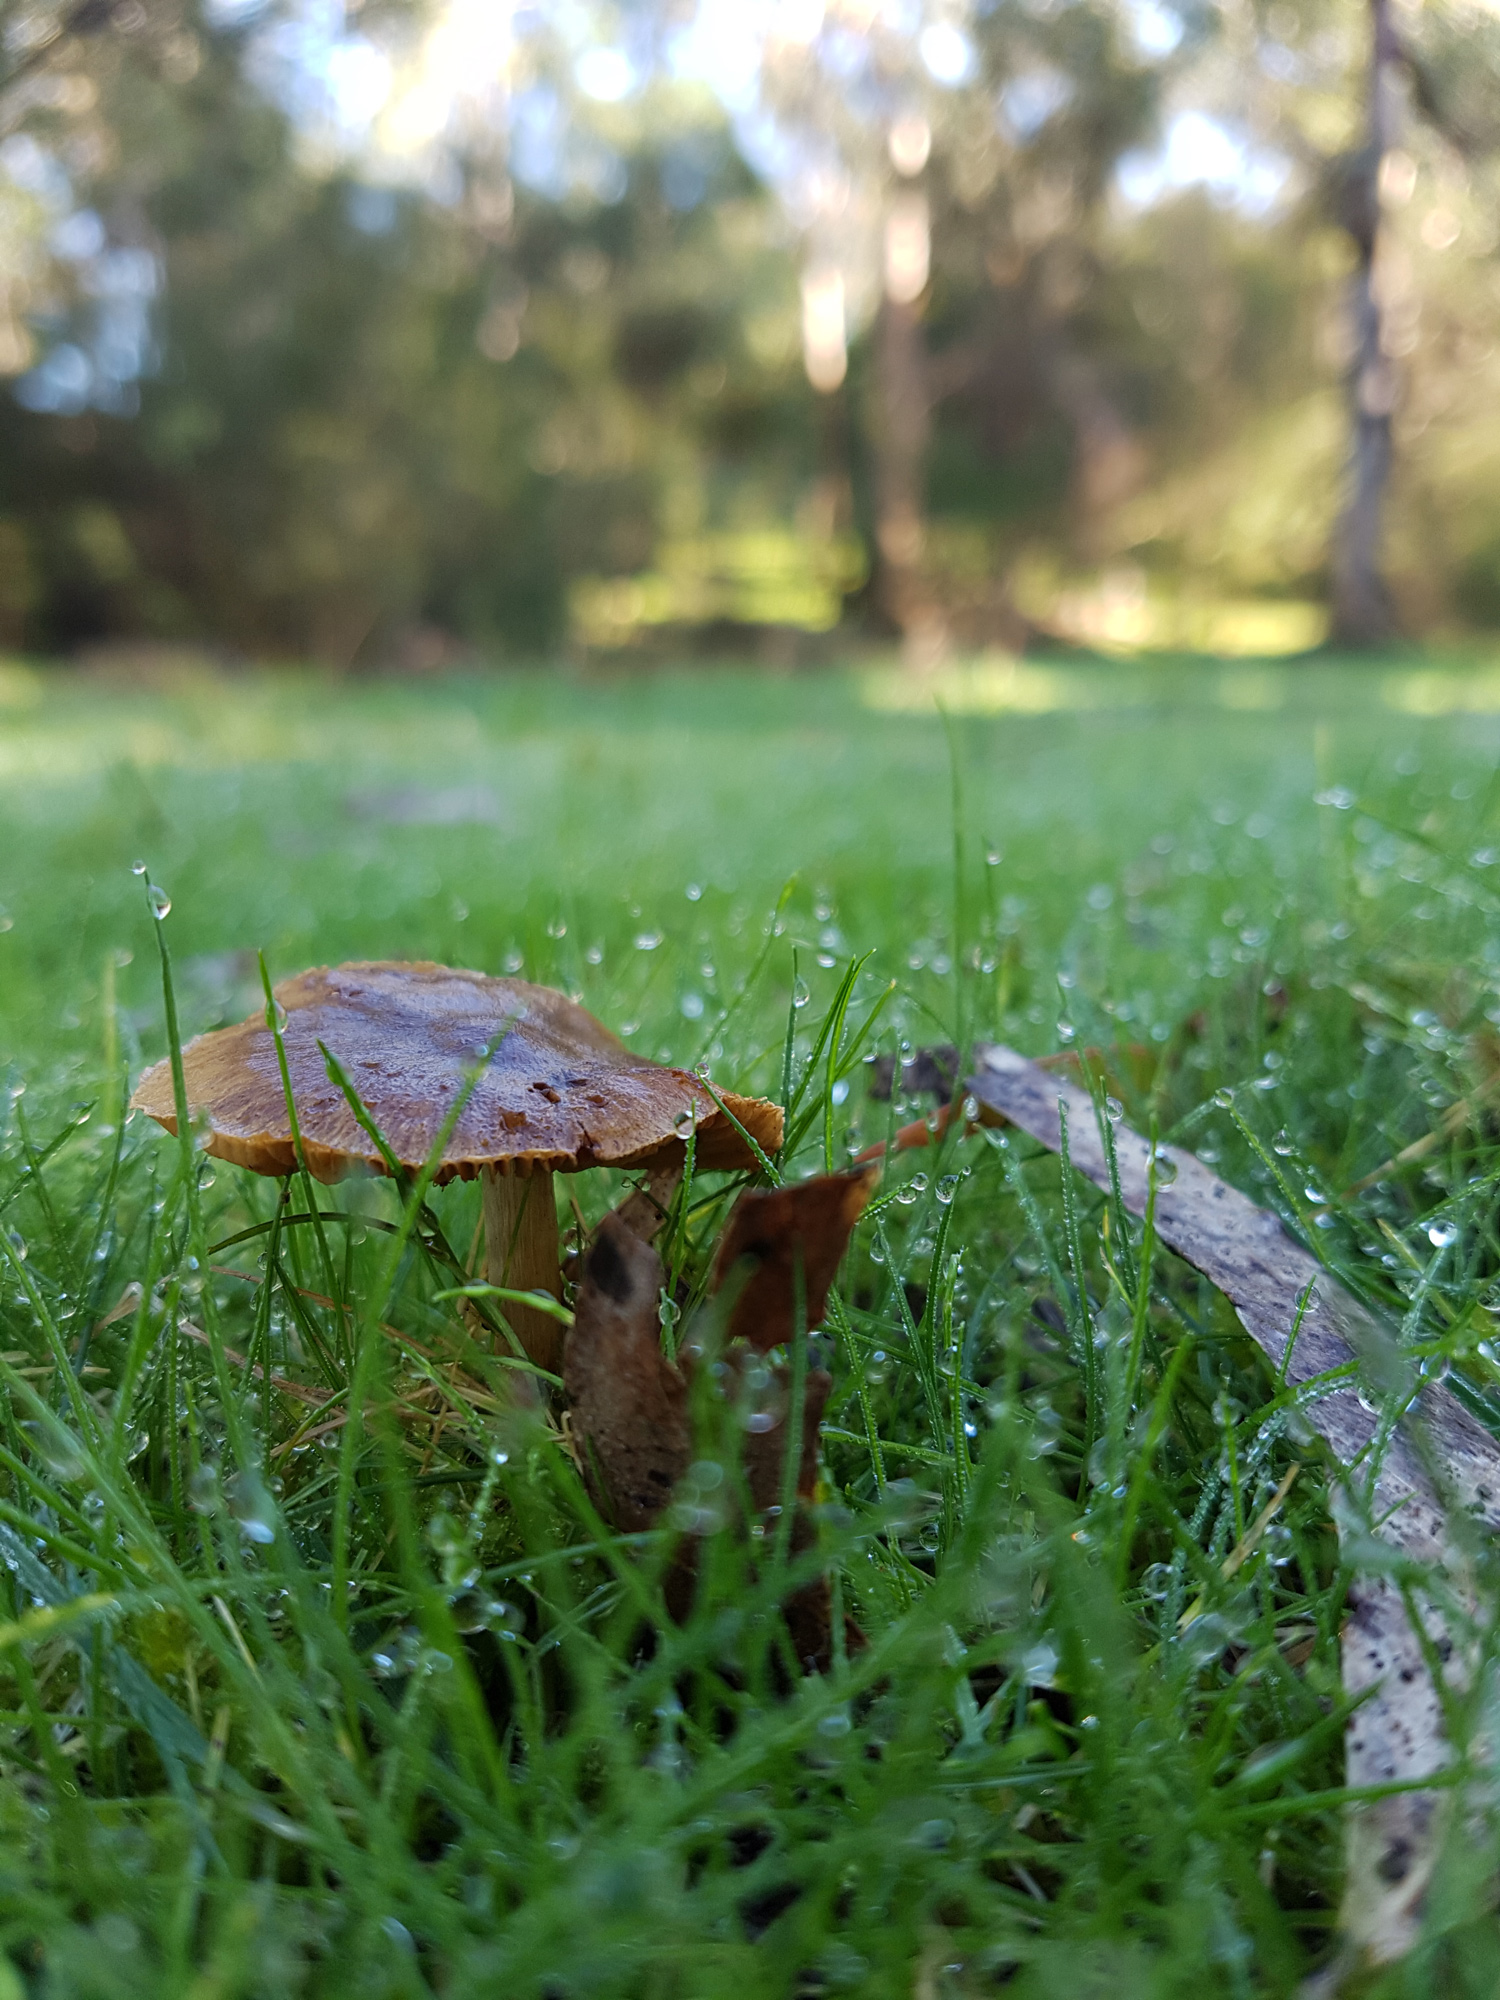
3) Rule of Thirds
This idea goes by many names and has some serious mathematical grounding, but I'm going to skip all that and introduce you to the most basic principal of this philosophy:
NOT EVERYTHING HAS TO BE CENTERED.
That flower or insect you are photographing doesn't need to be right in the middle of your screen. Try a few different things to see what pleases your eye, but an easy exercise to get you started is to imagine a proportioned hash drawn across your rectangle screen. Now compose the image so that your subject is positioned on one of the lines. Perhaps even the intersection of two lines!
Keep in mind that the subject in this image is not the entire stick insect, but it's eye. Or it could be the light in the lighthouse on the horizon or the ball making its way to the hoop.
Serving suggestion
PART B: USING THE CAMERA PHONE (a bit more technical)
1) Touch Your Subject
I'm not talking about sexually harassing your model here, I'm talking about your screen.
One of the simplest features of phones in cameras is the touch screen. Once you have your angle and composition right, touch the screen on your subject. This will tell the camera where you want the focus and lighting to be the most accurate. If your subject is too dark or light, the camera will correct its exposure to enhance that spot on the screen.
Play around with this feature. It's amazing.
Some phones, when you touch the screen, will also bring up other menu options for brightness, contrast, etc. Play around with these settings and decide which combination suits your taste.
Get your focus nice and sharp.
2) To Flash or Not to Flash
I'm still not talking about sexually harassing your model.
The flash on your camera is shit. I can make this blanket statement because I've never seen a flash image from a camera phone that is remotely passable except under perfect circumstances created by pros or by sheer fluke in an unrepeatable setup.
Don't get me wrong, if you're in super low light then you need it or you'll see nothing in your image, just don't expect that image to be great, and it's not controllable enough to serve as an extension of your creativity.
As a general rule unless you really know what you're doing or you are completely in the dark (literally, not figuratively) then turn off your flash.
3) Zoom
Pinch out to zoom. It's so easy. But if you can avoid it, DON'T DO IT!
The problem with zooming on most phones is that they don't have optical zoom. What that means is that when you zoom, you're not actually bringing the subject "closer", you're just making the image smaller. This uses less of the sensor and means you are more likely to get a pixelated, less sharp image.
To put that even more simply, you could get the EXACT SAME RESULT by taking an image without zooming, and then cropping the image on your computer.
The correct way to zoom with your phone camera is to use your feet and walk closer to your subject.
This won't be possible in some circumstances - fences, topography or disabilities could mean that pinch-zooming is your only option. Just make sure it's a last resort.
*Left: Kimberly in the bush. Right: Pinch zoomed. It looks the same as if I just expanded the left image. *
PART C: LIGHTING (creating awesomeness)
1) Outdoors, Full Sun, Midday.
I'm starting here because this is one of the hardest lighting conditions to shoot well. Highlights are bright and shadows are dark. Under these conditions scenery can look great, but closer subjects can look bad. Also at high noon lighting is extremely flat for scenery and very unflattering for most subjects (especially people).
To deal with this:
Avoid shooting anything at midday. Yeah I know that's not very helpful but midday sun is disgusting. If you cant avoid it then:
Try to keep your image composed either all in the sun or all in the shade. This will allow your camera to expose either for bright or dark, and not try for both.
Try to be slightly taller than your subject. At noon whatever you are shooting will be lit from above, so being higher will allow you to avoid those ugly shadows.
2) Morning or Evening
When the Sun is lower in the sky, lighting is much more workable. We can now start to use the light to our advantage.
I'm going to split this section into three parts.
i) Front Lit
This is when your subject is lit from the front - that means your back is to the Sun as you shoot.
This lighting condition will give you the most even light. It is the safest lighting for beginners and will return the most predictable results. Everything will be evenly exposed, your colours will all be nice and rich.
One thing to watch out for here is casting your own shadow on your image, particularly when the Sun is very low.

*I had better examples of front lit images but they're boring and they don't have kangaroos in them.
ii) Back Lit
This is when your subject is lit from behind - you're shooting into the sun.
This is a risky lighting choice, but done right it can create beautiful results.
The results can range from a complete silhouette through to a bit of sun flare or a nice halo effect, depending on your distance from your subject and how you expose your image. This all takes some practice.
Shooting towards the sun, you can see that the steam coming off the track is illuminated.
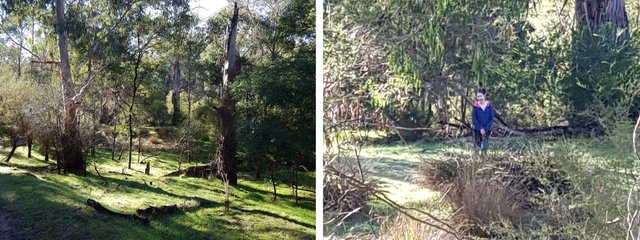
iii) Side Lit
Light coming from the side can give good and bad results depending how you use it. Side light can create dramatic effect or it can provide beautiful depth to an image. Alternatively, it could just create ugly shadows across your scene. Or beautiful shadows. For this reason there are no rules for side lighting. It requires an artistic eye and attention to detail and only you can make the call in the moment.
Here is a tree shot from three different sides to show shading options. None of these are wrong, It just comes down to preference
I hope this tutorial has been of interest and provided some useful tips to help you think deeper about the images you're producing.
If you have any other photographic tutorial requests please drop them in the comments and let me know if you'd like me to create another post.
Of course an upvote, follow and/or resteem would be much appreciated if you feel so inclined :)
Mark Fitzgerald is a professional commercial photographer operating out of Melbourne, Australia. He specialises in fashion and advertising but loves many different aspects of the visual medium.
You can check out his work at http://markfitzgerald.com.au and you can drop him a line at http://www.steemit.com/markfitzgerald
This is really impressive @markfitzgerald, well done!
Thanks Ben :) Was a nice day for it!
Congratulations! This post has been upvoted from the communal account, @minnowsupport, by Mark from the Minnow Support Project. It's a witness project run by aggroed, ausbitbank, teamsteem, theprophet0, and someguy123. The goal is to help Steemit grow by supporting Minnows and creating a social network. Please find us in the Peace, Abundance, and Liberty Network (PALnet) Discord Channel. It's a completely public and open space to all members of the Steemit community who voluntarily choose to be there.
If you like what we're doing please upvote this comment so we can continue to build the community account that's supporting all members.
Congratulations @markfitzgerald! You have completed some achievement on Steemit and have been rewarded with new badge(s) :
Click on any badge to view your own Board of Honnor on SteemitBoard.
For more information about SteemitBoard, click here
If you no longer want to receive notifications, reply to this comment with the word
STOPBy upvoting this notification, you can help all Steemit users. Learn how here!