New Ryan Ashley photo exclusive to Steemit and Photoshop walk-through!
Good afternoon, Steemit family. I’m playing catch up since I wasn’t able to make a post yesterday. I just wrote a bra and pantiless thought piece titled “A word to the new recruits; authoring when STEEM is down!”. If you’re new to Steemit, trying to make sense of where you fit in to the community, have a read. I dug deep on personal revelations I’ve made since joining last August.
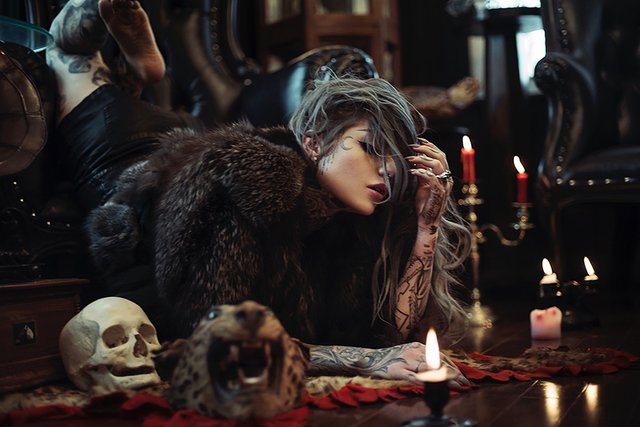
This post, however, is all about the pretty, tattooed lady right here. This is Ryan Ashley, winner of SpikeTV’s Inkmaster and one of my best friends. A few weeks ago I shared an entire gallery with Ryan exclusively here on Steemit. “Exclusive Steemit set w/ Inkmaster winner Ryan Ashley!” if you missed it. I decided to do another edit from the same shoot. These were originally meant for Inked magazine, but I’m feeling much better about sharing them here.
Post-processing in Photoshop walk-through
When I start a new edit of any client, I begin with selecting any visible area of the skin. It’d a tedious process. The skin is sleeted, but not the tattoos, fingernails, lips, nose or eyes. The reason for this is, the following step will be to soften that selection.
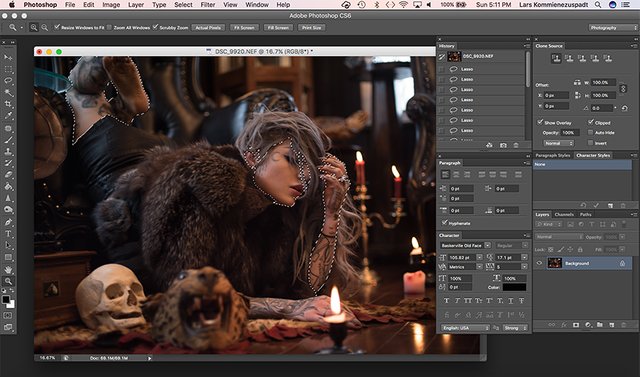
I use a large Wacom Intuos 5 Touch tablet for all my post process editing. This gives me the ability to quickly […relatively speaking] make selections around the skin in Photoshop.

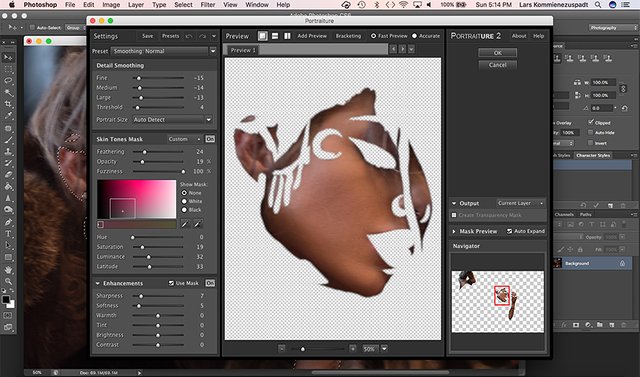
Once the areas I need are selected, I apply a plug-in filter called Portraiture by Imagenomic. It softens the skin without turning the model in to a pore-less mannequin. You can buy Portraiture for Photoshop for $200.
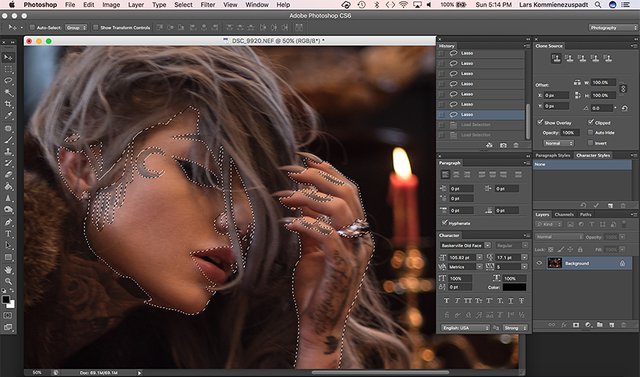
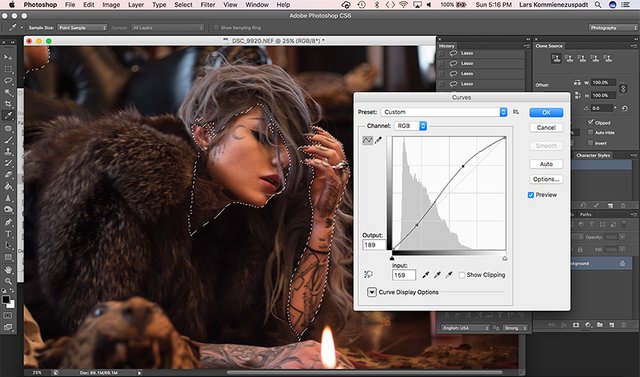
Following this step, I now re-select all the areas I avoided softening […lips, eyes, fingernails, tattoos, etc.]. I then move the the curves and bump the contrast and brightness. This is where the time consuming part of selections for Portraiture do make sense. My time was well spent because the curves bump subtly pops the subject off the background and draws your eye to the model.
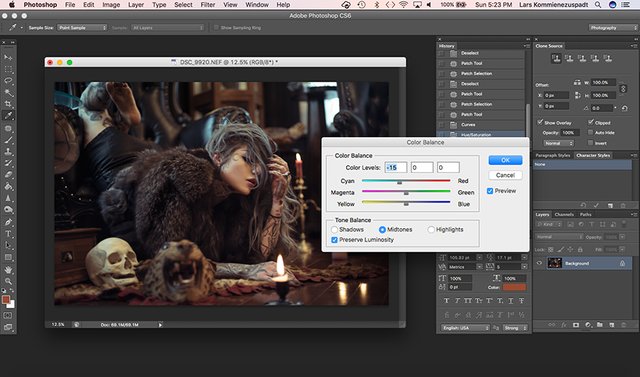
Following this, I adjust the color balance. Typically, I go with warming colors for most my photography, but you have to know your client. Ryan and Josh Balz […formerly of Motionless In White], prefer a cooler, slightly dead, porcelain look to their photos. Here, I adjust more towards cyan and blue to achieve that.
I now move on to Image > Adjustments > Selective Color and adjust the reds, blacks and grays.
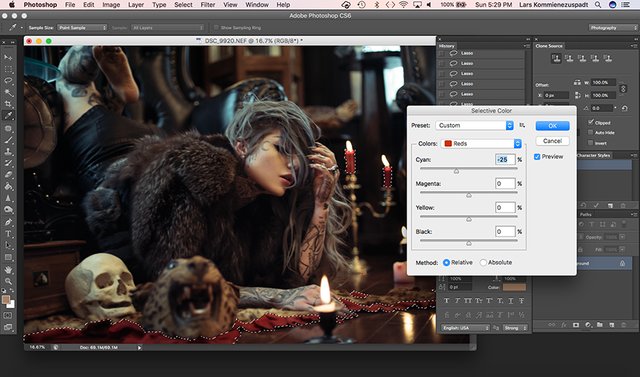
The last step is to pop the reds. I love that this photo is cool and desaturated, but I don’t like the reds looking dull. I go in and select everything red […the rug, the candles], and then move back up to Image > Color Balance and increase the reds.
Ryan worked in the fashion industry for six years before she started tattooing. She’s edited and retouched thousands of fashion photos and she’s even taught me several tricks I still use today. My photos of Ryan don’t have the same esthetic as most my photography, but our shoots are more of an artistic collaboration. The cooler, creepier look to these pictures are uniquely her.
Hopefully, this was helpful to other Steemit photographers. I know there are much more efficient ways to edit, process and mask, but this is my workflow that’s developed over the last ten years or so.
For more photography, art, illustration and perspectives on life, follow me @kommienezuspadt!
Its really excellent... @kommienezuspadt
Thanks @kyra-kristian! Glad you liked it!
I like that bra and pantiless thoughts :)
You're so talented 😘👌🏼
😘 @vermillionfox
O____O
HA! Glad you liked it @yusaymon!
Nice tutorial. You must spend a lot of time with Photoshop. :)
It's a huge part of my life @gatmi! We're well acquainted.
Amazing post mate, great info, keep it up !! :)
Thank you @hzavarce! I love seeing that people are reading the stories behind these photos!
That is a seriously HOT picture!