Tips - Photography on a budget: Lighting small objects without expensive photography equipment (For beginners)
I've been helping a few friends with their photography recently. A problem they face most of the time is taking more interesting/creative shots without investing in more equipment or learning how to edit.
This got me thinking it would be useful to share tips from time to time on how newbies/hobbyists can use everyday objects to add a different dimension to your pictures.
(I'd like this to be useful for almost anybody with any type of DSLR so for the main shots I've kept a focal length of 50mm at F4 - most modern kit lenses are capable of these values. I have also used straight out of camera jpg images instead of RAW files.)
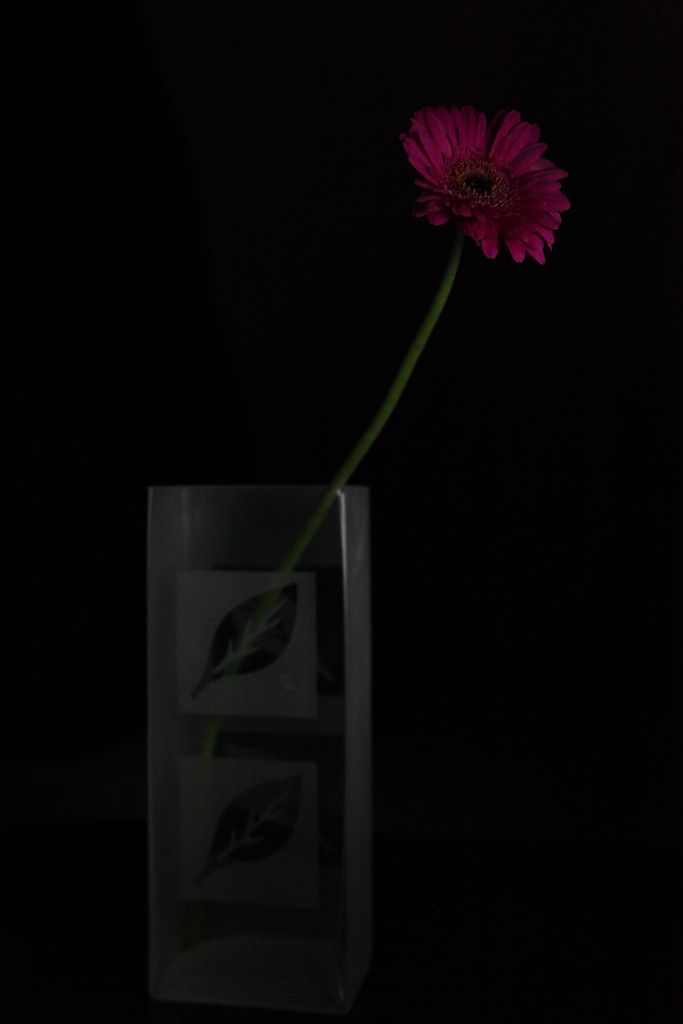
In this tutorial I'm going to take you through a short guide to try and create a similar image to the one below, without any specialist photography equipment - other than a DSLR - or any editing.
This WILL NOT produce professional results, but will certainly give you more avenues to explore if you don't have the budget for additional equipment.

This shot was taken at around midnight, so there was no natural light available. Even if you're taking this shot during the day, you should keep the room as dark as possible or it just won't work.
Here's what I used for this shot:
1 x DSLR
1 x flower
1 x vase
1 x empty box (about half the height of the vase)
1 x Laptop
1 x black card or a lid from a box (slightly larger than your laptop screen)
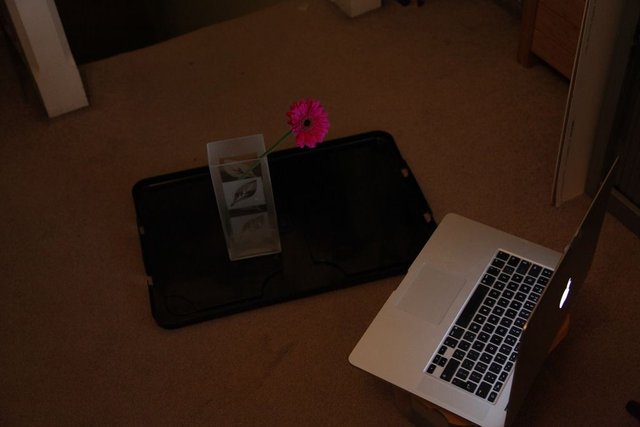
I first placed the flower and vase on the floor (actually on a plastic lid, but this isn't necessary), I had the flower facing forwards and to the right. Once they were in position I needed to find a light source. My initial thought was to use my phone, but this was a little too small and it was awkward to position by myself. I looked over at my desk and there I saw my laptop. I figured most people who own a DSLR will own a laptop, so this was ideal. Search the web for a white background and maximise the screen and set the brightness to high to get the most light from it.
I tried to place my laptop on the floor but it wasn't directing enough light to the top of the flower, so I rummaged around and found an empty box. I placed the laptop on the box and it was perfect:

So flower and laptop in place, I switched off the lights and took my first shot. Something important to remember is to set your exposure to the brightest part of the flower which should be the head. To do this, try the following:
Set your camera to manual. Set your ISO value to 3200 (or as close as you can get to that value). Next set your aperture to f4 or if your lens doesn't go that low, set it to the closest value. Now set your shutter speed to 1/80. Take your shot.
(If it isn't exposed correctly, play around with your shutter speed until you get the right exposure. If your drop your shutter speed too low, you'll get camera shake, so you'll need a tripod, or something stable to place your camera on - a sturdy box will do the trick)
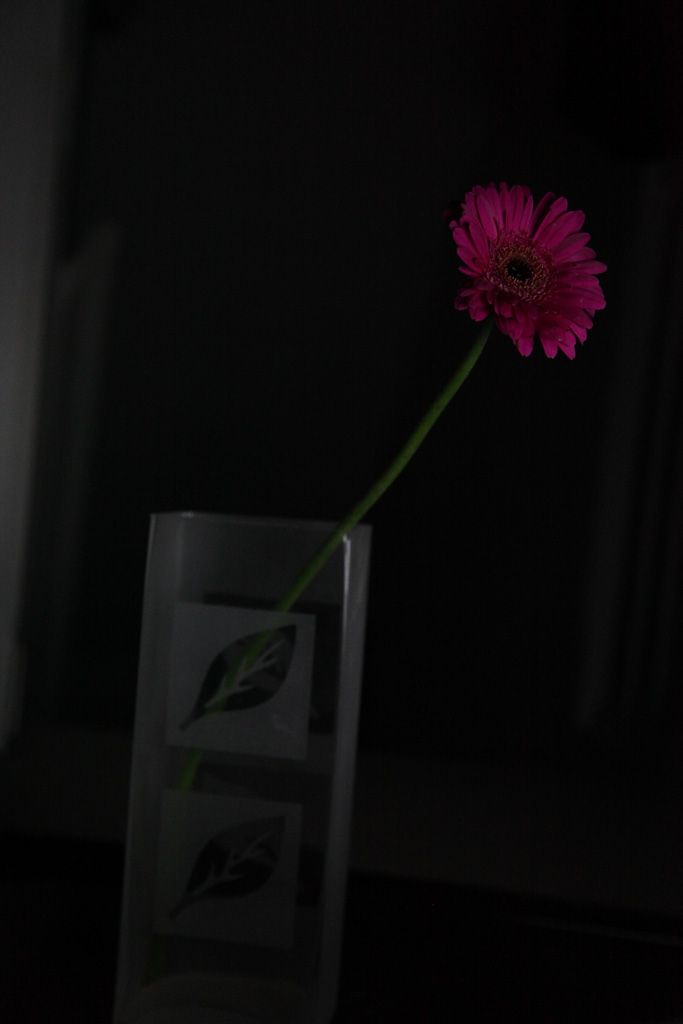
So here's the first test shot I took:

Now the purpose of the set up was to get the flower and vase in the shot only, the rest of the image was supposed to be black, but as you can see, there are objects showing in the background. To eliminate these you need to use a scrim of some sort. So this is where the plastic lid comes in handy.
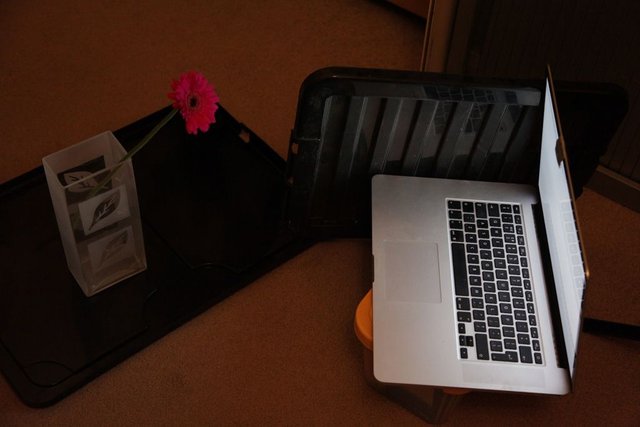
First move the laptop so the light is only spilling on to the same side of the flower as the laptop is (so rotate it towards the right until the light no longer spills to the left side). Then place the plastic lid next to the laptop screen and move it around until you see a shadow covering the light that you don't want.
This is what worked for me:

You should now be getting close to the first shot in this post.
You don't need to get too complicated with this. It's a simple method and it isn't intended to replace pro gear or produce pro results. It's just a way for beginners to start playing with light in different ways. From here on you can start experimenting with different objects, with peoples faces and alternative light sources, additional light sources you can find around the house etc.
I'm treating this post as a test. Let me know if you found it useful and I'll put some more tips together and maybe some basic editing tips using free software too.