Photography for beginners - Framing, angles and shot planes [ENG]
Greetings to the whole community! As you already know, Steemit is a place where photography abounds, which is a very good thing, since it encourages people to use this medium of artistic expression as well. My publication is intended to make known a little more of the world of photography, for those who are exploring this field or for those who are about to do it, I am sure that it will be very helpful to handle this knowledge.
These different points are related to each other, that is why I attached them in the same publication, at the time of photographing there are several things that a photographer takes into account; At what angle will the photo be made? What type of frame will use? And what is the desired plane? among other things. I will explain a little of each of these points, and I will show images as examples for your better understanding.

This part is divided into; directional framing, simple framing and composite framing.
Directional framing:
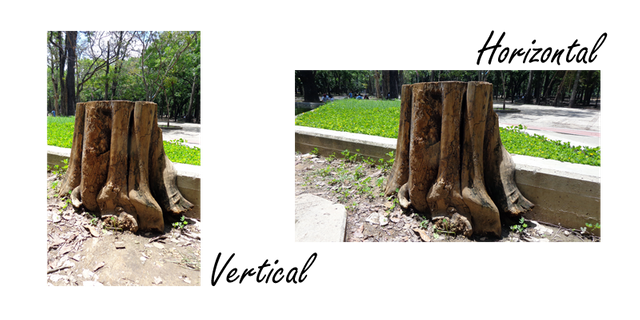
In this type of framing, the figure to be photographed is taken into account, and in which direction (horizontal or vertical) you can take more advantage, so that the person or object that is being portrayed can take better advantage of the space of the picture of the image.
Everything depends on the photographer wants to emphasize, for example, in the photographs of this trunk, if you want to emphasize the environment, the horizontal is the most appropriate option, but if you want to emphasize only the trunk and have prominence, then the vertical outlet is the most profitable.

The simple and composite framing
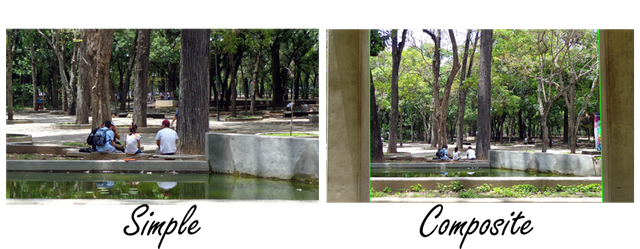
The simple and composite framing is necessary to mention them together in order to understand better; the simple consists of a shot without any detail that highlights an area, instead, the composite frame seeks to frame something within the image, people, objects or animals, these frames are made naturally within the shot, using mostly structures, or in other cases, nature.
This is an example of a shot I made in a simple way and another example of two structures that were in that place.
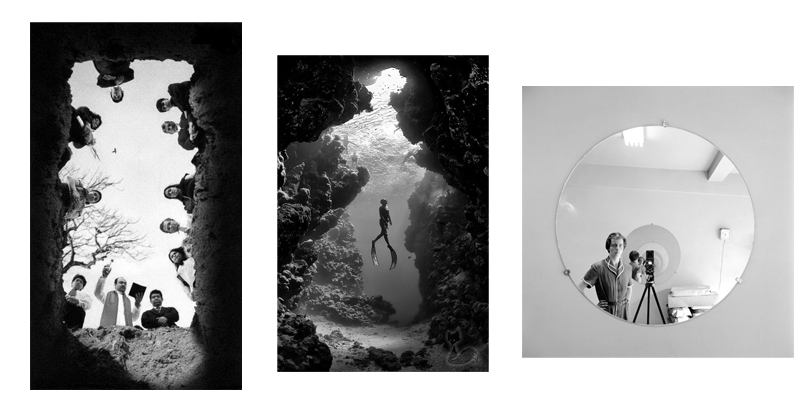
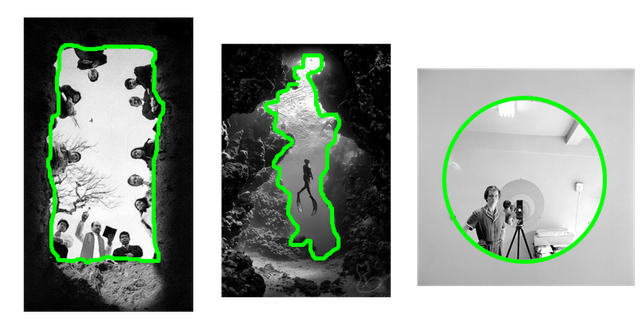
Photographs taken from my pinterest board:
These are other examples of composite frames, as you can see, they have a shape that can be circular, rectangular or organic, the purpose they all have in common is to frame or highlight something that is positioned within that composite frame.
Basically, as the name says, the angles in the photograph are the place where the camera or the photographer is positioned at the moment of shooting. Surely many of you have ever seen photographers in positions that seem to be very uncomfortable, here you will see what the purpose of this.
To define this, I have created some images as guides that will accompany my photographs taken at different angles.
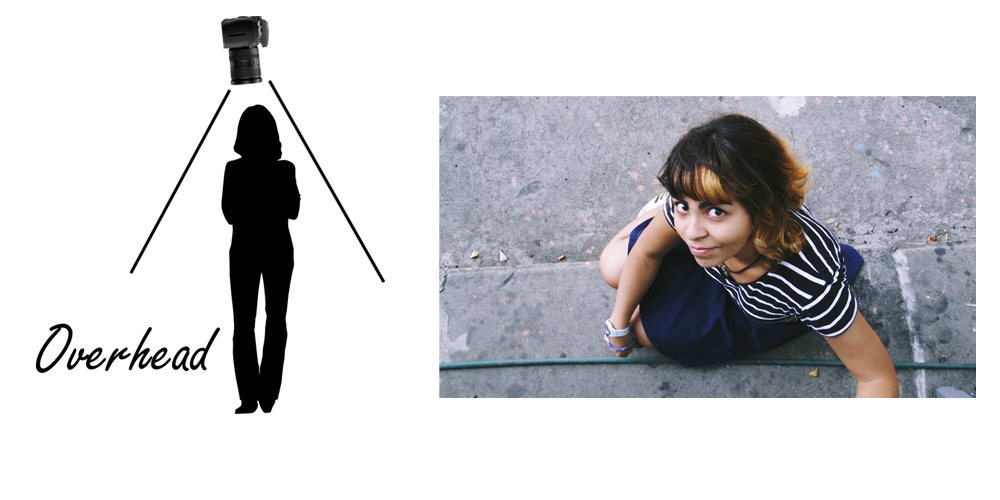
In the overhead angle as can be seen in the guide image, the camera should be positioned on the top of the object or person to be photographed, just above its head.
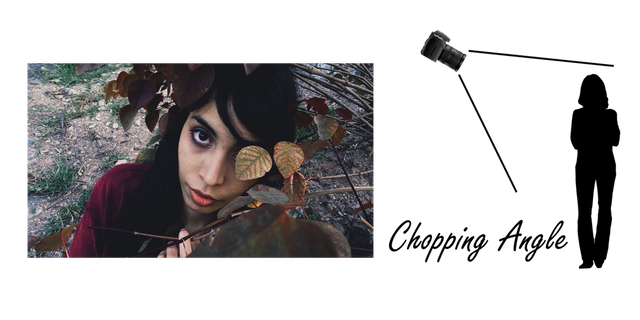
In the chopping angle the camera is positioned at a mid point between the front and the highest level, it is not completely above the subject or object, but it is appreciated that the shot is made from a higher point than the model.
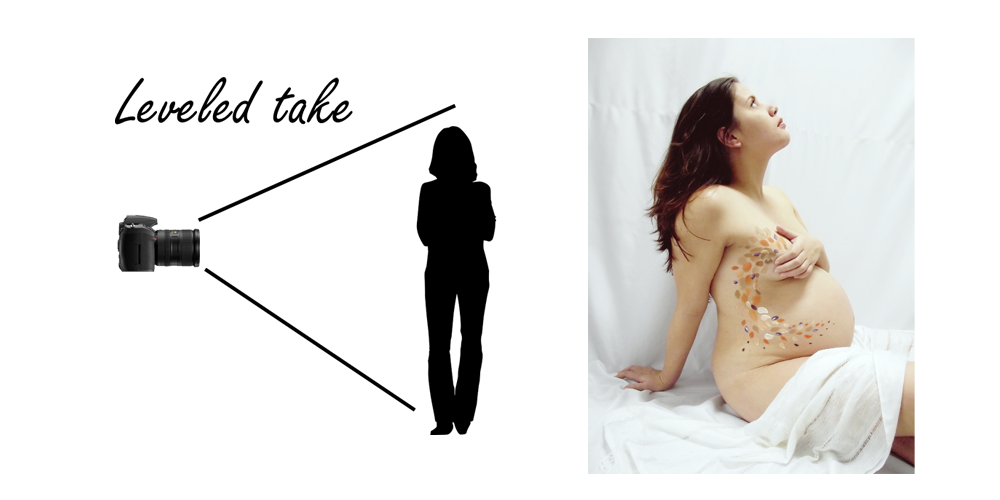
The angle or leveling is the most common that is usually done, it consists of positioning the camera just in front of the subject or object.
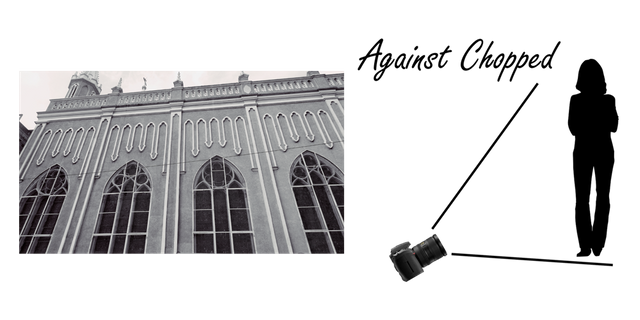
In the against chopped angle the camera is positioned between the midpoint between the front and the lowest level of the subject or object, similar to the chopped angle, only that this is from below. This is the type of angle that is usually used to photograph structures that are very tall, trees or anything that is located at a point much higher than the photographer.
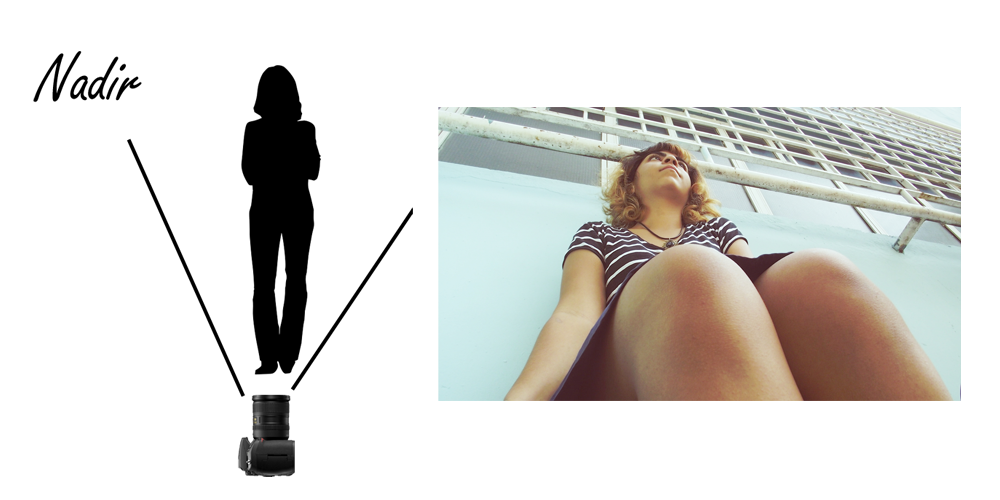
In the positioning of the Nadir angle, the camera is placed in the lowest place of the model or object, to achieve this shot the photographer lies on the floor completely, or the model is placed on a high bench, as In the case of this photograph that I give as an example, the girl is sitting on a bench.
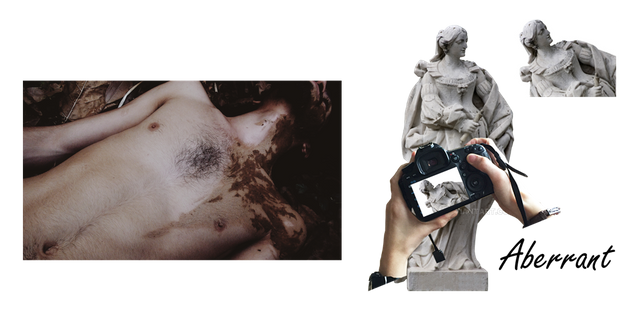
The aberrant angle is that which converts the horizontal and vertical lines into hexagonal, people usually take this type of angle as something wrong, but it exists and has a name, therefore it is not something that is wrong. As an assessment of this last type of angle, I would like to mention that Aleksandr Rodchenko (read Russian Constructivism), was one of the first photographers to promote this style that broke classic photography altogether.
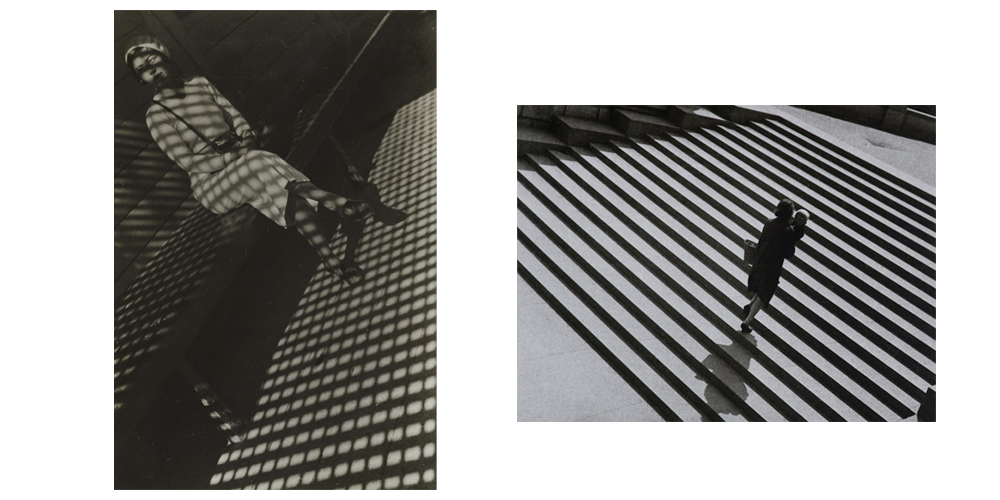
Photographs by Rodchenko
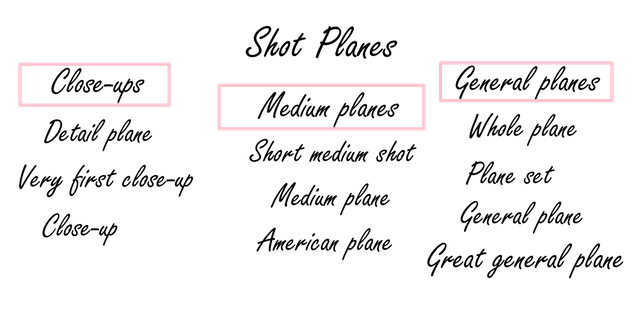
This concept is valid both in photography and cinematography, the shot planes are defined as the amount of space occupied by a model or object in the picture of the image, surely many people have already heard about this when someone says take a close-up of this or look at what a beautiful general plane, anyway, I will explain each of them, despite being over understood, it is very important to know where each plane arrives and where each cut should be made.
The shot planes are divided into three sections:
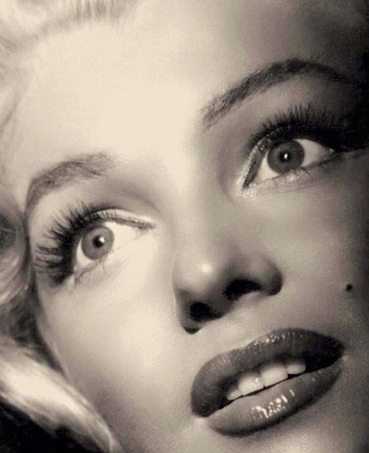
To vary now in the demonstration of each plane, I will use photographs of the beautiful Marilyn Monroe, it seemed to me that she is pertinent for having so many photographs in all types of existing plans.
Detail plane:
In this plane the photographer seeks to demonstrate a detail of the model or an object, a very close detail, for those who like to take photographs with a macro this is probably their favorite plane.
It should be mentioned that the detailed plane is not always a macro; it is simply an approach to a detail as I have mentioned before.
Very first close-up
This plane is usually somewhat intimidating because of the approach, the face completely fills the picture of the image, without giving way to any distraction. The purpose of this takes many times is to capture the look of the model and the message it conveys through their eyes.
In a person the cuts are made in the middle or above the forehead to the chin, for this shot it is important to maintain a good control of the focus and depth of field.
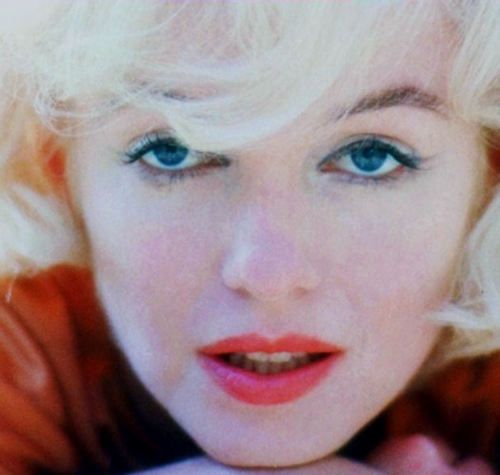
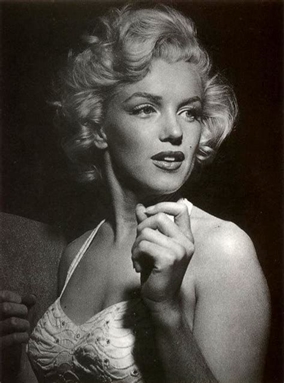
Close-up
In this plane you can see the whole object or the face of the model even from a close view.
The cut goes from the head to the shoulders, this is the type of plane used for the photographs that go in the identifications of each person. It is said that it is the most suitable approach to portray a person's face because it shows the gestures and details of the face.
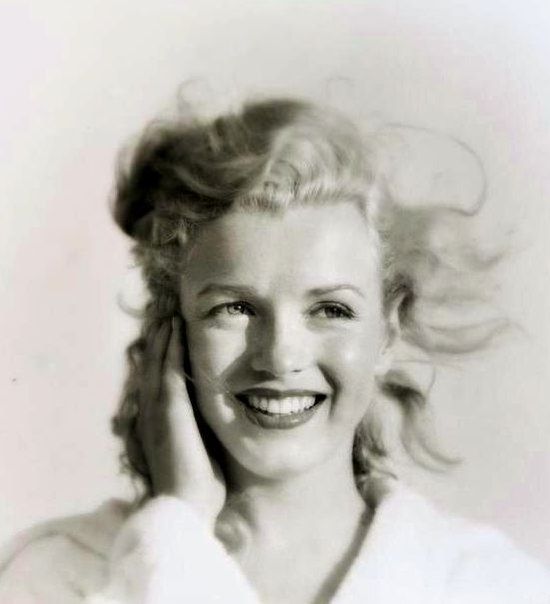
Short medium shot:
This plane is characterized by reaching the chest of the person being photographed, the ideal framing of this photograph would be the vertical directional framing, but everything depends on the photographer's intention, therefore it is not obligatory that it must be vertical.
The vertical intention of this plane is to isolate the model from its surroundings. This plane was one of those used to portray the people of royalty in antiquity.
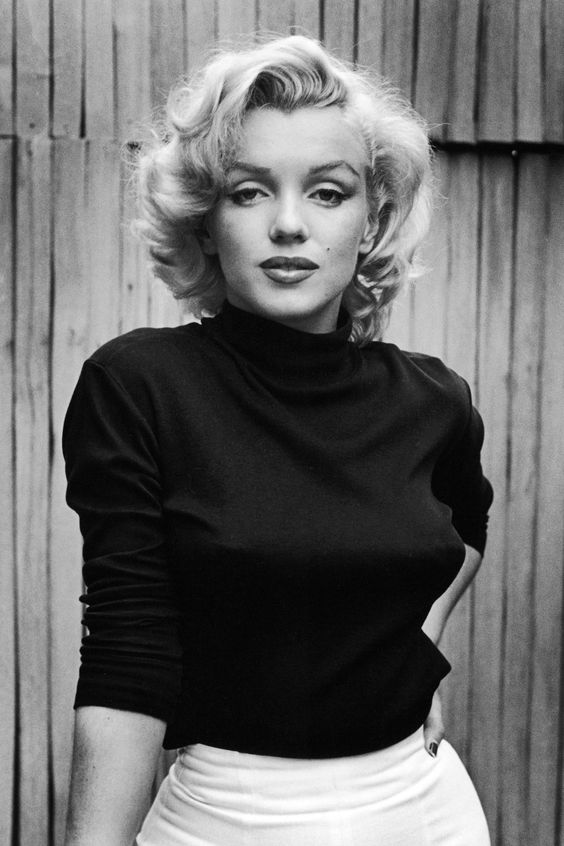
Medium plane:
In this plane the model takes all the attention in the picture of the image, is characterized by being one of the most used planes in the fashion industry, those that are often seen in newspapers and magazines.
The cut is made from the head or a little above the head to the waist.
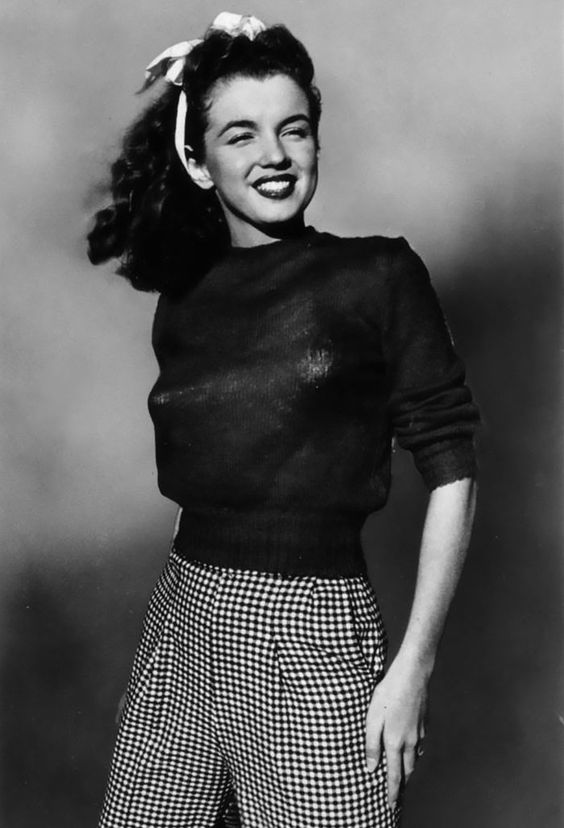
American plane:
Also known as three-quarter plane, it is characterized by the cut of the model, the origin of the name of '' American plane '' comes from the western genre films (cowboy movies) where the shots are usually by above or below the knees never on the knees, to have a good shot of their weapons and the moment where they draw it.
As you can see, from the middle planes the frame is usually in the vertical direction since if you photograph people is the best way, but it is to the taste of the photographer as I mentioned before.
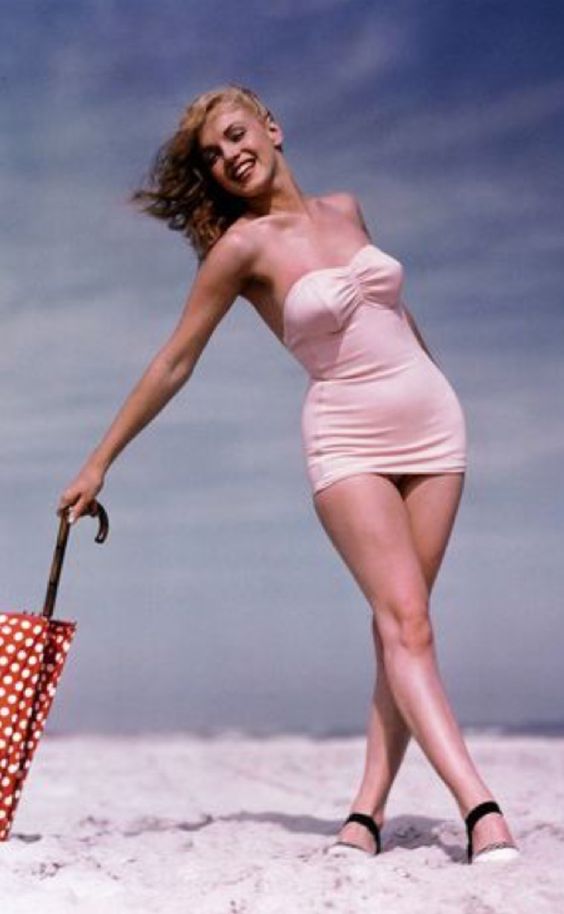
Whole plane:
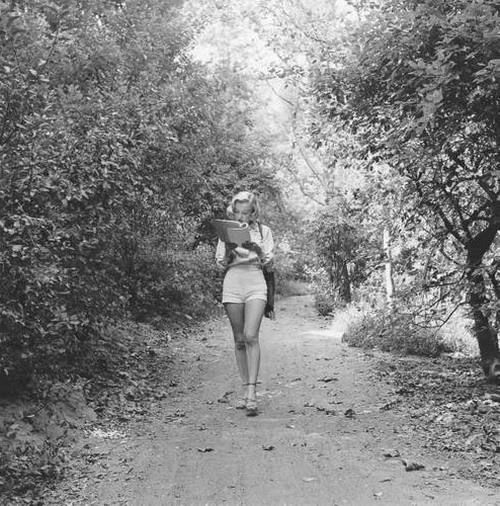
As the name says, it fits the model or object in its entirety, but without adding more, the purpose is to highlight the body of the model in its entirety, this plane is also commonly used in the fashion industry, as a sample of costumes of Vanguard.
This plane does not have cuts in the body of the model, but in the environment, because only the model or the object will matter.
To get more out of this plane, the background should be well planned, as in the example image, Marilyn is in a place that seems to be desert and there is nothing that attracts attention more than herself.
Plane set:
In this plane we begin to include the environment with the model or the object, to call it a joint plane I define it as the object or model next to the set of things that it has around it, then the environment begins to influence the theme of the photography, and the plane does not focus on a thing or a person.
This type of plans can be found in documentary photography, where the reality or the environment is shown in a dramatic situation.
General plane:
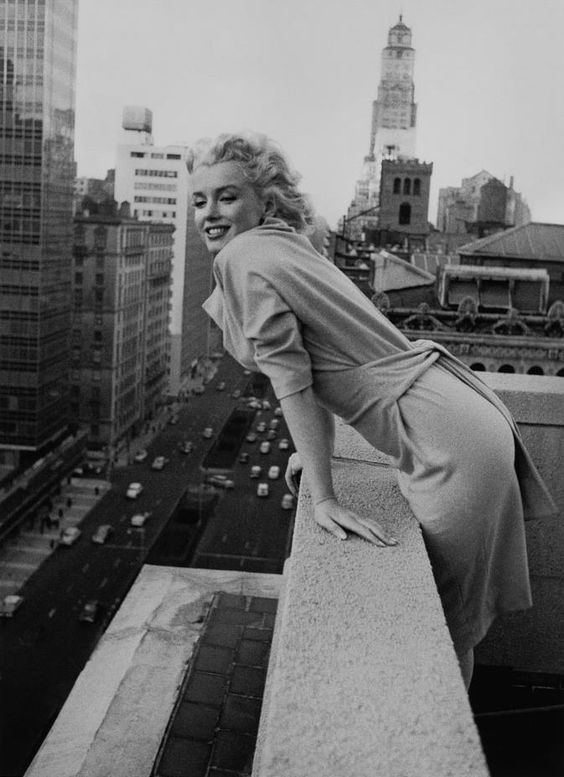
This plane seeks to give a complete vision of a whole scene, not only of the model or the object, but of its surroundings in the totality, just as the joint plane this plane also seeks to encompass more the context of its surroundings, it still has a character or object that has an importance visually.
This shot plane is found not only in documentary photography, but also in fashion, and travel.
All the pictures I used of Marilyn you can get them here
Great general plane:
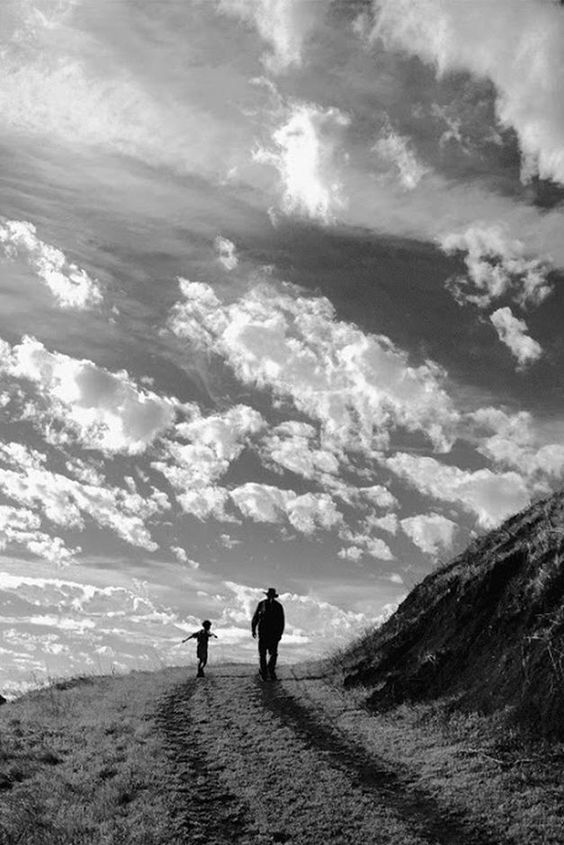
This shot plane is usually used to obtain shots of places, natural landscapes, cities, and large scenes. The characters are not so important in these planes, what matters is the environment, as shown in the image, the subjects are minimized in contrast to the great environment that surrounds them.
This plane as well as all the general planes is used a lot in cinematography, to have a clear vision of a whole, as for example, to demonstrate the geographical location of a place.
Source
Although this publication is full of technicalities, I want to remind you that photography is free, technical issues are nothing compared to the soul that each one puts to their photographs, my purpose is to educate but also to impel them to dare; Once you learn all the techniques, use them to create new rules and new compositions.
All the aforementioned things in terms of the types of frames, types of angles and shot planes should be mixed with the idea that each photographer has in mind, then when exploring, that not only are you looking to comply with those rules, but that in using them appropriately to transmit messages with each of your photographs.
Photography is not only a means of marketing, it is art and it is an expression of being, just like other artistic expressions.
Are you interested in more photography publications for beginners? I invite you to review my other post's :
1 - Compositional laws and how to break them
.







I would love to take better photos, but mostly I am terrible at it. This is a a superb post to learn how to take better photos, and the layout is perfect - I have to say I admire the effort taken to position the images alongside the text - works so well and makes this a pleasure to read and learn from. Really good educational post, thank you for sharing.
#thealliance
Oh, thank you for reading me!! I'm sure that you can improve your photography skills :), It took me some time to organize it because I couldn't find any example images, so I did them by myself to explain it for good comprehension.
Excellent Tutorial sharing for more visibility for it
Thanks for your visit mate!
a pleasure to visit
if you want more upvotes check out my last blog post @a-0-0
I will use these tips
I'm glad you like it :) !
Congratulations! Your post has been selected as a daily Steemit truffle! It is listed on rank 5 of all contributions awarded today. You can find the TOP DAILY TRUFFLE PICKS HERE.
I upvoted your contribution because to my mind your post is at least 15 SBD worth and should receive 97 votes. It's now up to the lovely Steemit community to make this come true.
I am
TrufflePig, an Artificial Intelligence Bot that helps minnows and content curators using Machine Learning. If you are curious how I select content, you can find an explanation here!Have a nice day and sincerely yours,

TrufflePigwow thank you!!!!!!!!!!!!!!!
You're welcome hun :)
Thanks for making this post—it's really interesting and informative!
You are welcome :) !
Wow! What an excellent explanation. I can wait to try my hand at perfecting these angles and also just experimenting with the joy of photography! Thanks for such a great learning post!
Is nice to know that you will try them, I would like to see some of your pics :)
Great info. I never knew the names behind these compositional techniques.