How to make product photos correctly: a guide for online sites
Online trading is unthinkable without quality product photos. The user can not touch or try on the product before buying - in fact, he makes his choice based on the image presented to him. Quality photography should provide the consumer with all the necessary information, answer all his questions, talk about the purpose of the goods, pay attention to the necessary details. Correctly made product photos at times increase the conversion, reduce the number of returns and increase the level of recognition and loyalty to the brand. No wonder they say that one picture replaces a thousand words.Creative director of Squareshot Dmitry Kovalenko made a detailed guide for AIN.UA with examples of correct product photography and told why it is profitable to invest in high-quality photos and video content.
Quality matters
American freelance platform Upwork found that high-quality photos are very important or even the most important factor in making a decision to buy for 75% of online buyers.
A study conducted by Voxware in the US in 2015 showed that 54% of all returns are due to discrepancy of color or quality of the product purchased by the client. In other words, every second return in your online store is made because the product in the photo does not match the color and quality of the real product in life.
Size matters
According to the US company Optimistic, the increase in the size of photos increases the conversion by an average of 9.46%. Depending on the sales volume of the online store, this figure is converted into significant additional sales every day, month and year.
And also the study from Econsultancy showed that people can remember only 20% of the information they read and 80% of the information they saw. On one of the sites participating in the study, the results showed that increased and more professional product photos increased conversion by 300%.
The number of photos also matters
And finally, eBay, having studied 6.8 million products on its platform with the help of algorithms, found out that the product illustrated by two pictures is sold at 7% more often than the product with one picture, and the product with three pictures is sold at 3% Than a product with two pictures. This trend continued up to eight pictures per product. Thus, the product, illustrated by eight images, was sold at 25% better than the product with one picture. After that, eBay made a very simple and logical conclusion: More pictures - more sales.
The result: it's worth investing in food photography.
Below is the most detailed and extensive guide to product photos on the Internet. In this manual, we thoroughly classify all product photos, give useful recommendations and give examples of using product photos in real online stores.
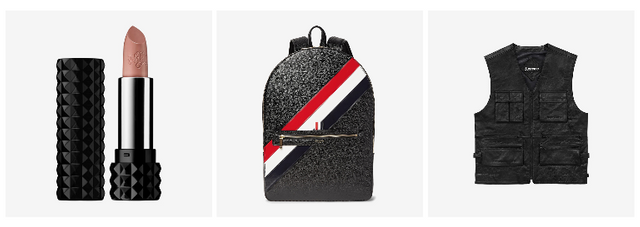
1. Hero Shot
This is the main, header picture of your product. Give her the most careful attention - in fact this photo is displayed on the catalog page and on all advertising materials. It is this photo that will be the first to attract the client's attention - which means that all the details of the product should be worked out as much as possible.
As a rule, the product is directly photographed on the title photograph (Straight On). This is not a strict rule, the main objective of the angle is to show the most advantageous position in which the maximum product area is covered. For example, in shoes, the title photograph is usually a side view (Side Shot), and the rings have an angle (Low or High Straight On).
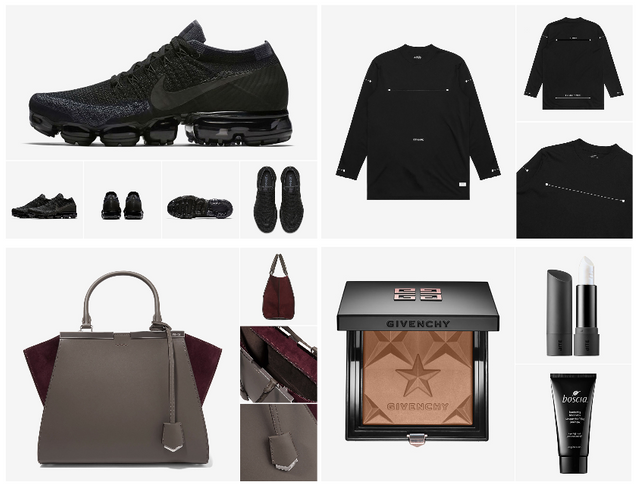
2. Side, Overhead, Bottom views
One photo, even the most successful, is not enough for high sales. The product needs to be shown from different angles. However, there is a very important rule - additional photos should always carry new information for the user. Therefore, in the segment of cosmetics or household products, one photograph is almost always enough: there is absolutely nothing to show from other angles, and there is no point in spending money on photographs that do not provide additional information. In addition, when deciding how many photos you want to make, you must take into account the cost of the product. If you make products in small quantities or low-margin products, then try to choose the 1-2 most successful foreshortening to show the product. Below we combined the angles and their optimal number for the main categories of goods.
3. Features
The task of these photographs is to help answer the following questions:
Why this product?
4. Close up shots
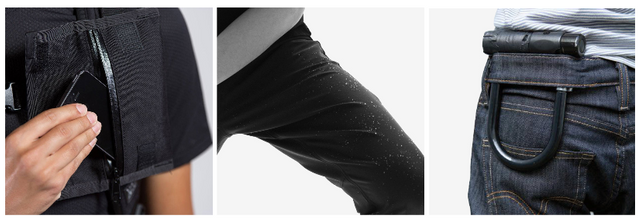
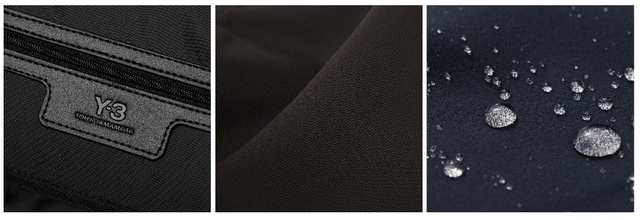
Close-ups are extremely important. They enable the user to learn the product at the most detailed level. Close-up pictures can be used to show the material and its texture, seams, interior trim, accessories, engraving, tag or any other detail that should be given special attention. Such photographs strengthen the credibility of the quality, provide additional useful information and show your attention to detail. But they are worth doing only if the product looks really good with magnification.
5. In use / In context
Show the product in real conditions of use - in street turmoil, under water or on the beach. If it's clothes, show the product model in conjunction with other wardrobe items. Help the user visualize what his future purchase will look like, where and how your product will be used. A photograph in context helps to understand its size and scale. For example, the online auction of works of art Saatchi offers potential buyers of the picture immediately try it on their interior.
The most effective way to show the length, thickness or volume of a commodity is to compare it to an object the size of which the buyer knows exactly. If it's a bag, put something next to it or take a picture of it in the hands of the model. If this dress is on the model, then indicate how tall the model is and what size of clothes it wears. If your product is a little, take a picture of it in your hand, or place near a coin or credit card, to show the thickness of the product. Your main task - to clearly explain to the client what size the goods, which he buys.

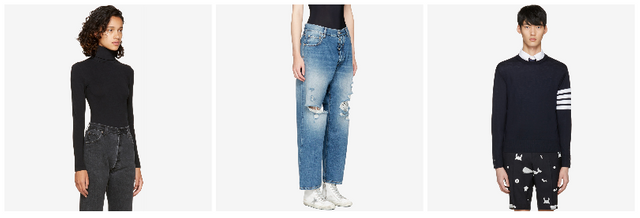
6. Model shots
Model shootings can be attributed to a variety of photos In context. Thanks to the model shootings, the buyer understands how the clothes on the person are selling. In addition, clothing on the model is almost always photographed in combination with other goods - an excellent opportunity to advertise other products and offer them in the kit. In the case of bags, model shots help show the size of the bag and how to combine it. If you decide to take photos of clothing on the model, always indicate the growth of the model and the size of the goods in the photo, in order to avoid a high number of returns.
7. Ghost mannequin
Advanced and modern level of product photos, which is suitable for any category of goods. Ghost mannequin pictures are ideal for showing the shape of the product. It's cheaper than photographing products on the model, so this type of photos are used by many top-end online stores. To create such images, additional equipment is required, as well as a high professional level of the crew. Additional efforts justify themselves: visually such pictures look much better than Flat Lay photos (see below).
8. Flat lay apparel
Flat lay photos - a simple, proven and economical way of shooting clothes. A huge number of online stores use Flat lay photos. They are great for standard categories of products, such as T-shirts, shirts, sweat shirts, jeans. The most difficult task in the pictures of this category is to make the finished image symmetrical and smooth at the edges, and this requires special skills in the beautiful layout of the goods.

Flat lay photos - a simple, proven and economical way of shooting clothes. A huge number of online stores use Flat lay photos. They are great for standard categories of products, such as T-shirts, shirts, sweat shirts, jeans. The most difficult task in the pictures of this category is to make the finished image symmetrical and smooth at the edges, and this requires special skills in the beautiful layout of the goods.
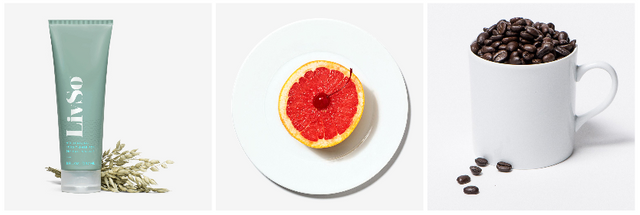
9. Product with props
Shooting goods in combination with all kinds of objects will make your photo more memorable. Props is an excellent tool to remind you of the composition of the product or how it can be used. If you sell a cream with citrus extract, then visualize this by putting an orange or lemon next to the product. If your product is dishes, fill it with beautiful fruits, this will give an understanding of the size of the dishes, and the picture will be more lively and interesting. Pictures with props can be considered one of the subspecies of pictures In context, but the distinguishing feature of pictures with props is that they are almost always photographed in the studio, which can not be said about pictures of In Context.
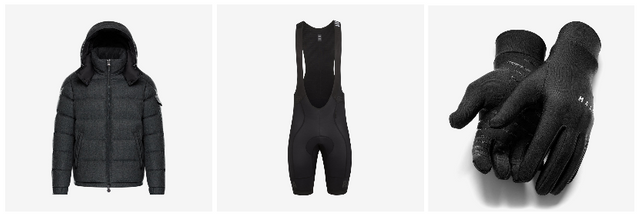
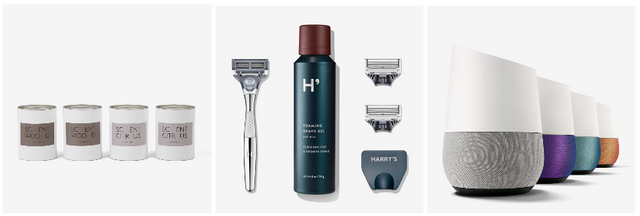
10. Group shot
Group shot is a shot when there are more than one subject in the frame. An excellent option to show the entire product line of colors or the entire collection of products. Such types of pictures as 'Products with props' or 'What's in the box' are subspecies of Group shots. This is a very common type of images, especially for advertising, because it allows you to show not only the product itself, but also its variations or bundle, which in the end gives more valuable information to a potential customer.
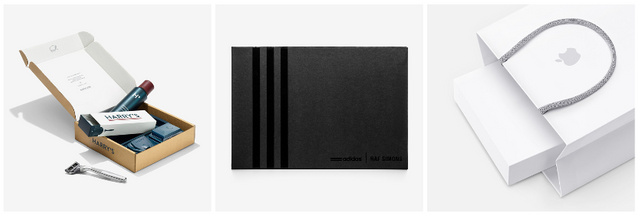
11. Box and packaging
A photograph of a box or package is an important part of the presentation of the product. A photograph of a box or package is especially useful for those customers who order the goods as a gift. This helps them see what the person they want to surprise will receive. A beautiful picture of a quality box shows your serious approach and attention to detail. The presentation of the product is no less important than the product itself - Apple has proven this to us many times.
12. Hand modeling
This sort of photo brings the potential customer closer to the product you are selling - the user unwittingly imagines that this product is in his hand. In addition, if the product is photographed in the hand, it is easy for the user to understand its dimensions. Of course, the hand should be beautiful, well-groomed and clean, and the shot - air. In other words, there should be a lot of empty space in the frame to concentrate the buyer's attention on the hand that holds the product.

13. 360 degree images
As shown by the research company Golf Galaxy, photos with the ability to rotate the product by 360 degrees - a powerful tool to increase the conversion. The same functions and tasks for product videos - show the product from all angles in a short period of time. Such images help the user to better study the product, which means that he is more likely to get what he needs and will not return the product back. Such a supply of goods will provide a significant advantage over competitors.
You can display the product by 360 degrees in several ways:
14. Product Video
Video products are used by many top retailers - the same Adidas, Mrporter, Asos, The North Face, Net-a-porter, Everlane. Such a product supply has a number of advantages:
15. Infographic
Photos are supplemented with infographics, when it is necessary to convey to the consumer a number of valuable information that is difficult to submit in the form of a simple image. For example, how much the product weighs, how long the warranty lasts, what the product consists of, how much is spent or what resources are saved during production.

16. GIF
Dynamic GIF images are becoming an increasingly popular tool every year. A great opportunity to show the product in action or demonstrate the range of colors of your products. GIF is very often used to show the process of unboxing a product. And it's a great alternative to video, especially for banner advertising, in which video can not be used. Also, GIF has less file weight than video, which means its download speed will always be faster.
Conclusion
Be creative, use any visual techniques to talk about the product as much as possible to show it in different situations and variations to give all the necessary information, while doing it uniquely, interestingly and uniquely.
Recommendations
Post created by @hrytsenko
@hrytsenko very eleborate and very useful. This is quality content. Thanks for sharing man! Please keep posting.