Photography : Fool your camera!
Now we have learned what the three most important pillars are to set on your camera, and you always can remember them by saying to yourself "I Am Shooting".
I = Iso
Am = Aperture
Shooting = Shutterspeed
Now it's time to go out with your camera and take that first photo! Can I do that with only these settings? Are there no more institutions than?
The answer to this is "Yes, you can only take photos with these settings", "Yes, there are still more settings you can do".
Are these extra settings necessary for making the photo? I can say, "No, they are not necessarily needed for taking the photo". You do not need more than these three settings to take the photo. But of course there is more to be done to take a well-lit picture.
The most important thing to photograph is light. And how you manage the luminous flux to your sensor, we know that now.
What we need to know now is a technical story about the sensor in our cameras. Every camera, no matter which one, has a sensor that is set to NEUTRAL GRAY. That means that the light measurement of our camera is also set to neutral gray, it is also called MIDDEN GRAY or 18% GRAY.
What does that mean for us? Why do we need to know this?
Because the sensor of our cameras is set to medium gray, we always have to take this into account, and tell our camera what we want to see in the picture. In some cases we have to say to the camera ourselves that we want a lighter photo or a darker photo.
We must then go INCREASE or DECREASE the amount of light that falls on your sensor.
But when do we do that? That is also partly dependent on the light measurement you apply. On a camera, (and I'm talking here again about the DSLR), you can set light metering in several ways.
The most common is the Evaluative Measurement. In this measurement, the camera looks over the entire image at the light that falls on the sensor and then determines the values that are necessary to illuminate all that well.
You have the so-called Center Measurement. The whole image is also included in the measurement, but the emphasis is on how much light enters the middle part of the sensor.
And finally there is the Spot Measurement. This is a measurement where only a very small part of the sensor is examined how much light enters. This measurement is useful in situations where you work with a lot of contrast.
In general, the Evaluative Measurement will be the most used and will often produce the desired results.
But I wanted to talk about the situations where you can not rely on the light measurement of the camera. And that is the case, for example, when there is snow.
Oh wow ... snow, I can hear you thinking. Then you generally want to go outside, grab that camera and GO! That wonderful white world is always the perfect moment for us to shoot beautiful pictures.
Great is often the disappointment when you transfer your photos to your computer at home and you see all gray pictures appear, while you just wanted to put your sunglasses on your face outside because of the bright white on your eyes.
So this is such a situation where you have to fool your camera! After all, your camera wants to make the white that is present in the photo 18% gray through that sensor. And you do not want that! This is such a situation where you have to say to the camera that he has to let in more light than he would like to do. You're going to fool your camera. Remember, you are the one who is in control and you tell your camera to OVEREXPOSE.
This picture was taken with the settings that should be correct according to the light meter of my camera. You see here that the snow is not white, and my light dog also looks like he would need a bath. Typically a situation in which I have to say to the camera that more light should come in.
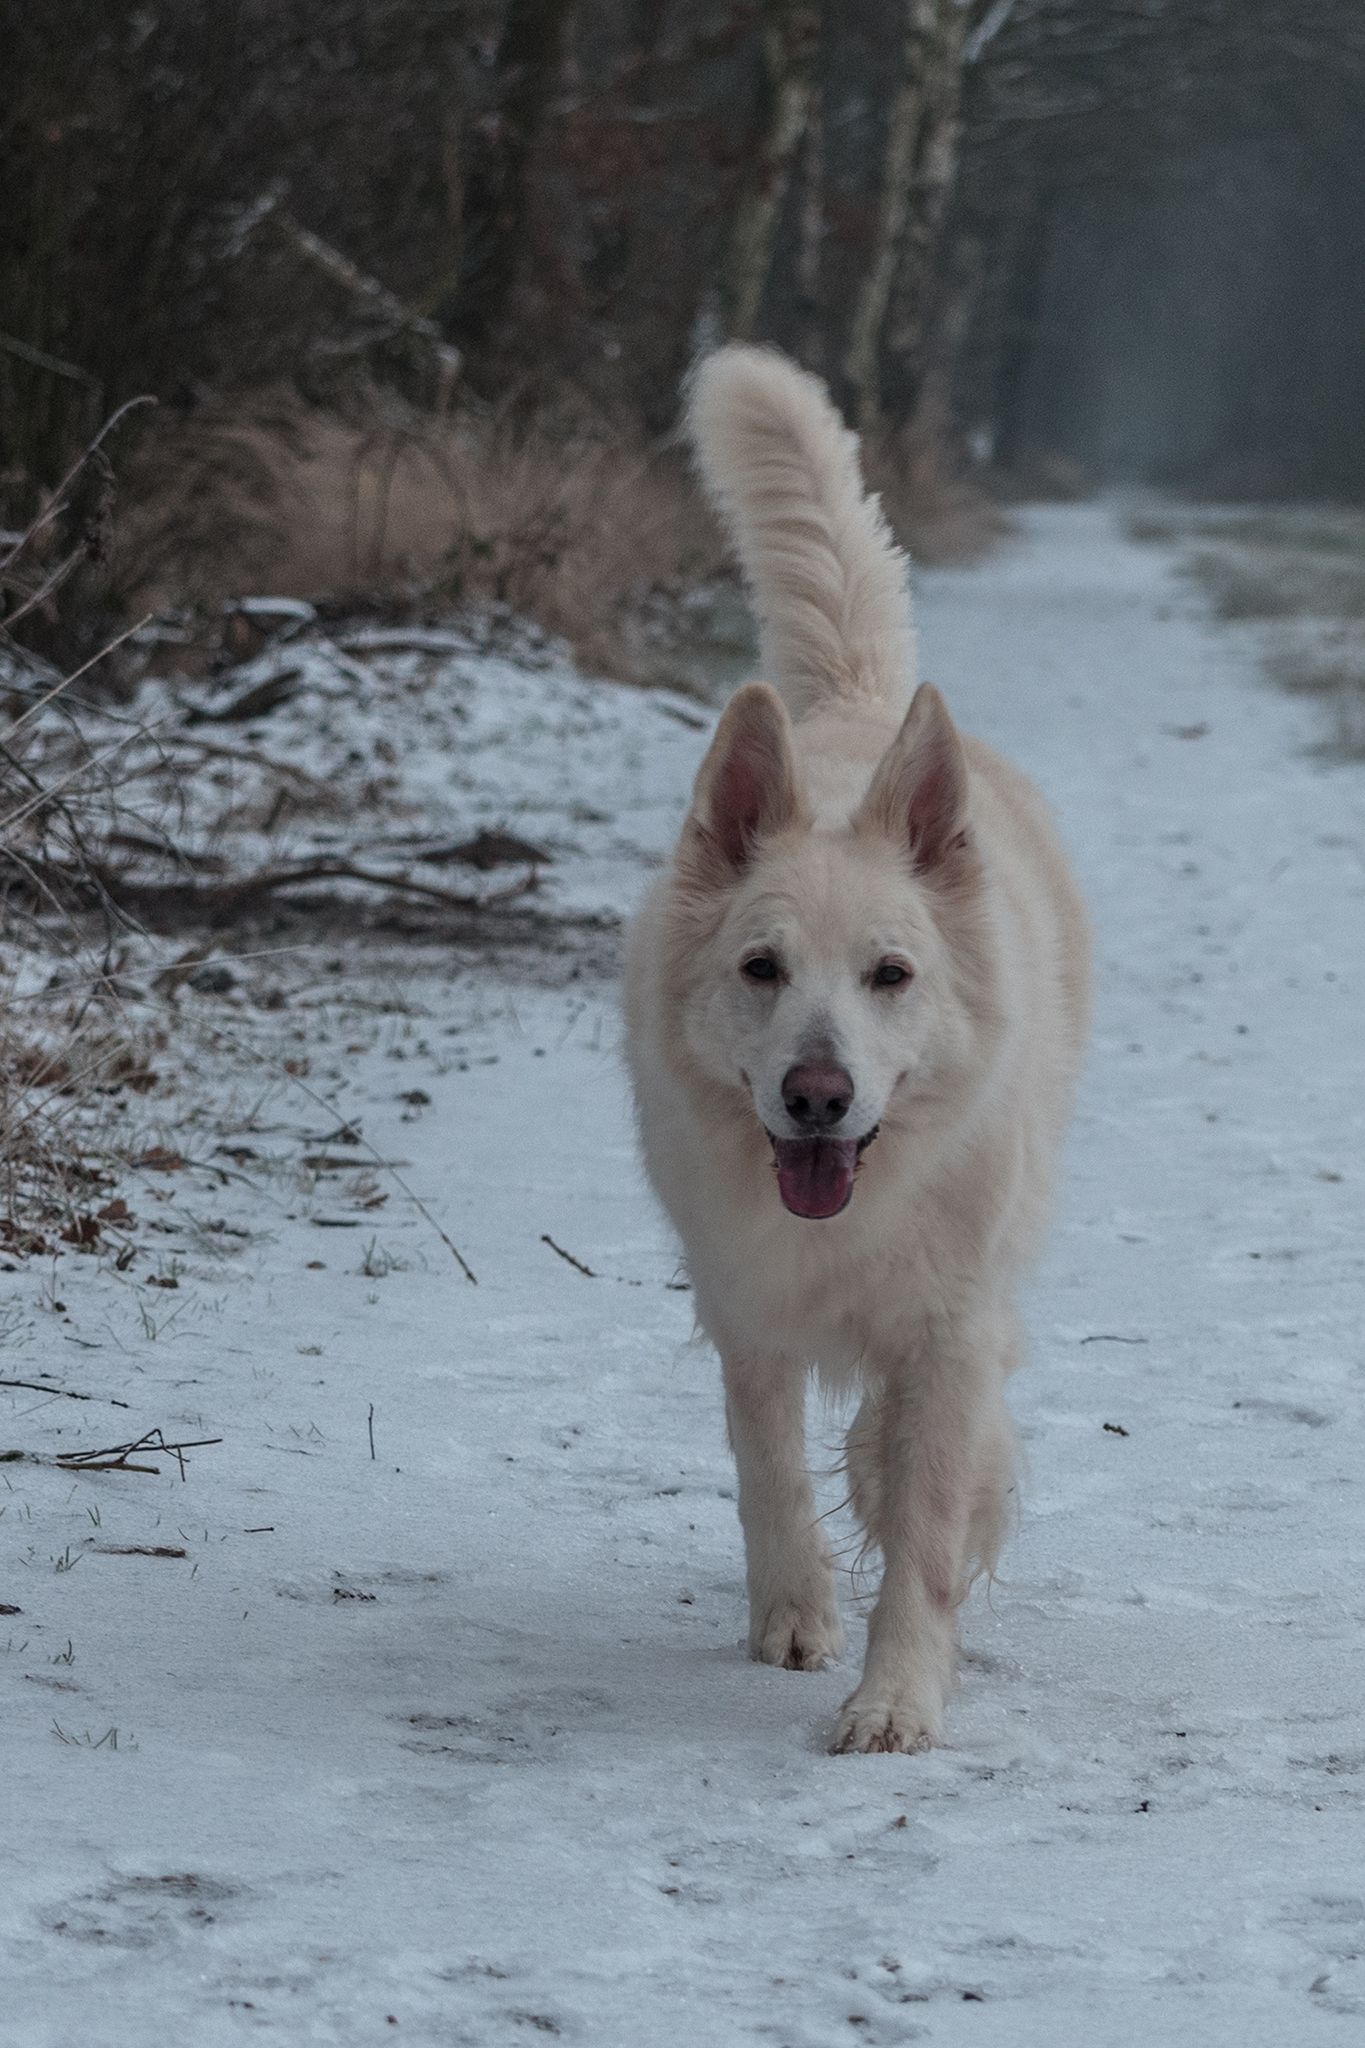
And that's just exactly what I did in the next photo. I told the camera to OVEREXPOSE, and then get this picture as a result.
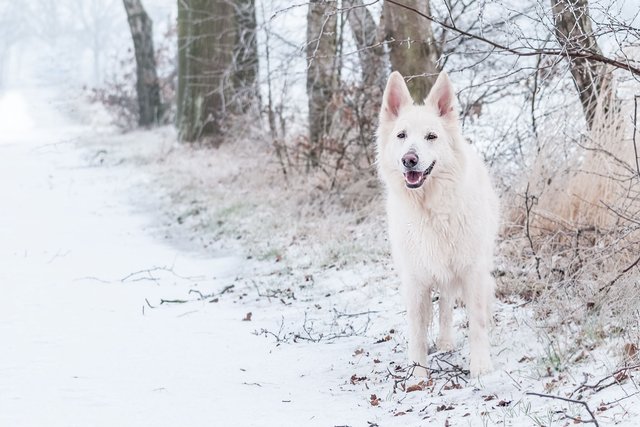
Now you can of course do that overexposure in different ways. You can manually adjust the shutter speed yourself, set a slower shutter speed so that the dash is no longer on the 0 but shifts to the + sign in your light meter. If you do not want to adjust the shutter speed and you have the possibility to open the aperture further (set a smaller f number), you can just do that. If that possibility is not there, you can possibly raise your Iso.
In a reverse situation ... where there is a lot of darkness in your photo. Then your camera will naturally decide that it needs more light. In such a case you have to fool the camera, but now the other way around. You want LESS light.
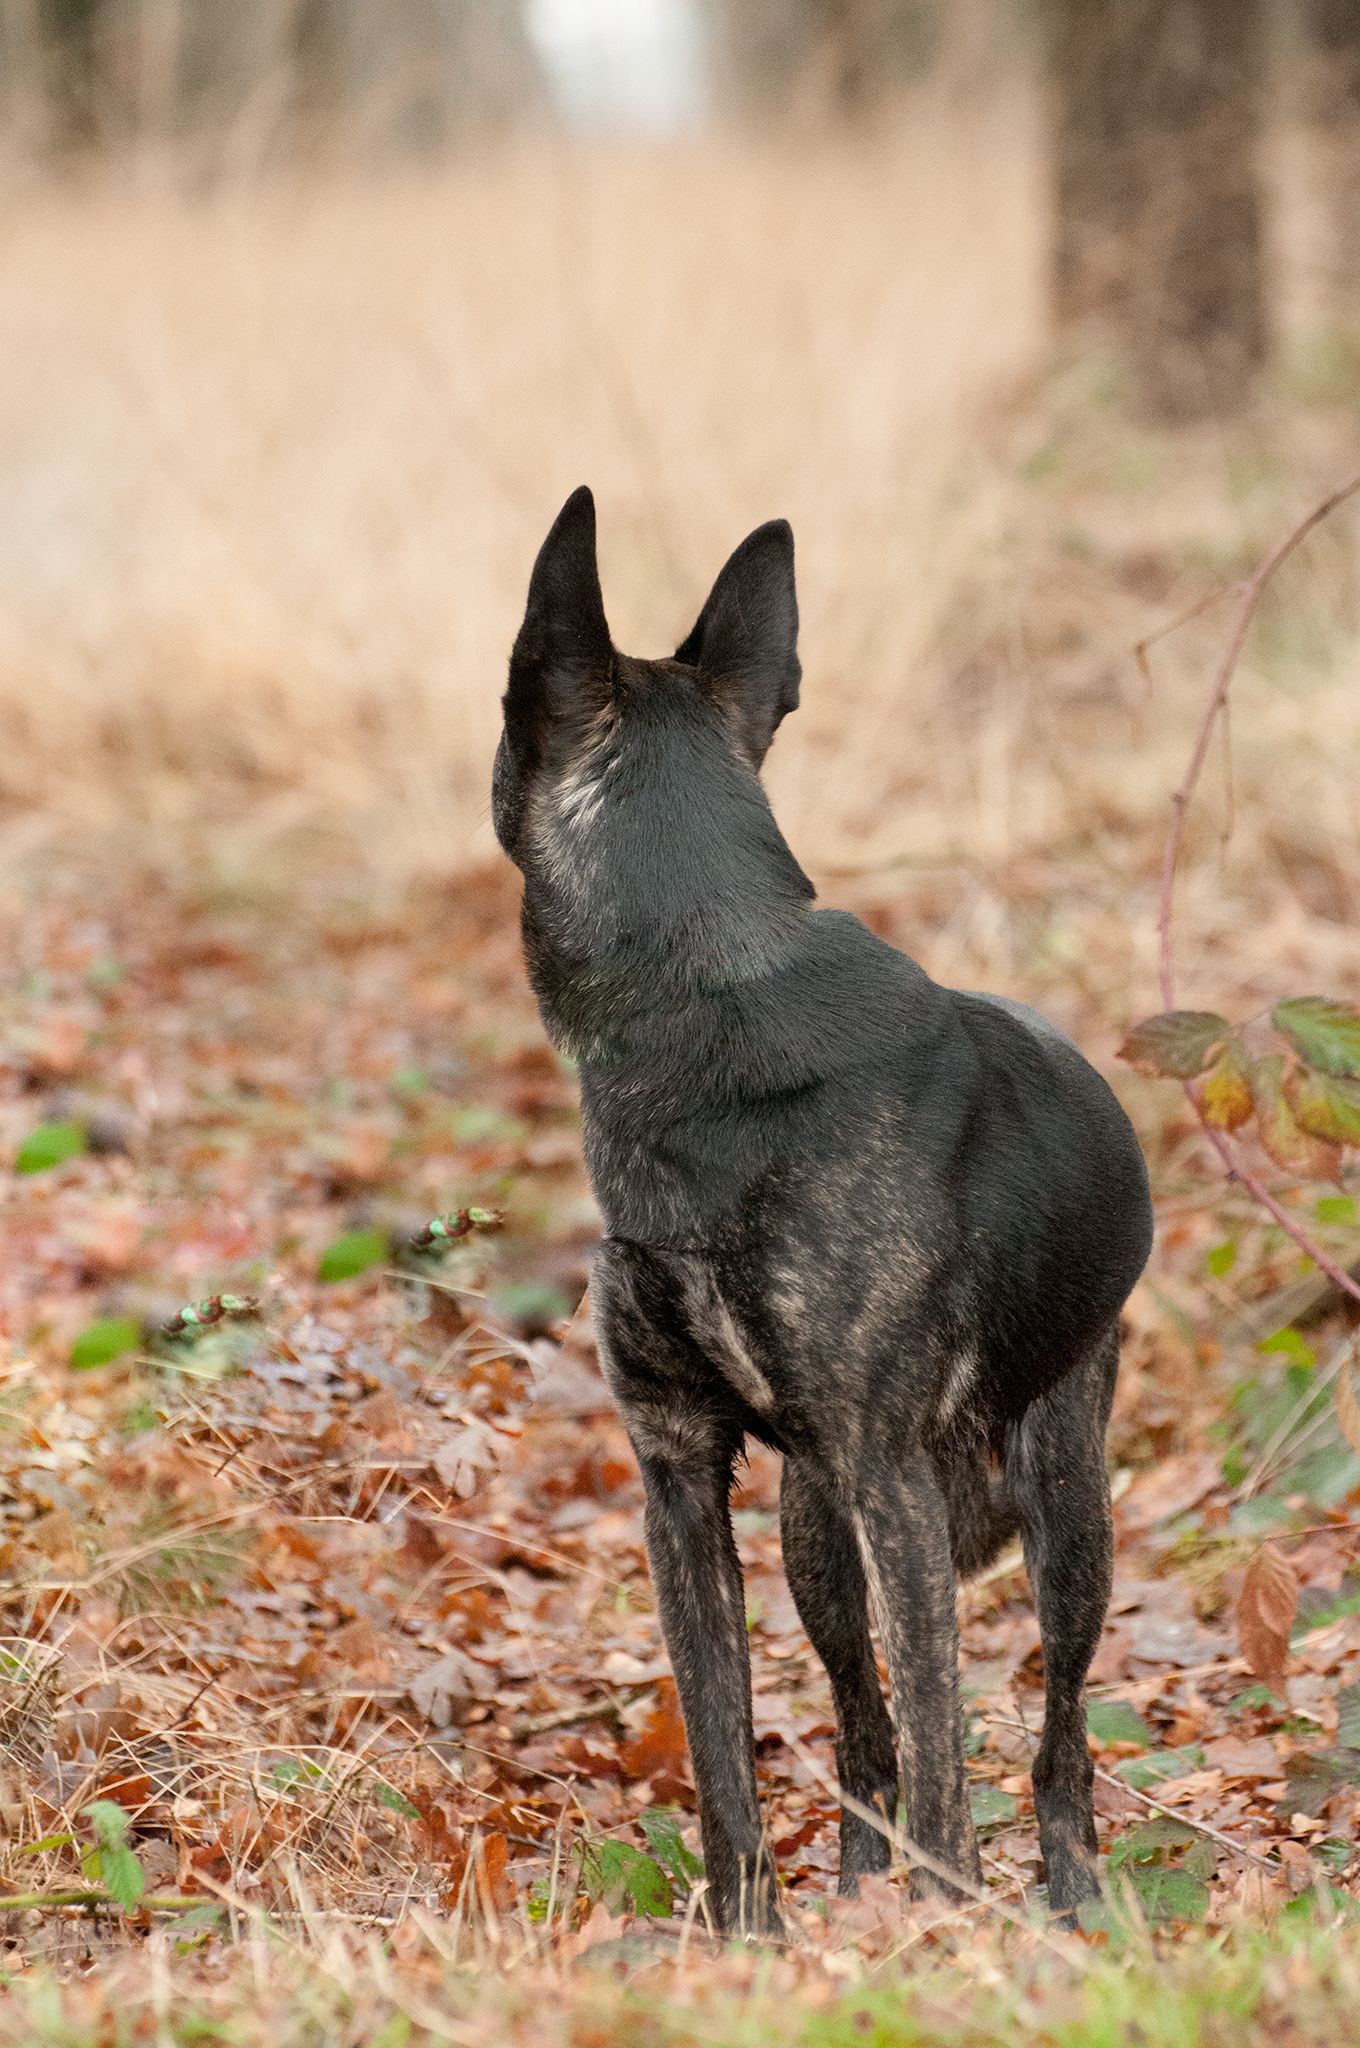
Below an example of Lana in the forest. Lana is a dark dog (almost black), and in the forest there is also not much light. Here too, you can adjust the underexposure by adjusting your settings yourself.
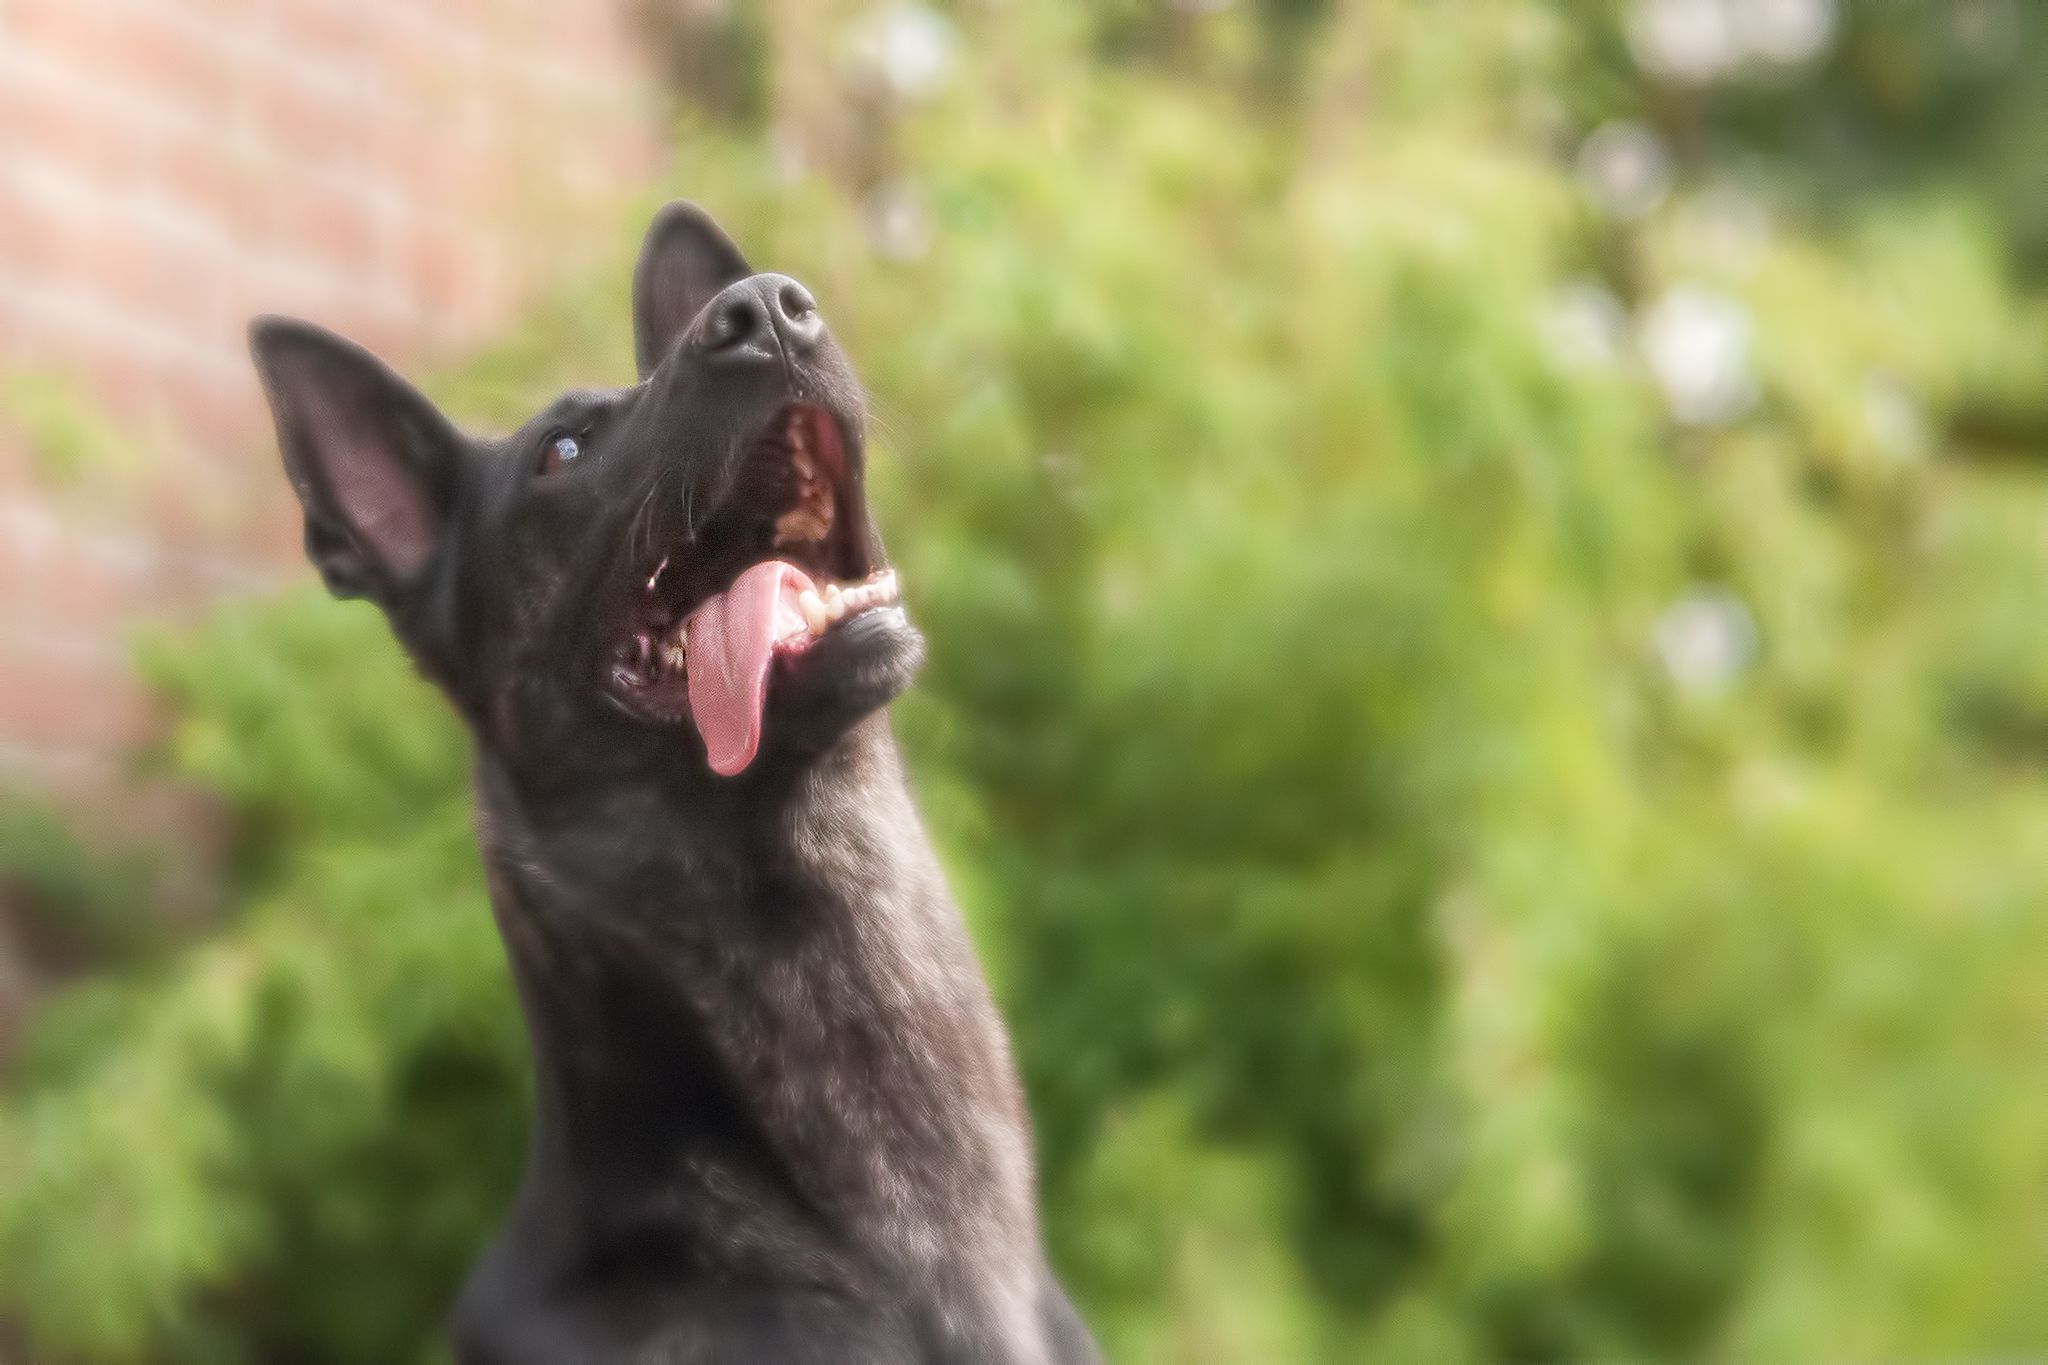
Here the picture is taken again with the settings that are good under these conditions according to the light measurement of my camera. And the result is a 'good' exposed photo, but the subject of my photo, Lana, is much too light.
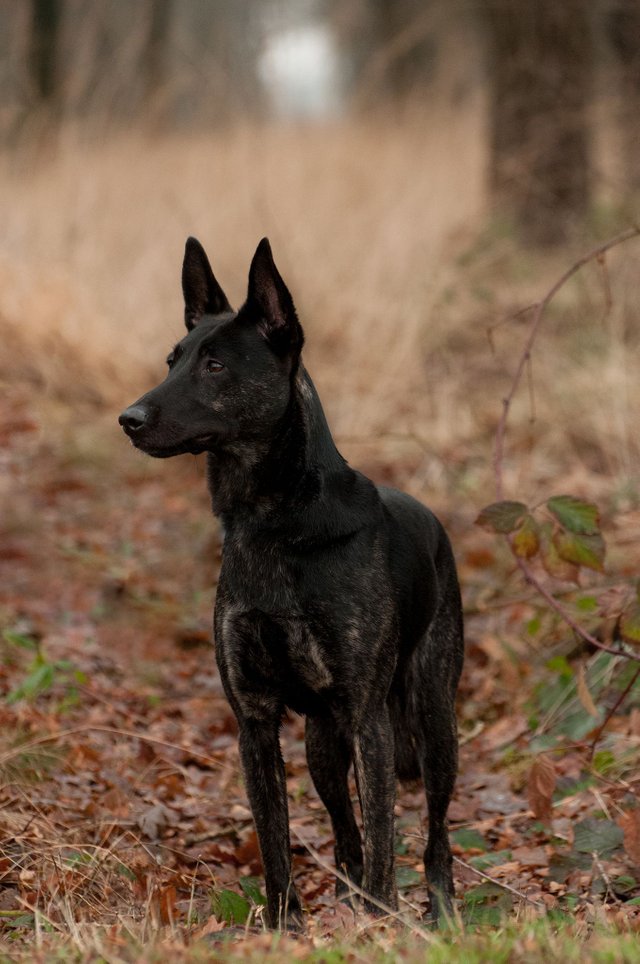
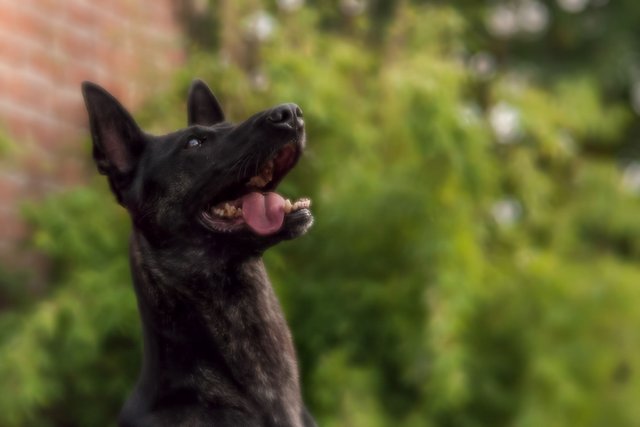
With the picture below I told the camera that I wanted to have LESS light. And the result is now that our Lana looks like it should. She is a dark dog, and that's how she should look like. So in this situation I have UNDEREXPOSED and again successfully fooled the camera.
When overexposing or underexposing by adjusting your settings you have to keep an eye on what you want to achieve in your photo. We now know that if we change the aperture, that will also change the sharpness / depth in your photo. A larger aperture, (smaller f number), means less sharp in your photo. And making your aperture smaller, (larger f number), also means more sharp in your photo. Adjusting the shutter speed may result in your picture suddenly being moved, or if you just want to ... by adjusting your shutter speed, you can suddenly be just out of movement. A faster shutter speed = freezing in the photo, a slow shutter speed = movement in your photo. And if you try to adjust your lighting with the iso, your photo may become very grainy. How do you do that if you have just defined all your settings and you still have to overexpose or underexpose?
You can also set on your camera that you want it to allow more or less light on the sensor! And you do that by using the +/- mark on your camera. (please check in the manual of your own camera how exactly you use it because it differs per camera). But almost every camera can do this, yes compact cameras also often have this. This way you say very simply to the camera that you want him to make the photo darker or lighter. Depending on what you need at that moment.
Pay attention to the fact that you do not get 'blacked-up' in your photo, or just 'bitten-out'. Even if you use an editing program, you can not recover it. A general rule for this is that you should never overexpose or underexpose again as a 2 2/3 stop. I usually keep a maximum of 2 stops for myself.
Hey, but now I suddenly talk about stop. What is a 'stop' then?
A stop is a doubling or halving the amount of light that falls on your sensor. That is very short. If you want to know more about this, I can also write a separate blog about this.
I hope it has been instructive again.
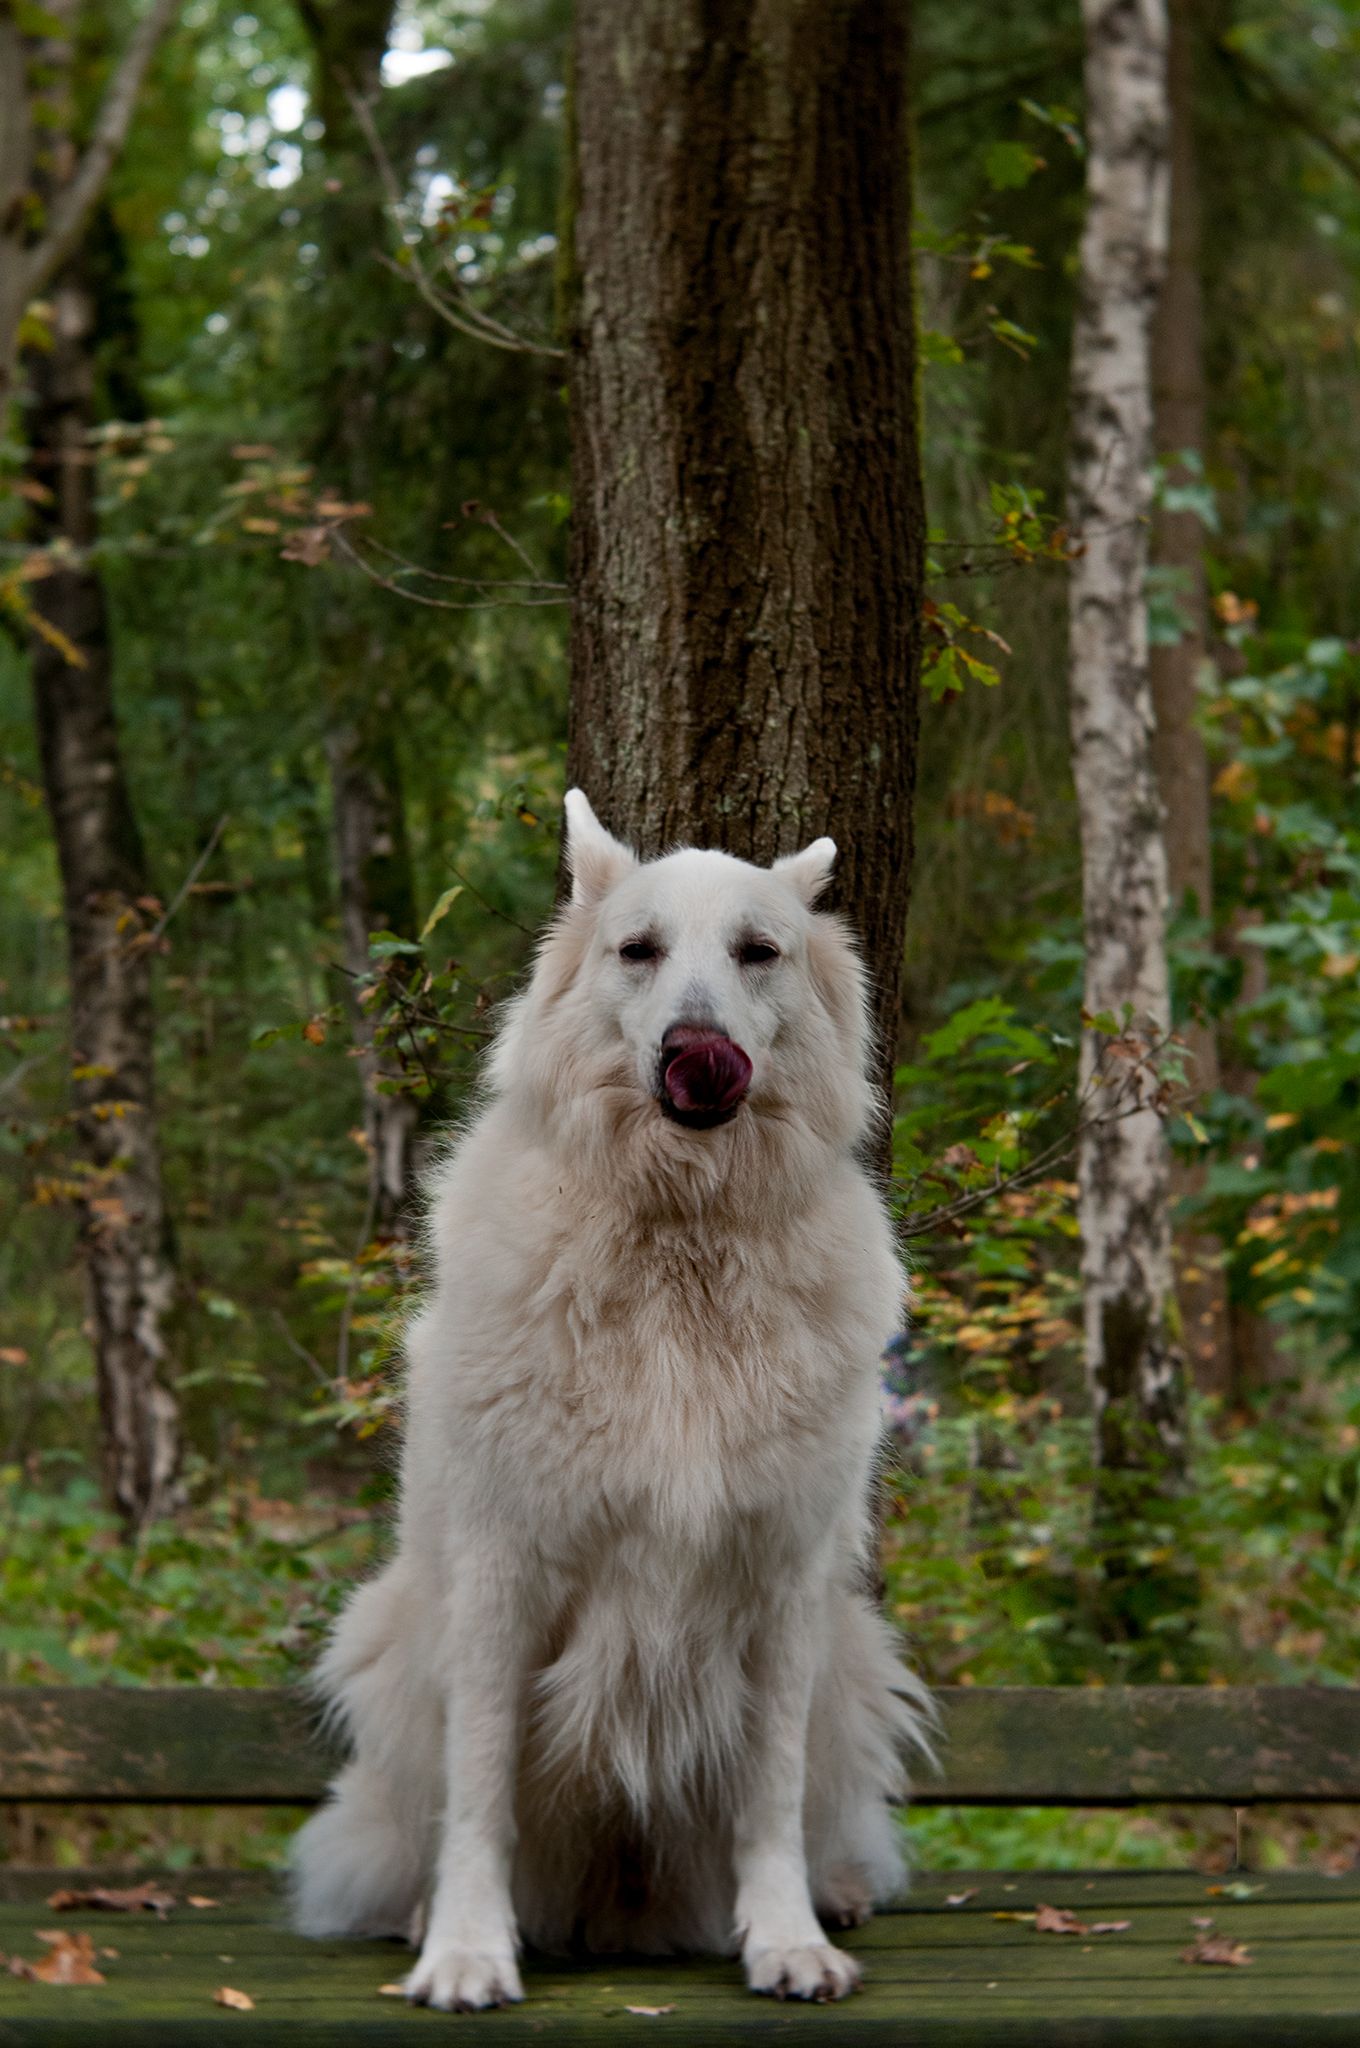
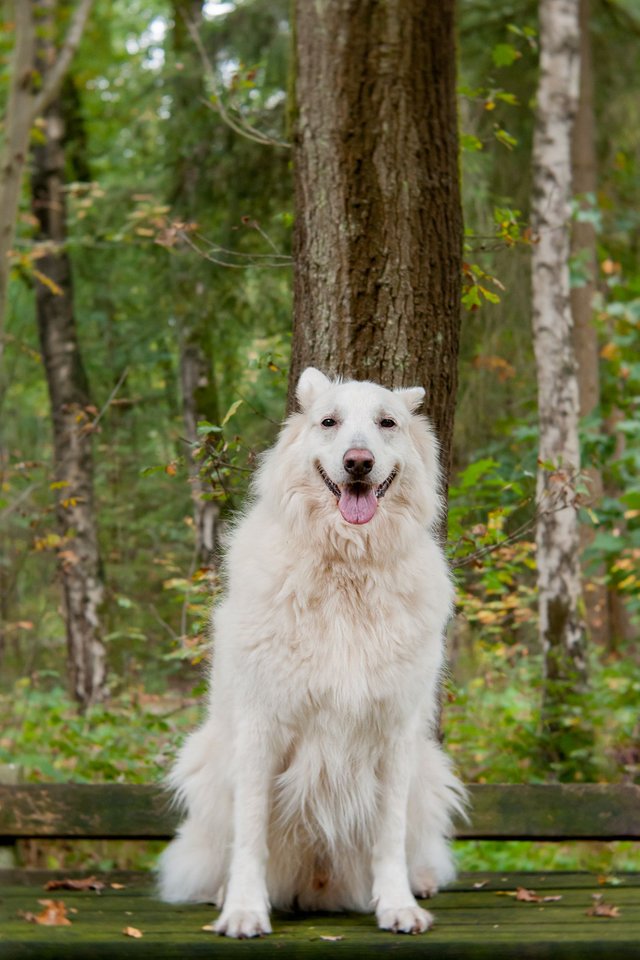
Here are a few more examples where the left picture is what the camera wanted to make with a correct light measurement and where I am manually overexposing (in the case of the white dog), or underexposing (in the case of the dark dog), on the right photo.
Here is my white dog well exposed according to the camera.
And this is my white dog well exposed according to me!
The dark dog well exposed according to the camera.
And this is how I want her to look, the way she is!
I hope you like my post, and if you do so, please leave a reply and upvote my post. I will be very grateful to you!
Have a nice day fellow Steemians.
This dogs are more photogenic than me :D great photos, i need to get myself a camera and start doing the same
Lol, why do you think I'm not in the pictures myself ;-)
Congratulations @hetty-rowan! You have completed some achievement on Steemit and have been rewarded with new badge(s) :
Click on any badge to view your own Board of Honor on SteemitBoard.
For more information about SteemitBoard, click here
If you no longer want to receive notifications, reply to this comment with the word
STOP@originalworks