THE SECRET - support bahasa

Photography is the Science, Arts, Applications and practices of creating durable images by recording light or other electromagnetic radiation, either electronically using image sensors, or chemically by using light-sensitive materials such as photographic film.
Photography can not be separated between Hardware Device "Camera" and Software "To Make the picture more beautiful as you wish". What a professional photographer can do is to select the photos that have been taken using their own tools, then they will modify or decorate their pictures with the help of the software.
In that case in my post times, I would share some simple ways to beautify / edit images using software "Adobe Photoshop CC 2017". Here I will briefly and clearly explain how to modify the image with color and lighting adjustments so that the image will look like the result of a professional photographer even though the image we take uses the Smartphone camera.

Translation/Alih BahasaFotografi adalah Ilmu , Seni , Aplikasi dan praktik untuk menciptakan gambar tahan lama dengan cara merekam cahaya atau radiasi elektromagnetik lainnya , baik secara elektronik dengan menggunakan sensor gambar , atau secara kimiawi dengan menggunakan bahan sensitif cahaya seperti film fotografi.
Fotografi tidak bisa dipisahkan antara Alat Perangkat Keras "Camera" dan Perangkat Lunak "Untuk Menjadikan gambar lebih indah sesuai keinginan". Hal yang bisa dilakukan oleh fotografer frofesional adalah menyeleksi hasil foto yang sudah diambil menggunakan peralatanya sendiri, kemudian mereka akan memodif atau menghiasi gambar mereka dengan bantuan software.
Dalam hal itu pada postingan saya kali, kiranya saya akan berbagi beberapa cara sederhana memperindah/edit gambar menggunakan software "Adobe Photoshop CC 2017". Disini saya akan menguikan secara singkat dan jelas tentang cara modifikasi gambar dengan penyesuai warna dan pencahayaan sehingga gambar akan terlihat seperti hasil yang dimiliki oleh photographer frofesional walaupun gambar yang kita ambil menggunkan kamera Smartphone.
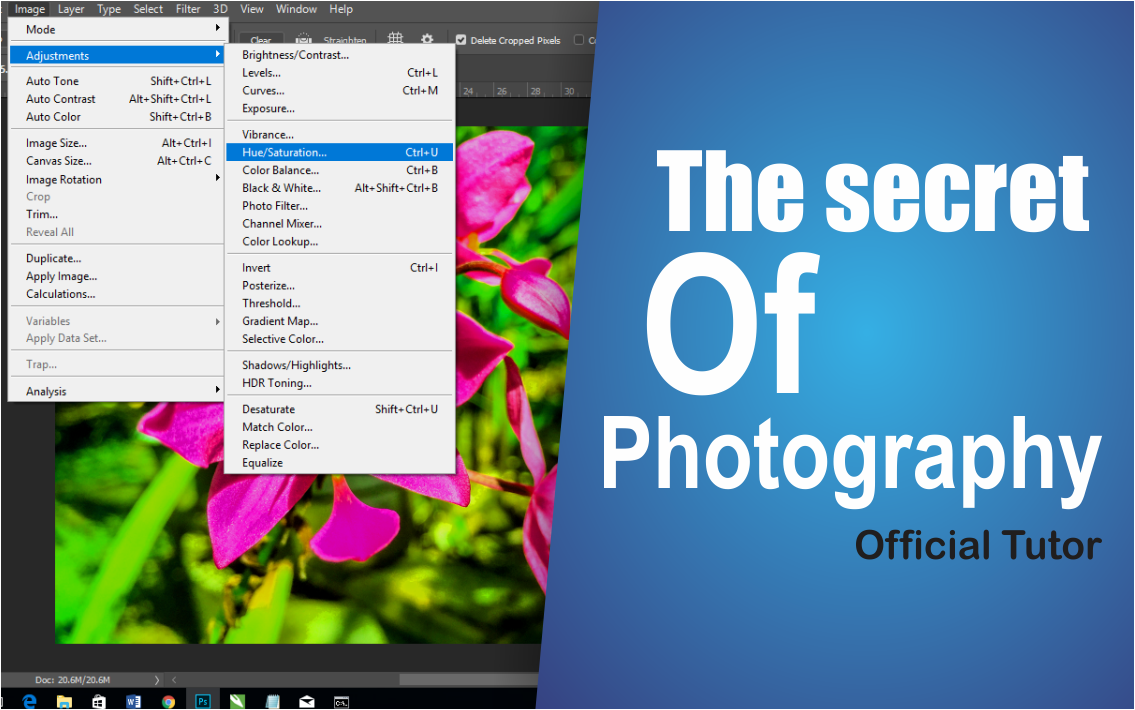
Next we will explore for a guide how to edit or make the image in accordance with what we want.
Translation/Alih BahasaSelanjutnya kita akan menjelajah untuk panduan cara mengedit atau menjadikan gambar sesuai dengan yang kita inginkan.

Translation/Alih BahasaLangkah pertama buka Software Adobe Photoshop anda, dan jika anda belum memiliki Softawre tersebut pada PC anda, maka anda harus pergi sekrang juga unutk mendapatkannya dan anda bisa lansung memasang setelah anda dapatkan itu.
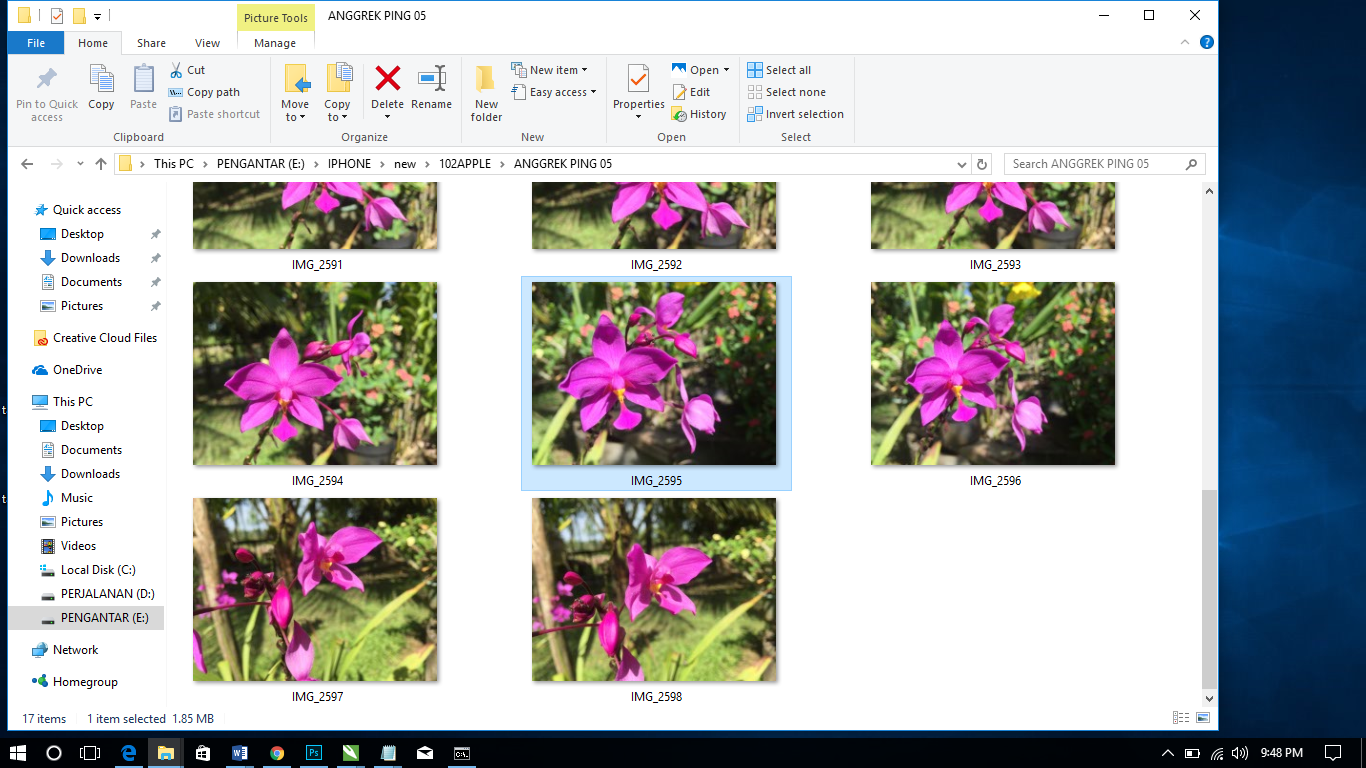
Translation/Alih BahasaSetelah anda berada pada layar utama, selanjutnya Ambil salah satu gambar yang hendak anda Edit atau Manipulasi, disitu anda bisa pilih perintah "Open" pada menu "File" atau tekan pada keybord "CTRL+O". Sehingga anda akan dialihkan kepada ruangan penyimpanan PC ada, disitu anda bisa memilih gambar yang anda sukai, untuk cintoh saya pilih gambar bunga.
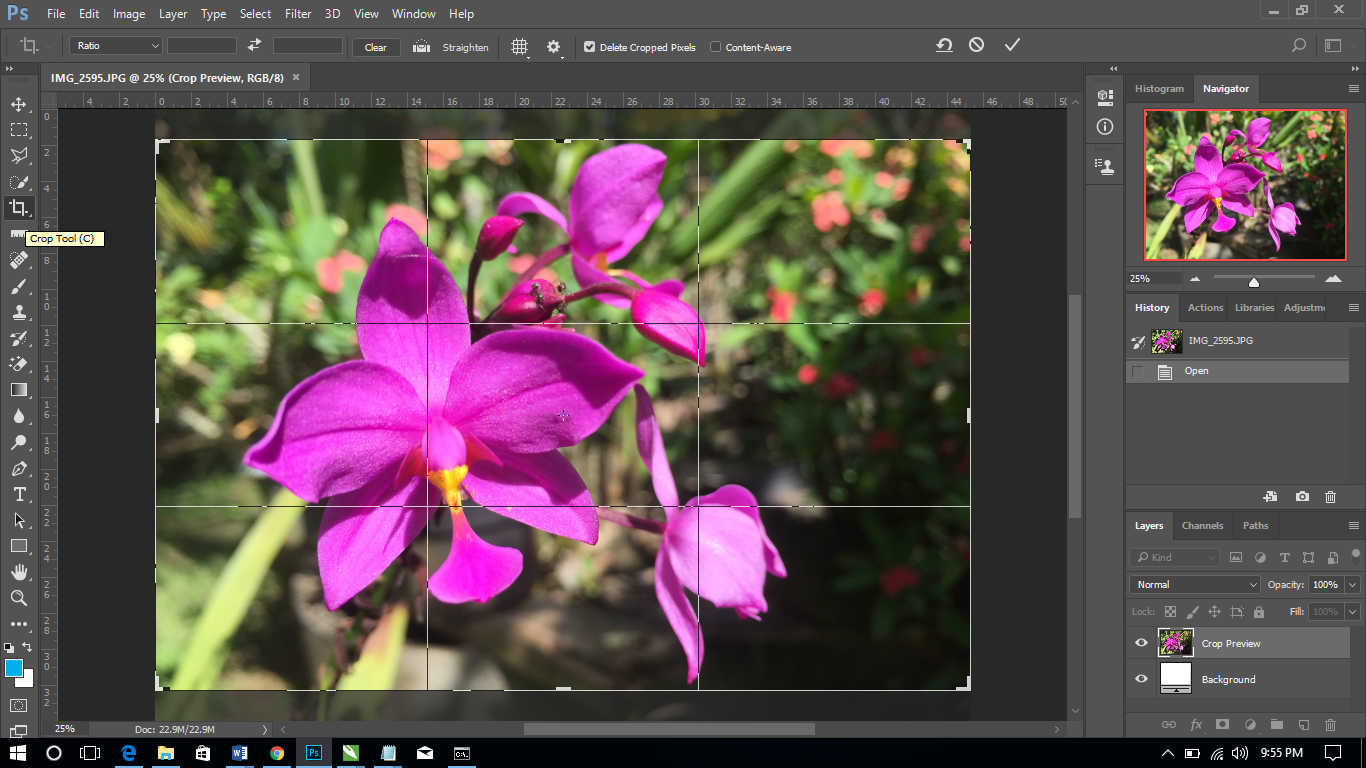
Translation/Alih BahasaNah, disini kita akan melihat gambar yang sudah kita pilih jika perlu untuk dipotong agar terlihat landscape sempurna, tetapi itu terigantung kepada pribadi masing-masing.
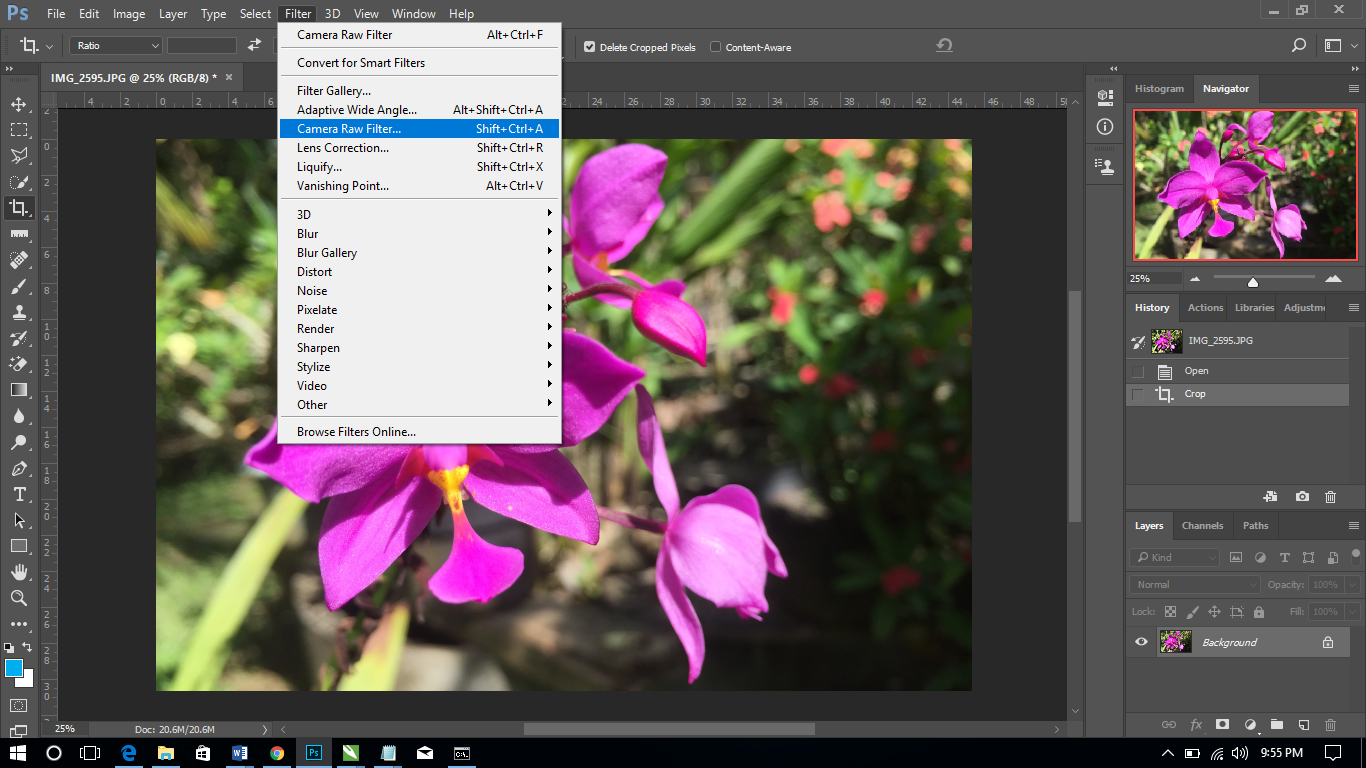
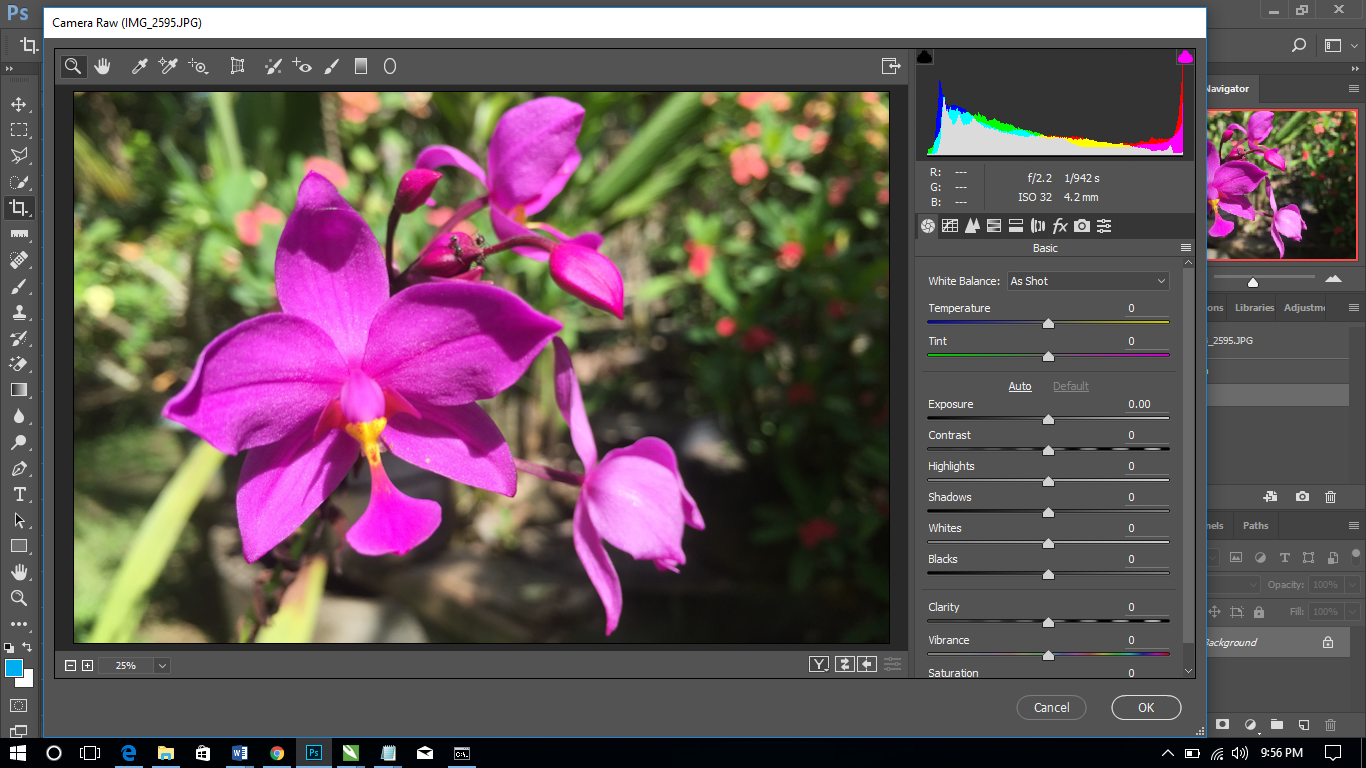
Translation/Alih BahasaDan selanjutnya pilihlah menu "Camera Raw Filter" Pada menu bar "Filter". Disini kita akan dialihkan pada ruangan untuk penyesuai warna dan cahaya pada pada gambar, dan ini sesaui dengan perintah yang kita inginkan.
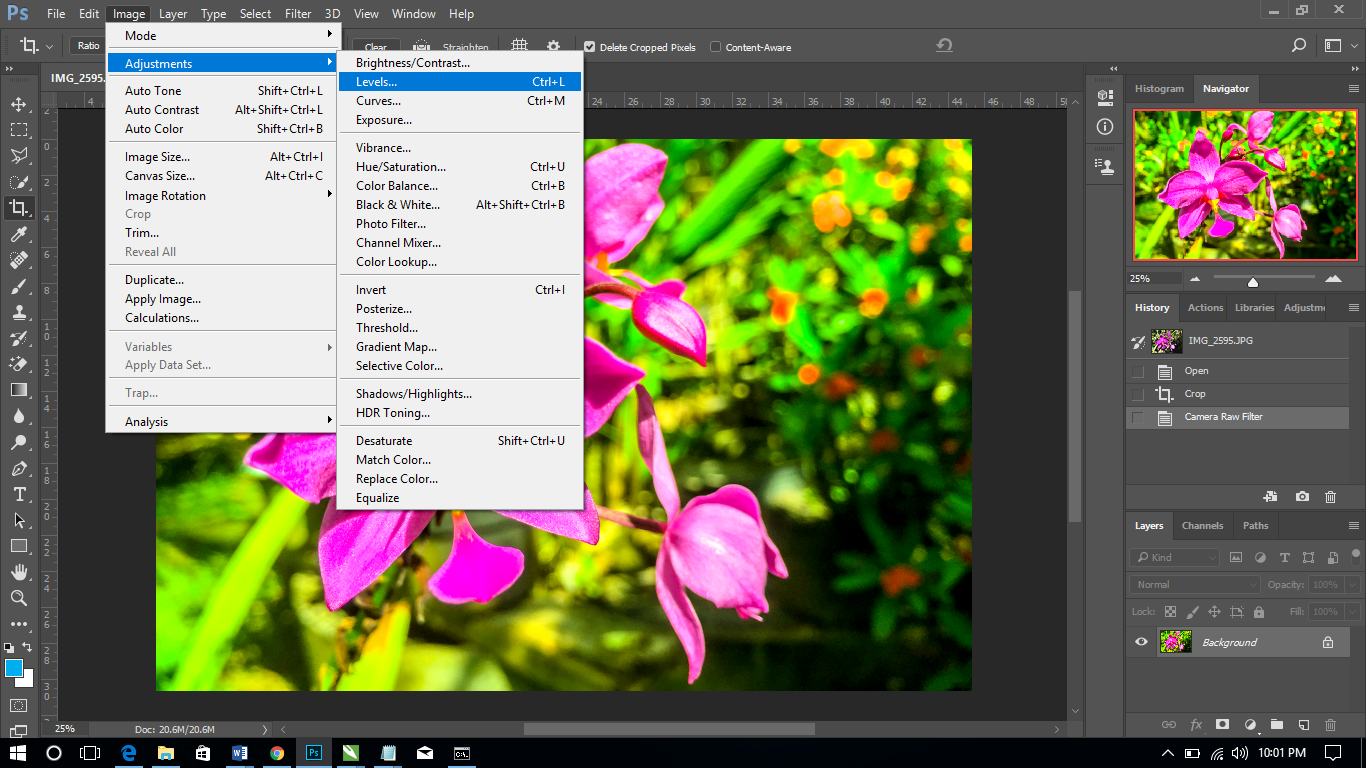
Translation/Alih BahasaInilah hasil warna dan pencahayan setelah di filtering, dan untuk menyempurnakannya anda juga bisa menggunakan toll "Level" untuk mengatur cahaya normal dengan itu anda bisa pilih seperti yang terlihat pada gambar atau tekan pada keybord "CTRL+L".


Wonderful sir...ur blog is worth of a regular visit, thank you.
Heheh