Tutorial: How to photograph a Solar Eclipse
There’s a Solar Eclipse happening on August 21st 2017, and if you are lucky enough to be in the area where it will be observable, then perhaps you’ve thought about going to see it, or even photograph it!
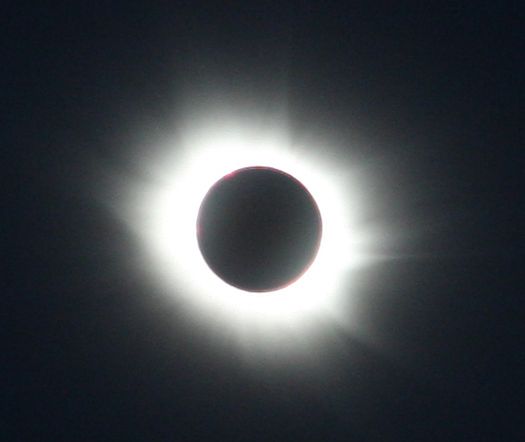
Solar Totality, University Centre in Svalbard - source
But how do you do that? I photographed the 2015 Solar Eclipse and it went pretty well so I will share with you how I did it so you can try for yourself.
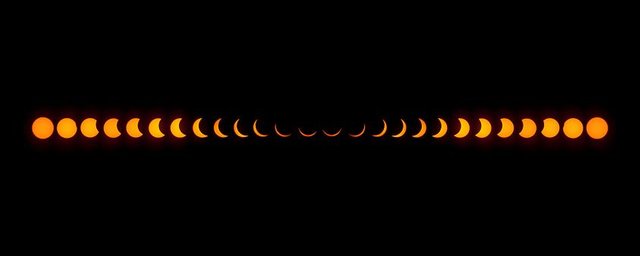
Full Sequence from 2015 - High Resolution version
This is a full sequence (start to finish) of the Solar Eclipse I photographed in 2015. I was lucky enough to be close to it when it happened, although to witness totality you had to be in the Faroe Islands (and they had completely overcast weather so didn’t get to see it at all) or in Svalbard which is the image I used as the thumbnail at the top of this post.
So let’s get started:
Equipment
First thing you need to do is prepare you gear. There are a few things you need to pull this off:
- A tripod
- remote or cable shutter release
- A DSLR camera
- A long Telephoto lens - minimum 300mm
- A Solar Filter
- A scarf or a snood (I will explain this.. I will explain everything)
The Tripod
You want to keep the camera as still as possible, or you won’t get a clear image. This is critical.
The Remote or Cable Shutter Release
This will add to the tripod’s stability, the less you touch your camera when the shutter releases the better. Even pressing the shutter release on the camera can cause shake.
DSLR Camera
You could use a mirrorless system too, this is just what I have. Really and decent camera that you can attach a good long lens to and has decent manual control should do.
The Telephoto Lens
I used a 300mm lens. It was just about enough, but really if you can get something higher (unless you have a telescope) that would be better. If I could I think I would have preferred a 500mm lens for this.
The Solar Filter
You really really need this, without it you might fry your camera’s sensor. Its like a magnifying glass on an ant. Bad News. I bought this one here.
It comes as a square sheet on its own. There is no way to attach it to anything, you are expected to have some thing to attach it to. I think its actually meant for serious people doing serious things with telescopes so they are expected to know what to do. So I had to make my own filter housing.
Unfortunately I didn’t document the build process (I never considered doing a tutorial at the time), but here are some pictures to give you a hint of what you can do.
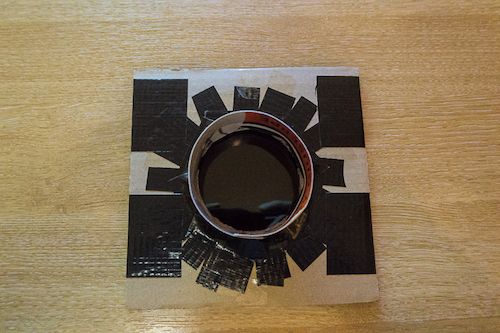
View of the top of the filter
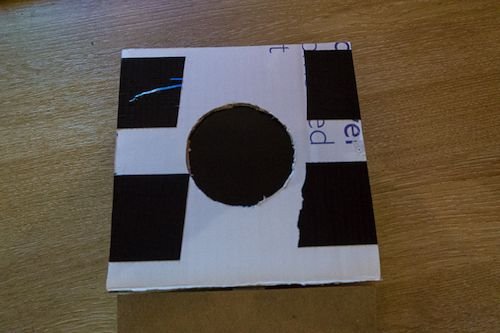
View of the bottom of the filter that connects to the lens
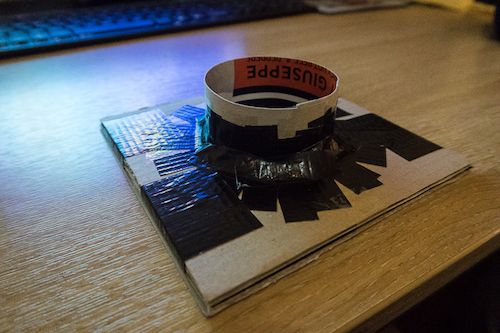
View from the side
Its probably best if you come up with your own as your filter housing will need to be made to fit your lens. They key part is that there be no light leaking from the filter housing where it connects to the camera. or it will interfere with your exposure.
I can offer you a list of the materials I used:
- some regular cardboard
- a piece card (you could cut up a plain greeting card or an old cereal box is the right thickness too)
- tape
- duct tape
- sharp knife - box cutter, stanley knife or a craft knife is good.
- pen
The Scarf or Snood
Ok.. a snood is a neck warmer scarf type thing. Like a cloth tube like this: Amazon link
You put it over the top and bottom of the camera at the back by the view screen so that you look through the snood at the screen. Why? because its like a mini darkroom and since you are staring at the sun you won’t be able to see you screen and see if your image is in focus etc. Trust me this was a lifesaver. Its not necessary, but it does help you to see what you are doing.
Here's my setup, you can see the snood hanging over the camera, and my filter attached to the lens
Looking at how much I am squinting in the photo, I would also recommend bringing sunglasses along!
When and Where
OK the next step is to find out where and when you need to be. I got you you covered. Here’s and interactive map of the solar eclipse’s path:
http://xjubier.free.fr/en/site_pages/solar_eclipses/TSE_2017_GoogleMapFull.html .
Hopefully that makes up for the solar filter fiasco earlier.
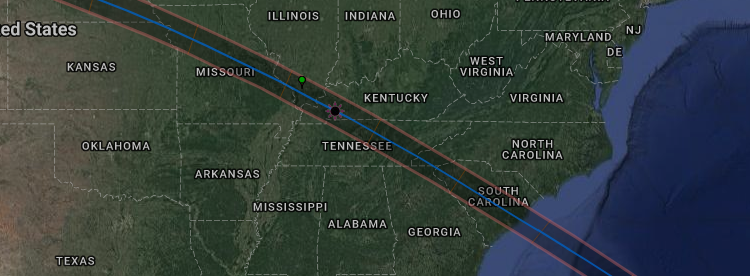
Screenshot of above linked Interactive map - follow the link so you can play with it!
So you want to be anywhere along the highlighted path but ideally you want to get yourself to the point of totality which is clearly marked on the map.
Camera Settings
So I kind of figured it out as I went. I got there about 30 minutes before it was due to start. I got setup and framed the sun in my lens and adjusted my settings using the live view screen as well as ensuring everything is in focus. This is where the Snood came in handy.
I used an aperture of f/5.6, ISO 200 and 1/80 second @ 300mm to start.
Screenshot from the live view screen on my camera
As the moon tracks across the sun and things start getting darker you need to adjust settings. I would gradually lower the exposure time and ISO settings leaving the aperture alone as you can see in the screen shots of my live view screen.
Live view screenshot
Live view screenshot
Take pictures of all the different stages and keep reviewing your shots in case you need to adjust your settings as you go. There are no standard set settings for this kind of project as you are at the mercy of the environmental conditions you find yourself in. Another reason why you should turn up early! Not just to setup your gear, but also to adjust your initial settings for the conditions, and not be rushed doing it. You want to get it right, Solar Eclipses don't happen every day!
When its over and you’ve gotten back home you can review your images. I moved them all into photoshop and combined them to make this Solar Eclipse sequence:

Full Sequence from 2015 - High Resolution version
So there you go, that's how I shot a Solar Eclipse. Hopefully this guide will help you get started in trying it yourself. If after reading this you have any follow up questions please ask in the comments, I will be more than happy to answer as best I can. Good luck and if you go out and capture the Solar Eclipse make sure to share your pictures with the rest of us here on Steemit!
Thanks for looking.
Follow Me: @fiftysixnorth
..and dont forget to upvote!
All pictures are taken by me except where otherwise indicated.
Nice tutorial!
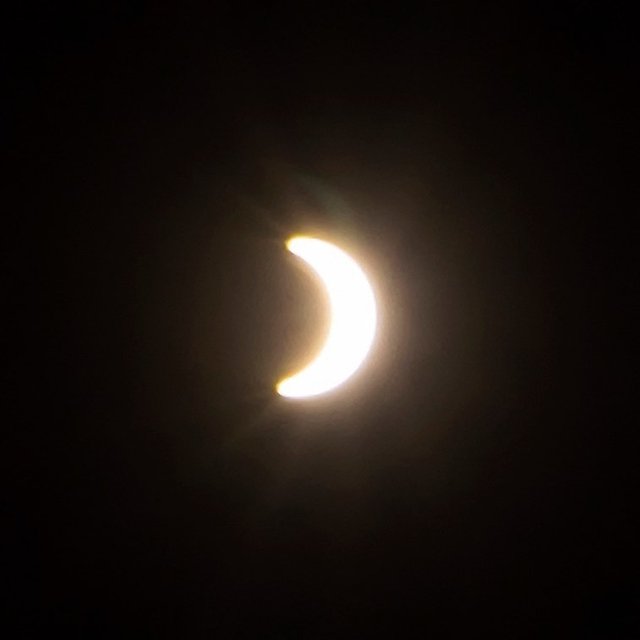
This was my first try at that, with just 70mm lens, a couple of strong ND filters and no snood - next time I will definitely use it to get the focus right!
The result is not nearly as good as yours, but anyway it was interesting to take that picture ;P
Thanks! Thats awesome! Its fun to attempt this kind of stuff isn't it? Especially when its something that happens on such a rare occasion :)
Oh yes, it's definitely fun ;)
Nicely put post mate :) And nice shots, i might try doing that one day :) I believe that sun filter was really dark, judging based on your camera settings. Do they come in different levels?
Thanks man! I definitely recommend it. If I ever get the opportunity again I will take it. I want to try and get a picture of the total eclipse next time! The filter is pretty dark but I don't think they come at different levels. All the one's i've found are 18 stops.
My pictures would have been much brighter had I used f/2.8 instead of f/5.6 but the lens I was using didn't go that low.
You definitely should. considering the filter my thinking was how many stops down do you really need to photograph the sun. As you can to to f22 and 1/4000th without any filter at all. and how many additional stops would you need to be able to photograph the sun :)
I had to think about the answer to that for a second.. That is actually a bad idea. See even if you take a picture at f/22 and assuming you are in live view mode, the aperture of your lens is likely at f/1.4 until you click the shutter. The energy of the sun is strong enough when focused by your lens to heat the internals of your camera very quickly. If things get hot enough, they will be damaged. Even if the heat doesn't cause damage, the voltages generated in the sensor's electronics may be enough to damage the circuitry.
Another thing to keep in mind is that the higher the sun is in the sky, the greater the damage it can cause. If the sun is lower on the horizon there is more atmosphere and clouds in the way to prevent that.
The filter is there as much to protect your camera internals as it is to filter out the light :)
I mean you can try it, there's a chance you wont cause damage to your camera, but I wouldn't recommend it!
I think is is an interesting theoretical discussion. Sadly i currently do not have a camera with a live view to test it as i have sold my d3s. But.. i have just read in a few forums, that while in manual mode Live View does not actually change aperture, and instead it only gives you an estimate exposure by adjusting shutter speed. But when you press the shutter button it turns off Live View and takes a shot according to your manual settings. Would be interesting if you had a chance to turn Live View on your camera and see if turning it on actually changes aperture on the lens :)
That's an interesting idea. I will have to try it later. I just tried it with my 70 - 200 lens but I can't see the shutter at all. I will need to try again with another lens.
Not the shutter mate. See if lens aperture blades ar opening or closing when you turn on the LiveView.
Sorry that's what I meant.
Ahahaha! Interesting! My camera behaves in the exact opposite way! When live view is off the aperture remains completely open until you hit the shutter. However, in live view mode the aperture is actuated to whatever its is set at.
This post has received a 6.86 % upvote from @booster thanks to: @fiftysixnorth.
@fiftysixnorth got you a $1.9 @minnowbooster upgoat, nice! (Image: pixabay.com)
Want a boost? Click here to read more!
Congratulations! This post has been upvoted from the communal account, @minnowsupport, by fiftysixnorth from the Minnow Support Project. It's a witness project run by aggroed, ausbitbank, teamsteem, theprophet0, and someguy123. The goal is to help Steemit grow by supporting Minnows and creating a social network. Please find us in the Peace, Abundance, and Liberty Network (PALnet) Discord Channel. It's a completely public and open space to all members of the Steemit community who voluntarily choose to be there.
If you like what we're doing please upvote this comment so we can continue to build the community account that's supporting all members.