Good Nature Photography Needs Care and Consideration
Exposure is always a concern for really good nature photography. The uninitiated and the inexperienced will sometimes get something they like and quite often what they don’t like. I have another discussion on the kind of film that you should choose for the result you want to do on the page dedicated to film.
If you use too much light, you lose the highlights. Faces get wiped out and turn a ghastly white for instance. If you use too little light you wind up with an underexposed negative or digital image and you lose any detail that’s was originally in the shadow areas.
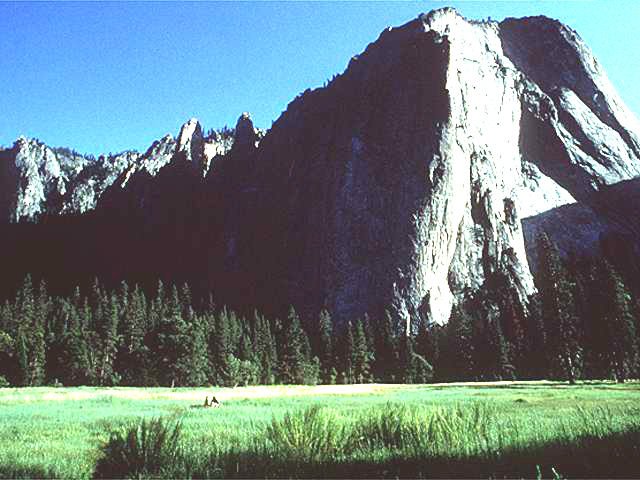
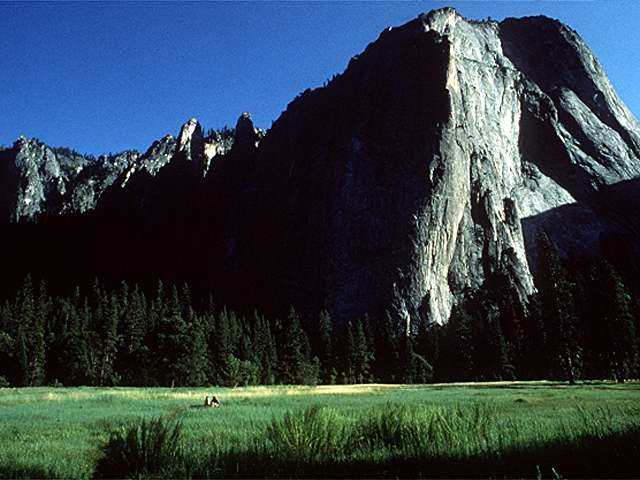
This becomes quite evident when shooting mountains. Here in Alberta, we have the most beautiful mountainous areas that make the best nature photography subjects available.
Most film has reasonably wide exposure latitude but if it isn’t exposed within the acceptable limits of the film the results can be absolutely devastating.
For instance – one customer recently took his neighbors advice and used DIN/ASA 800 film to shoot his daughter’s wedding. The day of the wedding was very sunny and bright and this 800 film literally cooked the color. Faces were basically colorless and the colors in the finished prints were not even close to the color of the subjects being photographed. They were literally burned out of the negatives.
I won’t get into a discussion about reciprocity failure (or curve cross) but that’s the tech term for both over and underexposing film and it is not correctable. Once you either under or overexpose a color negative, that’s it. What you get is what you get.
Unfortunately, about the only way left to salvage these photographs is going to be to hand-color black and white prints. Even these are going to have an overall ‘muddy’ look in spite of the best efforts of the darkroom tech and the color artist.
In an emergency, underexposed black and white film can be salvaged to some degree by using a silver enhancer like Negative Film Intensifier which is no longer available except from a specialty chemical supply house. The treatment for overexposed black and white used to be a reducer but I haven’t heard of it being available for years, pollution and all that.
The best overall answer is a decent hand-held light meter. Fairly decent ones are being sold for well under $100. My personal favorite is Sekonic.
With digital cameras, however, this is not the case. There is a lot of pretty decent software around that will do the job for you. If the corrections are not too extensive, something like Jasc’s Paint Shop Pro will do a nice job. For situations requiring more extensive corrections, however, Adobe’s Photoshop is the best I’ve used but at about 6 times the price of Paint Shop Pro. (By the way, Adobe bought Jasc just recently so we’ll have to wait to see where that goes.)
Pay close attention to what you’re light meter is telling you. Take a “spot” reading in the area you are particularly interested in and use it.
If you want to shoot people in front of a very large area like a mountain, take a close-up meter reading of your subject’s faces, use this as your base exposure and let the background fall where it may. If the mountain is your prime subject the people are secondary you, of course, expose for the mountain.
To make really sure you have what you want, bracket your shots. Take one “normal”, one a stop under and one a stopover. If you’re not sure and the shot is important to you, don’t be afraid to use more film in bracketing. It’s a whole lot cheaper to use extra film than it is to lose the shot or have to do it over again.
As a matter of fact, this is a good habit to cultivate anyway until you have become quite proficient. Even as a working pro I used to bracket every important shot unless I was in a situation where ‘snap’ shooting was necessary. Weddings are a good example of this.
Digital cameras are a whole different matter. Some of these even have a built-in bracketing capability. My own camera (an Olympus C-5050) can shoot either one frame each side of normal or two, depending on what I want to do.
Digital correction for exposure should be limited to about one to one-and-a-half stops for best results. Unless you have some very serious specialty software at a very serious price, you can’t add or subtract pixels that don’t exist.

You can see a little bit more detail in the shadow area of the mountain but at what cost?
Using a tripod is always desirable when in “the field”. It takes time to compose a really good photograph. Snapshots are fine as far as they go but if you’re serious about getting the best you can, a tripod is the best way to go.
If your camera is mounted on a very steady platform like a tripod you have an opportunity to play around with depth-of-field. You can try shooting at very low shutter speeds without having to suffer from camera shake.
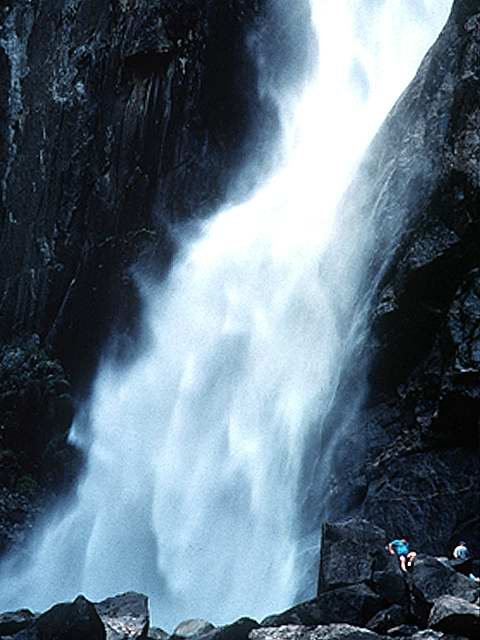
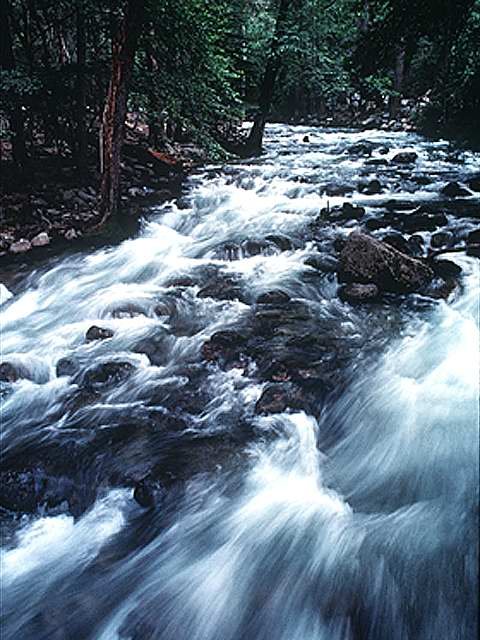
One of the best examples I can think of is fast-moving water, a waterfall, pounding surf, rapids. These situations provide endless opportunities for some great effects. Here’s a couple of examples of what I’m talking about:

To my mind, these time-lapse photos provide a far more dramatic effect than the needle-sharp, stop-motion images you can get with high shutter speed and wide aperture.
Don't be afraid to experiment. You've spent all this good money for a great camera so now all you have to do is make it do what you want it to.
Enjoy!

