How To Revive Your Old Grainy Photographs For Beginners Part 2
Let's Get Started
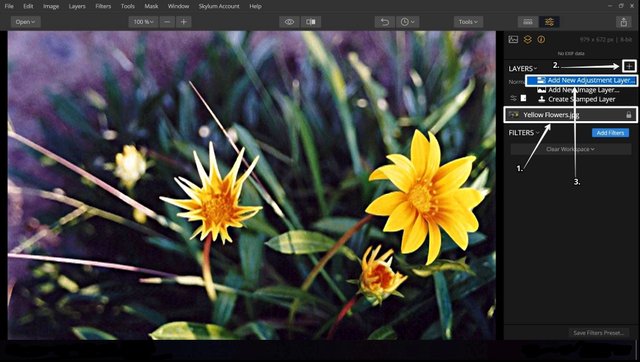
This tutorial is for beginners with little to no experience editing photos, but still want to make there photographs look amazing. In this first screenshot you can see I have uploaded my photograph in Step 1. Then I selected the + to open the Layers dropdown menu in Step 2. Once the dropdown menu opens you have three choices. Your first choice is Add New Adjustment Layer which is what you want to use if you want to make adjustments with the filters. The second option is Add New Image Layer that is used if you want to replace a sky which can be done using a gradient mask. The third option is Create Stamped Layer which I think is the same as Ctrl J in photoshop to copy the layer. For this tutorial I'm going to use the add new adjustment layer in Step 3. because I'm going to add filters to smooth out the film grain in my old Photograph.
Filters
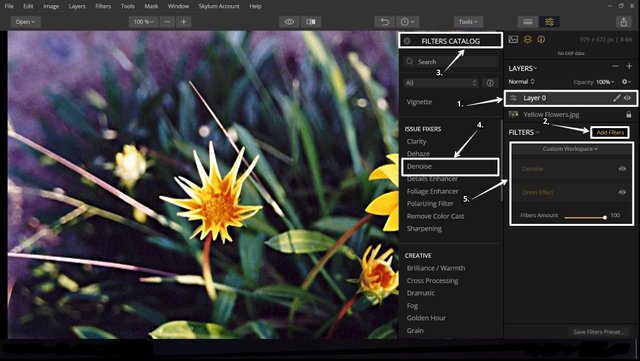
In this screenshot I am going to be adding the filters that I'm going to use to layer 0 in Step 1. Next I'm going to select Add Filters in Step 2. to open the Filters Catalog dropdown menu you see in Step 3. In the Filters Catalog you will see all the filters you can use to edit your photographs. In Step 4. you will see I'm going to add Denoise then I'm going to scroll down and add the Orton Effect filter which is not shown. Once I select the filters I want they are going to be placed in my Custom Workplace that you see in Step 5. You can add as many filters that you want in your custom workspace. This is where the editing magic will happen. For this tutorial today I'm only going to use two filters.
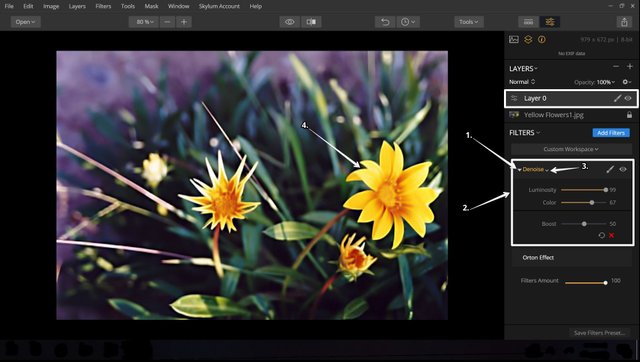
Denoise
In this screenshot you can see I opened the denoise filter. You can open and close the filter by clicking the down arrow that appears to the left of the filter when you move your mouse over it like in Step 1. After opening the filter you can see in Step 2. I have set the Luminosity at 99, the Color at 67 and I left the Boost at the default 50. The smaller down arrow you see in Step 3. opens a dropdown menu that has the options to Reset the filter to default, Delete the filter, use the Blend mode like in photoshop, and to Mask the filter if you only want to apply the filter to a specific area in your photograph. Using this filter you can see it has started to smooth out the film grain in the background, but the flowers have started to loose to much of the detail in my opinion in Step 4.
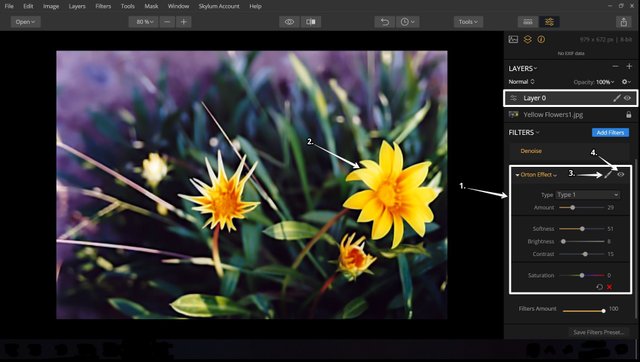
Orton Effect
I love this filter, it gives photographs that dreamy look. In Step 1. You will see at the top of the filter it says Type 1, if you select the down arrow you have a choice of Type 1 or Type 2 in the dropdown menu. Type 1 has a dark effect and Type 2 has a light effect. I usually use Type 2, but for this particular photograph I liked the dark effect better because it made the colors look more rich. I think the filter has a great effect on the background, however it took out more of the details in the flowers in Step 2. If you select the brush in Step 3. a dropdown menu will give you the option to select a Brush Mask, a Gradient Mask, a Radial Mask, or a Luninosity Mask. If you select one of the masks on the filter the mask will only effect that filter. If you select the eye in Step 4. it turns that filter on and off so you can see the difference the filter makes.
Layer Mask
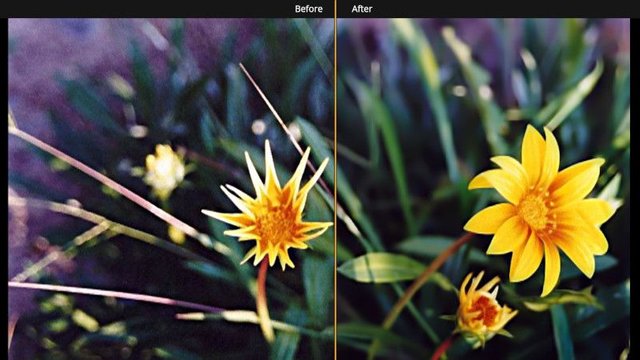
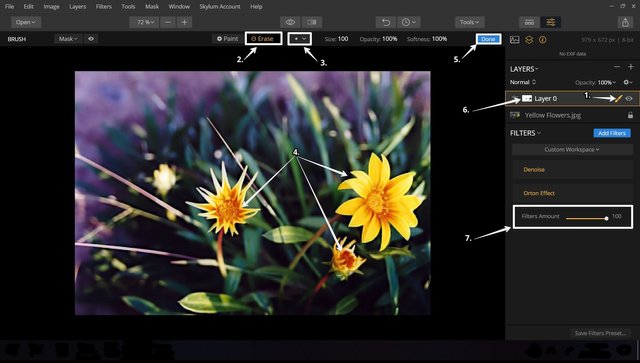
In this screenshot I'm going to create a layer mask by selecting the brush icon on the layer in Step 1. I selected the brush icon on the layer instead of on the individual filter because I want to remove all of the filter effects from the flowers at the same time. Once the dropdown menu opens up I will select the brush mask so I can put the mask exactly where I want it. In Step 2. I selected erase so I can remove the effects from the flowers only. To change the brush size, opacity, and softness select the dropdown arrow in Step 3. to make the necessary changes. Once I have erased the filter effects from the flowers I will Click on Done in Step 5. You can see once I finished making my mask it shows up in Step 6. Last but not least at the bottom of the Custom Workspace you will see the Filters Amount in Step 7. This gives you some additional control over the overall effect by letting you turn all of the filters up or down at the same time on the photograph. Now that I have finished editing my photograph you can see the background has a much smoother texture and the colors are more vibrant. As I said in part 1 of this tutorial series you can check out the close ups I have below to compare the two software's.
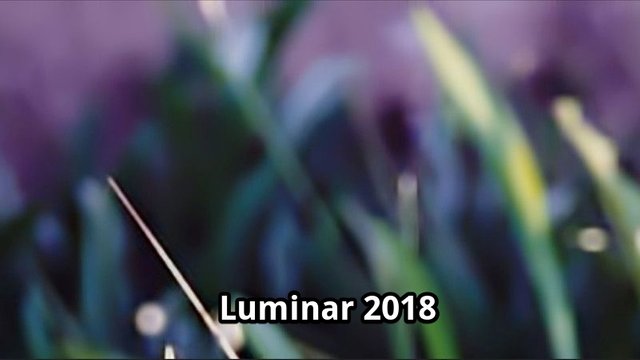
Luminar 2018 VS Photoshop CS6
Which Effect Do You Like Better?