Shooting portraits using Ultra Violet lighting techniques
I wanted to share one of my recent project with hair prodigy Seung Ki Baek, him and I have been working on UV images for over a year now and our most recent work together was for a submission to the British Hair Awards 2018.
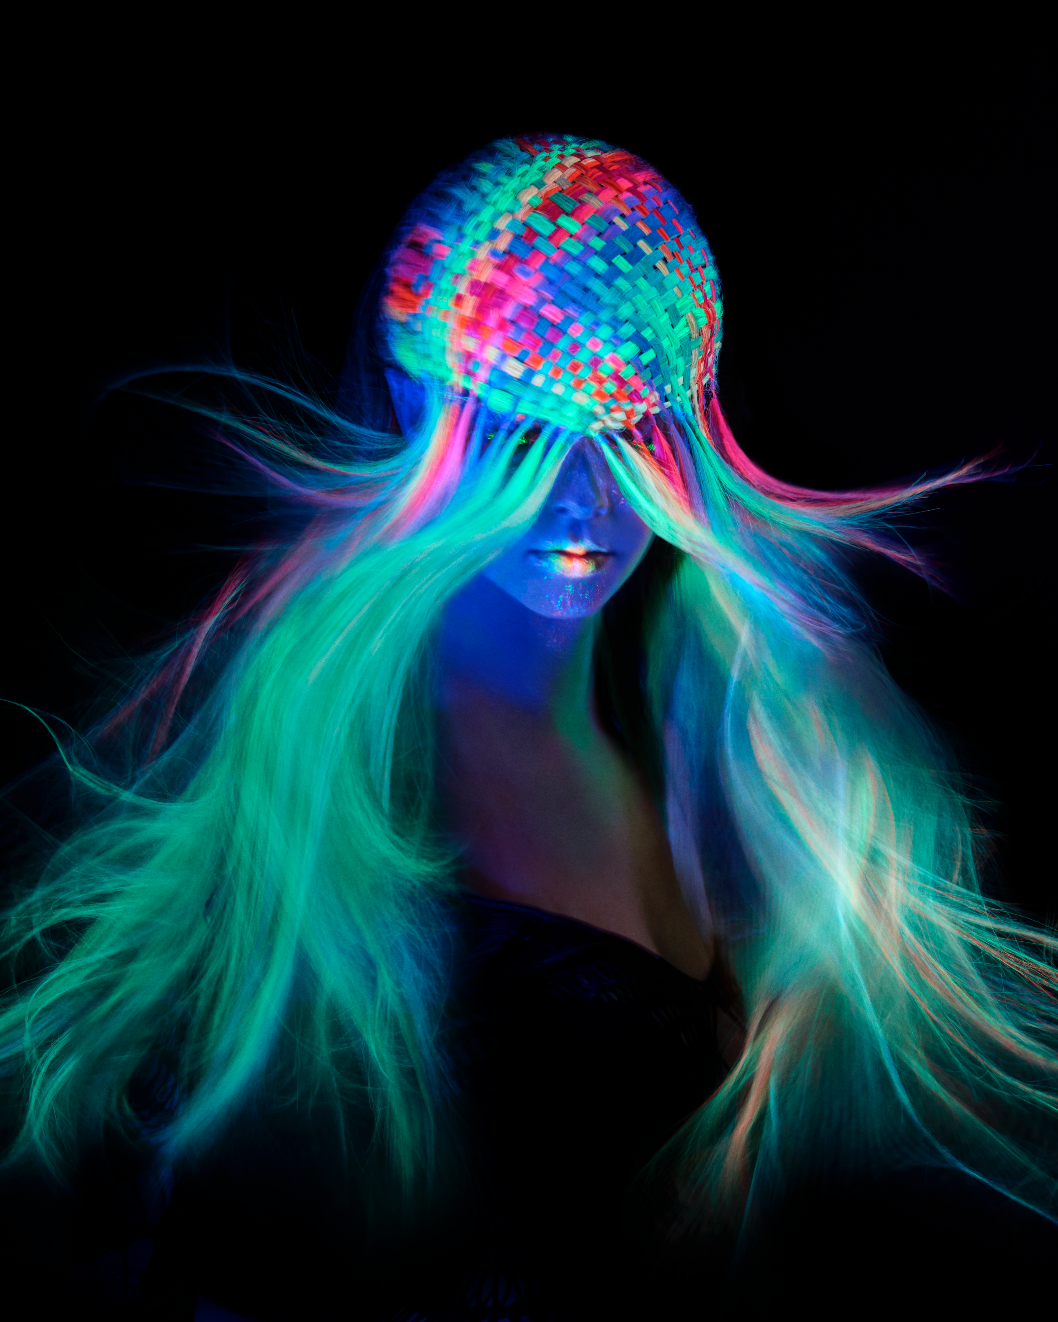
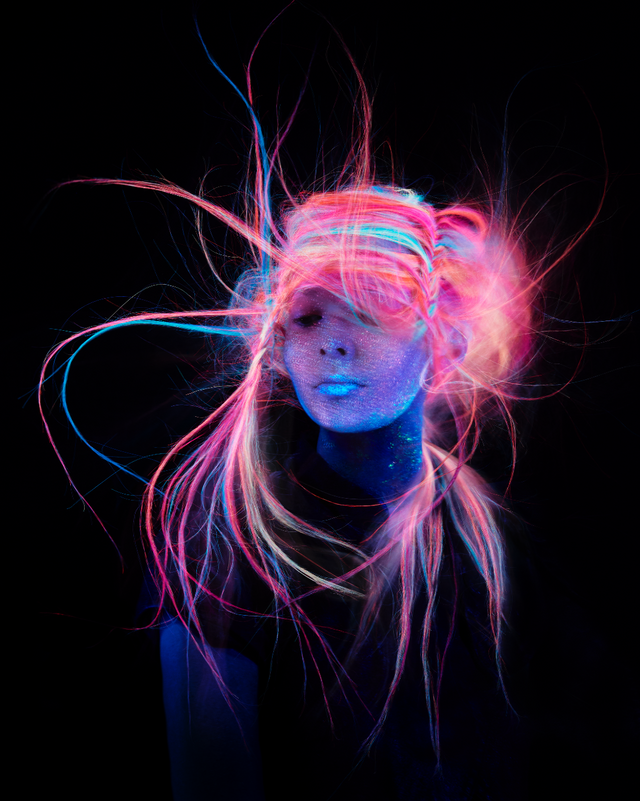
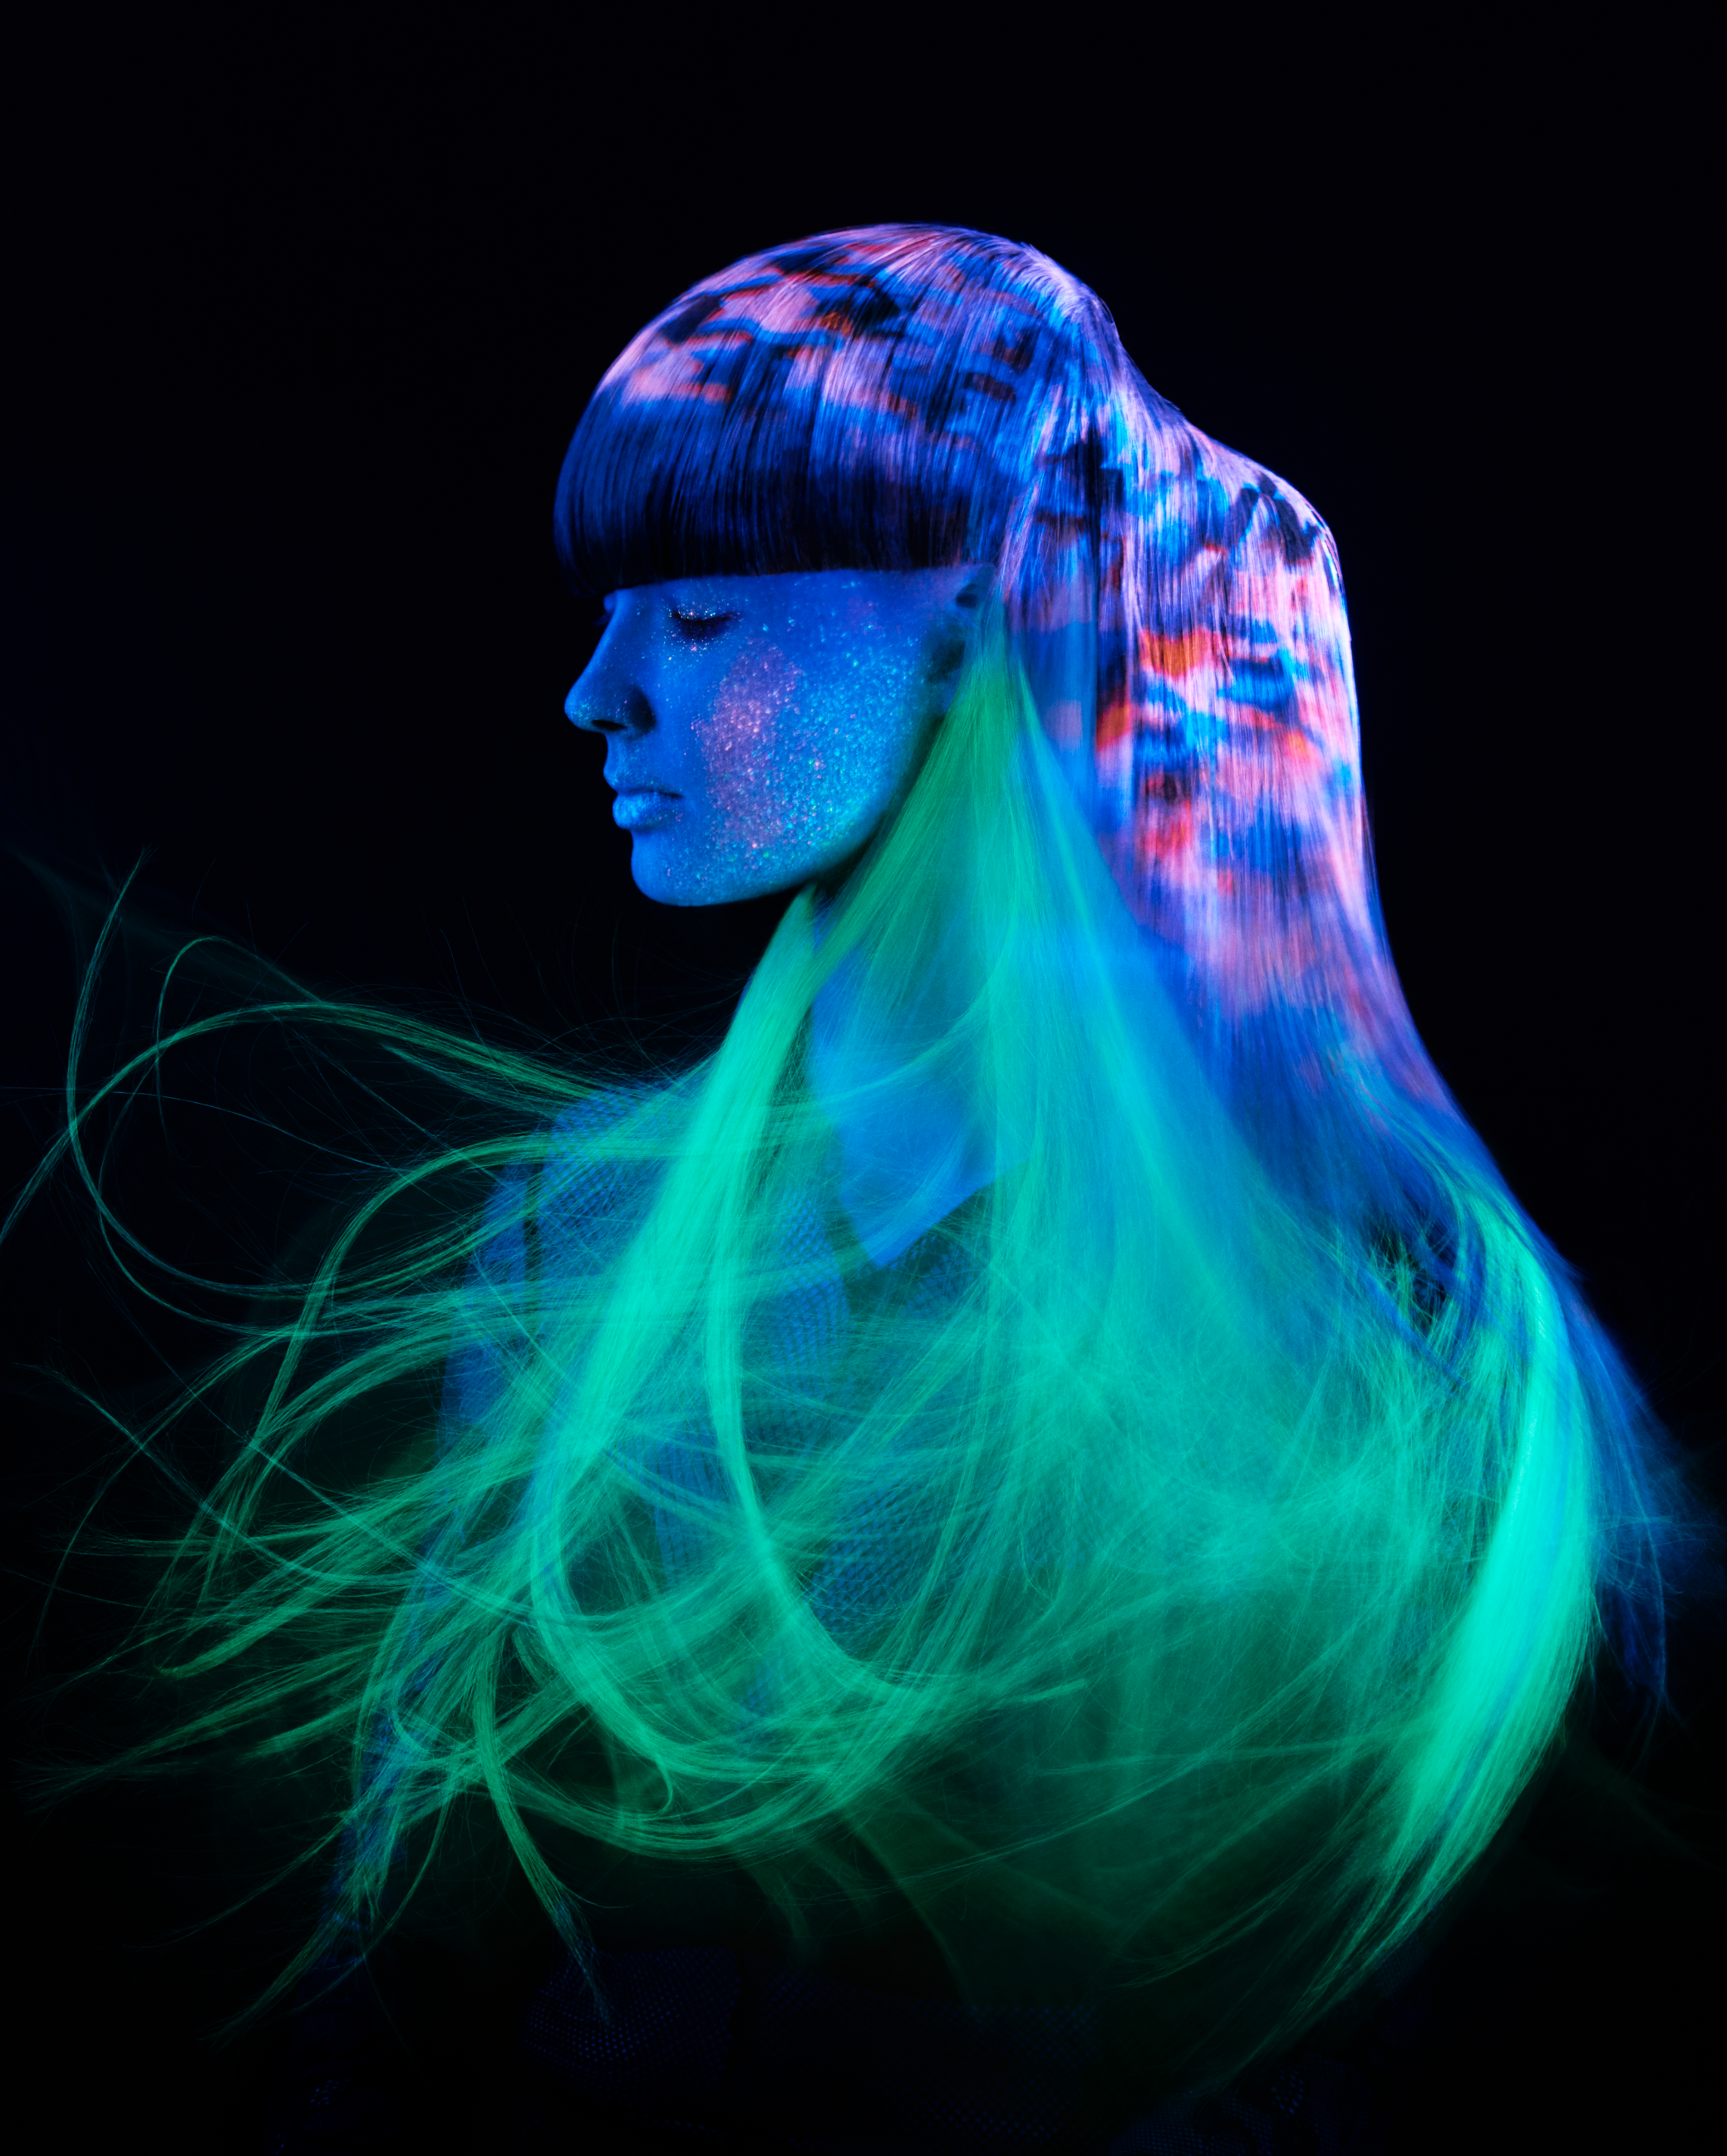
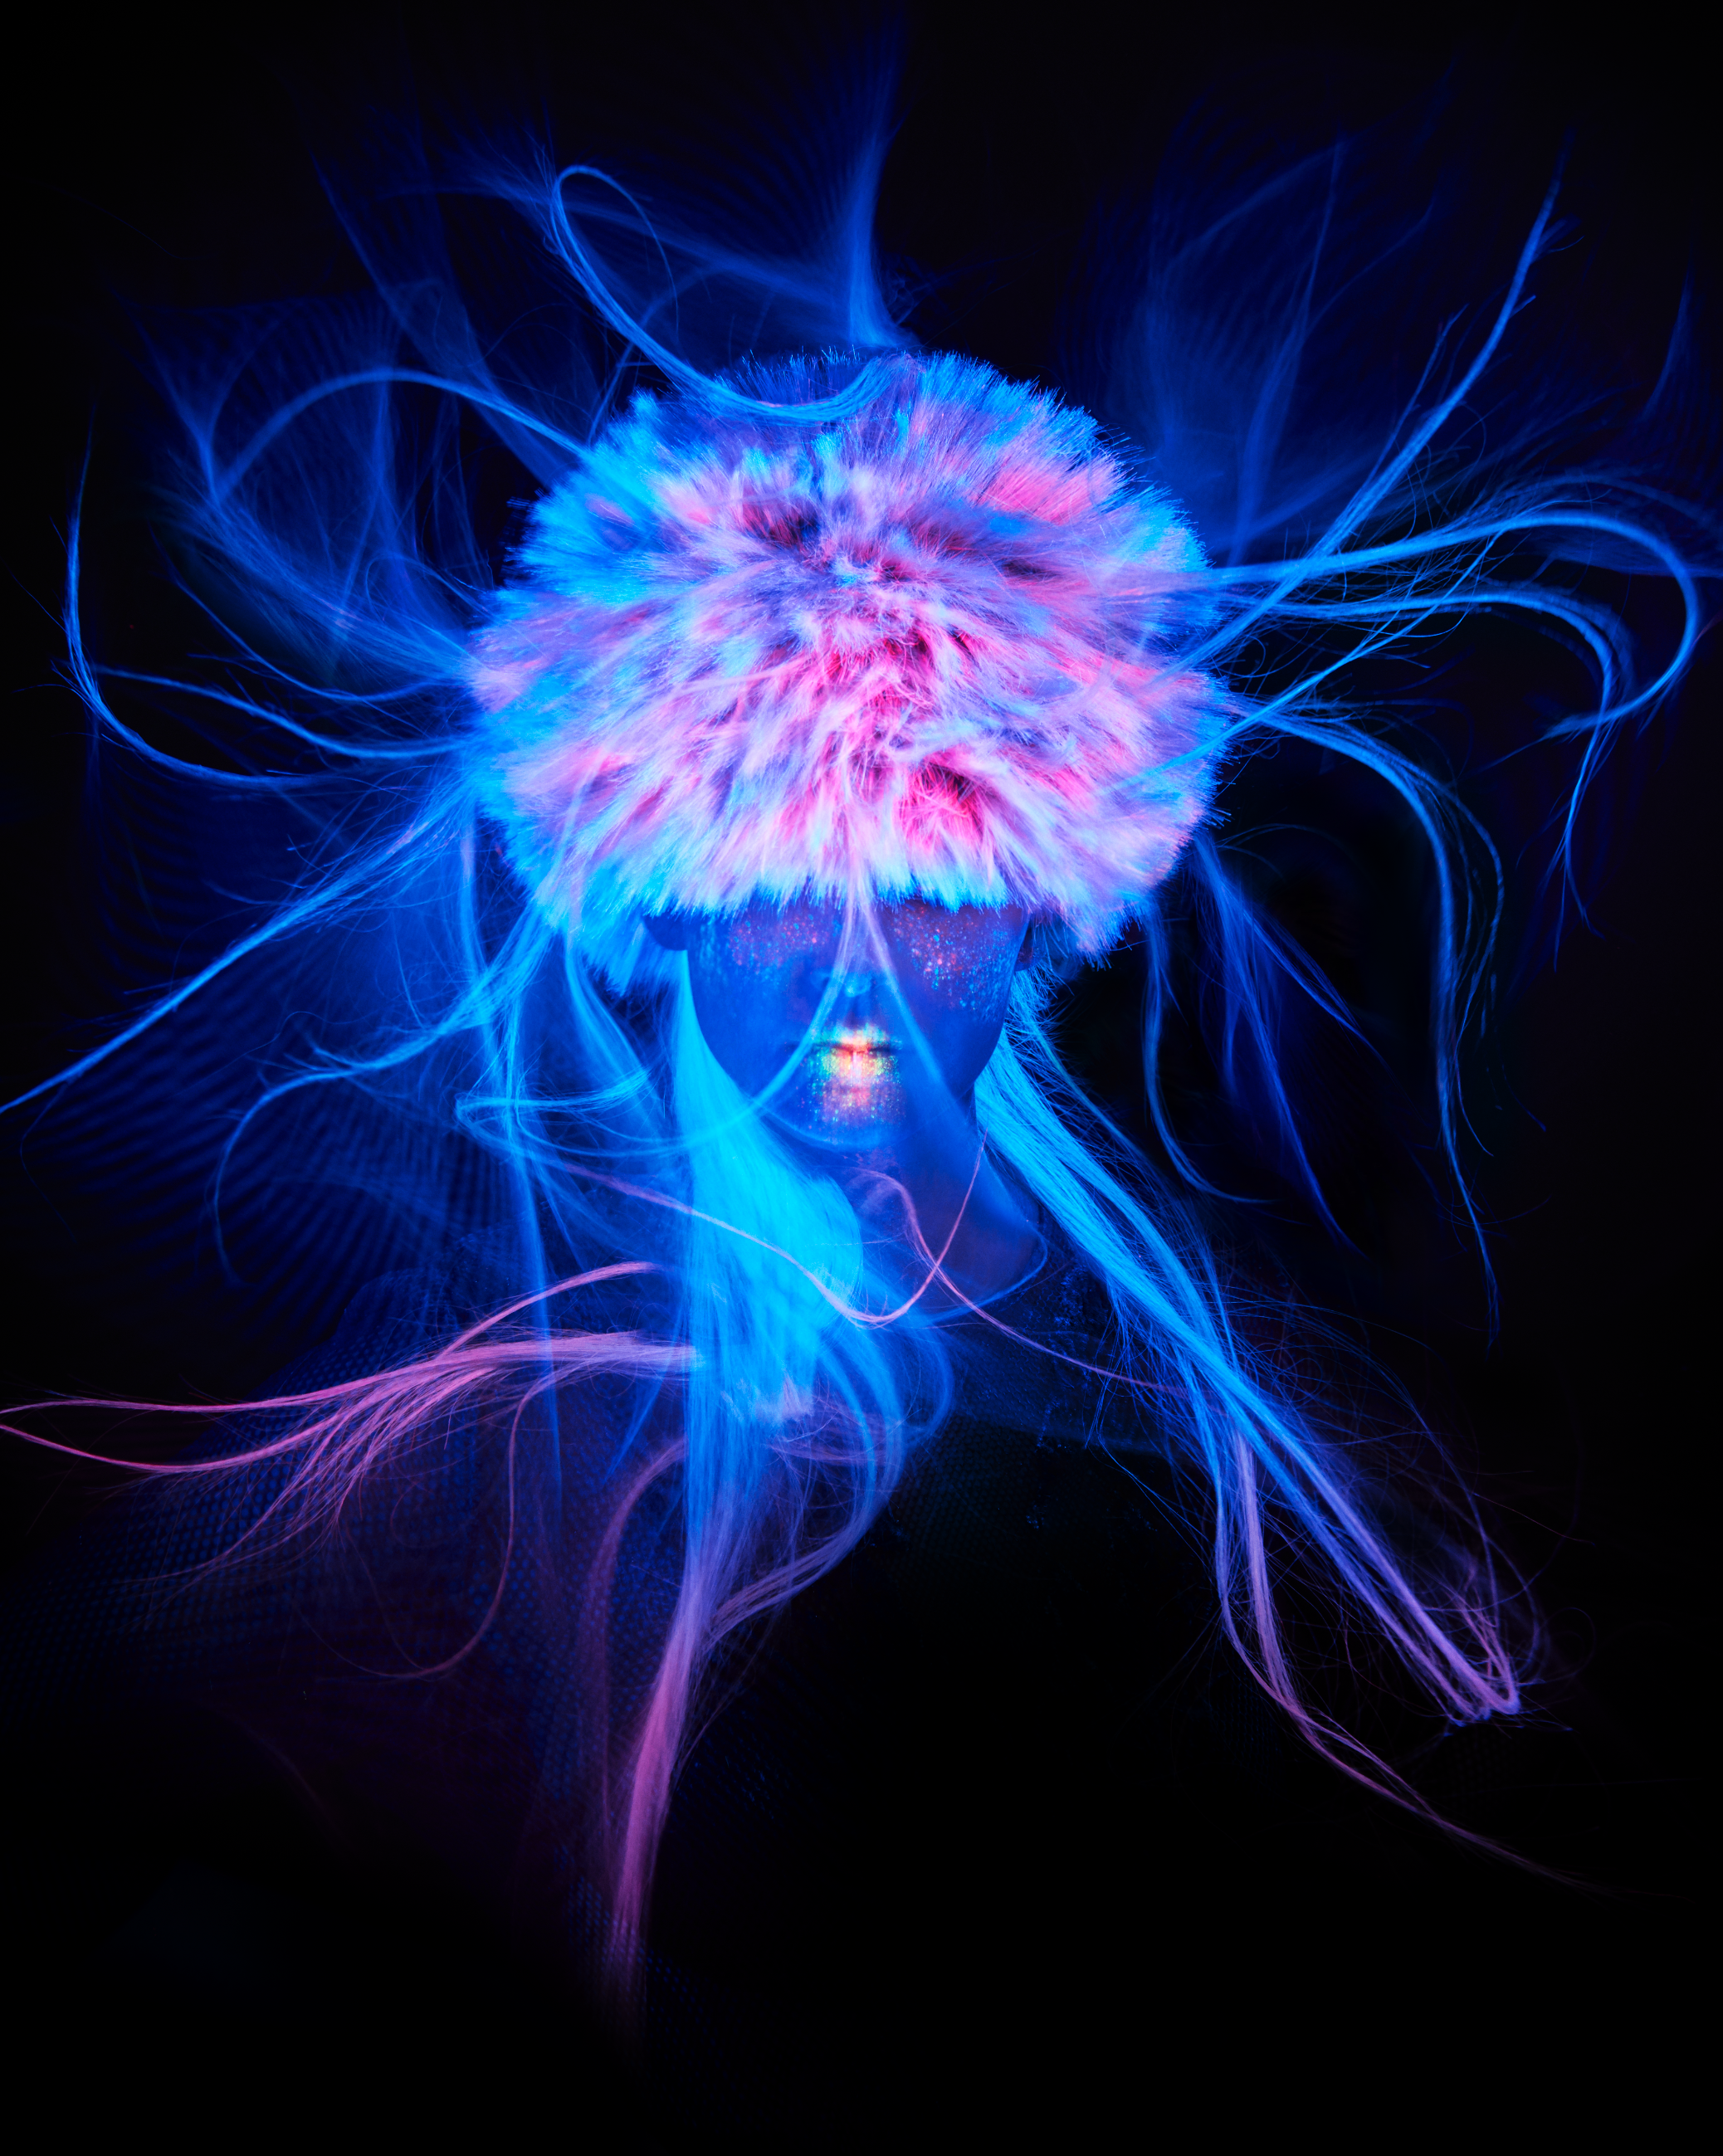
We shot a series of deep sea inspired hair looks using a mixture of continuous and flash lighting. We used the Broncolor UV attachment on one of the Siros S800 heads alongside an 800W UV cannon (continuous). Hair was made using various wigs treated with UV hair dye & the make up was made using any regular party UV make up you can find at costume stores. Its important to note that any pigments or materials that are not UV reactive will come out as black or not have any colour and so experimentation with different pigments & materials is quite important.
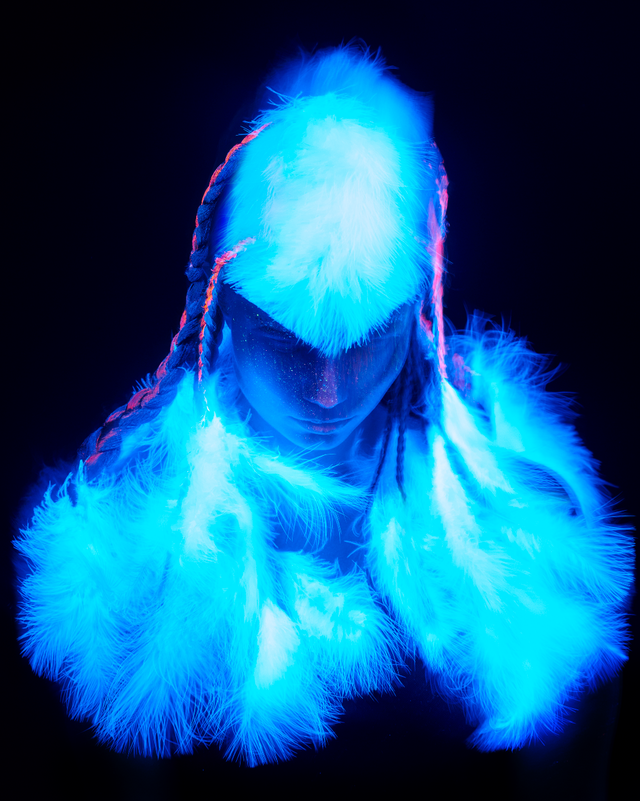
There are quite a few tips and tricks involved with shooting clean UV imagery, firstly, UV light is very easily bleached out by ambient light or other light sources, so as close to a black out environment as possible is ideal when working with UV. Either using a blackout studio or if your on a budget, you can easily gaffa tape up black fabric to your windows in your bedroom to create a black out.
Secondly, you need continuous UV light sources as well, firstly because hair and make up need to be able to see what their work will look like under UV light, as materials & pigments behave differently under UV light than they do under natural or flash lighting. The continuous UV light source is also key during shooting to help you auto focus, as the mod light cannot be on whilst using the Broncolor UV attachment a continuous source is required to illuminate the subject in order to focus properly.

You will also need a tripod, you can still work easily without using a tripod, however I have found through lots of testing that longer shutter speeds achieve the best ‘glowing’ effect and so makes the shot feel more like a UV shot. When shot with a too fast shutter speed say 1/60-1/200 the images can feel too sharp and the glow of the pigments does not pick up so well. My favourite results where achieved by shooting on longer 1-2 second shutter speeds with the UV flash firing between 1 - 3 times during the exposure to create a sharp image of the subject and the continuous light on throughout the exposure to create more of a glow effect mixed with the sharpness of the flash.
Using hair dryers to blow the hair around, we created more motion in the images, and while to model sat perfectly still I would continuously shoot 1s exposures one after the other until the hair would move in a way which was captivating or particularly nice.
You dont need expensive UV lighting to atleast give it a try and the results are always weird and wonderful, a simple continuous UV light bulb might set you back $10-20 on Amazon but it is enough to get started on your UV journey!
I hope you enjoyed the post! Thanks to the great team involved.
Model
Rachel Brockman
Hair
Seung Ki Baek
Make Up Artist
Adelaide Filippe / Josie Chan
Stylist Tina Farey
Tutorial Film
Nicole Markhoff
Film
Alexander Hardy
Great stuff. Love the detailed explanation as well.
Thanks, just let me know if you ever seeking advice on studio photography :)
awesome colors! love it!
Thank you!
Wow, these look amazing!
Thanks Cacoe ^_^