Basic Techniques Using DSLR camera
To produce high quality images and has artistic value, a photographer must master at least the basic techniques of using a DSLR camera. The basic techniques are good object composition, the lighting is balanced and sharp focus. To train it all certainly needed exercise consistently, by instinct / sensitivity we would be more refined, especially related to the composition will be quite difficult to master without regular exercise. The composition of not only the objects that have a nice arrangement (from nature to good) but also the angle or viewpoint was good also where the photographer is able to find the best point.
Shooting time can be done anytime, day, evening or afternoon by considering the lighting conditions where to shoot and master the use of various camera accessories to get the pictures we wanted.
Each camera certainly has its own characteristics, therefore it is important for a photographer to master the camera specifications they have. This is where the importance of the role of guide book / manual book in which there are innate explanation and panel buttons on the camera body, the camera parameter settings and suggestions for keeping the camera to be more durable in use.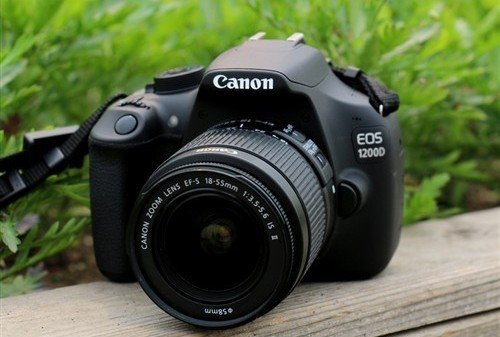
Here is a technique of camera settings that need to be mastered
- White Balance
picture of kelvin scale Kelvin temperature scale picture of white ... To make the white balance setting we need a white object, can use paper, clothing or walls. Suppose we use paper then the way is to put the paper in a certain field, use lighting that are (no less or excess), use manual focus and try the whole picture frame filled with the paper. White balance settings can using kelvin scale or with pictures to express temperature such as room lighting cloudy, tungsteen, white flourescent etc. We are biased only use one of several options according to the conditions encountered during the day under a tree suppose bias choose shade or cloudy disituasi bias we chose cloudy. Not only limited to preset because we can set the temperature as desired figure dicustom temperature. When we take photos manually and want a specific outcome for example yellow / warm temperature, the white balance is not in accordance with the guidelines of course not a problem for a specific purpose.
Kelvin scale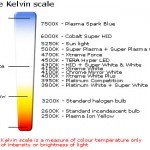
From the Kelvin scale above shows that 1,000 kelvin 10.000kelvin colored red and the blue sky, it shows that if we kelvin setting is too high to be yellowish, and if we kelvin setting is too low to be bluish. Arrange the kelvin scale according to the image above, the images appear to be neutral, ie not yellowish or bluish.
- Focus
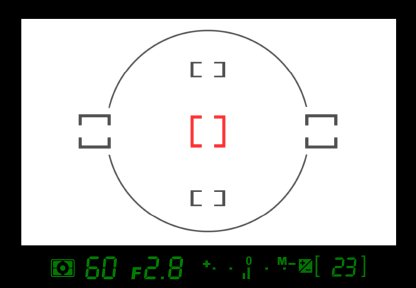
focus lens
Manual focus adjustment can be done by shifting the mode to Manual (M ) panel focus on the lens . With so sharp focus can be set manually by turning the focus ring on the lens. Manual focus is often used in cases such as indoor or low-light conditions at night . Use auto mode if it does not want to bother to set it , the focus will move automatically to adjust the zoom . Some techniques related to the shooting distance is 1.Extreme Long Shot ( view Very Wide ) 2. Long Shot ( view more nearby than ELS ) 3. Medium Long Shot ( Man from the knees to the head) 4. Medium Shot ( onjek above the waist until the head ) 5. Medium Close up ( Object man from chest to head ) 6. Close up ( Face) 7. Big Close up ( nose / eye ) 8. Extreme Close up ( pores of the skin ) that have a very clear detail .
3.Diaphragm / aperture
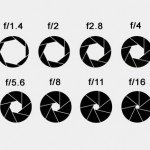
aperture settings
The diaphragm is symbolized by f / aperture the lens aperture setting, as we see in the picture beside, the smaller the value, the greater its f aperture lens. Wide aperture opening used to let in more light to the sensor. It will also have other effects because the sharp area will be more narrow and the wider area will bokeh. Wide aperture openings are widely used in portrait photography to isolate the subject from the background so it appears prominent. While a small aperture opening will lead to all areas of the frame will appears sharp. Small aperture itself is widely used for landscape photography, where the objective is to show the impression of 3D, so all the areas need to be sharp, sense of depth and sense of scale need to be highlighted. aperture lenses have different, and most have a zoom lens aperture prime lens is not as wide, and even if there would be very expensive precious. In selecting a lens with a wide aperture, then one consideration is the number of blade, because the more it will bokeh seems softer and shaped roundness.
- Shutter Speed
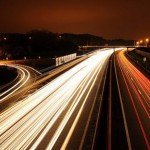
Shutter speed is the speed setting open and close the camera shutter or window. Shuter speed setting is in seconds, for example 1/125 or 1/1000, so the greater the number 1/1000 unit eg the faster load time and close the shutter / window so that light entering the image sensor less. Conversely, when the smaller digits unit eg 1/125 then the longer the open and close the shutter speed / camera window so that light entering the image sensor more. To freeze an object waterfall slow shutter speed photography moves such as a person surfing or blades on the helicopter required setting a high shutter speed like the picture next. Normally the picture shooting technique called panning or freeze. So the faster the movement of objects we want to capture the greater the shutter unit speednya. Set the shutter speed setting above 1/250 to freeze the action (as shown beside), and use a shutter speed below 1/25 to blur the object like water falling / waterfall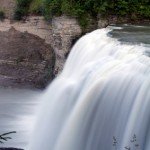
shutter speed is slow
Photography Techniques Slow Speed
To produce corresponding photo image right beside the required setting a low shutter speed, this will multiply the incoming light is very useful if done at night. At a low shutter speed needed assistance Camera stand (monopod / tripod), to be able to reduce shake and the resulting image is not blurred. Better yet, if using a shutter release / camera accessory to replace the role of right hand in pressing the shutter button. This tool can also be controlled from a distance so that the resulting image will be sharper. to produce a water flow gently like the picture on the right, in addition to the slow shutter speed will also need the help of the ND filter / Neutral density to reduce the amount of light into the sensor due to the use of a slow shutter speed. - ISO
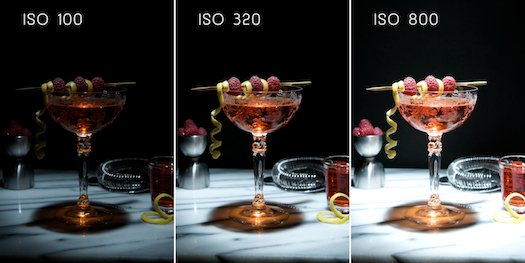
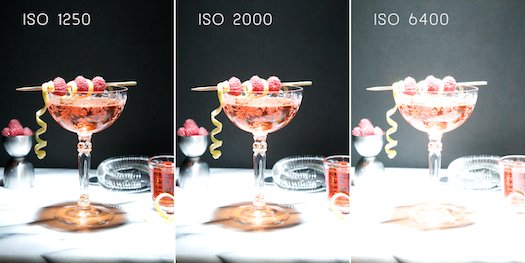
ISO is the sensitivity level of the camera sensor . The higher the ISO , the more sensitive the sensor anyway so that the resulting image will have more light , conversely the lower the ISO setting , the less well the light that enters the camera sensor . As the picture above , the lower the ISO the lower the noise , otherwise the higher the ISO , the higher the noisenya . We must find the right ISO setting for the camera , and on the glass case above the range of 320-800 for more than that over-exposure image and the less of it the picture looks dim or low light . High ISO is usually used at night or when the light is really minimal. So that the images produced maximal use ISO 100 and increase only if needed . Remember , raise the ISO also means raising Noise