Steemit Image Guide: Click To Enlarge Image - The Simplest Way - For Steemit Beginners, Amateur Photographers and Coding Noobs.
So I have posted enough photos on My Travel Blog to have figured out the simplest way (in my opinion) to posting photos and images which you can enlarge and see in full size. Just click on the image below and see what I mean.
I have seen some extremely over-complicated ways to get this very simple thing done.
Firstly, I will say that apart from my time learning the markdown guide for Steemit, and implementing a little bit of it here and there, that I do not come from a coding, or programming background by any means, so if you are in the same boat, just follow this guide and want the most basic, step-by-step guide to allowing people to see your picture in all its true glory.
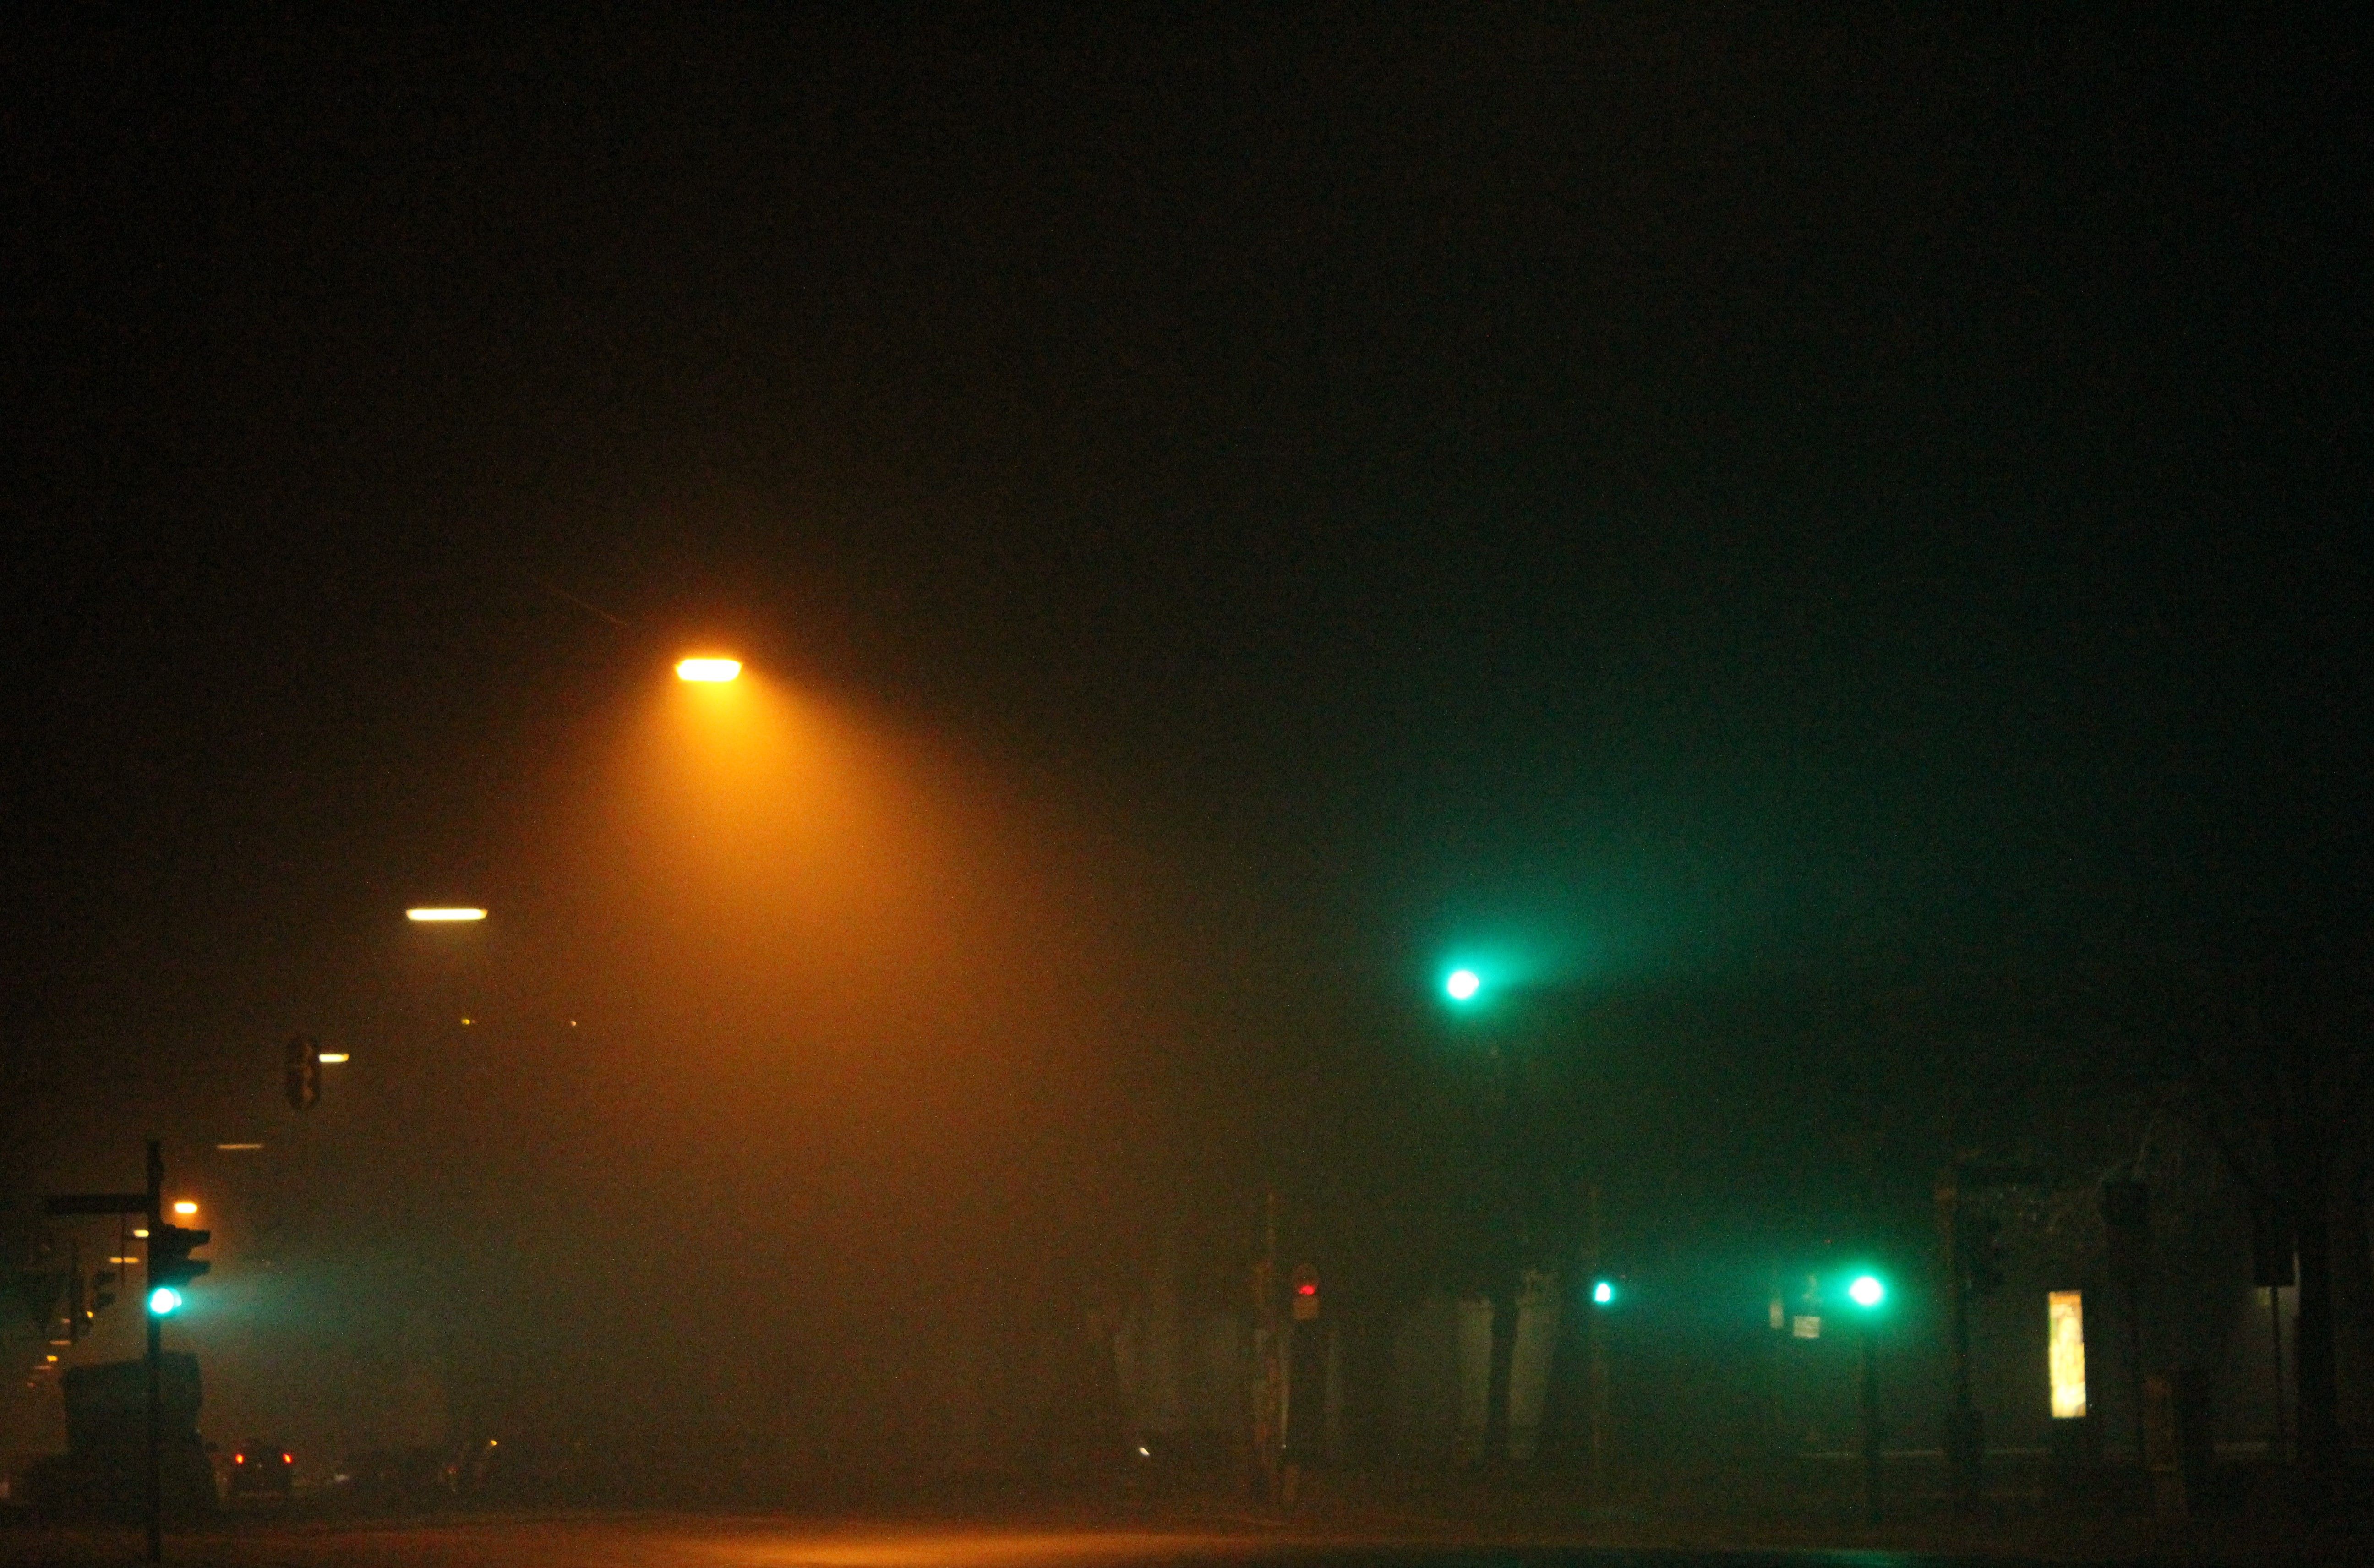
Step 1: upload your image so your images link is in the text box. (for the guide I have used a clearly named pic from my library called FOGGY STREETLIGHTS).
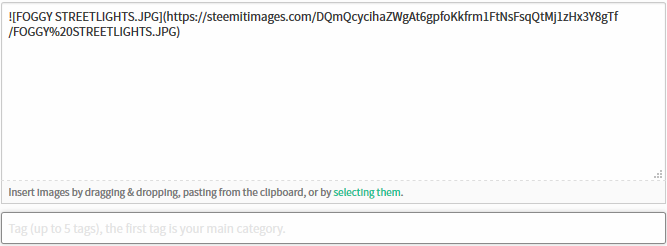
Step 2: Add square brackets to either side of the link.

Step 3: Copy the link of your picture, excluding its name.

Step 4: Paste link directly after the last square bracket.

If you are familiar with the Markdown Styling Guide (which you should be to some degree, if not, give it a few reads) you will notice that all you have done is created a link. And this is really all you need to do. Hover your mouse over your picture and you will see it is now a link. Click the picture and it will take you to a new page with the full size version of your image. If it doesn't work, go back to step one. It is that simple.
Step 5:
So now you have a link, you need to tell people it is a link to a larger image, because it is the kind thing to do. Simply type below it: Click image to enlarge... or something of the sort.

Now If you want to center that text then enter this code:

Step 6: Centering your image.
This looks a lot better in photo competitions such as the ones hosted by Wes at @derangedvisions and also 7 World's Continents Photo Challenge @czechglobalhosts, where you post your entry in the comments section. This is the same as centering your text and you can just copy paste the code if you want. So firstly enter the code highlighted at the start of your entire image link.

Secondly, enter the highlighted code at the end.

AND VOILA!!! THAT IS IT!!!
****** Bonus step ******
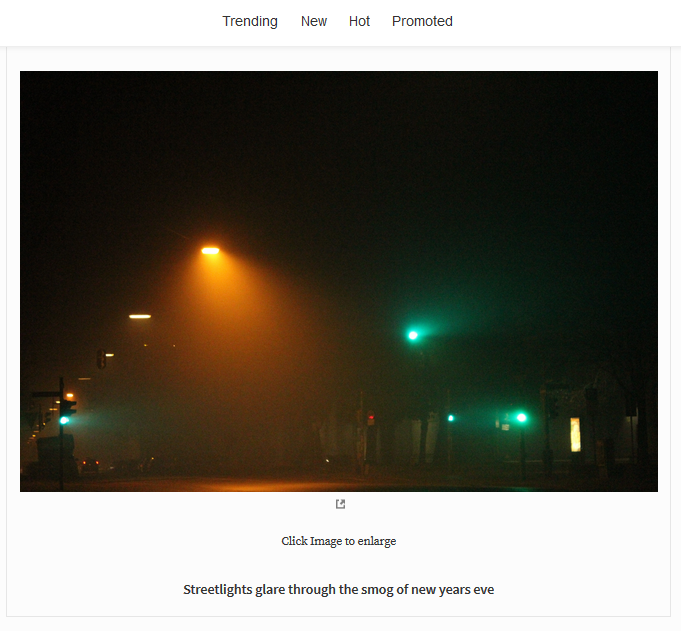
If you want to caption your photograph, simply repeat Step 5, and change the text in the middle as below.

The hashtags simply change the size of the font. As does the code containing 'sup'.
If you have followed these steps correctly, your image should look like this:
If you have any questions, feel free to ask, Though as I said I am not a programmer or coder so anything too technical will probably have to be answered by someone else!
If you found this helpful, feel free to subscribe!
Very good information, it will helpful in my photographic work. Thank you very much for sharing.
Glad it helped @juancarlos1175
Congratulations @danedebeau! You have completed some achievement on Steemit and have been rewarded with new badge(s) :
Click on any badge to view your own Board of Honor on SteemitBoard.
To support your work, I also upvoted your post!
For more information about SteemitBoard, click here
If you no longer want to receive notifications, reply to this comment with the word
STOP