My night shots (and a little howto) (ENG/RU)
The problem
Every beginner in photography (like me for example) sometimes for the first time faced with the desire to do something new. For example, shooting at slow shutter speeds. Of course it requires a tripod.
But even having a tripod novice can face the problem. The problem is that when you press the button, slight movement of the camera on a tripod may occur. As a result, you can get a blurry picture, or on your photos from each light source will depart thin strip of light.
In my case, since I temporarily use my friends old laxity tripod, I was faced with the fact that the camera is moving very strongly. And even adapt myself to do push easily and accurately I still receive a portion of spoiled shots.
Каждый новичок в фотографии (как я например) иногда впервые сталкивается с желанием сделать что-то новое. Например, съемка с длинной выдержкой. Естественно для этого нужен штатив.
Но даже имея штатив новичок может столкнуться с проблемой. Проблема заключается в том, что во время нажатия на кнопку спуск может происходить небольшое шевеление камеры на штативе. В результате вы можете получить смазанную картинку либо на вашем фото от каждого источника света будет отходить тонка полоска света.
В моем случае, т.к. я временно использую чужой штатив, я столкнулся с тем, что камера шевелится очень сильно. И даже приноровившись делать нажатие легко и аккуратно я все равно получал часть кадров испорченными.
Here is a picture that spoiled with movement.
Вот как выглядит испорченный шевелением кадр.
Decision
This problem is easily solved by the acquisition of the cable release. And it could be complete.
But what if the picture needs to be done here and now, and you do not have cable release?
Today I learned how to do it.
Эта проблема легко решается приобретением тросика (cable release). И на этом можно было бы закончить.
Но что делать, если снимок надо сделать здесь и сейчас, а тросика у вас нет?
Сегодня я узнал как это сделать.
Once you have set the camera on a tripod, you make all settings and ready to take the picture, turn on the the self-timer delay in camera settings. For example, set for 2 seconds. Then turn on the self-timer. Press the shutter button to take the picture. Even if at this point your camera is moving on the tripod, you have 2 seconds to stir ceased. And by the time the shutter opens, the camera will have a stable position.
The solution is simple enough, but a man who has little experience in photography, it may not come to mind. And it can cause frustration because of several unsuccessful shots. I know it is on its own.
This solution has a drawback. If you need to take the picture exactly at the right time, for example, when the car is passing by, you will be hard to guess when to press the shutter button. But in this case you can only go to the store and buy a cable release. In the end, I did it.
После того, как вы установили камеру на штатив, сделали все настройки и готовы сделать снимок, включите в настройках камеры задержку для автоспуска. Например, установите 2 секунды. Включите автоспуск. Нажимайте кнопку спуск чтобы сделать снимок. Даже если в этот момент ваша камера будет шевелиться, у вас есть 2 секунды, чтобы шевеление прекратилось. И к моменту, когда затвор камеры откроется, камера уже примет стабильное положение.
Решение достаточно простое, но человеку, который имеет мало опыта в фотографии, оно может не прийти в голову. И это может стать причиной расстройства из-за нескольких неудачных кадров. Я знаю это по себе.
У этого решения есть недостаток. Если вам необходимо сделать снимок точно в правильное время, например, когда мимо проезжает машина, вам будет сложно подгадать время нажатия кнопки спуск. Но в таком случае остается только идти в магазин и покупать тросик. В итоге я так и поступил.
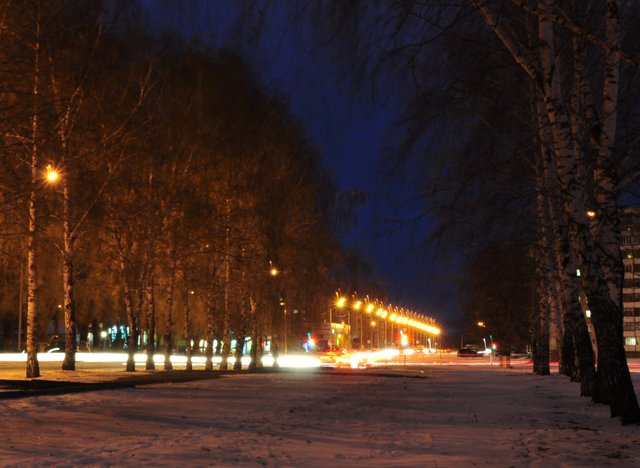
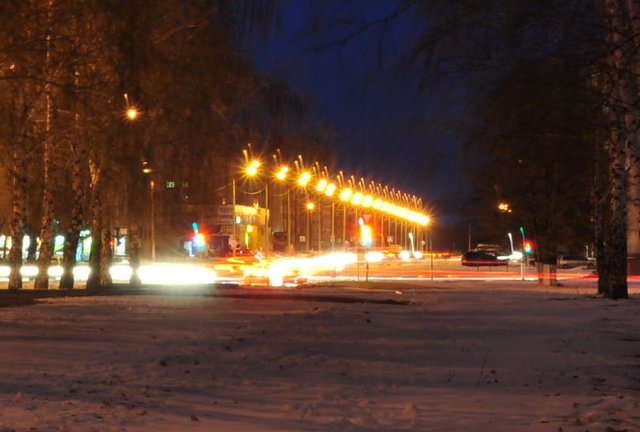
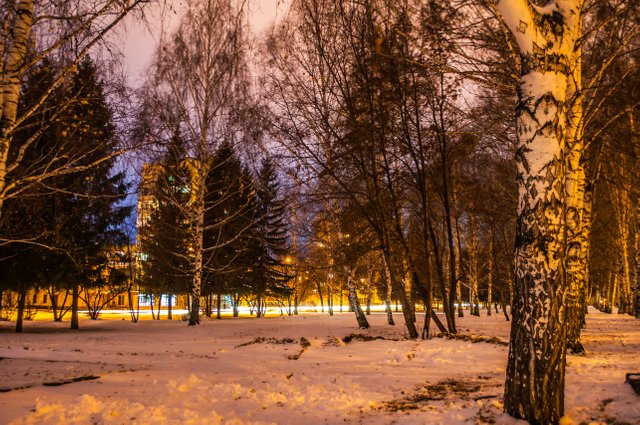
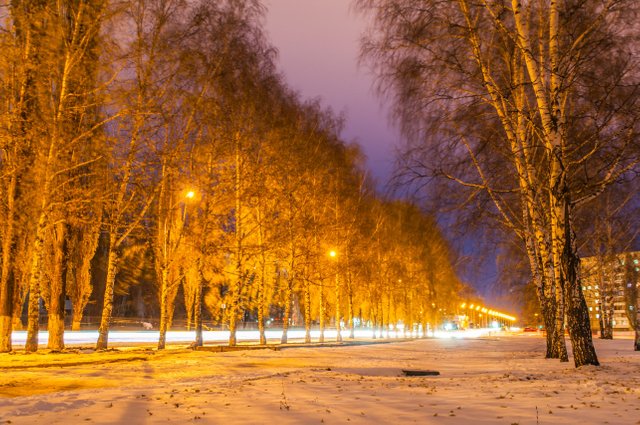
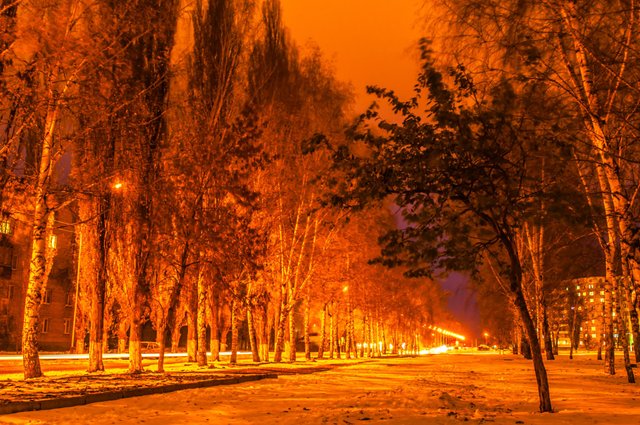
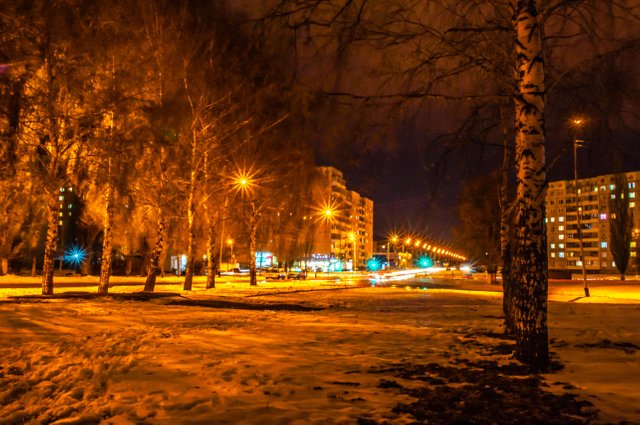
Below I share a few photos wich made with the method described by me. These pictures are taken with different exposures of 10 to 30 seconds. As you can see, they are not in blur.
Ниже я делюсь несколькими фотографиями, сделанными описанным мною способом. Эти снимки сделаны с разной выдержкой от 10 до 30 секунд. Как вы видите, на них нет движения.

Nikon D5000 18-55VR
Do you like this post? You can see more of my works in my blog @boddhisattva
If you like this short review of photos from my blog, you can learn how to make it here.
Thanks to @t3ran13 for this interesting tool.
Очень интересно, есть чему поучиться), спасибо за пост!
Спасибо! Очень рад, что кому-то это оказалось полезным 8)
Great Pics! Thank you for the tips on long exposure. I'm a beginner in photography and this was very helpful. Keep up the great pics
Thank you for your comment. Nice to hear that this post can help you. From the beginner to beginners 8)
This post has been ranked within the top 50 most undervalued posts in the second half of Nov 19. We estimate that this post is undervalued by $8.26 as compared to a scenario in which every voter had an equal say.
See the full rankings and details in The Daily Tribune: Nov 19 - Part II. You can also read about some of our methodology, data analysis and technical details in our initial post.
If you are the author and would prefer not to receive these comments, simply reply "Stop" to this comment.
There's one more thing you can do to enable even more stable shooting: enable the mirror-lock up function!
Thanks for the tip, but I'm not sure if my camera have this function 8)
I didn't found it 8)