How I edited this portrait Adobe Photoshop & Lightroom Tutorial
I'd made a post on instagram asking if I should make a tutorial on how I edited this photo. I got a lot of requests to do so and thought I'd share it here.
This photo was taken with overhead/backlight and a golden reflector below and to the left of the subject.
Final Result

RAW Image

Tutorial
I sort all my photos in Lightroom and edit in photoshop. Right-click on the image you want to edit and choose:
Edit In > Open as smart object in Photoshop
By opening the image as a smart object we are more flexible to make changes to certain adjustments I'll be making in the next step.

The first step to editing this image is a Shadows/Highlights adjustment.

Photoshop has default adjustments but I've set everything to zero and saved that as my default by clicking "Save Defaults" in the bottom left of the dialog.

Once you've saved your defaults to zero you can make the adjustments I've made in the screenshot below.

Next, we'll remove any blemishes. Create a new layer then select the "Spot Healing Brush" tool and check the "Sample all layers" box. Adjust the size of your brush with the square brackets on your keyboard.
There was only one red spot I wanted to remove in this photo.

Let's create a new "Black and White" adjustment layer using the flyout below the layers panel.

Set its blending mode to "Luminosity" and adjust the red slider to -17.
By setting the blending mode it only adjusts the brightness of the pixels we make changes to. In this image the pixels with red info in them.


From here using the adjustment layer flyout create a new "Color Balance" adjustment layer. We'll adjust the shadows, midtones, and highlights by using the drop-down menu and sliders.


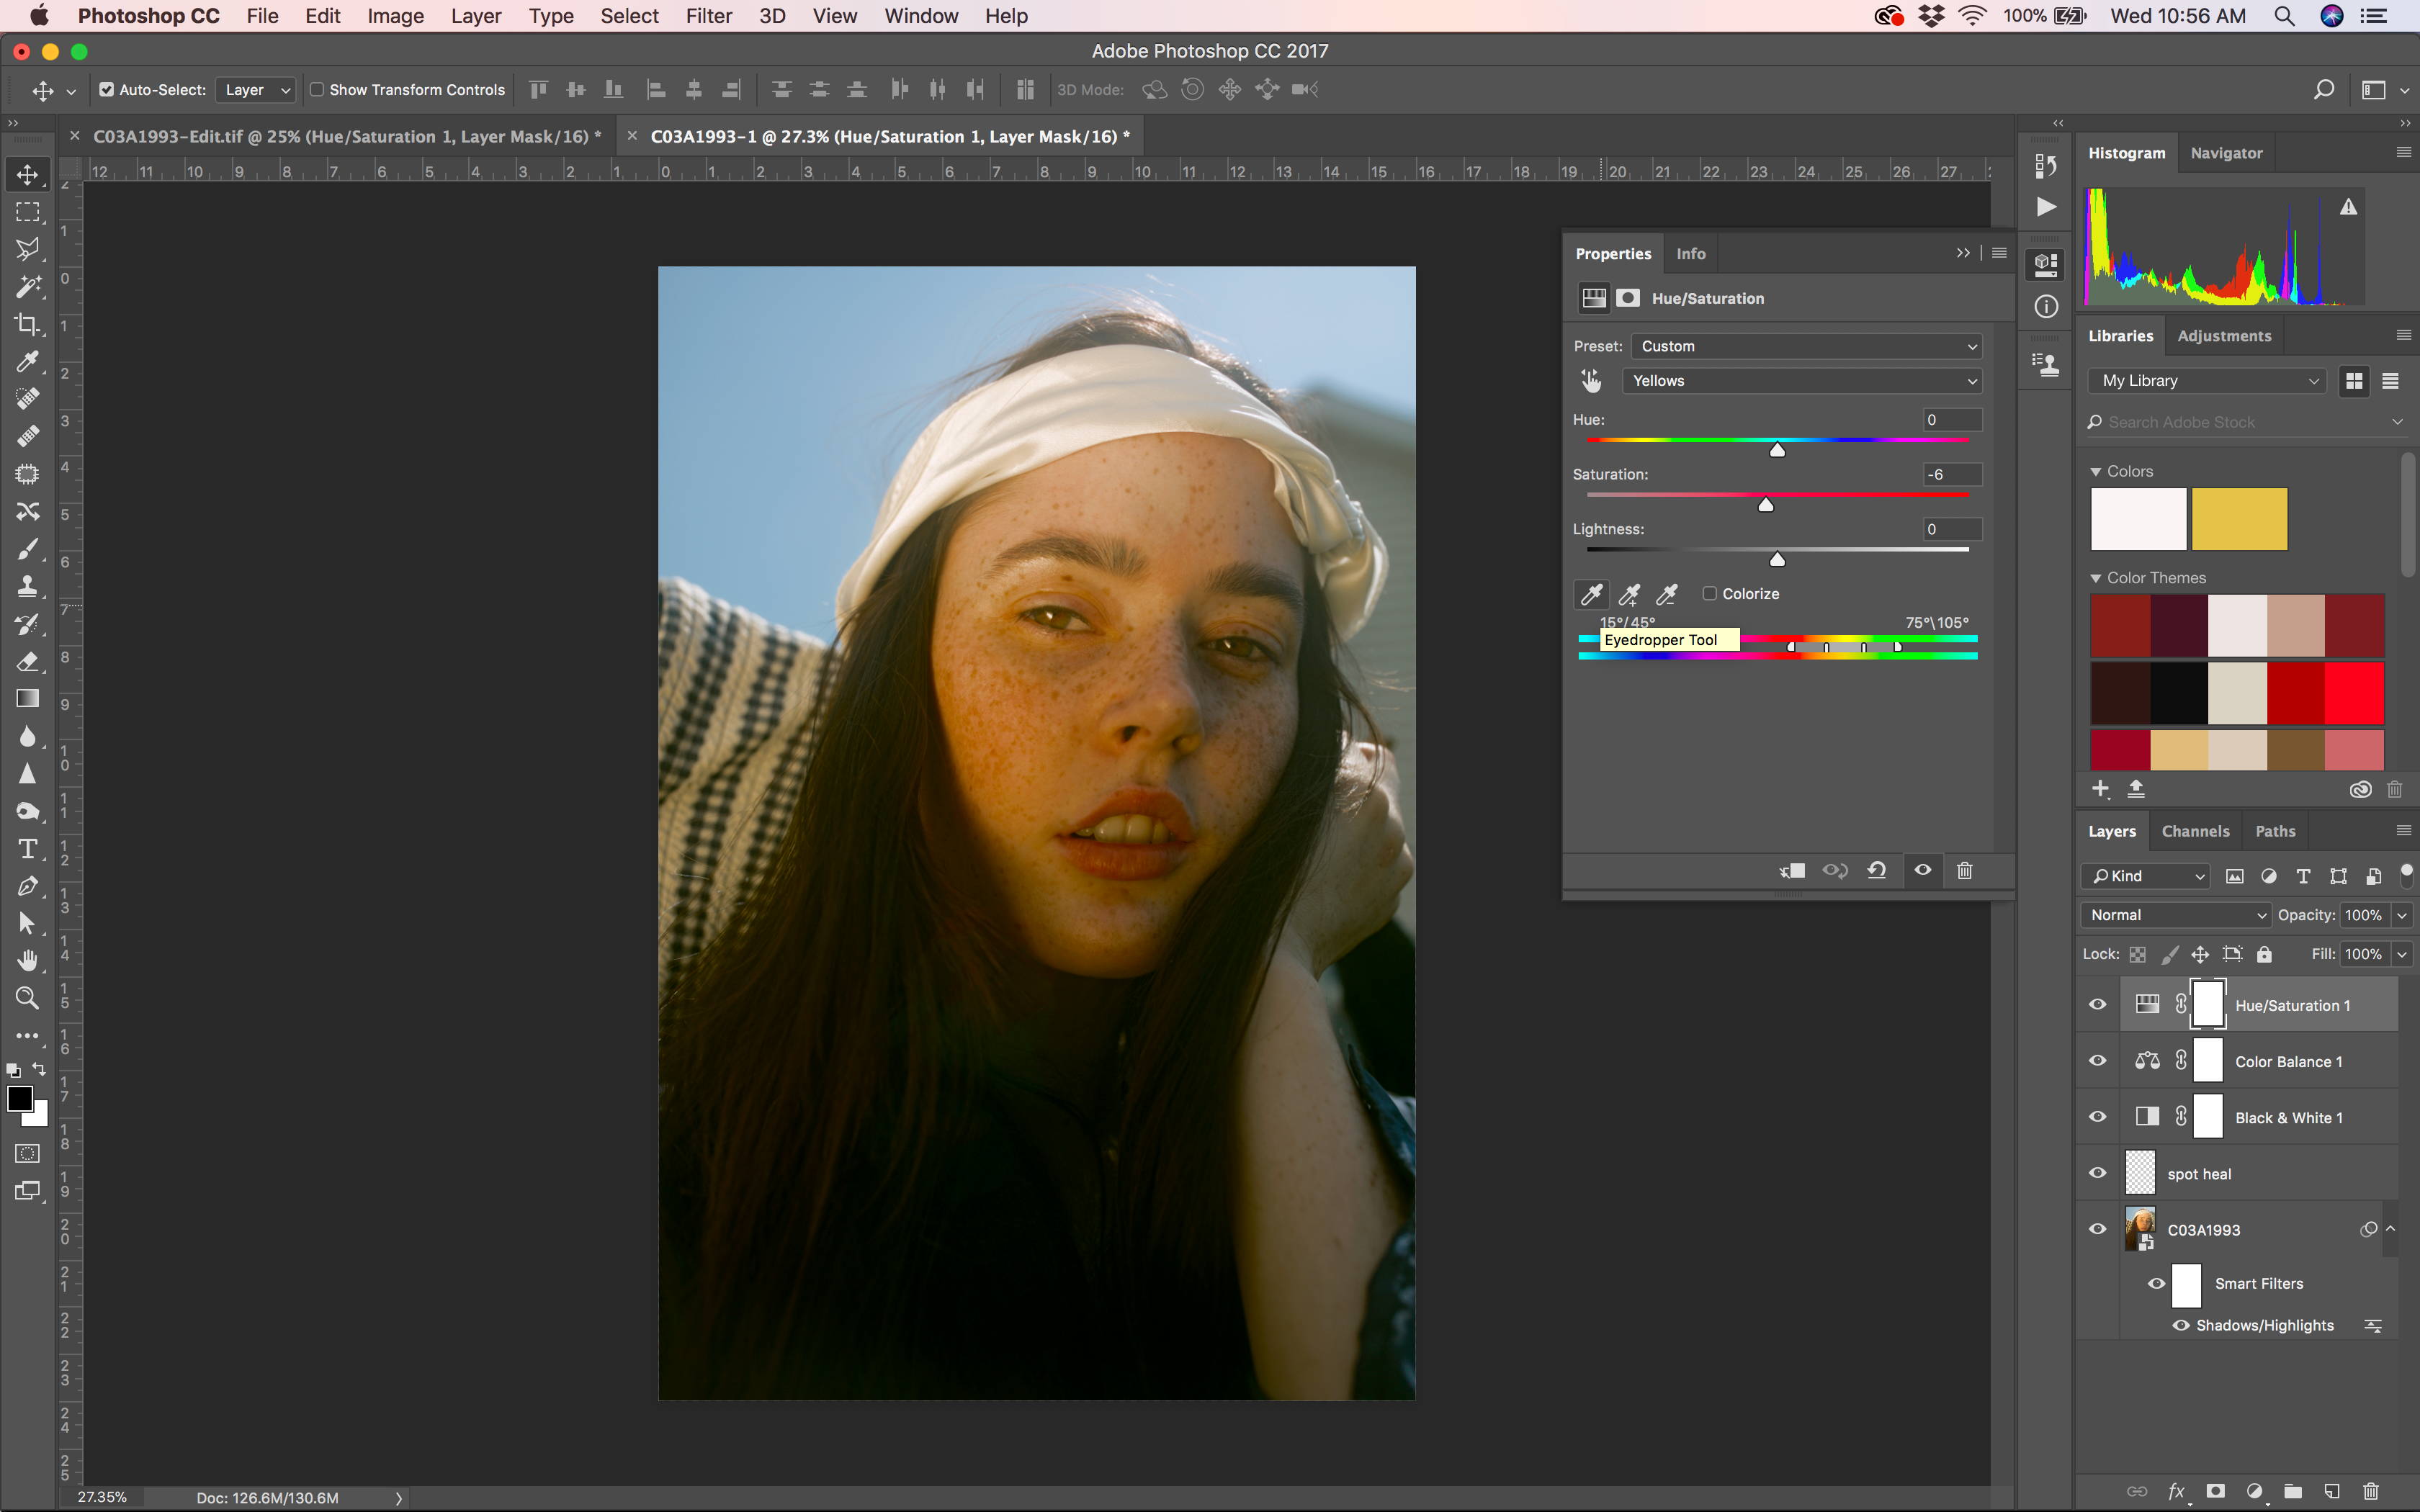
Using the adjustments layer flyout create a new "Hue & Saturation" adjustment layer and make the following changes to the master saturation -12.

We'll then choose yellow from the drop down and desaturate it by -6.
Now choose "Greens" from the Hue & Saturation drop-down. Click on the bottom left eyedropper tool and then pick a green-ish area in the photo and adjust the saturation to -22.
(Photoshop will create a new item in the dropdown called "Yellows 2")

Create a curves adjustment layer using the flyout and make the following adjustments.

Next press Command + Option + Shift + 3. This will create a new layer with all your changes merged on to it.
Now choose Filter > Other > Highpass and set the adjustment to 10px. Set this layers blending mode to "Soft Light".


Create a new layer then chose Edit > Fill and fill the layer with 50% gray.


We'll add noise to the layer by choosing Filter > Noise > Add Noise and setting the adjustment to somewhere around 68.
Desaturate the layer by choosing Image > Adjustments > Hue & Saturation and set the saturation to -87.
Set the layers blending mode to "Soft Light".

Now choose Filter > Blur > Gaussian Blur and set the amount to 1.1px.

That's it, you're done!
Your final result will vary depend greatly on each individual image.