My edits for Photogames FixItFriday week #4
Last week I found @photogames, I really like playing the FixItFriday because you get to see so many creative outcomes from one photo. Each photostar submits a raw photo to edit. After the challenge is up that photostar picks their favorites.
Its a little tidius listing all the steps I did for the edits but I figured it might interest a few people. I am using lightroom to edit these.
The first raw photo that I edited is @jarvie's.
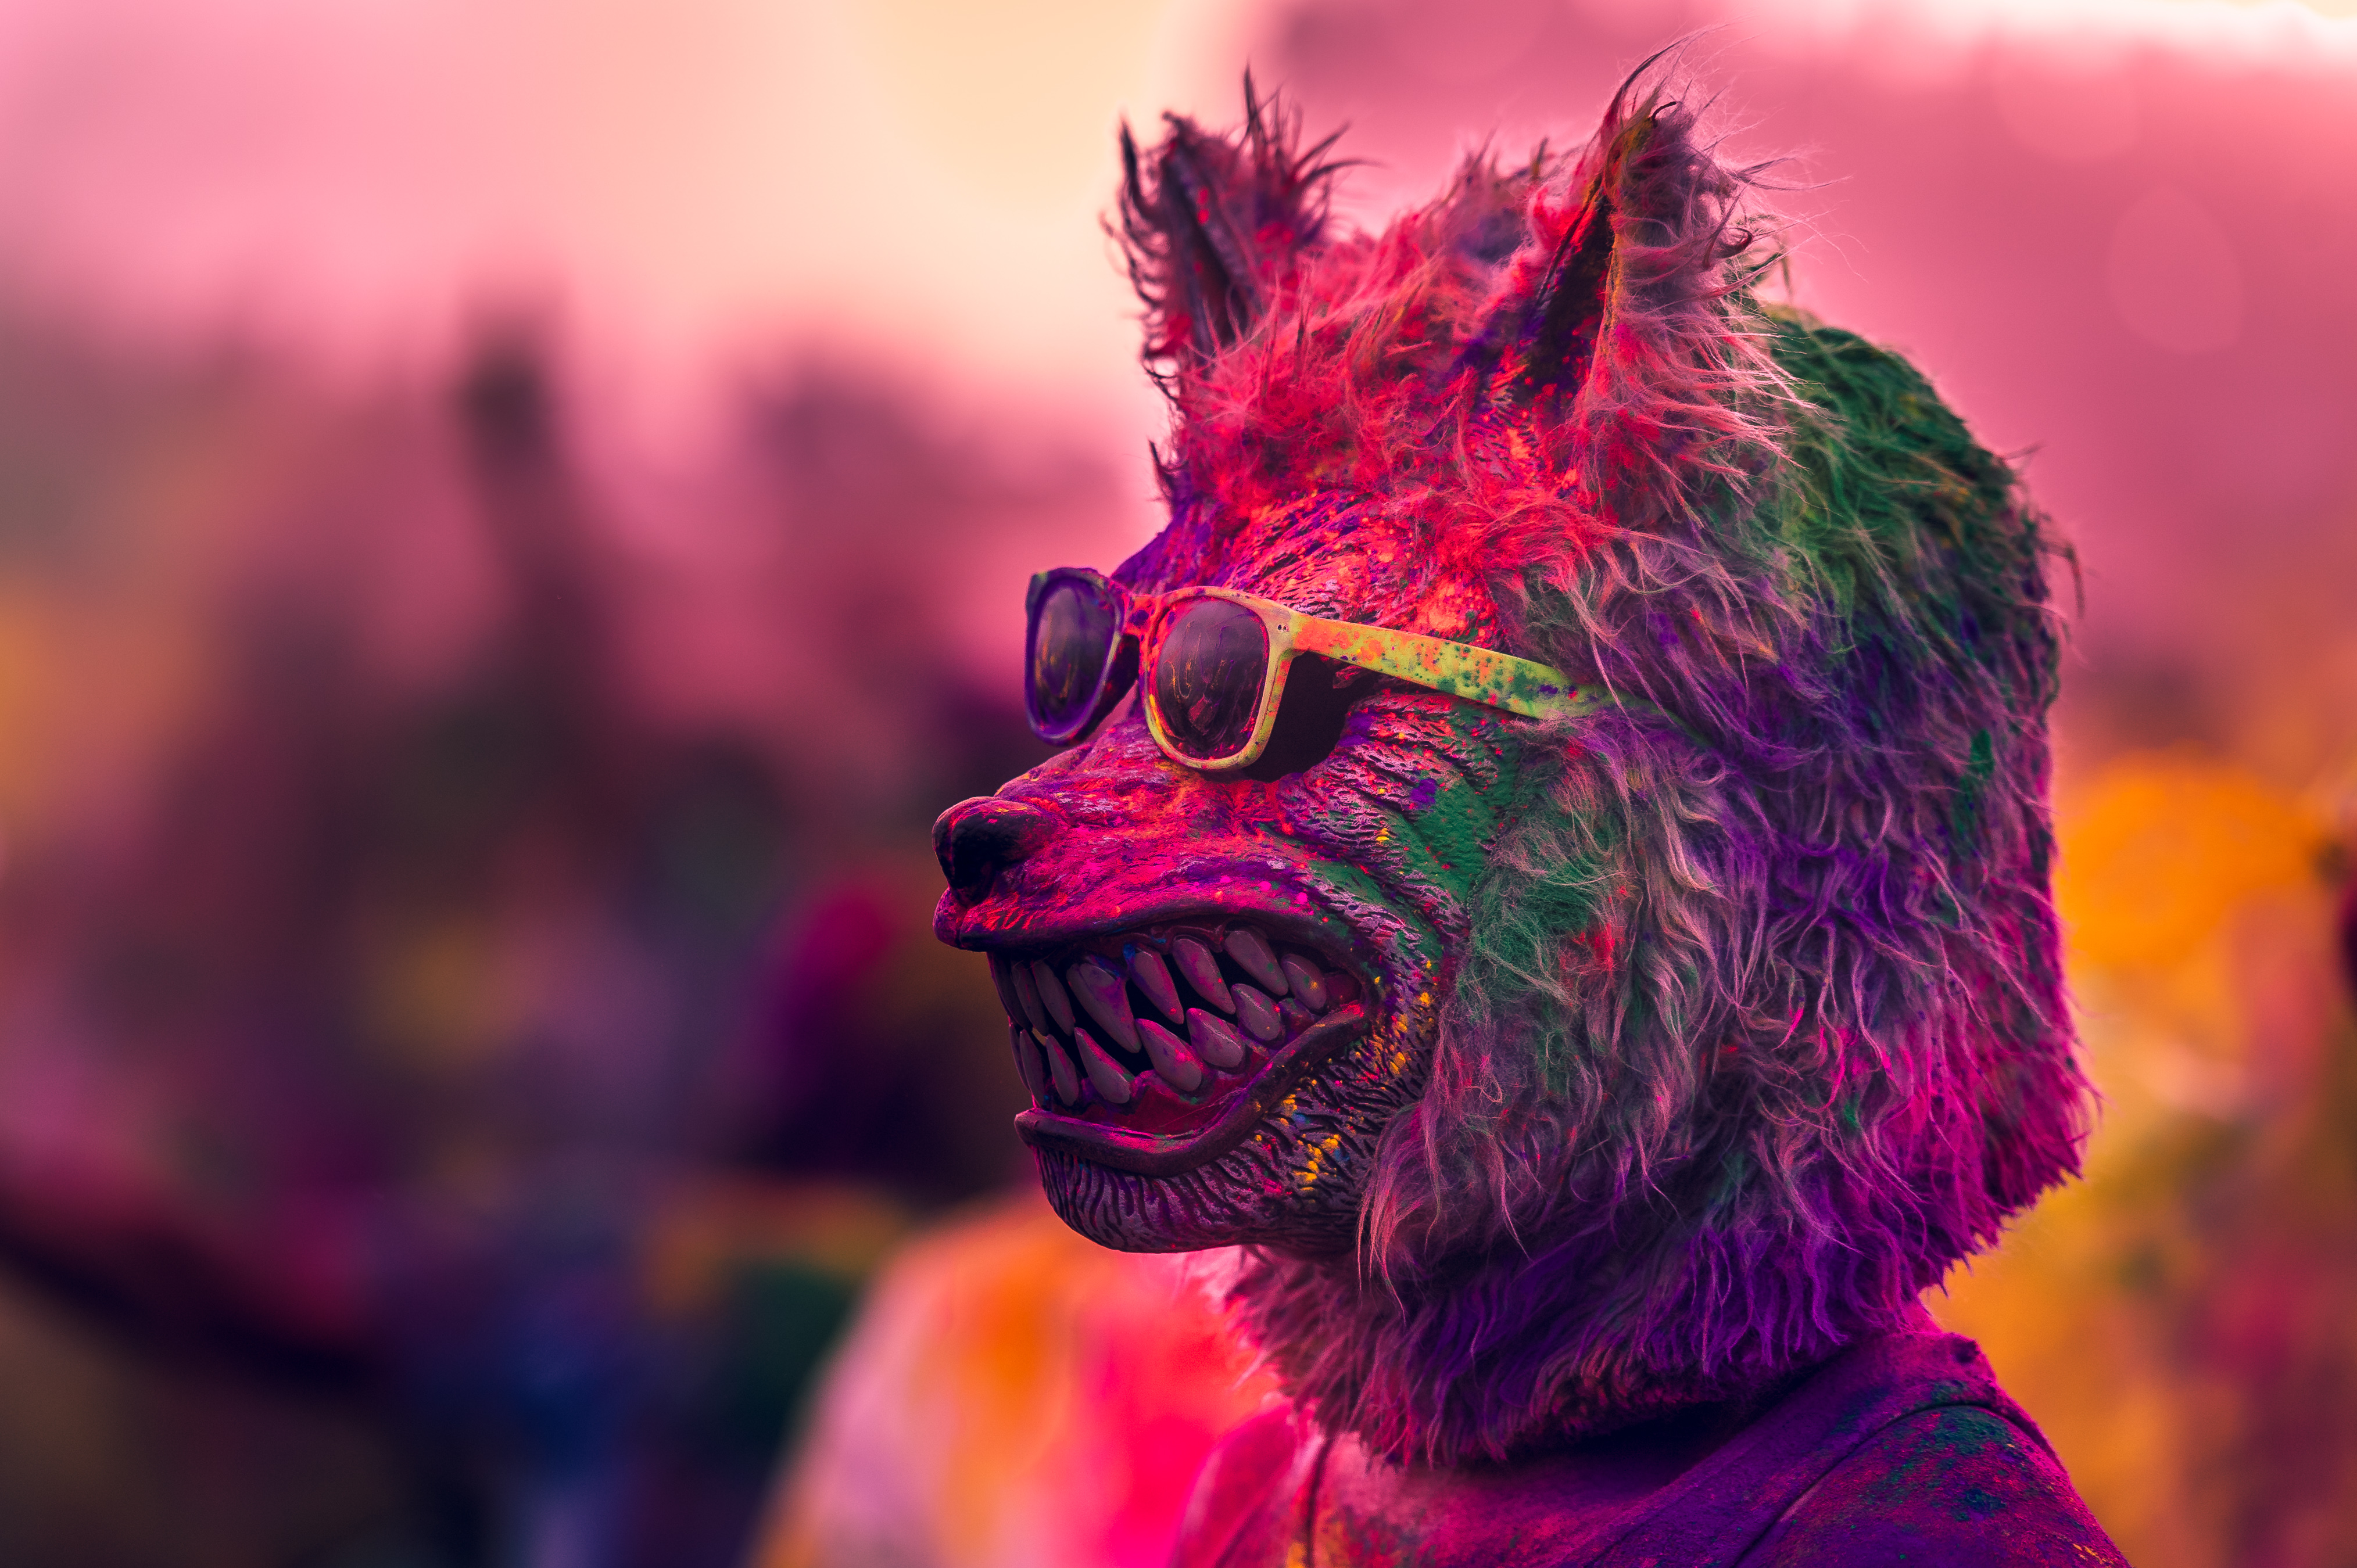
I started out by hitting the "auto" button for tone and started looking at the different white balances. I liked the way fluorescent pops on this photo. Really makes those colors stand out.
I pumped up the Clarity and Vibrance. Turned down the highlights and blacks, then lifted shadows. I used the luminance tool to bring up the blues, greens and reds.
Played around with split toning just see what happened and really liked the mix of orange and blue.
On to sharpening. I probably used to much here but wanted to exaggerate it a little.
I just took the defaults for auto chromatic abberation removal and profile corrections.
I always add just a little vignetting but don't want it noticed.
And probably my favorite effect is dehaze. Usually I turn it up and enjoy the effect but on this I turned it down a little.
I cropped and rotated a little then flipped horizontal.
Last I used a radial filter to lower the brightness of the background.
This next photo is @intrepidphotos
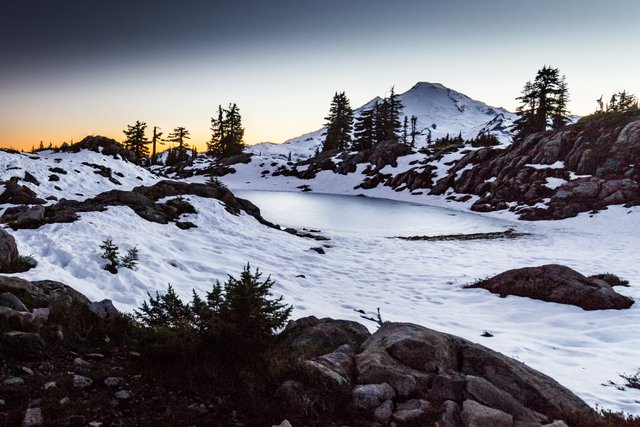
This time the first thing I did is crop. I found a focal point I liked and lined the mountain, horizon, and shrub on the rule of thirds crop grid.
Next I hit auto on tone and cranked up the exposure. Increased the contrast, clarity and vibrance
The person on the horizon was bothering me so removed him/her.
I also used a graduated filter on the sky.
Since I cranked up the exposure it created a lot of noise on the foreground so used a brush to decrease that.
I decreased luminance on the red orange and yellows to make a little more orange visible on the horizon. I also increased the blue which brightened up the landscape a little.
Increased sharpening and noise reduction. I used a little vignetting and increased the dehaze effect.
Next up is @scottshots
First I found I crop that I liked then changed the white balance to fluorescent.
Hit auto again on tone and then pumped up the shadows, clarity and vibrance.
Next I turned down the luminance on orange, blue and purple.
Really cranked up the sharpening, probably too much again. Increased the noise reduction a little.
Used more vignetting than usual and cranked up the dehaze again.
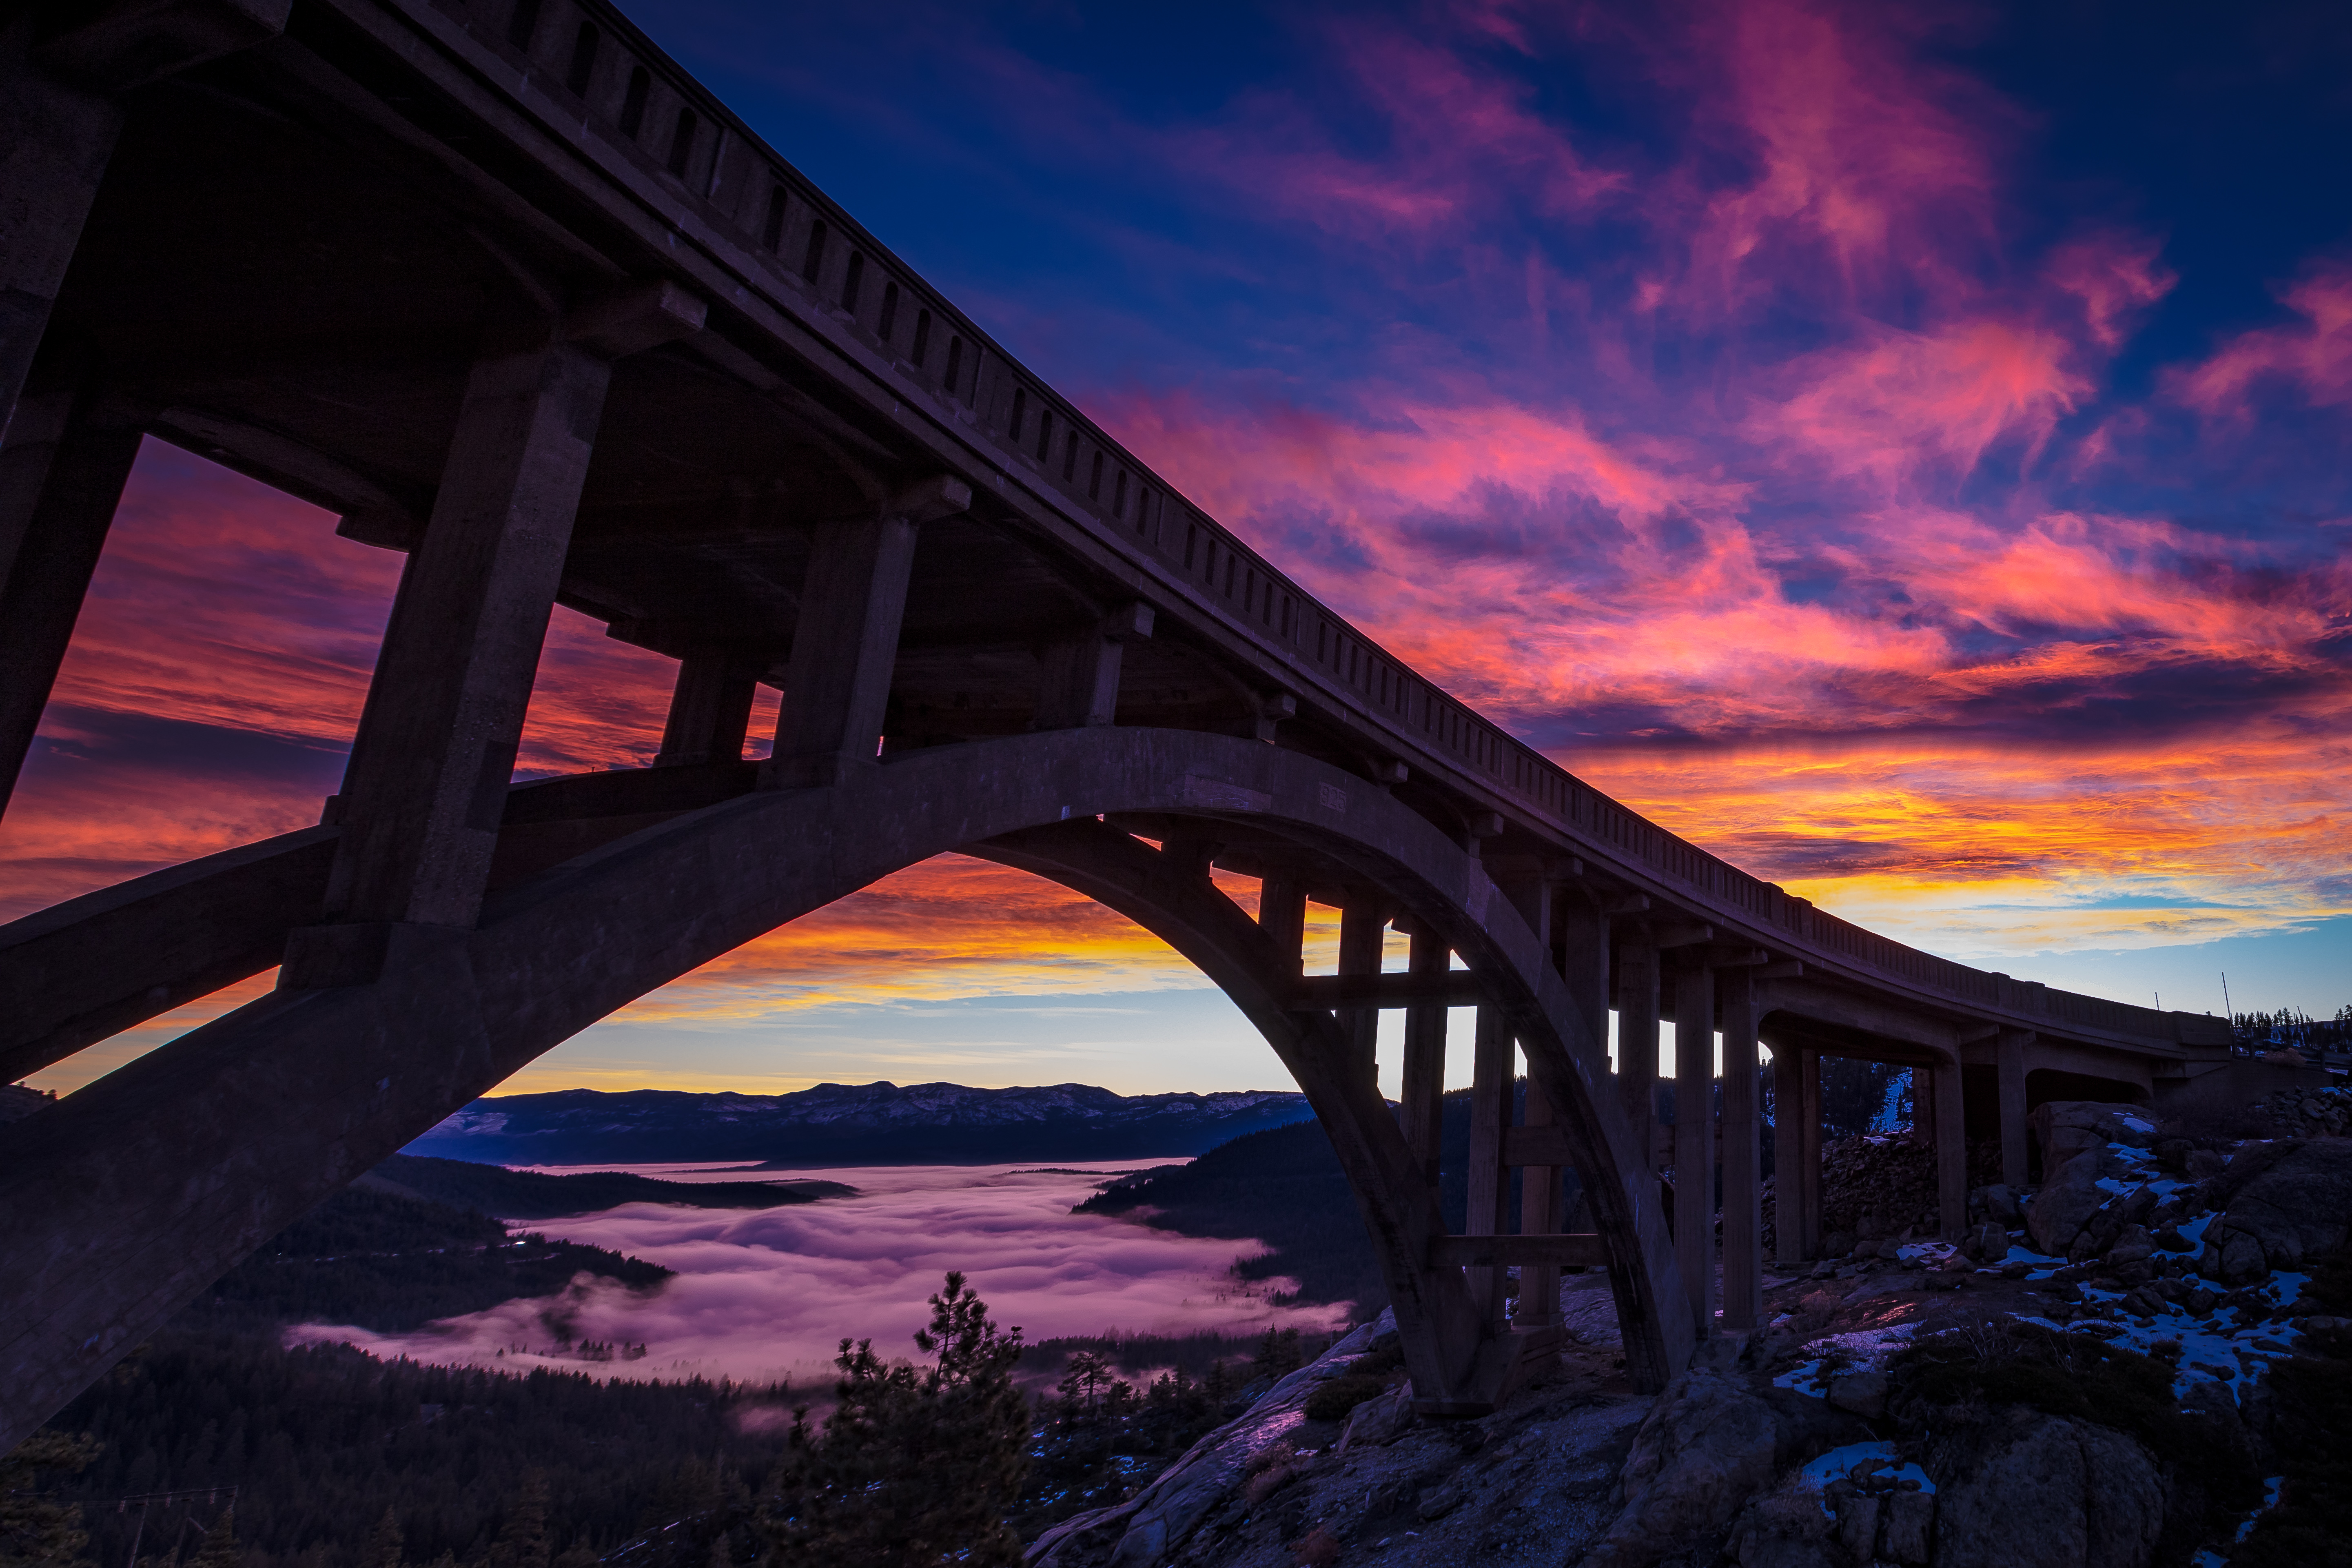
Next up is @caseygrimley's photo.
Started out by resetting the edits, It imported some previous edits with the photo.
I changed up here and increased the dehaze, I was already down at the bottom of the panel and I wanted to see what it would do with the sky.
Next I went ahead and added the vignetting. Then hit auto on the transform tool and enabled profile corrections/remove chromatic aberrations.
Increased the sharpening til I could see it affecting the tree bark then backed it off. Added the noise reduction while I was there.
At this point I could keep going upward I had to go all the way to the top and adjust the exposure. Working backwards was messing with my mind a little.
The dehaze effect had darkened the bottom of the photo so I used a graduated filter from bottom to the horizon to increase the exposure.
At this point I went ahead and cropped to put the horizon at the bottom third of the image.
Last I pumped up the luminance for the blue.
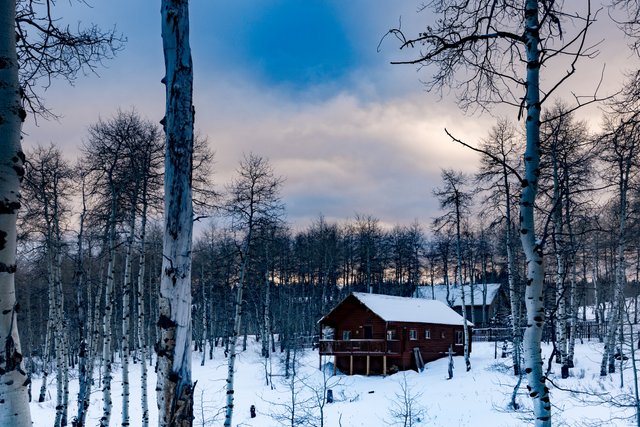
My last edit for the night is @derekkind's. I have stayed up way to late on these!
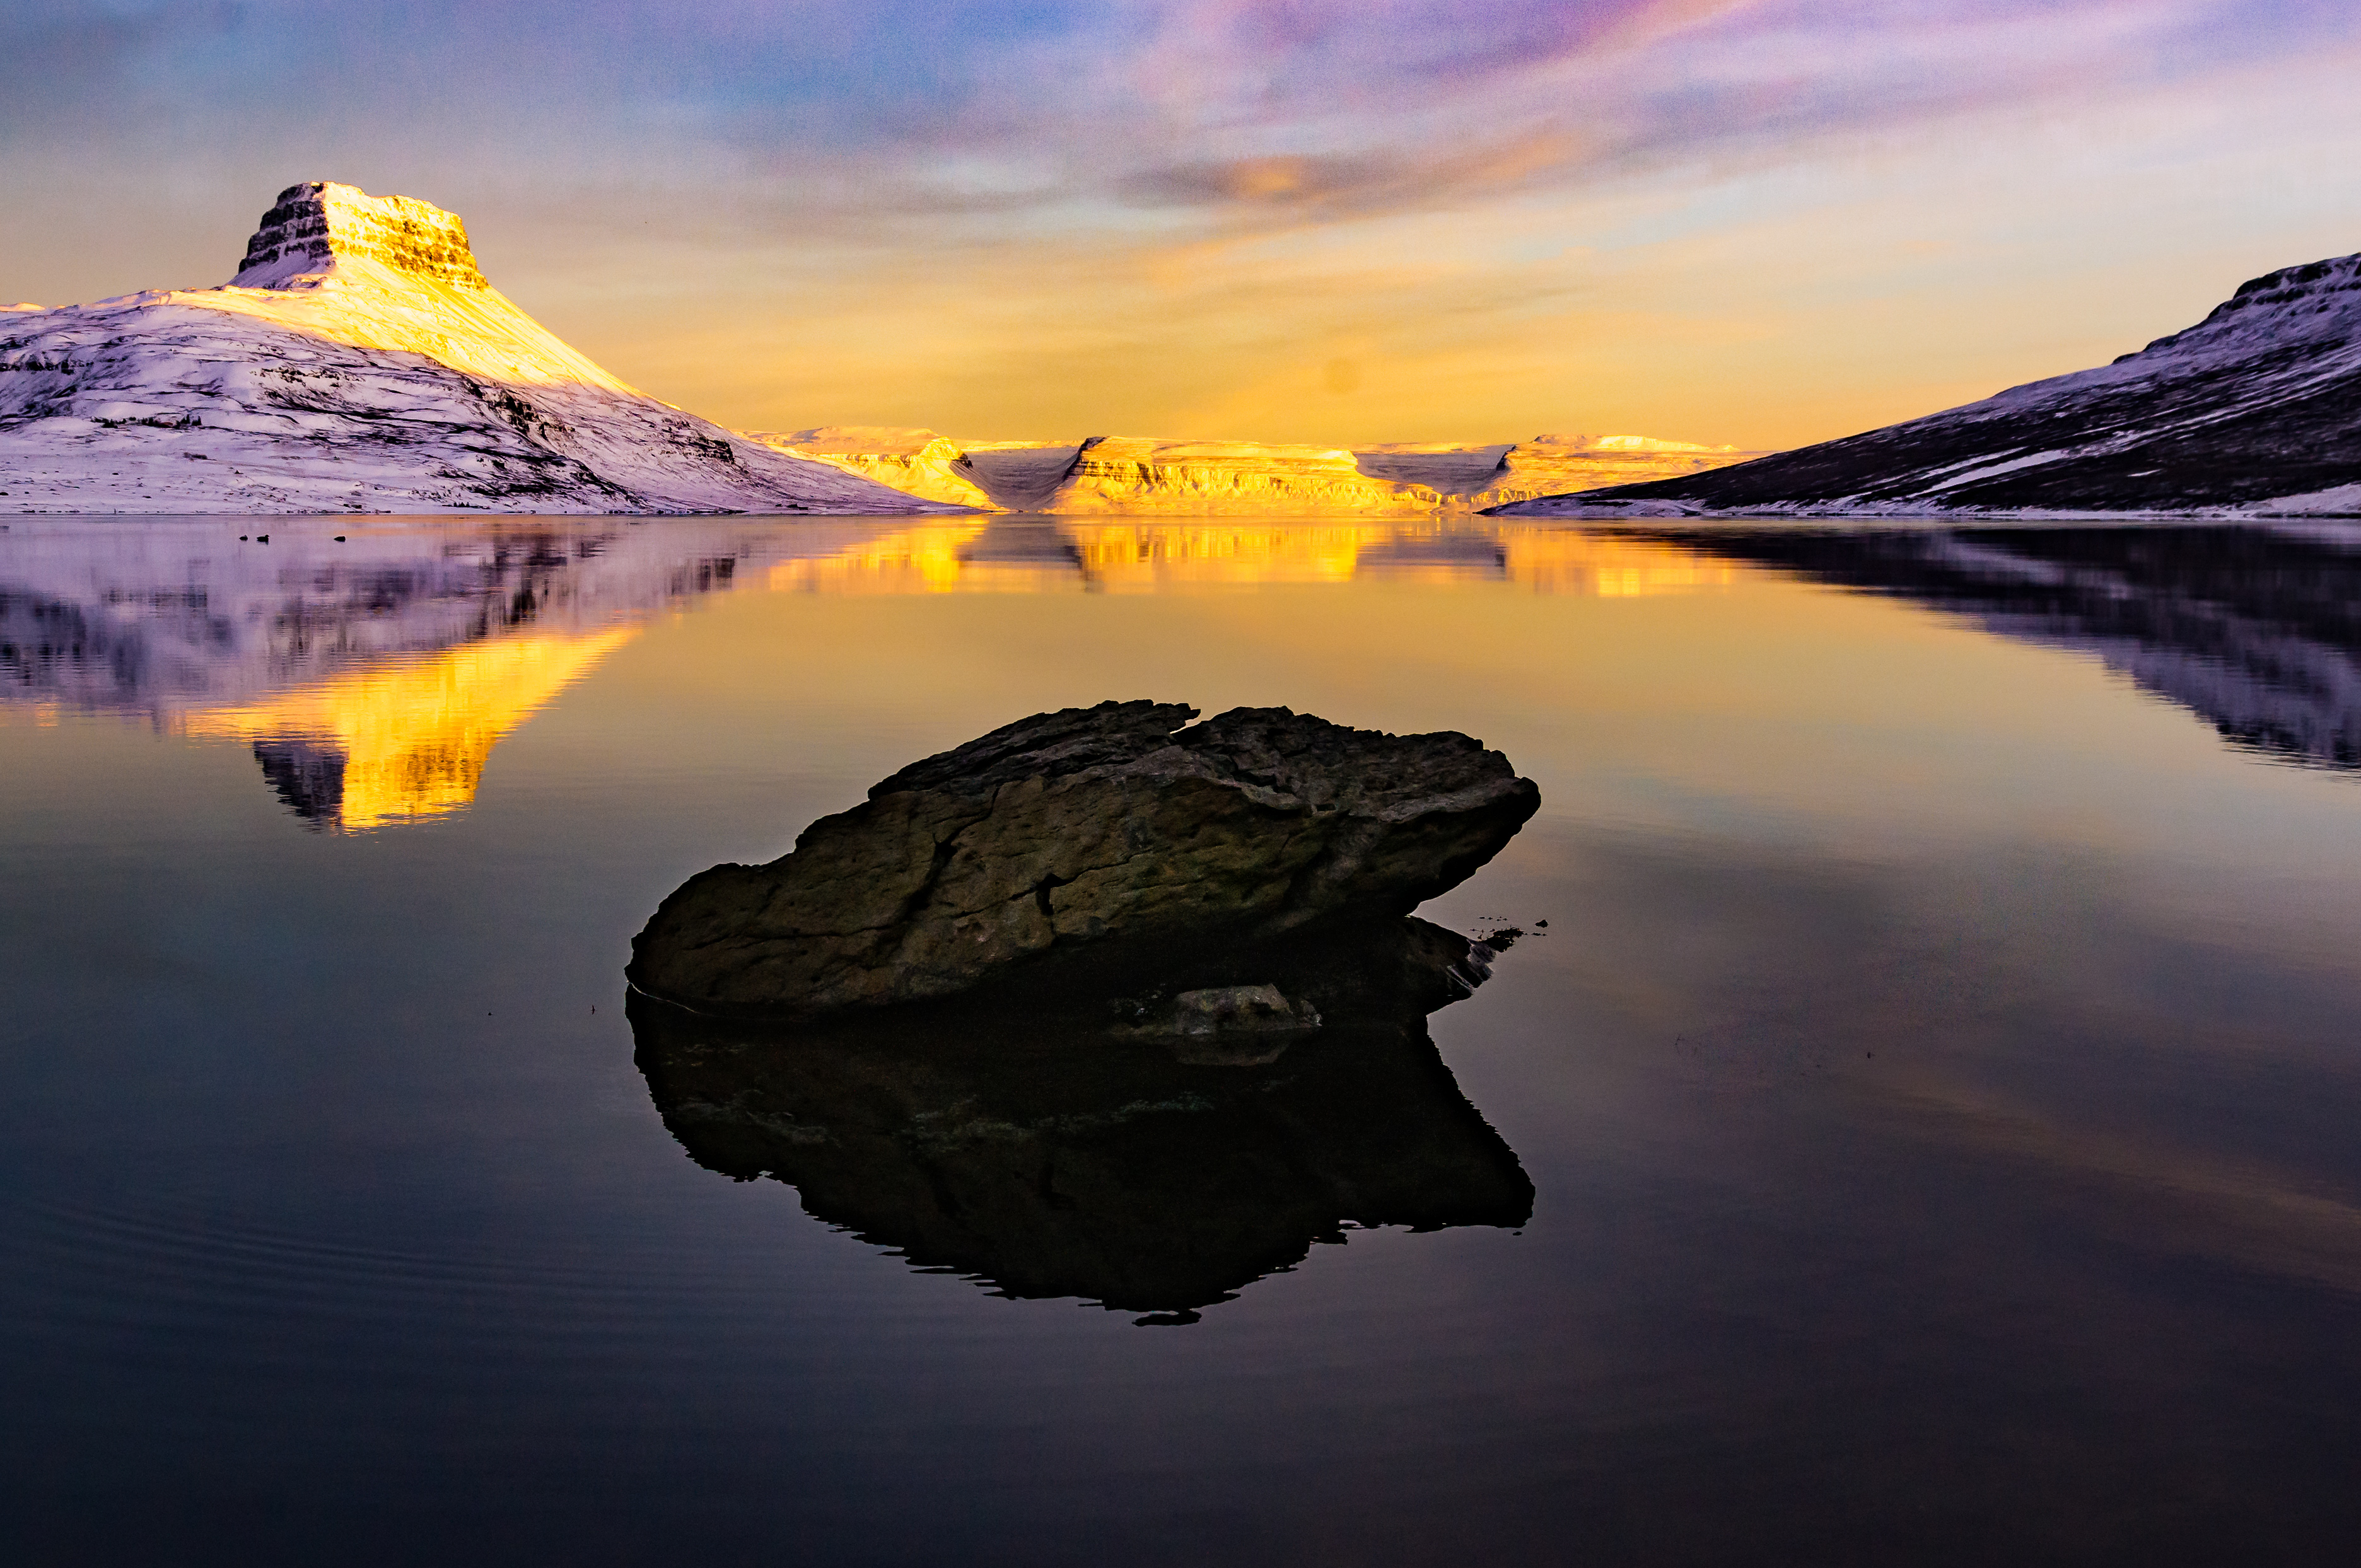
I hit auto on the tone controls and enabled the profile corrects/remove chromatic aberrations to get started, then hit auto on the transforms.
While I was picking a white balance the grass in the water was bugging me so I removed that.
Going back to the tone control I raised everything.
I lowered the luminance on the orange and yellow, and raised purple and magenta. I next went down to the dehaze and cranked it way up.
I increased the sharpening but used a lot of masking. I also used a lot more noise reduction than I normally do.
I then cropped in a little. Last I used a brush on the rock in the foreground and increased the exposure a little for the shadows.
I think I have stayed up way to late on these but I did have a lot fun editing them. Can't wait to see what all the other creative submissions have done with these photos.