The Process of Building a Perspective Illusion

Today I'm going to post a sweet and simple process sequence of how I built up this scene. Without diving too deeply into the personal symbolism I embedded in this photograph, I will say that this photograph is based off of my experiences growing up around my parents' church. If you know how I use perspective illusions as a part of my visual vocabulary, then you might be able to figure out how I feel that most churches are just a facade of a spiritual place, composing no more than a pile of bricks. But I digress!
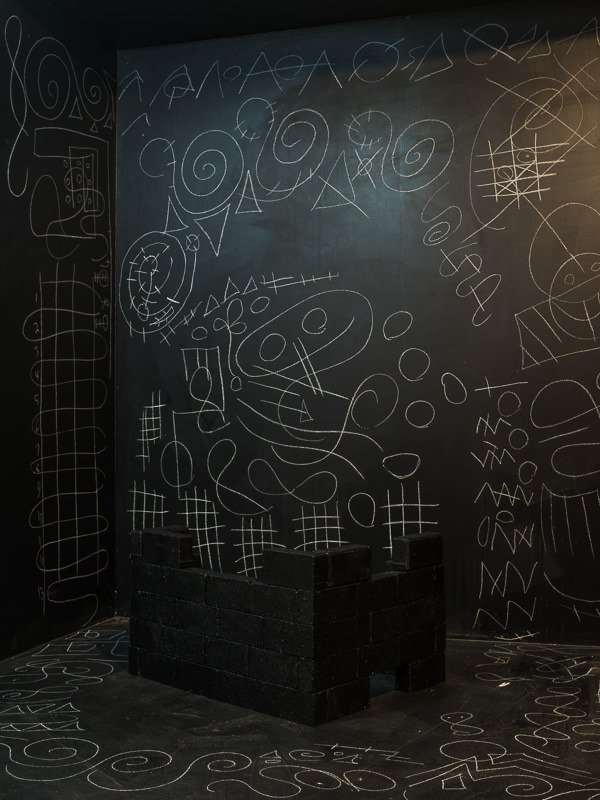
During the first step, I set up my structure of unused bricks, which I had painted in primer and chalkboard paint. I choose the angle and commit to it, and take the first photograph. Then I retire to my room for the evening to begin sketching the composition that will later be drawn onto the stage in chalk. This drawing is something I scan onto the computer, refine, and then superimpose over the photograph I took of the set.
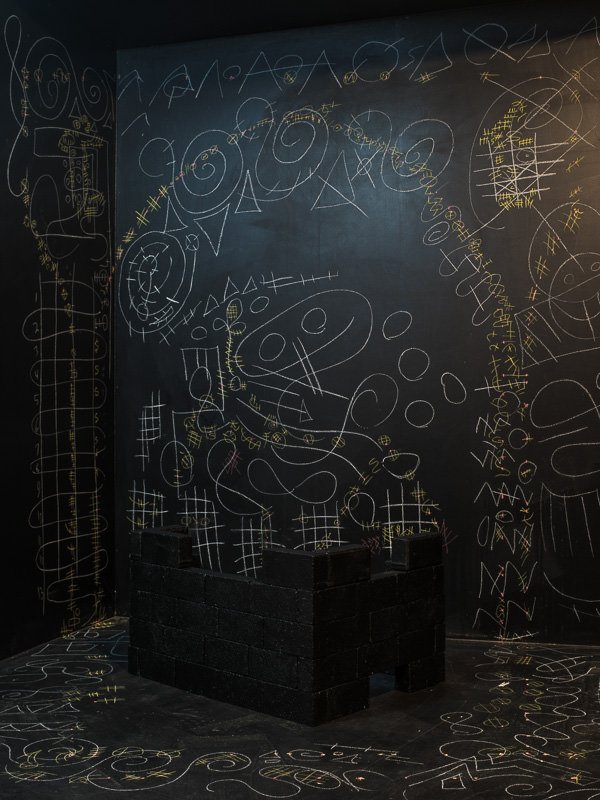
The next step is fun for me, as you can probably tell by the image above, because I get to scribble a bunch of random shapes and patterns onto the floor and walls of the stage. The purpose of this is to get an idea for where the design that I've drawn earlier must be placed in order for the illusion to work out.
This process continues as I hone into the exact location where I will draw my illusion.
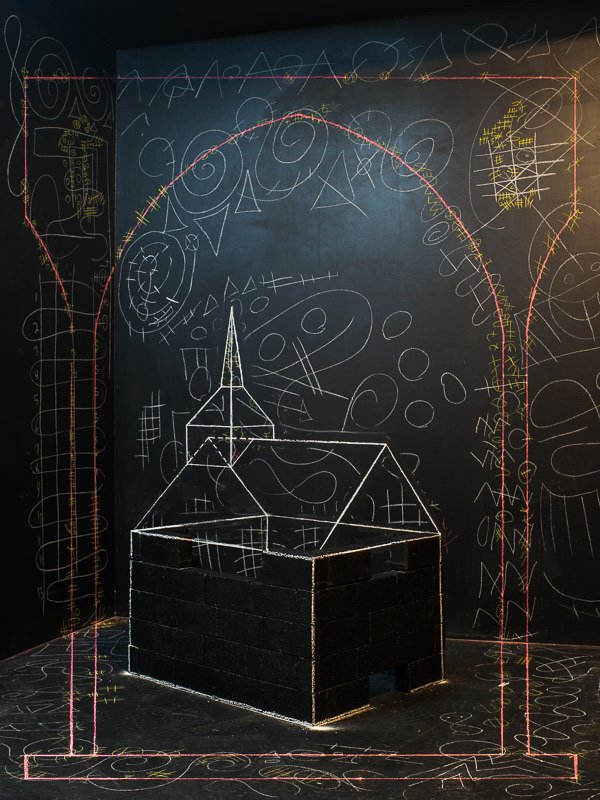
After this, I get to place down painter's tape along the edges of the design. This is probably the least exciting part. It takes numerous pieces of tape which, thankfully, can curve just the slightest bit, but not enough to use one continuous piece of tape. After I've laid the tape down, I can erase all of the preliminary plotting scribbles away.

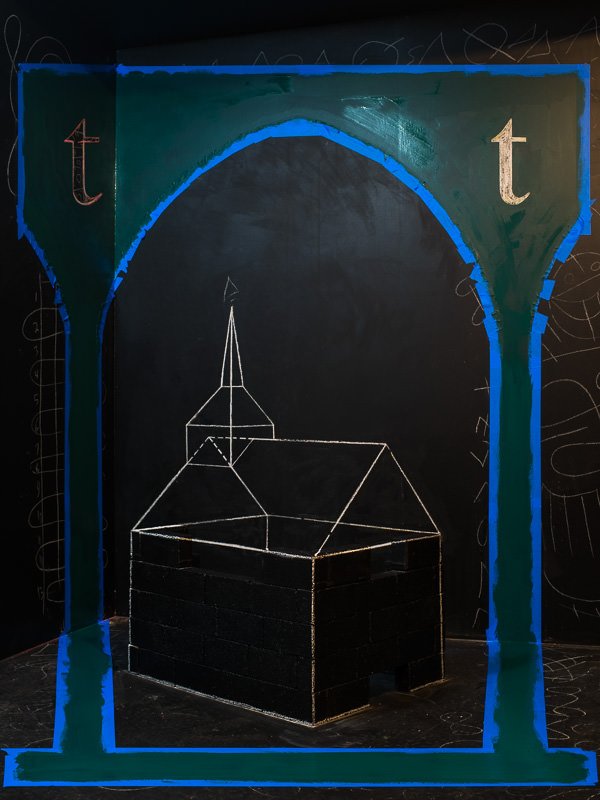
After I've painted my design, I can then move forward to experiment with how to light the photograph. This takes several hours as I try to choose angles that don't reflect a ton of light off the wall. This wouldn't be as much of a problem if I weren't confined to an 8'x 8' x 8' foot stage, and I look forward to the day I can afford a studio to build larger sets. For now, this has to do.
For this image, I chose to place the light about nine feet off the ground, to the right. I couldn't manage to avoid bad lighting within the small enclosure, so I removed the faux ceiling I had installed months earlier (say hello to my garage ceiling!) I then placed a reflector on the ground, to the left of this image. I really loved the way the reflector bounced light onto the bricks, causing them to slightly shimmer. At 51 megapixels, the texture of the bricks are incredibly lush. I also enjoyed how the structure cast a shadow across the left column, in order to partially break the illusion and expose the reality of my perspective illusion.
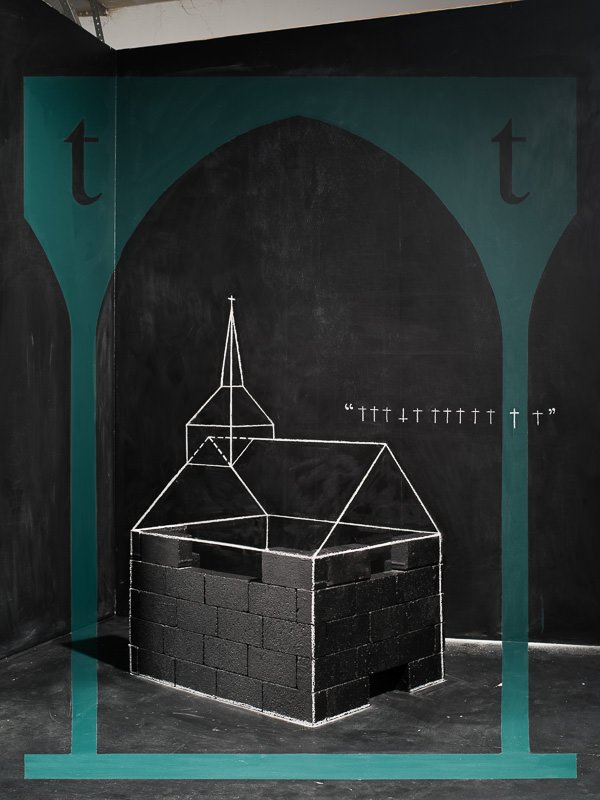
The final step, which you see above, happens when I lay down behind the bricks with a remote shutter release, stick my hand through the opening in the bottom of the structure, and capture the image.
I hope this series of process images give you a better idea for the reality of my work.
Best regards,
John Dykstra
Thank you for the nice insight into your conceptual way of working. Excellent result!
My pleasure!
Wow! The illusion is complete - I love it. I think if this picture was a reflection of me the building would be a school