PARACORD Survival Bracelets Tutorial! ideal for Travel, Adventures. How are they made? @desirenoriega
Hello dear Steemers
I want to tell you that since I was a little girl I learned to make various types of fabrics and knots for bracelets, I have always dedicated myself to costume jewelery and accessories, I currently have an instagram page where I publish and place my creations in sales, so I thought it was interesting to show you and teach them how to make this type of bracelets.
Paracord Survival Bracelet
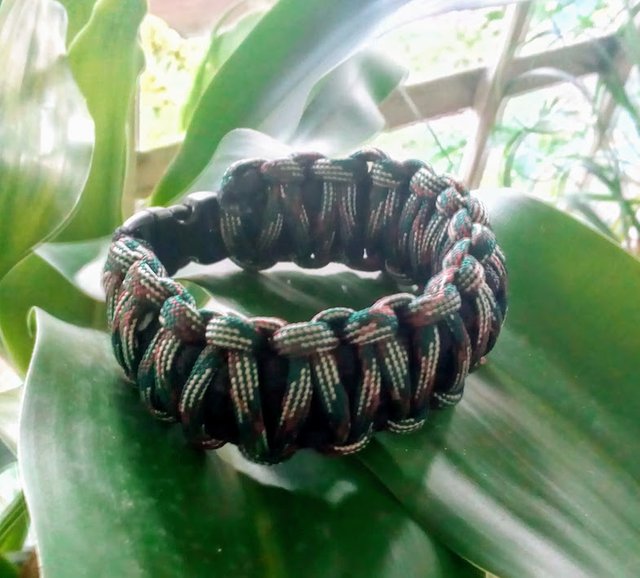
For all those lovers of adventure and survival, this practical bracelet gives us the possibility of carrying in one piece two components:
- Rope: It helps us because in certain situations we will get out of a hurry because at some point you can find yourself in situations where a rope is indispensable, whether to fix an object, make an emergency tourniquet, make traps, shelters among other things.
- Brooch: It is super useful as they contain a spark initiator to light the fire and includes a whistle, to be equipped in any circumstance that arises.
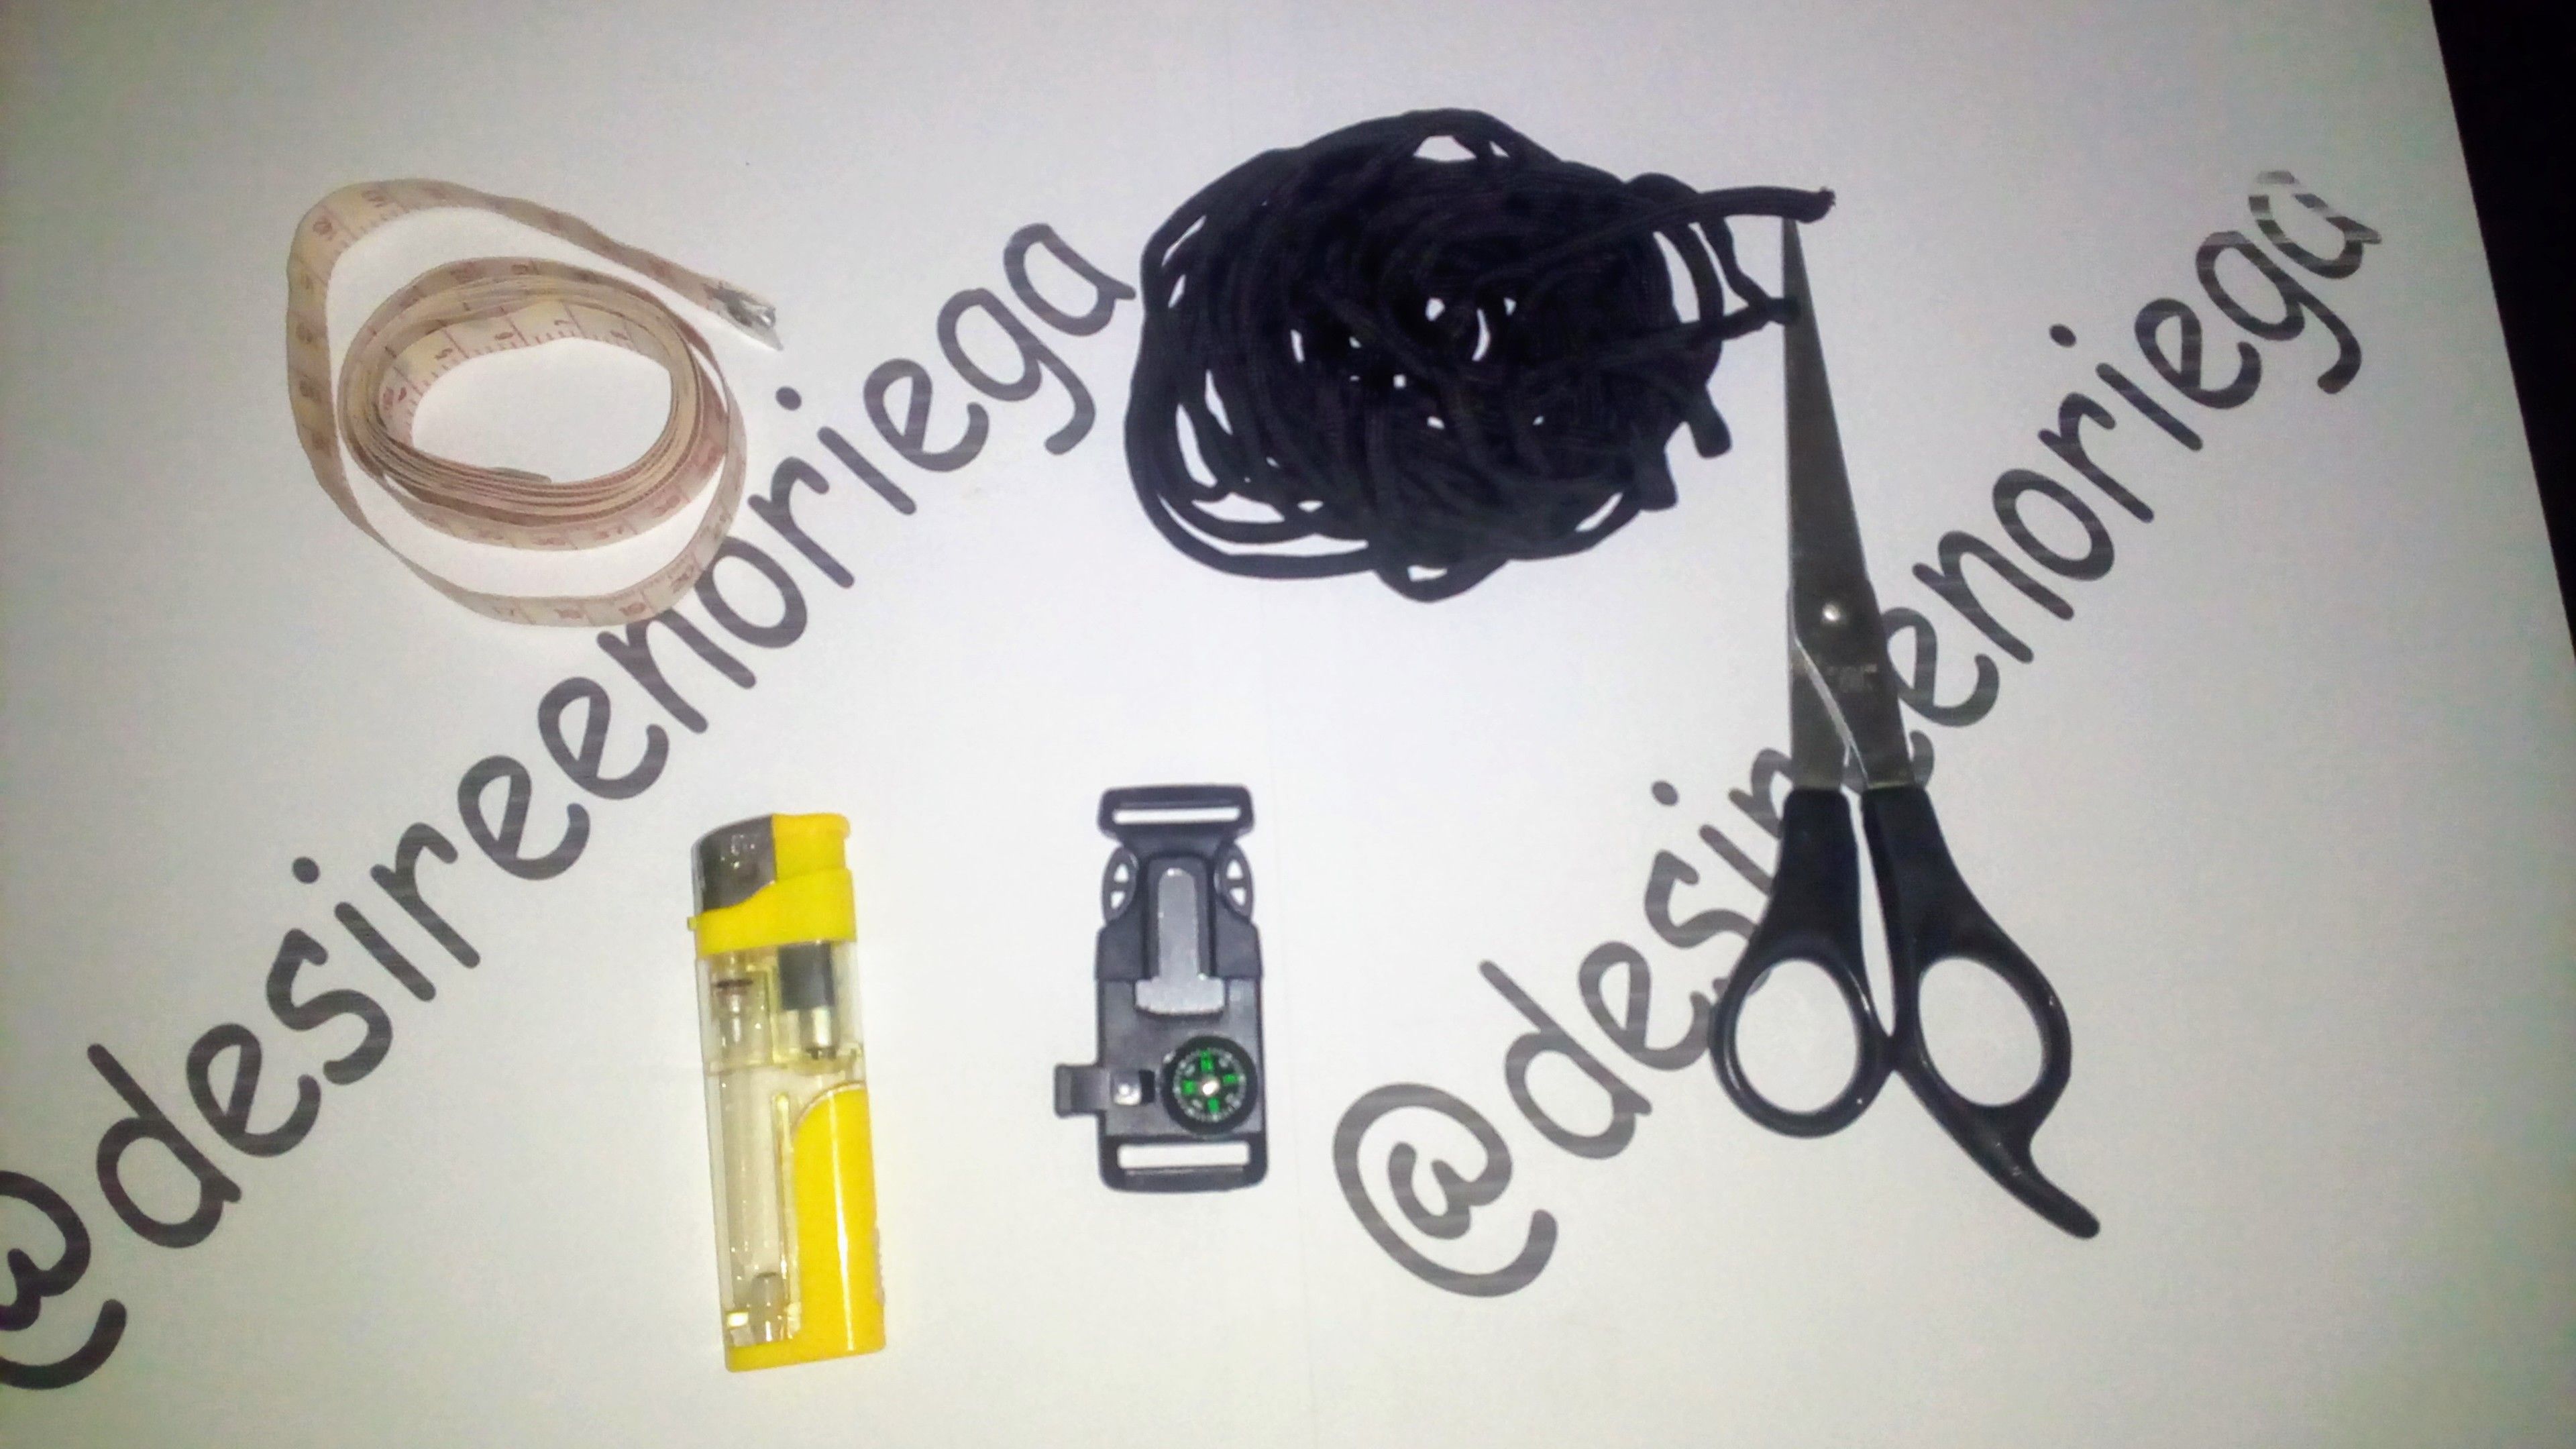
Then the materials that we will need are:
- 4 meters of Paracord rope 550 of the color of your preference
- Brooch with flint and whistle.
- Scissors.
- Measuring tape.
- Yesquero or Lighter.
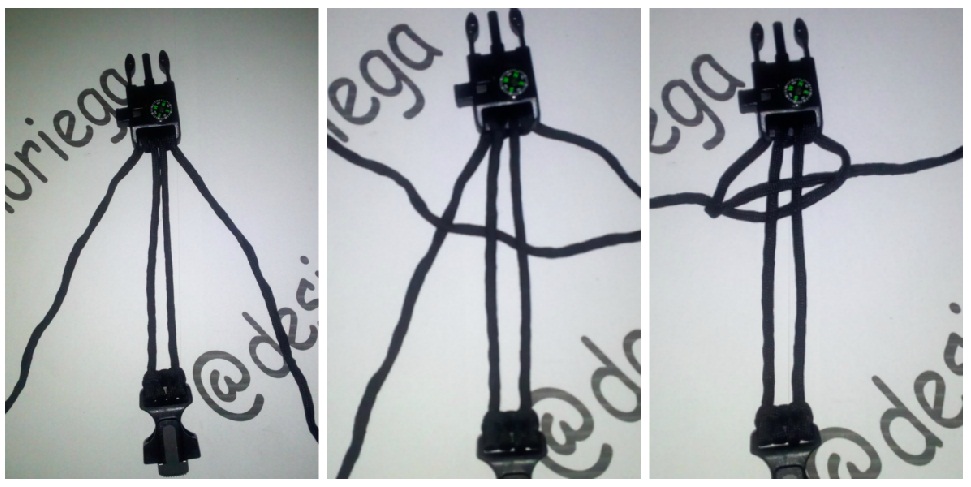
Step 1 Measure the wrist.
-Place the tape measure on your wrist and take note of the exact centimeters.
Step 2 Find the center of the brooch
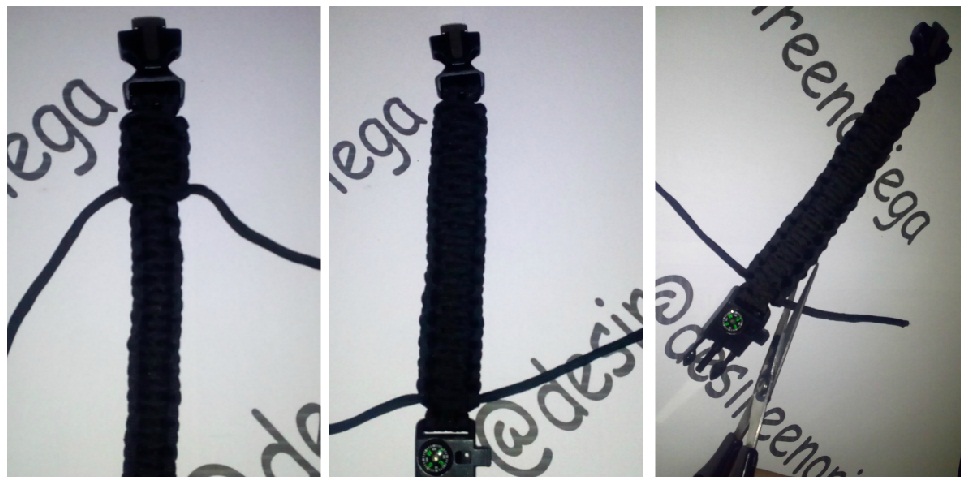
-We take the 4 meters of paracord rope and bend it in half, a matter of which there are two 2 meter ropes. (do not cut yet) then the two tips are introduced in the center of the brooch until you reach the center of the rope, we passed the tips and we have a simple knot as seen in the image.
Step 3 Length of the bracelet.
-Before tying the other end of the brooch back to measure the length of the bracelet on your wrist, you should stay well and not too fair.

Step 4 Start the fabric
-For this step we will make a braid using the cobra knot or flat knot, consisting of This knot should be repeated indefinitely until it covers the bracelet in its entirety. Remember to exert the same pressure on all the knots so that they are uniform and well tensed.
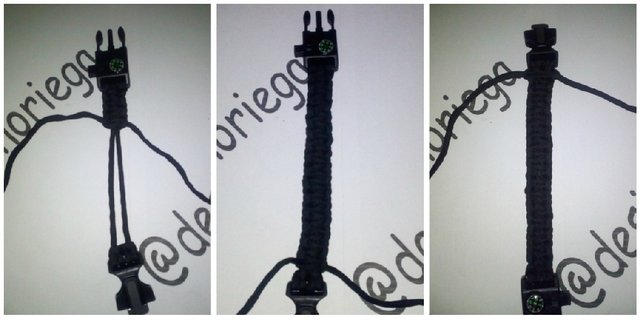
I leave a video made by me so you can observe the times you need as the knot is made.
Step 5 Cut the excesses
- Since we finished making the fabric in the bracelet we must cut the excess of rope with the scissors
Step 6 finish the bracelet
-In this step use the lighter to burn the tips and avoid fraying the rope.
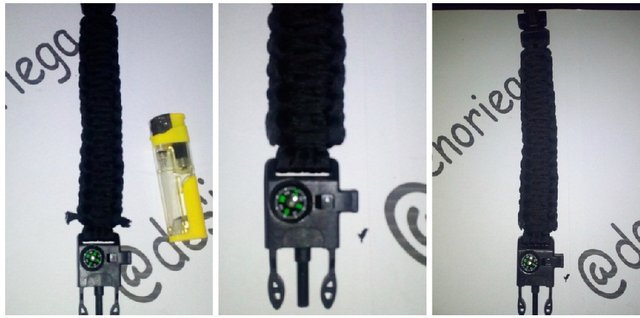
We are ready!
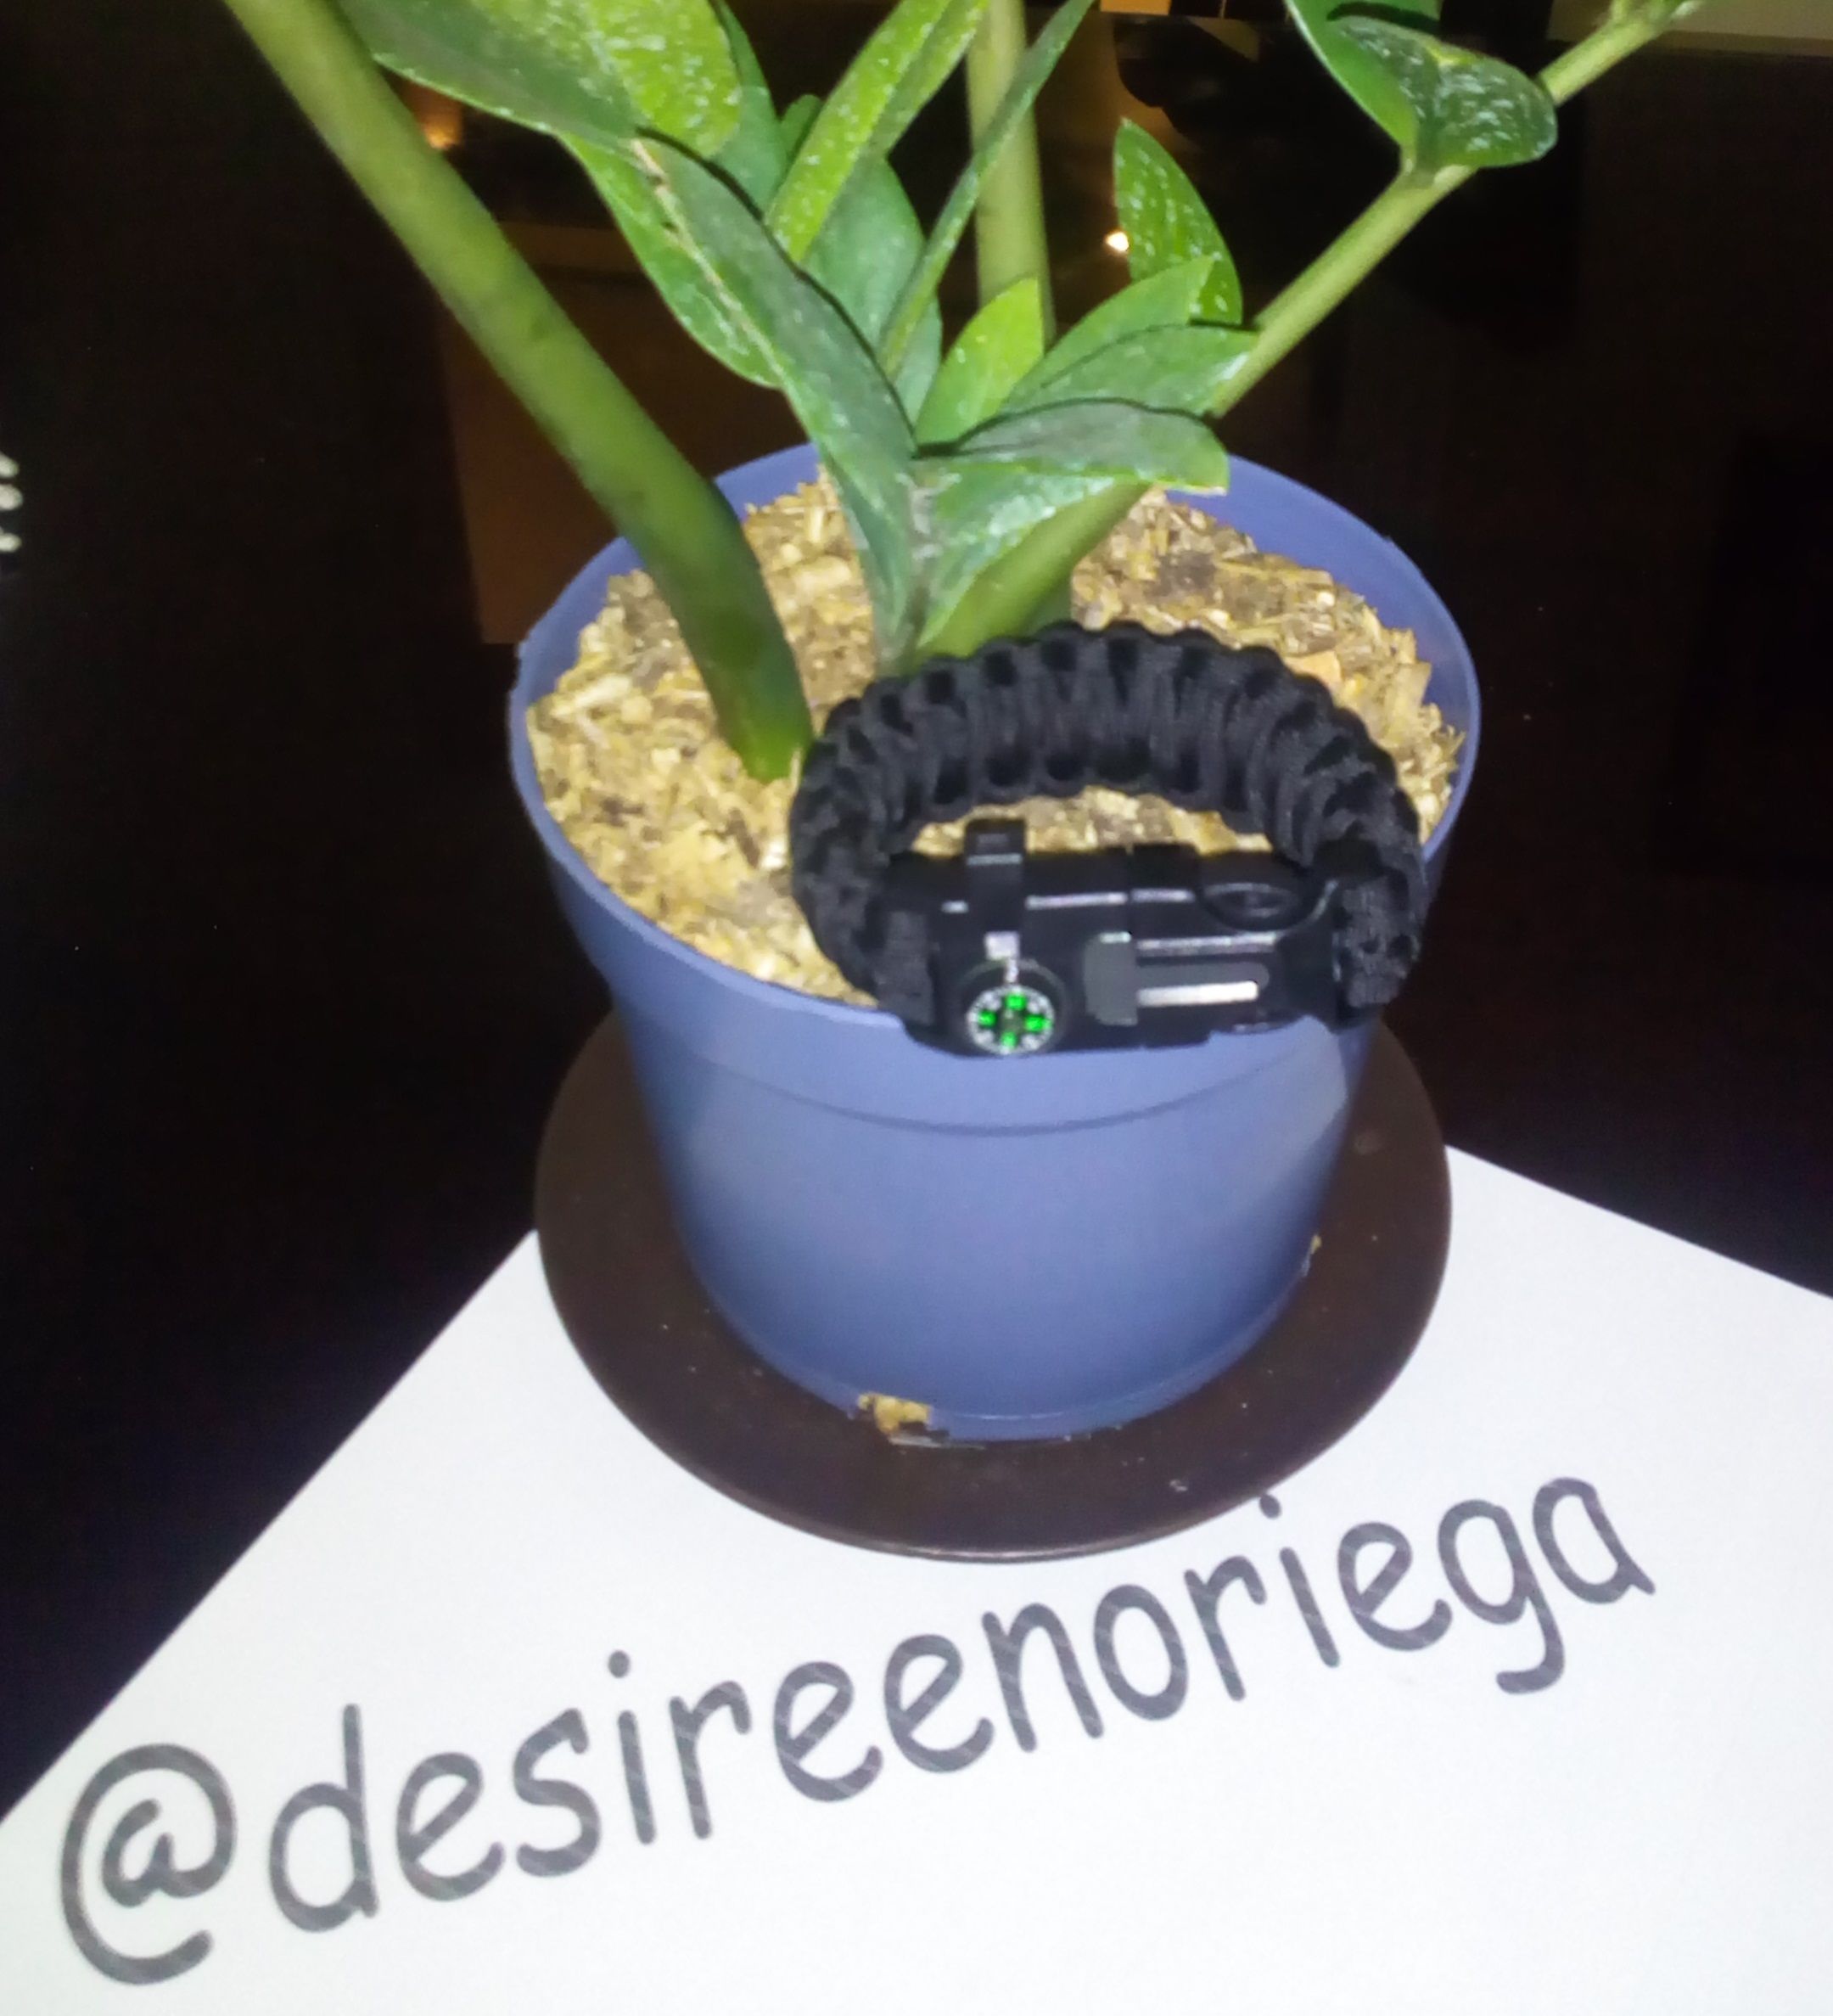
As you may have noticed you can make your own survival bracelet in a few simple steps, you only need to have knowledge in knots and if not, it is a good time for you to practice them.
I hope you liked this little tutorial, I did it with a lot of love!
** Click on the button and follow me on my instagram page if you want to see more paracord models and accessories made by me **

good post pryty girl