Adventures in Furniture Repair
Want a Challenge? Try repairing particle board!
This was my second attempt at repairing and repainting a piece of furniture. I found this little nightstand on the side of the road and thought that I could rejuvenate it. It had the wobbles, unsecure, and ready to topple in on itself. The old faux veneer was bubbled and peeling. The handles on the drawers were ugly, mismatched, and broken. Worst off all was the missing broken pieces of particle board.
Wood glue can be used to perform miracles. I completely disassembled this piece, all the cheap fasteners and tiny screws made me question if the original manufacturer wanted this nightstand to withstand the test of time. Every spot that one piece of board was going to touch another board had glue applied to it. Waiting is the hardest part, but I took the time to figure out how the hell to fix the cracks and missing chunks.
Caulk? No.
More glue? I don't think so.
Bondo? There's my ticket.
I had some experience with the substance so I gave it my best. I was able to press it into the cracks and reform the missing chunks. The hardest part was sanding and keeping the form. I screwed up with the bondo, and I'm happy I fudged up the lines and forms because I'll remember for the next time. It turned out decent, It looked much better than before.
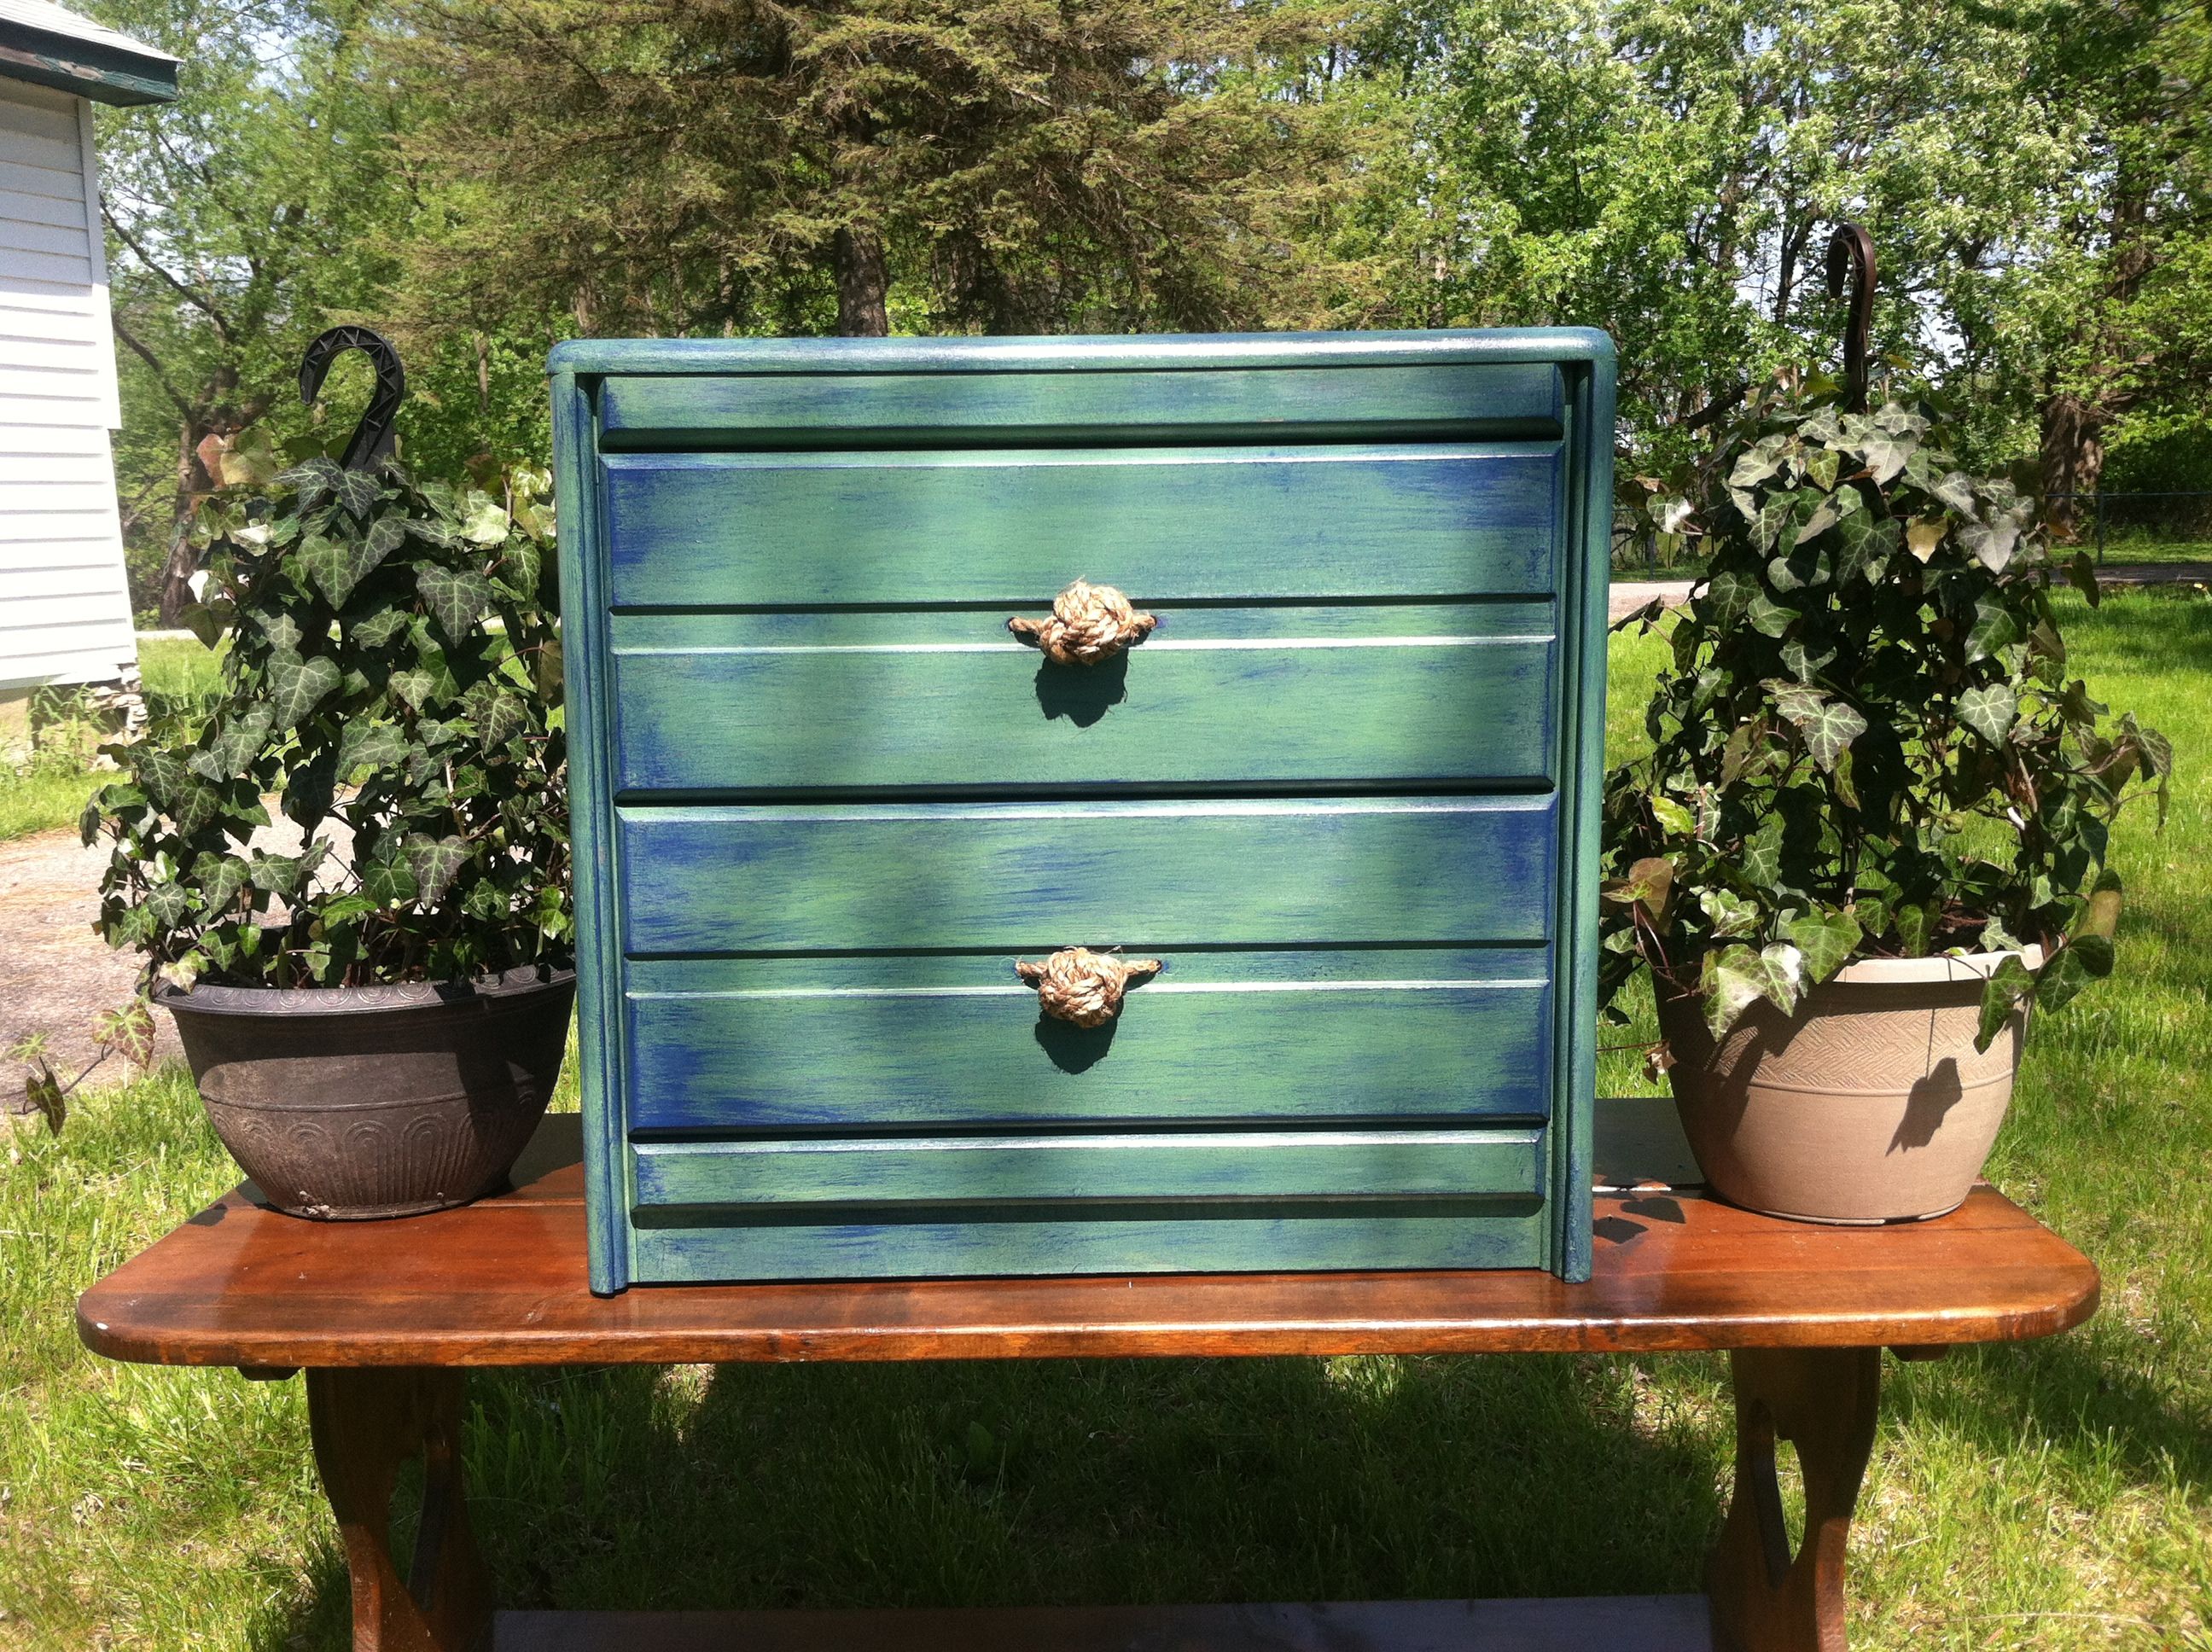
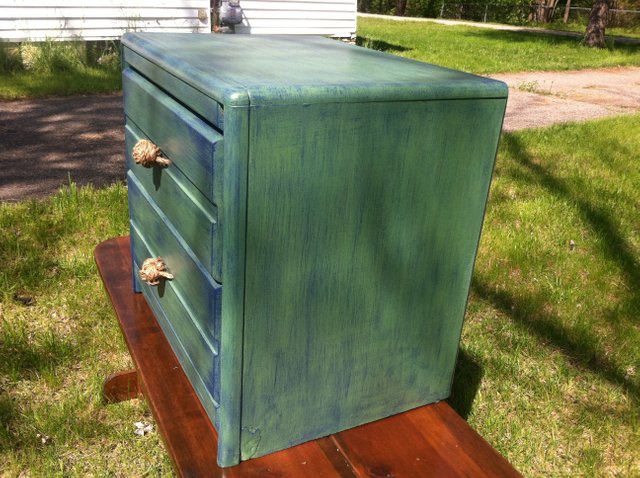
I assembled everything, it was sturdy once again although I doubt it was ever this sturdy. I began sanding off the junkie looking sheeting posing as veneer. This exposed the particle board underneath that was ready absorb any moisture like a sponge at a Grateful Dead concert. I needed something different to seal this board and cover the horrid texture. Acrylic latex paint mixed with a little bit of water and plaster of paris created a beautiful barrier of seafoam green.
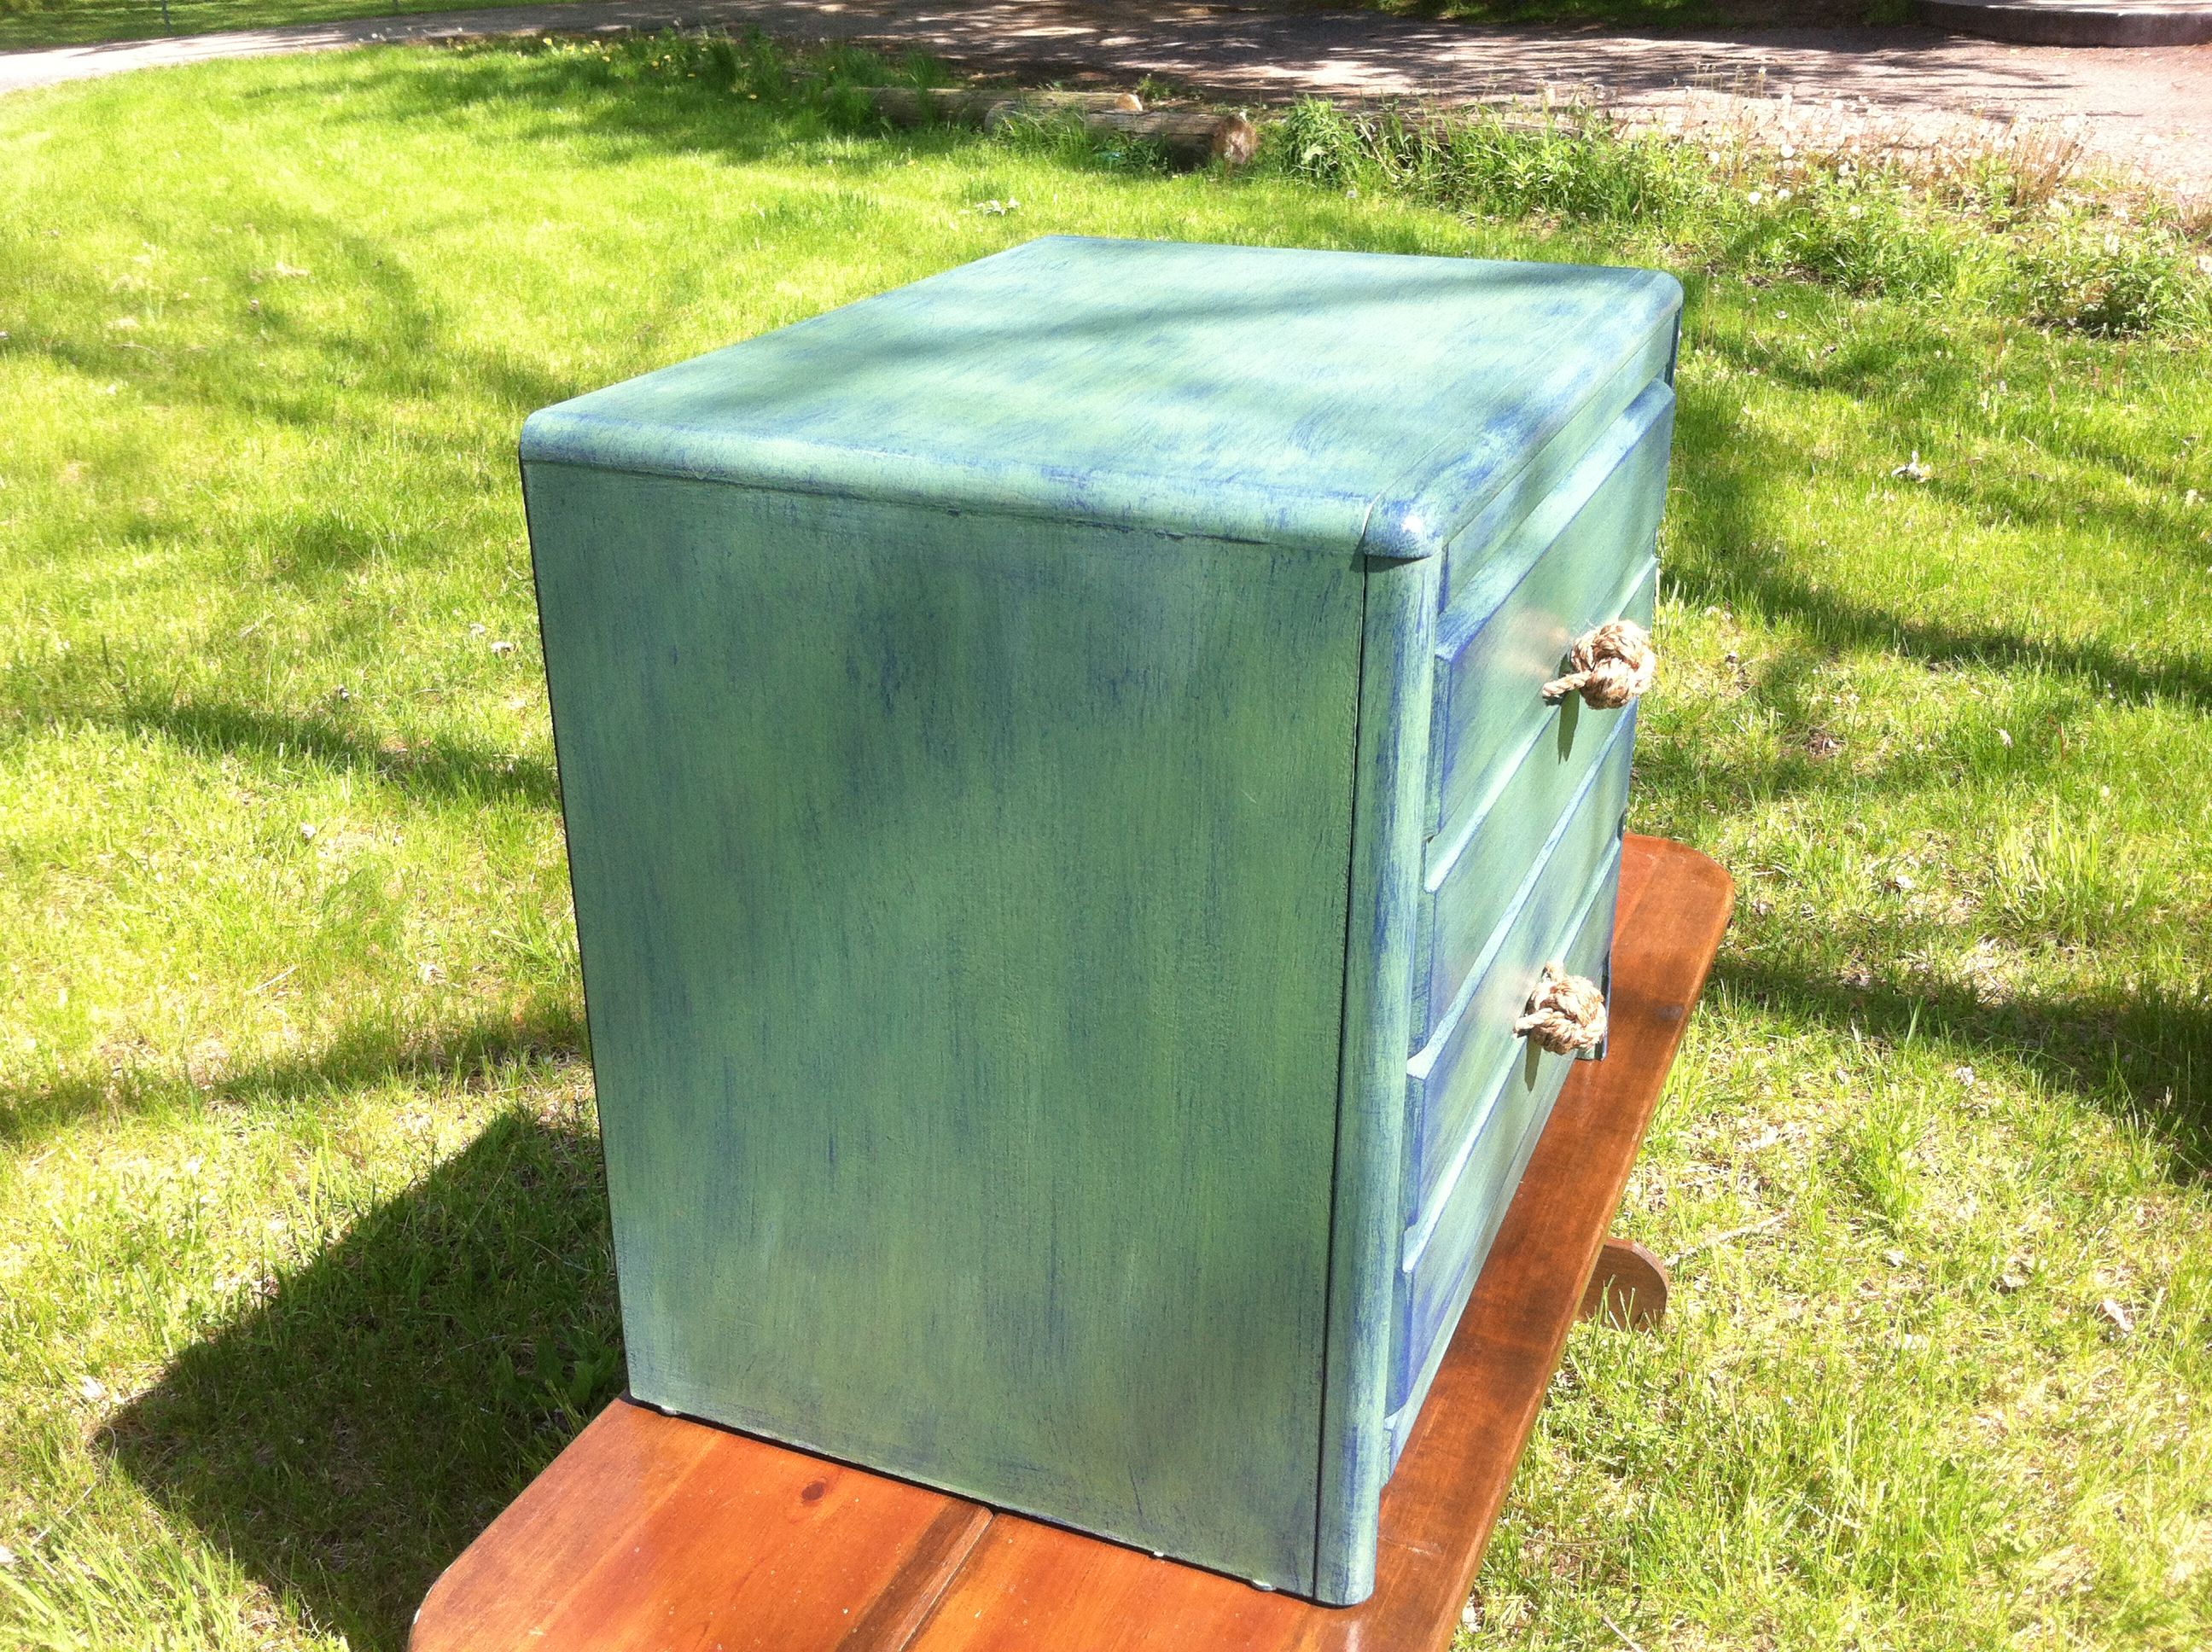
There was too much negative space, not a lot was going on aside from the less than perfect bondo work. I wanted to take a whirl at dry brushing. Id never attempted it but I loved the various results and how each color complimented one another. I bought a quart of dark blue paint and found that I had much more than I needed. It took a light hand to produce the results I wanted, I was heavy handed at first before I got the hang of it.
God, the handles were awful, a nasty brown color with a fake brass finish. I needed something that would compliment the color scheme. Monkey fists! I had some rope laying around the garage and a willingness to learn to tie a new knot. Practice, practice, cut off circulation in a few fingers, practice. I had the finishing touch that made the nautical colors pop.
I learned some more tricks with this project: Dry brushing, bondo on wood, knot tying, and learning to leave the particle board on the side of the road. I still had fun doing it, and I happily screwed up once again.
Wow, beautiful work! :) Making knots for handles is a cool idea and they fit in perfectly. Great choice of colours as well!
Thank you. I always have a hard time choosing colors, I find myself unsure of them until the clearcoat dries.
Congratulations @aceofthegrove! You have completed some achievement on Steemit and have been rewarded with new badge(s) :
Click on any badge to view your own Board of Honor on SteemitBoard.
For more information about SteemitBoard, click here
If you no longer want to receive notifications, reply to this comment with the word
STOPHey! I have some furniture refurbish posts a few months back. I may need to do another soon!