Origami Tutorial for @kristyglas
@Kristyglas asked for a tutorial on some fun origami. I have chosen Joseph Hwang's unit from his bouncy modular ball to show something fun and practical.
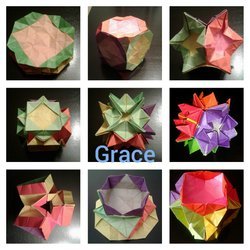
Joseph Hwang's origami Trivet/Flexagon.

The origami bouncy modular ball calls for 30 pieces of fairly stiff paper and is full of elegant swirls, circles and stars. The video tutorial can be found here:
As often happens, once I started folding the units I started playing with how they connect. The origami trivet using only six units was the result.
I have tested this model and six pieces of 15cm x 15cm paper can hold at least 3kg and while I probably wouldn't test it with a pot off the stove. I have been using it for my hot cups of tea and the paper has not deformed or held onto the heat.
I have asked permission to create a pictorial tutorial of this unit and it has been kindly granted.
Please note that the pictorial tutorial does not follow the video tutorial step by step as I wasn't able to show which arm of the model I was working on.

- Start with the colour side face down.
- Fold corner to corner in both directions.
- Turn the paper over and fold edge to edge. Rotate 90 degrees and repeat.
- Collapse into the waterbomb base colour side out.
- Fold the tip down to bottom edge
- Fold the tip back on itself.

- Mountain fold the model in half to concertina the model.
- Unfold the model and colour side up fold two squares in on just one side
- Rotate 90 degrees and repeat creating a two by two square in one corner. Repeat on the opposite corner.

- Fold each corner in two square lengths and unfold.
- Draw an A in the left top square of your two by two square corners.
- Turn over and draw a B in the left bottom square of your two by two square corners.
Don't worry you won't be able to see the letters on the final unit.
- Pinch the two edges together so that you can still see your A
- Bring the right hand edge around so that your B covers your A.
- Fold the half house formed back around the corner.
- Fold the top half of the house down.
- Repeat on opposite corner.
- Collapse unit into a waterbomb sink fold. (Mountain fold then valley fold the concentric squares in the middle.) The video shows this step quite nicely.
- Fold the pointy corner up 90 degrees counter clockwise.
- Fold tip in half back on itself.
- Repeat on opposite arm.
Fold six units and check that they all look the same. Like a lot of modular units this unit has a left formation and a right formation. As along as all the units 'face' the same way you will be fine.
Construction
- Open up the blunt arm and bring the half house back around extending the arm. ( Do not draw the arrows as they will be visible on your final model.)
- Insert the folded down tip into the revealed ledge of the second unit.
- Slide across until it is behind the half house.
- Bend the half house back behind.
- Fold the top of the house back down locking the two models together.
- Repeat on adjacent arm.
Fold all six units together in this way.
Corrected construction can be found here
Congratulations you have made your own origami trivet.
This has also been crossposted on whaleshares under my name @grace
It is a pretty fun and neat looking origami @gmatthe2 And functional too :)
Posted using Partiko iOS
Thank you @marblely.
Dropping by and supporting your post @gmatthe2. It has been featured by @aiyumi, as an entry into our Pay It Forward Community's weekly curation contest.
As part of the @pifc community, we would encourage you to check into it!
Yep. “Bouncy modular ball” sounds fun to me! 😊
While I have heard of origami, I had never before now read anything about the details of creating one. I really enjoyed all of the intricate details, both illustrated and in writing, of “what it takes” to produce one. Impressive!
Nice! Very thoughtful and respectful of you … 👍
Thank you for your effort here to add value to our Steem blockchain!
Thank you for the detailed reply @roleerob This tutorial was an interesting learning curve I learnt a lot about the difficulty of accurately showing the difference between arms on a multi armed unit. The original tutorial was all yellow paper, however all but the first four pictures had to be scrapped otherwise my tutorial would have basically been 'and then magic happens' I was also hit with a huge burst of inspiration to create this
Which was fun, but kind of exhausting.
It was my pleasure @gmatthe2.
Yes, that is very clear from all the work you put in. While I know nothing about origami art, I do know a little bit about what it takes to create a good quality post "in here." And "what it takes" to overcome the inevitable challenges ...
Your image here was not in your original post. Is this part of work underway to create a "sequel?" 😉
Please "keep on keepin' on!" 👍
It is a model of my own design. The inspiration for making it kind of blindsided me while I was making the original tutorial. That 'what if' that wouldn't leave me alone.
Impressive @gmatthe2!
Yep! From my system of belief, this creative “spark” is what separates us from all the rest of creation …
While a “newbie” in here and even online, I am a relative “oldie” at life. It is fascinating to me what we are currently experiencing, the results of a cumulation of creative “sparks” over time, brought “to life” …
Australia NSW is on “the other side of the world” from here, yet we are both working together “in common cause” to add value to something for both of us … Inside a “virtual universe” networked together, not under the control of any central authority …
Keep the flame lit and the inspiration flowing. Nicely done! 😊 👍