Needlework Monday:How to sew an infinity dress
Hey guys i recently posted this tutorial without all the illustrations and diagrams ,so i drafted up all the diagrams ,hope you enjoy the tutorial.
INFINITY DRESS SEWING

SUPPLIES
• Jersey/stretch fabric-
• Basic sewing supplies
• Sewing machine
DIRECTIONS
Measuring
Measure your waist, take that measurement and divide it by 6.28 to get the radius for the skirt
.If you are using knit/jersey fabric subtract 0.1 to 0.4 inches from that ,it doesn’t have to be exact
because it stretches .Take that measurement down.
For your waistband length measurement, do the following calculations: radius measurement
you got above multiplied by two multiplied by 3.14 and then add an inch seam allowance. Note
that measurement down.
Now measure how long you want the skirt to be and take that measurement down.
Take the measurement from the center of your chest to the back of your underarm and note it
down, this will be your strap width.
Note:
• If you are using jersey/stretch fabric it might not be necessary to hem as it does not fray
and the edges will still look ok raw but if you prefer it hemmed then all you need to do is
add an inch seam allowance to no 3 and no 4 measurements.
• To figure out the amount of fabric you need, add your no 1 and no 3 measurements and
multiply by 4, then divide that number by 36(number of inches in one yard) and take
down that measurement as X .Now multiply your height by 1.5 and multiply again by your
no.4 measurement take down that measurement as Y. Add X and Y and the figure you get
should give you a good estimate of how much fabric you will need. Also make sure your
fabric width is at least your no3 measurement and the length is at least your height
multiplied by 1.5.
Cutting
Now fold your fabric in half; lengthwise; then fold in half again widthwise, into a quarter. Measure
and mark the radius of the skirt from the corner which has both sides folded, on both sides. Now
using tailors chalk join the two points together with a gentle and gradual curve and cut along the
line. See diagram A.
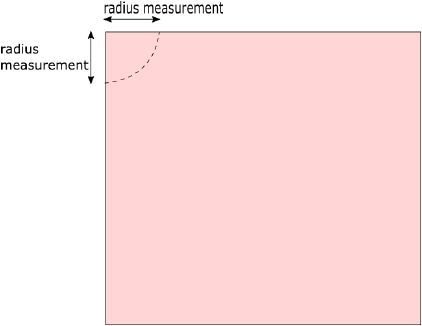
Diagram A
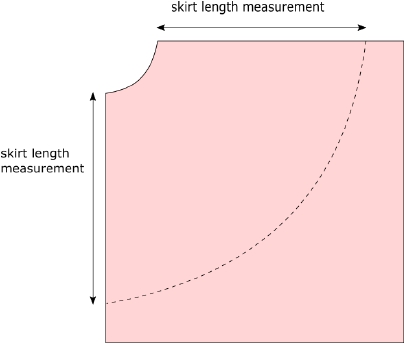
Measure and mark the length of the skirt from the arc remaining after you cut the first
segment. Do this on both sides and again using tailors chalk, join the two points together with a
gentle and gradual curve and cut along the line. See Diagram B
.jpg)
Diagram B
Open up your skirt, it should look like diagram C below.
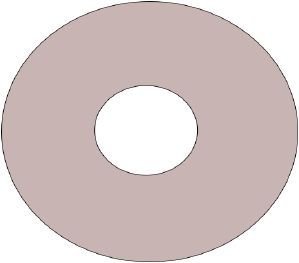
Diagram C
Cut a rectangular piece your waistband 10-14 inches wide and length as you measured in no.2 of
the measuring section

Diagram D
Cut two rectangular pieces for your straps, length 1.5 times your height and width as you
measured in no.4 of the measuring section.
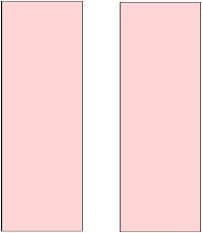
Diagram E
Sewing
Get your straps, wrong sides facing up, and overlap them a little, about 3 to 5 inches and pin.
The more inches you overlap the more coverage on your bust and vice versa, see diagram F. (If
you are hemming your garment then you should hem the straps right round before overlapping,
leaving the sides which you are overlapping the straps only.
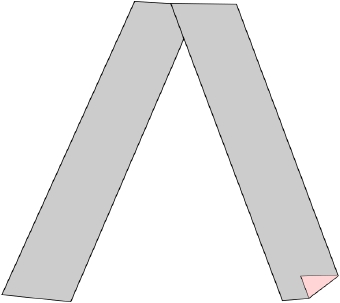
Diagram F
Now take the overlapped straps to the skirt and pin them down on the skirt from edge to edge.
Make sure the straps are still wrong sides up/wrong sides facing you and the skirt is right side up.
After pinning stitch down the straps onto the skirt with your machine as illustrated in the diagram
G below.
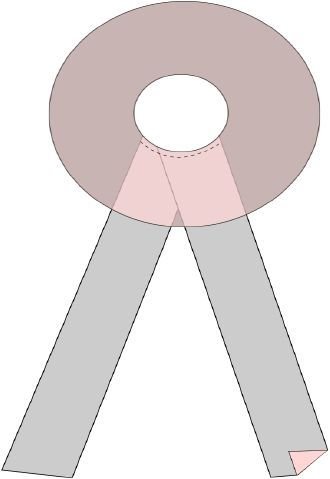
Diagram G
Take your waistband, fold it in half and sew the open ends together using a ½ an inch seam
allowance, so that the waistband becomes a circle.
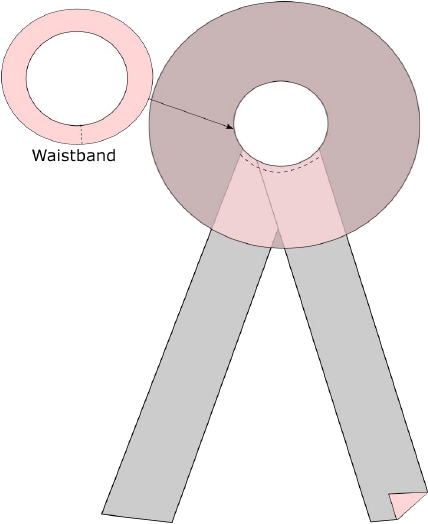
Now take your waistband, pin it to your skirt on top of the straps and sew around the
perimeter. See diagram H. Make sure you place the vertical seam of the waistband on the front
part where the straps are so that it will be hidden when you wear the dress and that’s It you are
done!
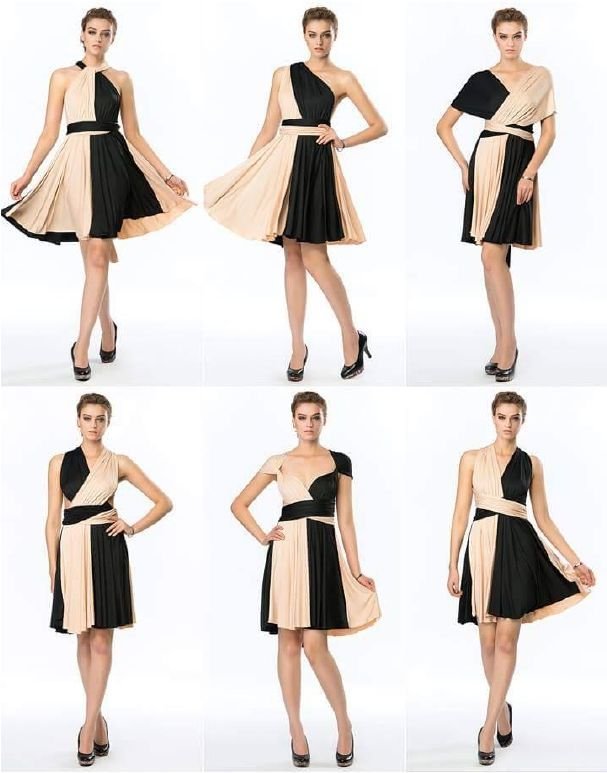
There are so many ways in which the dress can be tied so go wild with creativity…
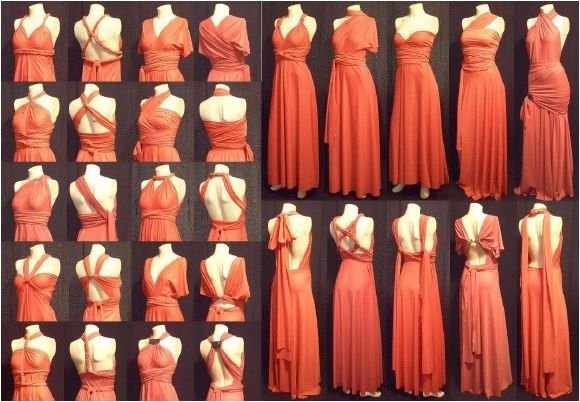

You can even mix up different colors.
Hello @farie! It looks like this information was copied and pasted from online because I found similar information (pictures, words and all) surfing the web. When copying and pasting you should list the source from where you found this information from because it is seen as plagiarism and this is not deemed good here on the Steemit plattform.
Also, the #NeedleWorkMonday tag is only used for needleworkers to share and post about their original work. If you are not posting about your original needlework and are only copying and pasting from online I will have to ask you to refrain from using the tag. Thank you for your cooperation with this. 😊
@crosheille ..I AM the one who drafted this pattern and many more others from scratch...i actually used to have an etsy and craftsy shop where i used to sell all my tutorials..Refrain from jumping into conclusions ,i think im allowed to post my tutorials anywhere on the internet and including on my steemit account as well...i would never use someones tutorial without crediting them.Also paste me the links of where you found the tutorial so i can follow up.