Needlework Monday - Useful tips for modeling polymer clay. Handmade from @elenka
Hi, Steemit!!!
Greetings dear readers! With you @elenka
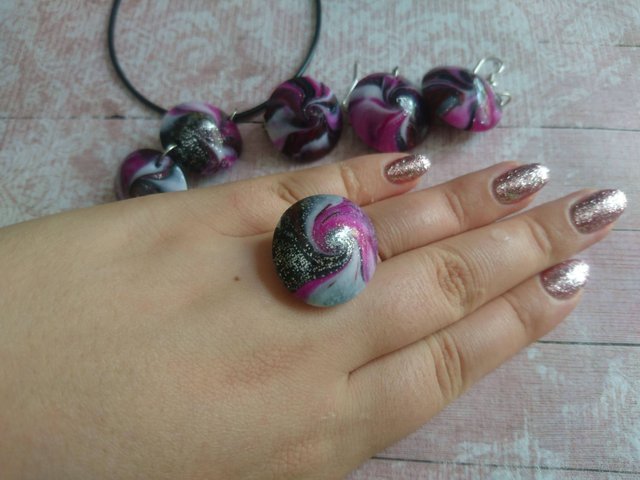
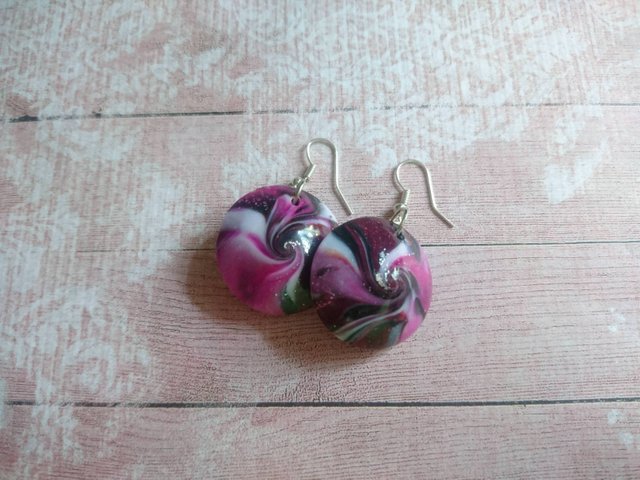
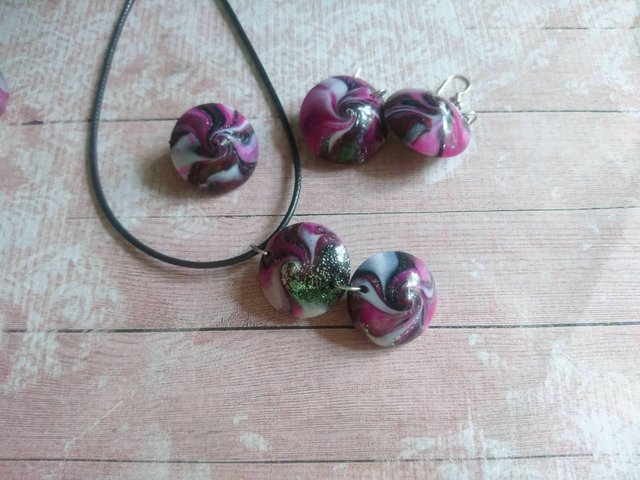
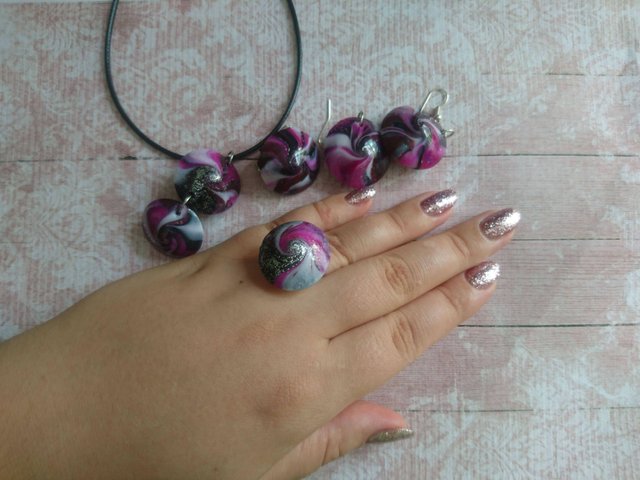
There was an idea to share with you some interesting tips (or as it is now fashionable to say "life hacking") on modeling. I will do it on the example of such bead-lentils, from which I made a pendant, earrings, brooch and a ring.


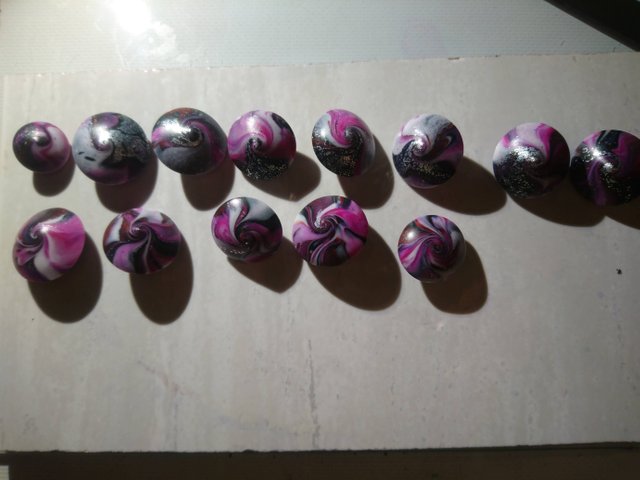
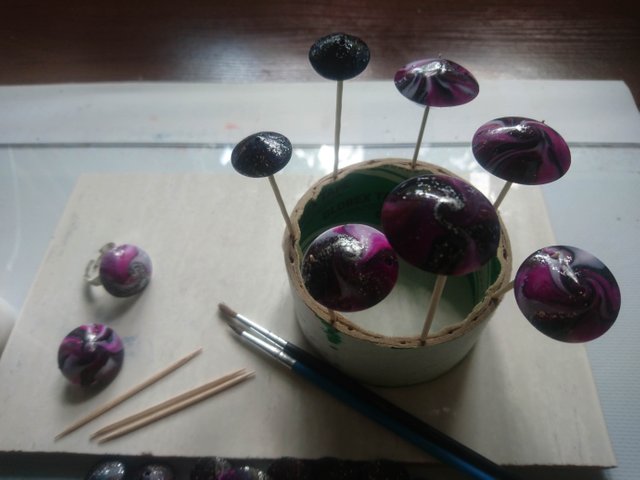
№1
Any master who is engaged in modeling from polymer clay, remains multi-colored remnant-pieces from previous works. Sometimes they accumulate and there is a need to apply them somewhere. You can use this clay for the inside of beads or as a substrate for some jewelry.
But there is another option - to make beads-lentils. In such beads mixing colors looks very beautiful and harmonious. More than once, I was convinced that the leftover leftovers are more beautiful than when you specifically select colors for them.
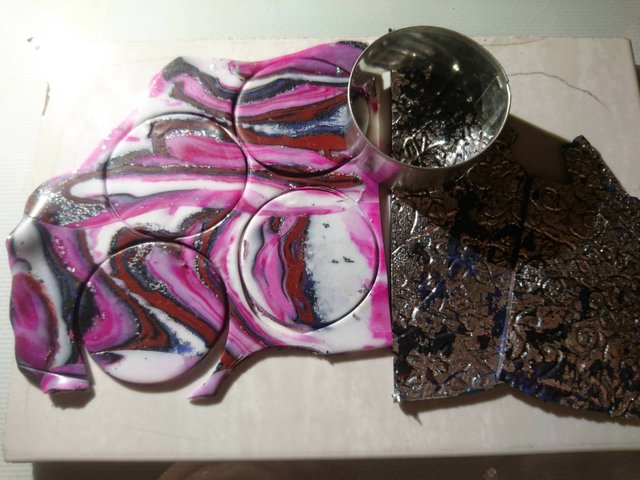
I had a mixed piece of black-and-blue-brown clay and another of the remains of pink-white. I joined them and rolled out the layer on the largest thickness of the pasta machine.
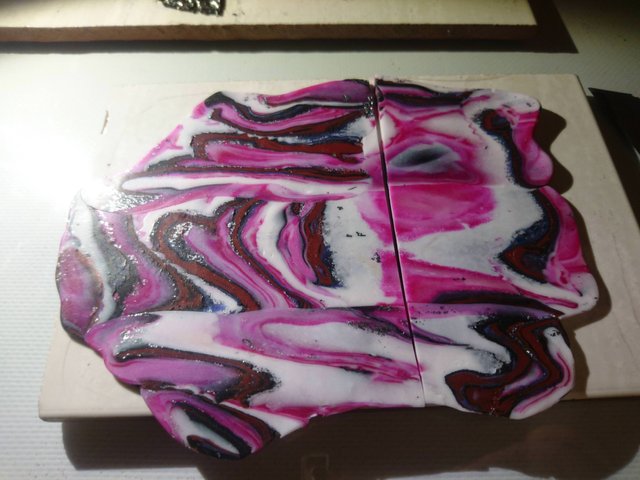
Plus, there was another piece of black stratum with silver lashes.
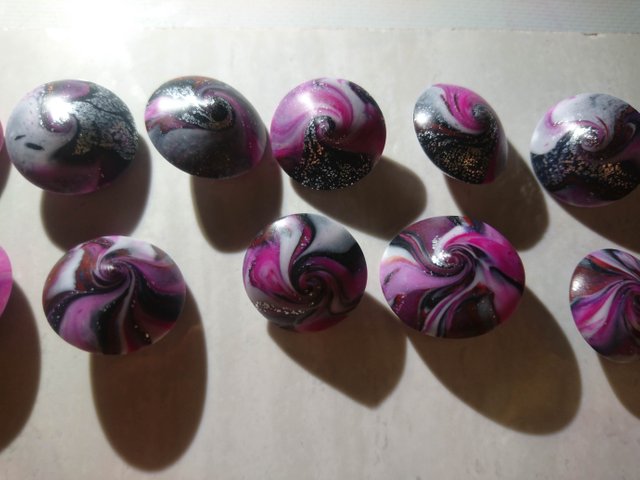
№2
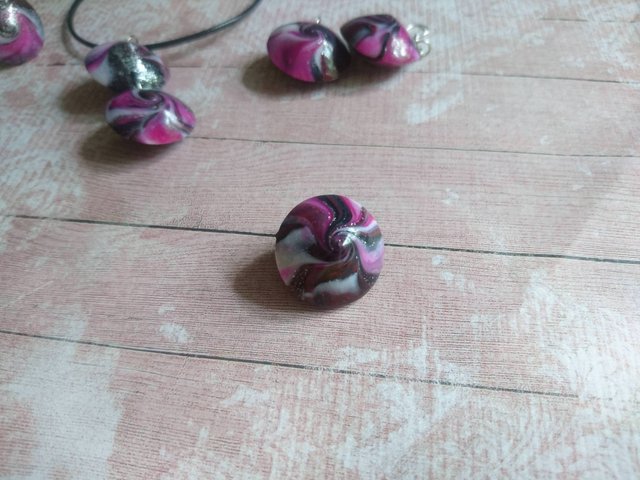
In order to get the beads identical, you can use any cutter mold. Please note that in the photo you can see that I divided the layer into 4 circles. They make the same beads.
№3
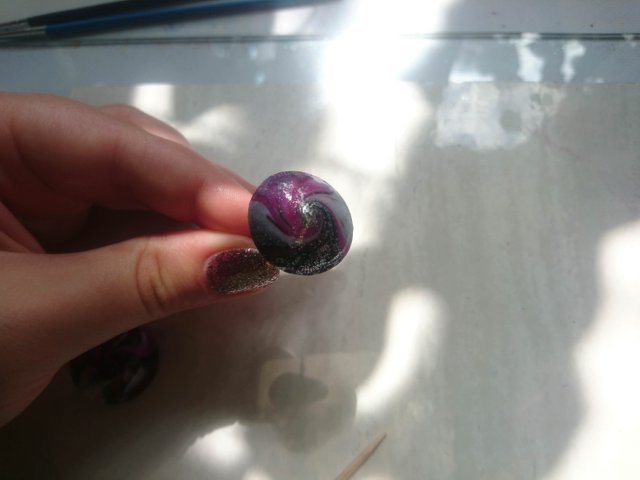
In order for the potal to be visible on the surface of the bead, you need to roll a small piece from the layer with a leaf, on top of it to the ball-base for lentils.
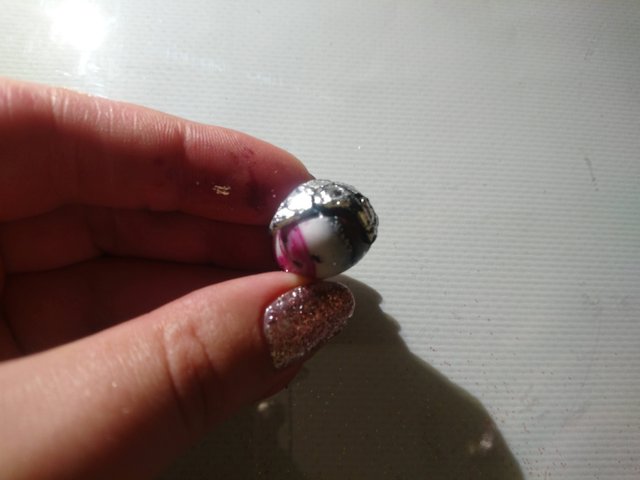
It turns out such a beautiful bead with a brilliant impregnation.
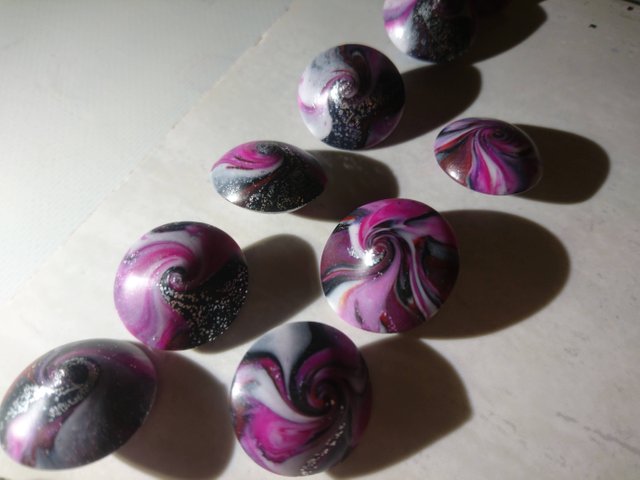
№4
It is rather difficult to make holes in lentils, but still it is better to make it with a large needle before baking in the oven. You need to put on gloves and carefully, with boring movements, make holes in the beads.
№5
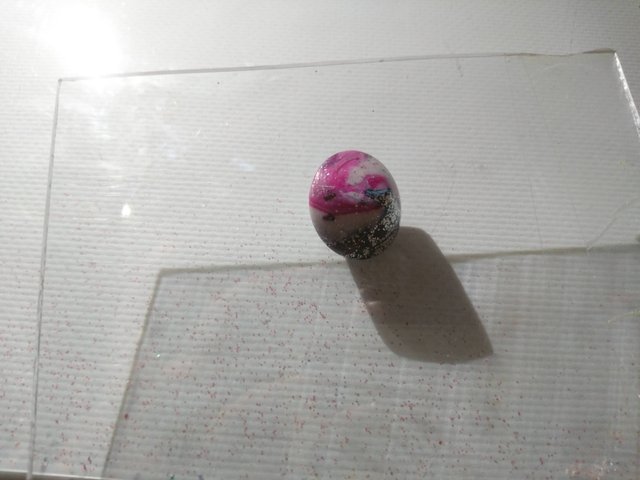
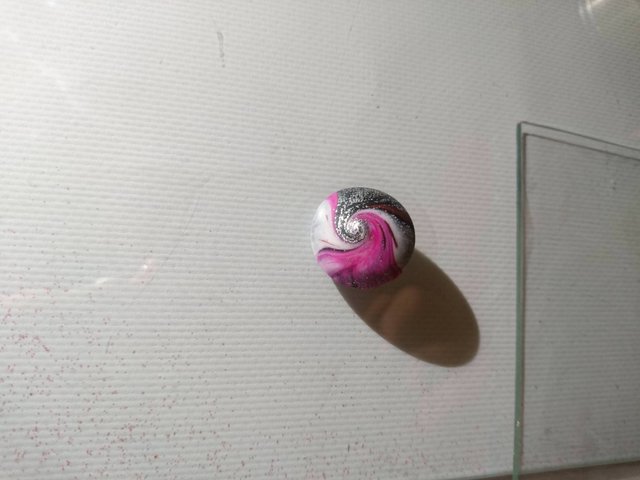
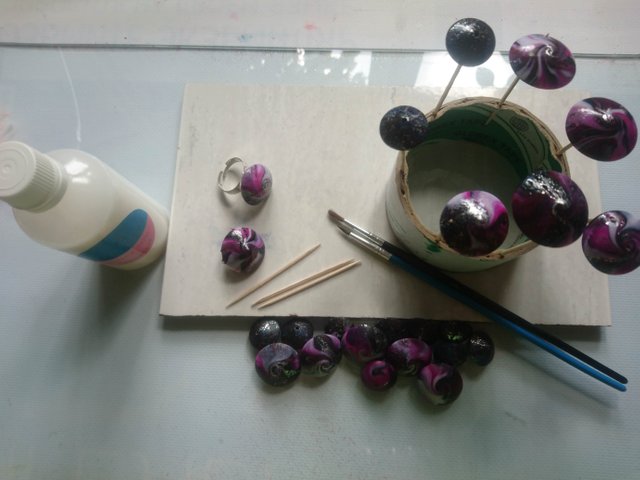
Varnishing some products need to reveal the beauty of the color gamut or protect it from external influence. In the case of my beads - it's two in one. After varnishing, the colors in them play beautifully, plus the potal will hold better.
It is very convenient to use toothpicks and a scotch tape or any sponge. I somehow got rid of the scotch blanks better, so I use them when I cover the beads with lacquer and also when I bake round beads in the oven.
Varnish should be applied in a very thin layer. It is better, if necessary and desired, to cover with two layers than with one, but thick - there can be smudges and it will dry for a very long time.
№6
Sometimes there are not very pleasant surprises. For example, after baking, I saw that one bead had cracked. The crack was not deep, but noticeable, and the second side of the bead was intact and beautiful. This can happen because of the air that remained in the clay, after rolling and mixing colors. Apparently, I did not press the clay tightly enough when I sculpted.
You can’t put such an element in the beads - you’ll see a crack, but you’ll just throw it away. Therefore, there was an idea to make a ring. I polished the cracked side a little with a nail file to fit under the ring base and glued the bead to super glue.
And on the reverse side, to fix, pasted over with foil. Foil gives extra grip to metal and clay.
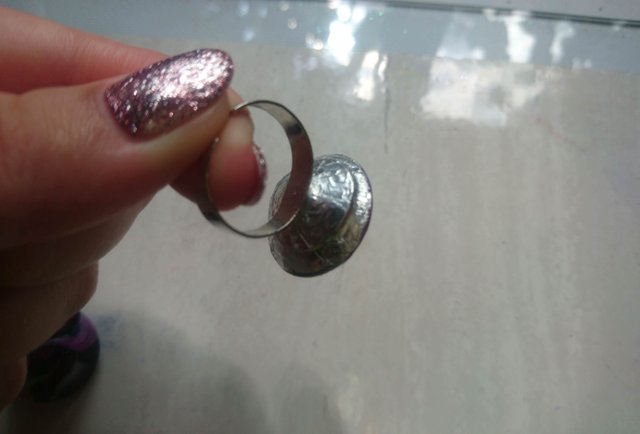
Here is a little ring turned out.
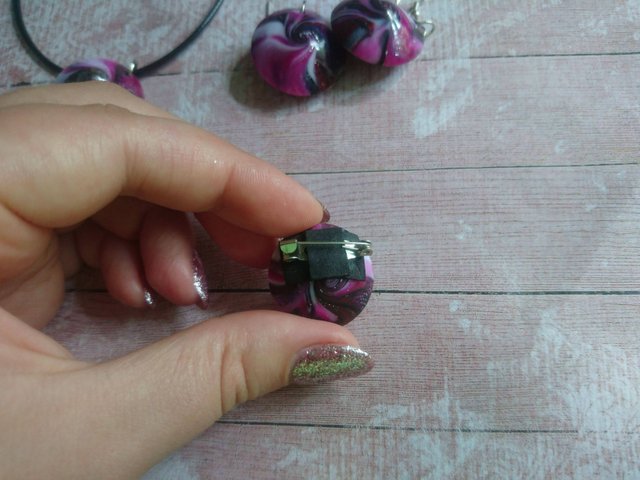
№ 7
Another of the beads made a brooch. There were no cracks on it, I just really liked the pattern and it became a pity to drill it. Therefore, glued the base for brooches on a piece of foamiran.
#NeedleworkMonday by @crosheille
I enjoyed this post. I have learned so much about working with clay from you and I appreciate the work you put into making these posts so easy to follow.
Beautiful jewelry set!
Thank you very much! Dear @jamethiel, I am pleased to be useful for your training.
I've made things with clay before, but nothing quite as pretty as these. Good information on how to blend different colors.
Thank! glad to be useful to you)
Have a nice day!
Congratulations @elenka! Your post has been placed in the spotlight for this weeks @NeedleWorkMonday Featured Post #39!
Thank you for your quality post and for being apart of the needlework community!
#NeedleWorkMonday is an initiative that supports and rewards the needlework community while inspiring the Steemit blockchain.
For more information on #NeedleWorkMonday and the @needleworkmonday community please visit our FAQs!