Start MySQL IDE on Windows – the Default and the Alternatives
In software development, having the right tools is often a deciding factor for success. Creating an application suggests plenty of tasks with lots of requirements. It is vital to perform them accurately and quickly. The good news is that such tools exist. There are even hundreds of them. Therefore, the next issue arises: you need to have all the necessary tools at hand. Preferably in one global system. It is the fundamental principle of an IDE.
What is an IDE, and why is it so high-demand and popular? Let’s find out.
IDE stands for Integrated Development Environment. The solution allows performing all the software development and post-development tasks in one place. As a rule, IDEs include tools for build automation, an SQL editor for code writing, and a debugger. There can be other tools, like compilers, object browsers, version control systems, etc.
Another thing to note is that such solutions have similar interfaces. Besides, modern IDEs are often GUI tools as well. Though the command line remains essential, working with graphical interfaces is often faster and more accurate.
MySQL IDEs are among the most demanded solutions. The reason for that is simple: MySQL is one of the most popular relational database management systems. Technological giants like Google, YouTube, and Facebook use it. Countless applications are based on MySQL databases.
Now, let us talk about how to install a MySQL IDE and run it on Windows. We will overview the default MySQL IDE and its more advanced alternatives.
Workbench - the Default MySQL IDE
To begin with, let us take a closer look at Workbench - the default IDE for MySQL. It contains tools for data modeling, MySQL database development, server configuration, user administration, data backup and recovery, and lots of other professional features. The solution is cross-platform (Windows, macOS, and Linux). Besides, it is a free MySQL GUI (Community edition).
The MySQL Installer is a package containing several components, and Workbench is one of them. When you are installing MySQL Server, you will see Workbench selected by default for that process:
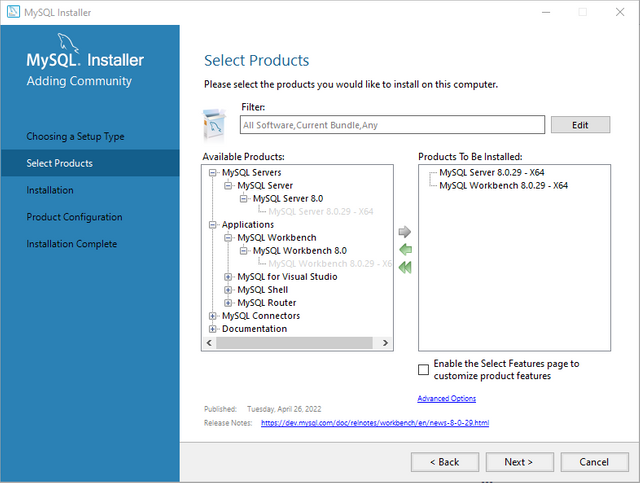
You can remove the Workbench from the products to be installed and get it later, separately. This article assumes that you already have MySQL and now would like to install and start using MySQL IDE.
The Windows requirements for installing and running Workbench are as follows:
- Microsoft Windows 11/Windows Server 2022;
- Microsoft .NET Framework 4.5.2;
- Microsoft Visual C++ 2015-2022 Redistributable.
Workbench MySQL download is available on the official page official page. You can get familiar with the source code of this IDE on GitHub.
Note:
In order to install the software, you need to be an Administrator or a Power User
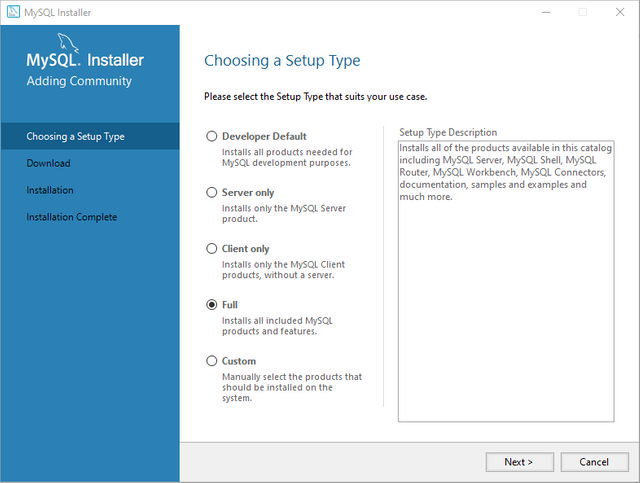
Download the installation package and execute it (double-click it or right-click and select Install from the menu). The Setup Type window of the installer will open. Select Full – this will allow you to use all features of the IDE.
The default installation path is C:%PROGRAMFILES%\MySQL
Note
%PROGRAMFILES% is usually the C:\Program Files\ directory, but it can be different on your computer
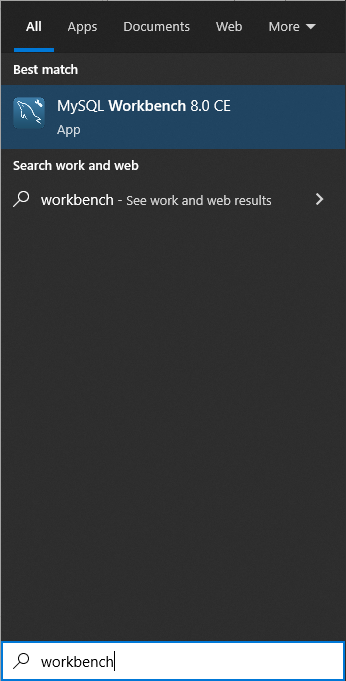
When the installation is complete, you can launch the IDE from the Windows Start menu:
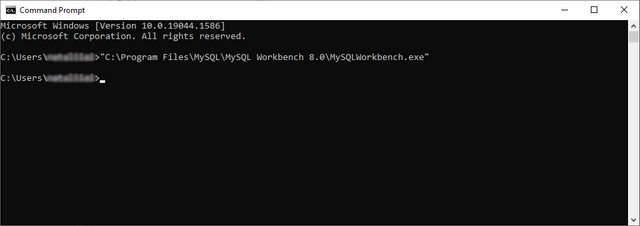
Alternatively, you can use the command line, entering the following string:
“C:\Program Files\MySQL\MySQL Workbench 8.0\MySQLWorkbench.exe”
Connect to the Database
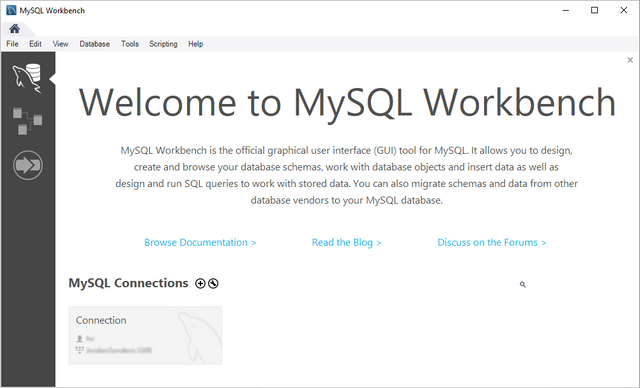
On launching the Workbench IDE after the installation, you'll see the home screen.
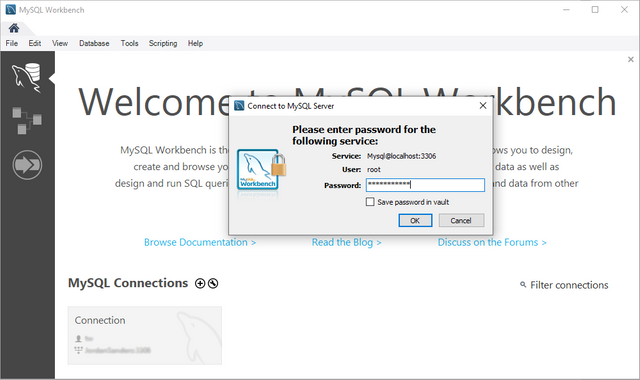
Now, connect to MySQL. Click your MySQL Connection at the bottom of the home screen. Enter the password for your MySQL Server, and you are connected.
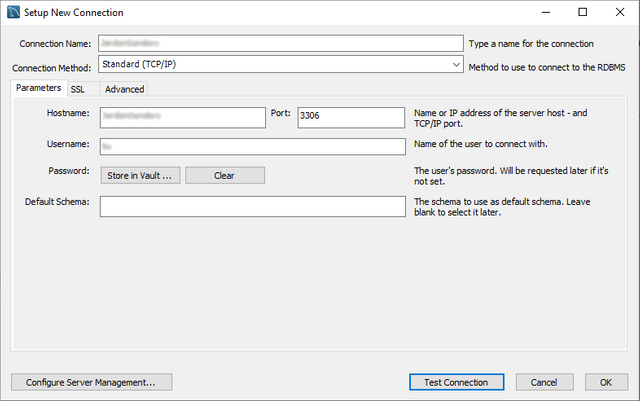
You can create new connections by clicking the (+) icon. Fill in the details, enter your password, and click Test Connection.
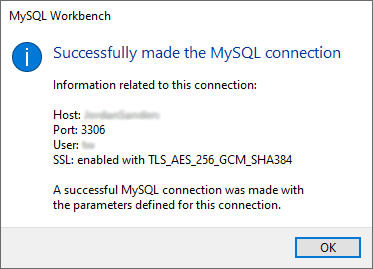
If everything is configured correctly, you will see the following message:
Another important thing in the Workbench interface is the left sidebar menu that is located on the home screen. The first option from the top there is the Connections section. It gives you a list of all your connections with detailed information.

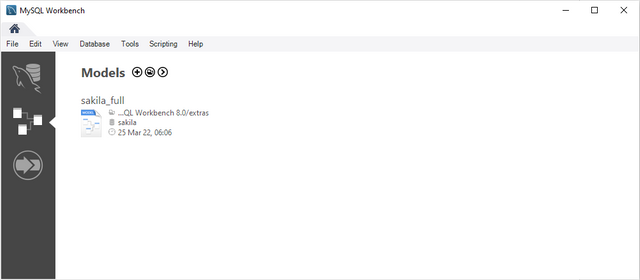
The second option on the left sidebar menu is Models View. It contains the database diagrams you worked with in the past. You can add new models, save used models, create diagrams from databases, and perform other tasks.
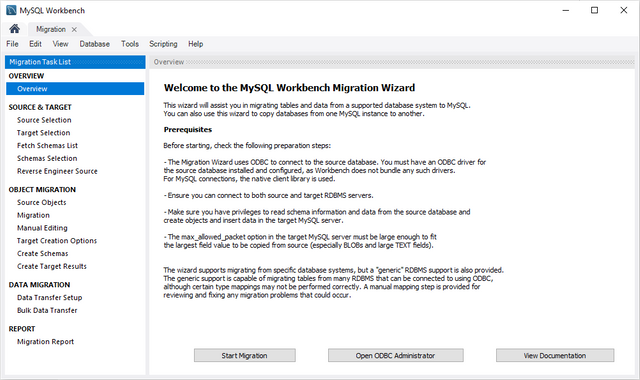
The third option is Migration View. Here, you can import other ODBC-compliant databases into MySQL. Workbench is meant for MySQL primarily, but you can import Oracle databases, SQL Server, or PostgreSQL as well. The Migration Wizard helps you migrate those databases, copy data, and convert tables. However, it does not convert stored procedures, views, or triggers.
Main Tools of the Workbench MySQL IDE
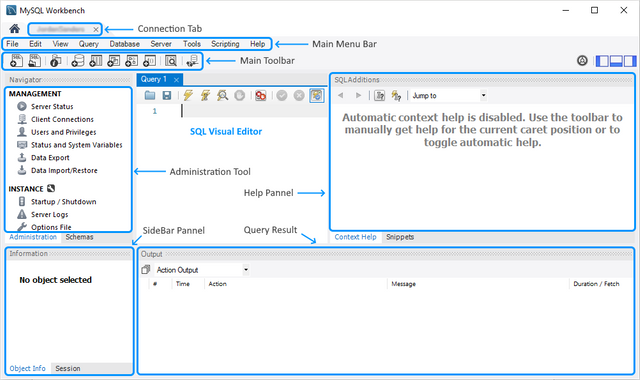
After connecting to a MySQL database, you get into the workspace. On the left, you can see the Navigator pane with two subtabs – Administration and Schemas (Databases).
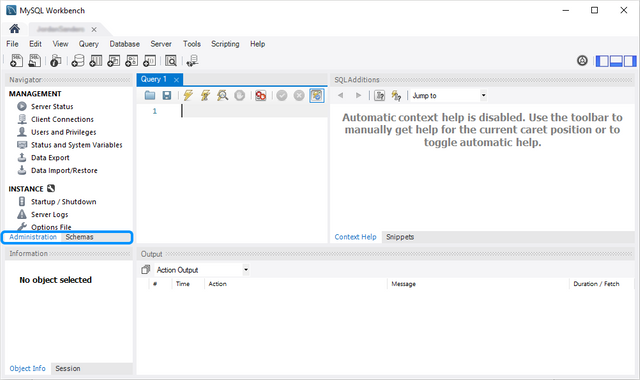
The first subtab is Administration:
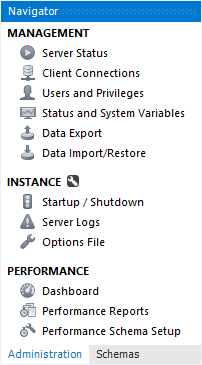
In this section, admins can configure servers, manage users, backup/restore databases, etc.
The Schemas subtab contains the options for SQL development:
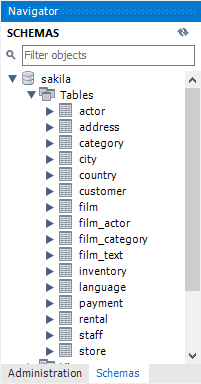
The Object Browser with the list of existing databases allows you to explore any database and its tables and table data, and refer to all components, such as columns, indexes, foreign keys, and triggers.
The SQL Visual Editor lets you create, edit, and execute queries against the selected database. The SQL query tab opens when you connect to the server and presents the particular query. There is a Result Grid window where you can check the results of the SQL queries.
More editors are available for schemas, tables, and other database elements.
Pay attention to the main toolbar of the Workbench IDE for MySQL – it has the shortcuts to the most common actions in the Schemas section:
- Open a new tab to execute the query
- Open a new SQL script file
- Inspect the selected element
- Create a new database on a server
- Create a new table in the active database
- Create a new view in the active database
- Create a new stored procedure in the active database
- Create a new function in the active database
- Search the table for some text
- Reconnect to MySQL (or another DBMS).
To get detailed explanations of specific tasks, refer to the Workbench guideline . The Oracle company that owns MySQL keeps all the information and manuals up-to-date.
Workbench is, undoubtedly, the best-known IDE for MySQL, but it is not the only option. With all its advantages, Workbench lacks functionality in many aspects. Users have to search for additional tools or IDE alternatives.
dbForge Studio for MySQL – the all-purpose IDE for MySQL and MariaDB
Among the most popular ones, dbForge Studio is one of the best MySQL GUI tools. As a MySQL IDE , the Studio offers a complete toolset for all kinds of tasks related to database development, administration, and management.
You can use this multi-featured tool to work faster using a clean and intuitive user interface, automate routines, and analyze how the server works. You get plenty of features that are unavailable in Workbench, such as schema/data synchronization, visual query building on diagrams, code completion, refactoring, etc.
It is worth mentioning the Database Projects functionality. There, you can import from existing databases, manage project files in a dedicated window, and browse logical project structures. Then, MySQL Debugger is a helpful tool that supports script debugging and commands for step-by-step execution in Object Editors and SQL Documents.
You can generate any amount of meaningful test data. There are hundreds of predefined generators, and you can add your own data generator. The IDE supports HTTP and proxy, allows sending database backups to ZIP, stores the query profiling history, lets you compare profiling results, and provides many more options.

Let’s see how you can use the Studio to handle your MySQL routines.
To install the software, you need to download the installation file from the official website. Run the dbforgemysql.exe file and install the software. When it’s done, open the Studio – you’ll see the start page.
At the very beginning of your dbForge Studio journey, you will see the tabs representing the main modules of this IDE for MySQL:
SQL Development
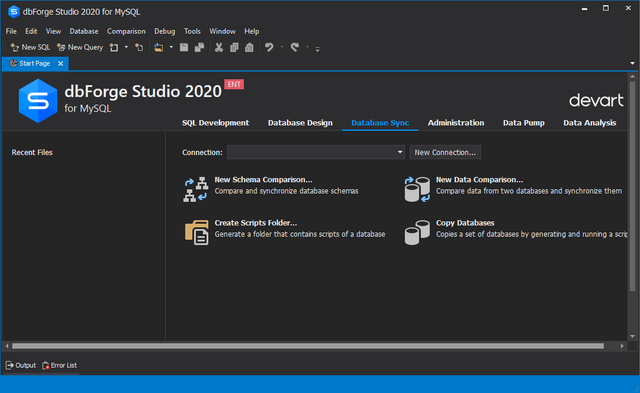
Database Design

Database Sync
Administration
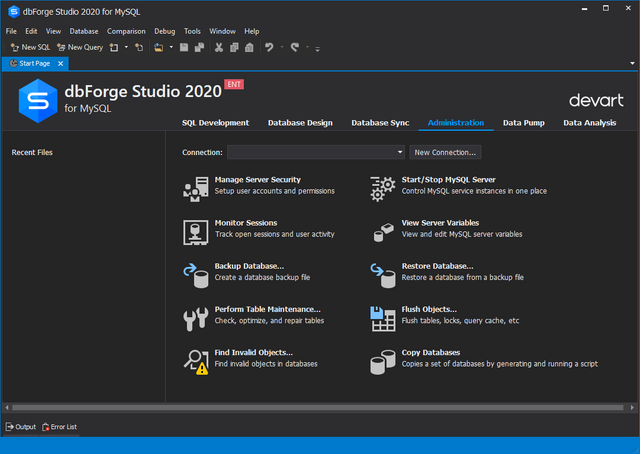
Data Pump
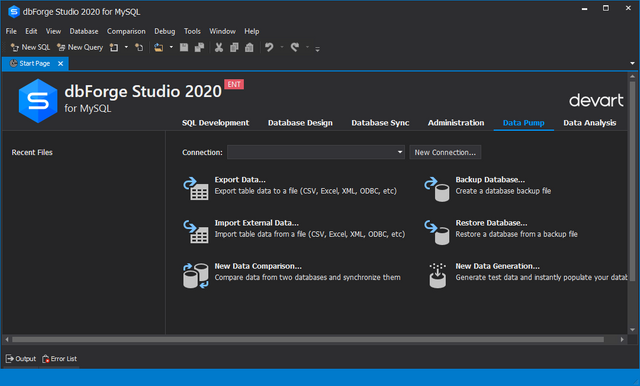
Data Analysis
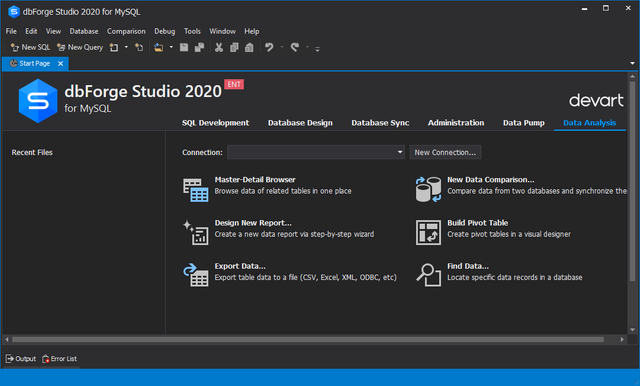
On each tab, you will see the shortcuts to every tool you might need while working with databases.
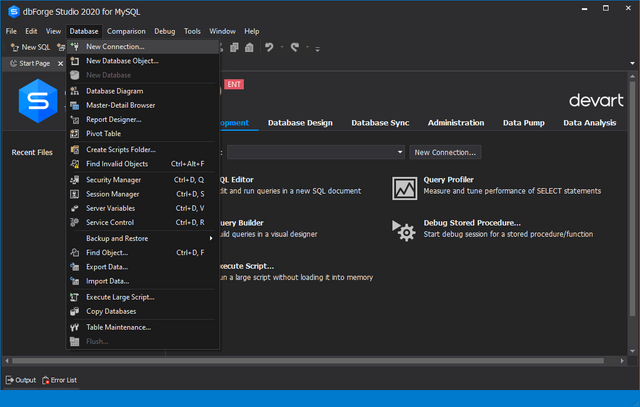
The first thing to do once the Studio is installed is to connect to the server:
In the Database menu, click New Connection. The configuration window will open.
Specify the connection type, enter the Hostname, and define the Port (3306 by default). If your connection type is a Named pipe, enter the required name. Also, provide your credentials (User name and Password), and indicate the name of the Database to connect to. The system will generate your Connection name automatically if you don’t specify it yourself.
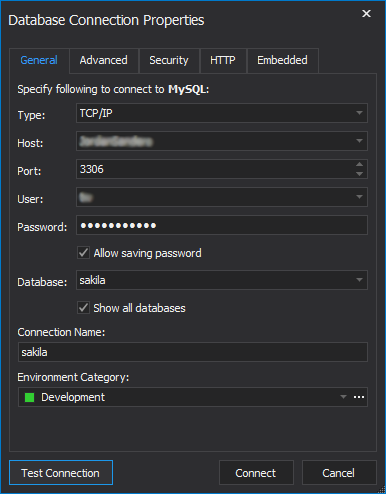
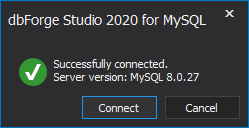
Click Test Connection to make sure it is correct, and click OK to finalize the process.
You can also refer to:
- a video tutorial on getting started with dbForge Studio:
CONCLUSION
An IDE for MySQL (and other systems) is always a convenient solution. It lets users with different specializations speed up the processes and increase the overall productivity at all stages of software development. The essential factor is that it is easier and faster to master an IDE with all the necessary functionality than pick up separate database tools or plugins and integrate them.
If you work with MySQL, you need a functional IDE. It could be the default Workbench solution or some more cutting-edge and functional MySQL tools, such as dbForge, DBeaver, Toad Edge, Sequel Pro, Valentina Studio, or Aqua Data Studio. Our team has tried many options, and dbForge Studio for MySQL turned out to be the most affordable and feature-rich one. A free trial is also available if you’d like to test the full functionality without having to pay anything.
Technological giants like Google, YouTube, and Facebook use it.