How to DIY Install a GunSkins Vinyl Wrap on Your Personal Firearm
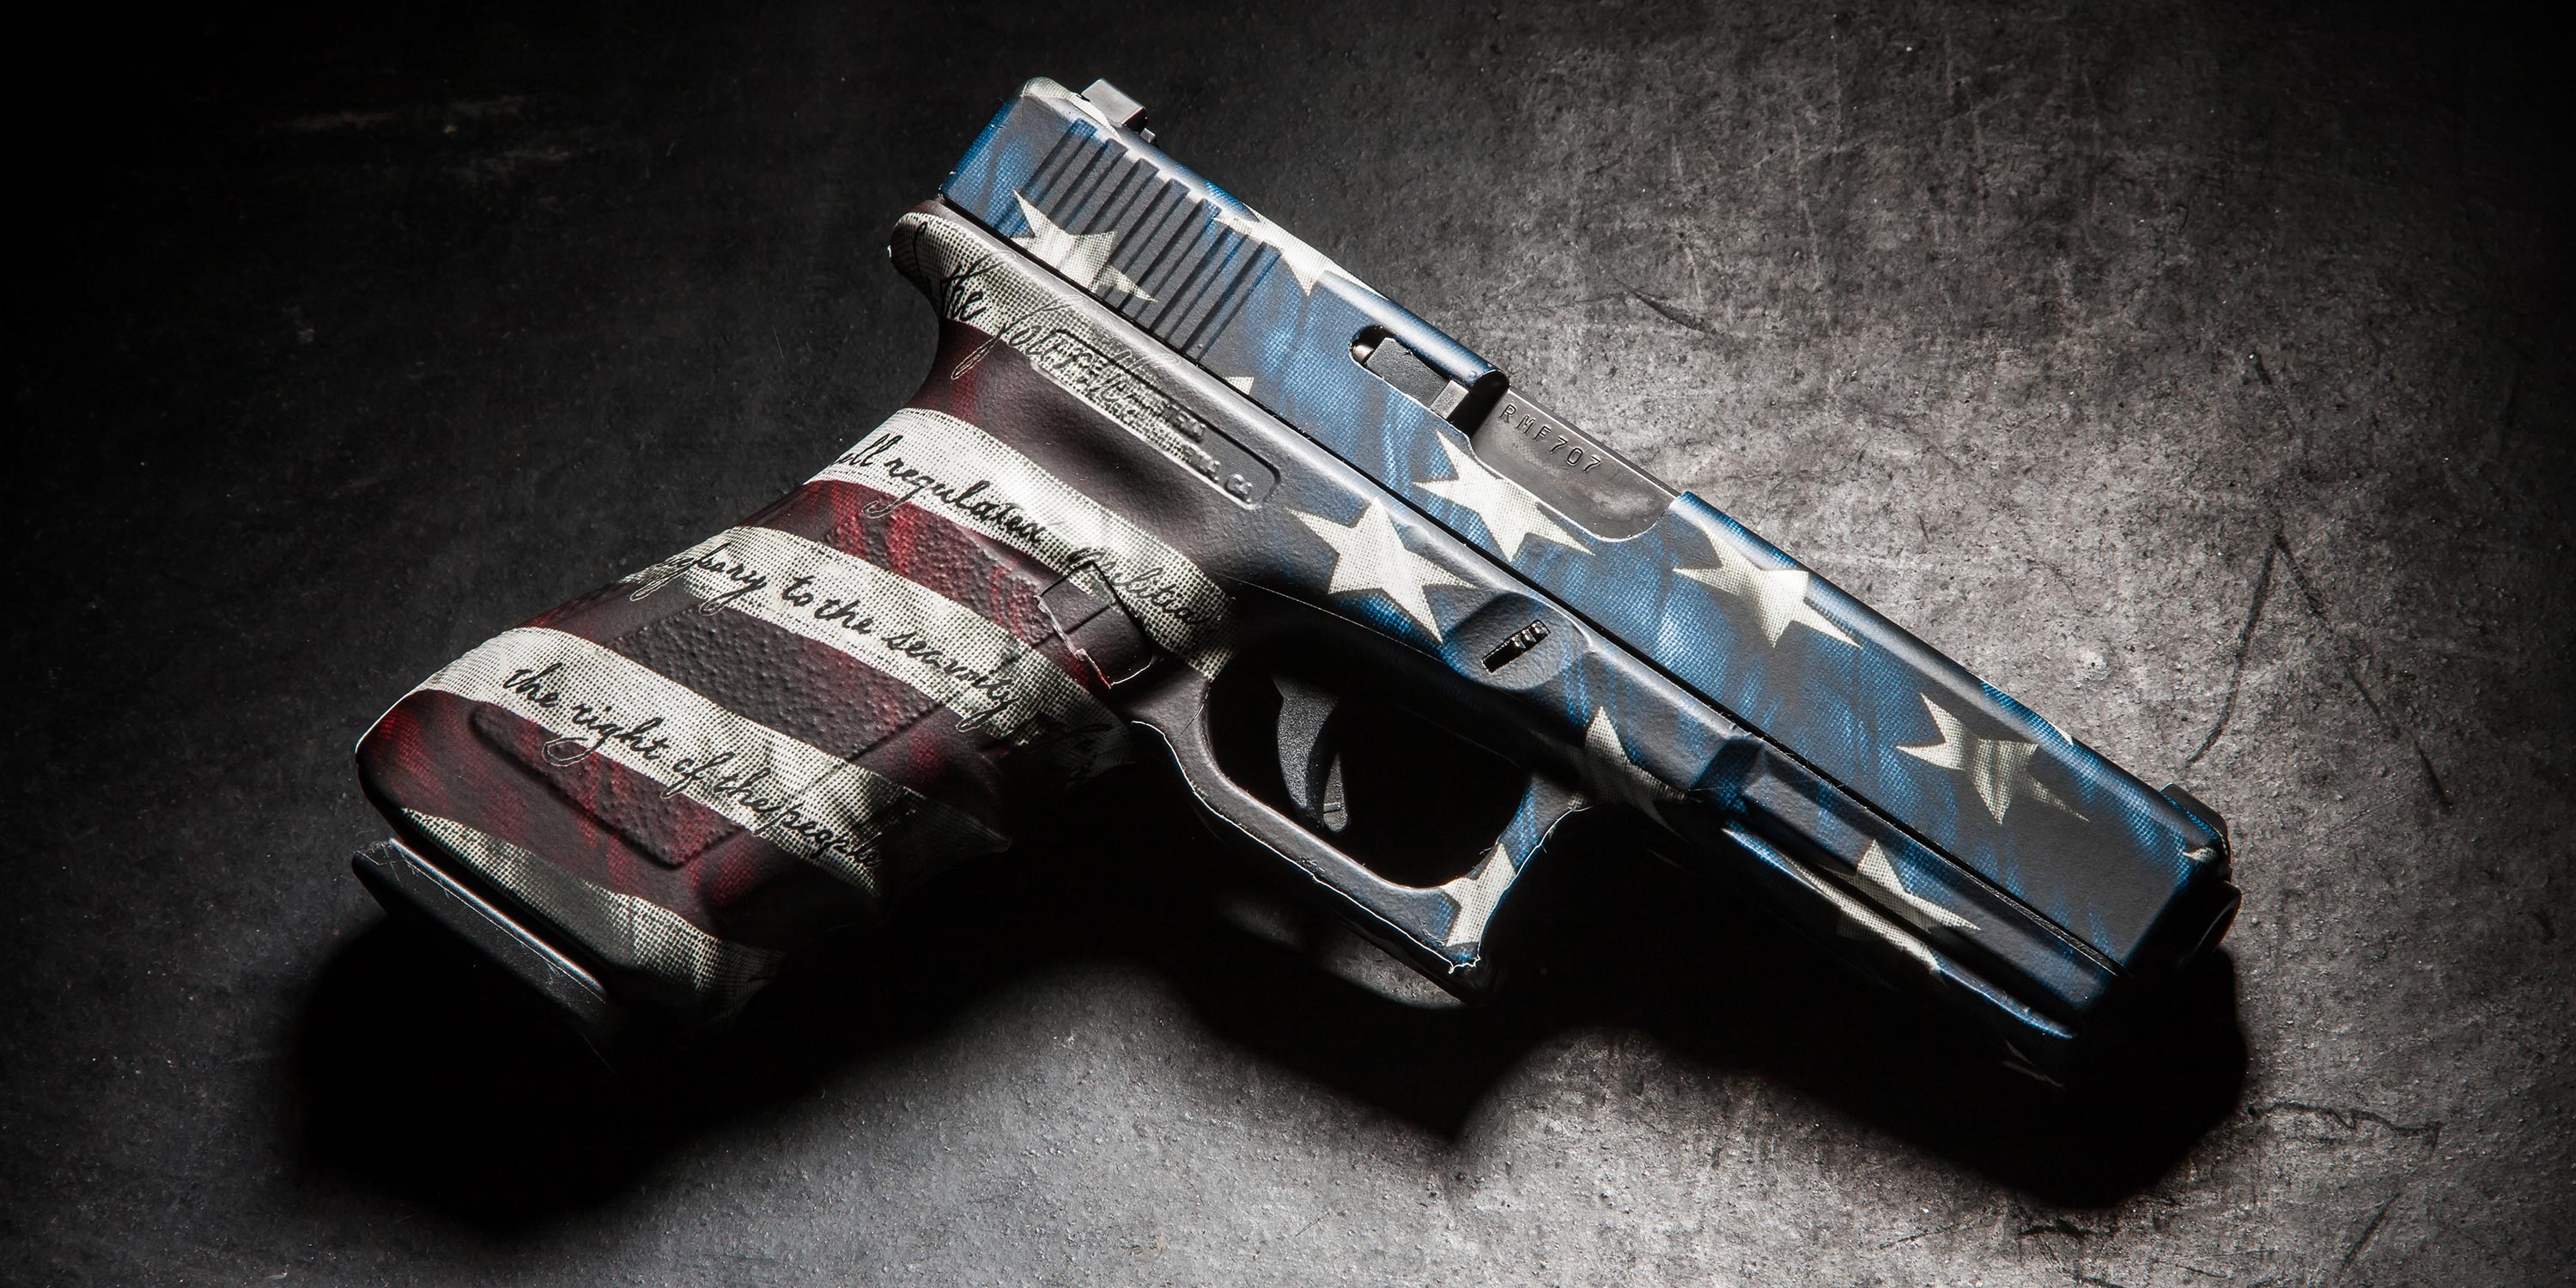
There are several good reasons to consider applying a vinyl gun finish on your favorite rifle or pistol. Besides making the gun looks like one-of-a-kind specialty firearm, it also protects the surface and preserves the condition of your gun. All the while, the material will take the use and abuse of daily shooting so your gun doesn't have to.
Installing a vinyl wrap on your gun isn't as hard as it may appear. Most of our kits come with pre-cut pieces for easy install, including our kits for AR-15, AK-47, hunting rifles, and shotguns. Our Pistol Skin, however, is a universal kit that will fit any pistol. Because handguns come in all shapes and sizes, we'll show you how to install the install and trim to fit any your exact gun!
Step 1 - Clean the Gun
Vinyl wraps are adhesive on one side, which contains the bonding agent that keeps it on your gun for a years and years. However, is the surface isn't prepped properly, the vinyl won't stick. All gun oil, grease, and lubrication has to come off anywhere you intend to wrap. We personally use Froglube Solvent to get the job done, but any gun-specific degreaser will work. If the gun is really dirty (I'm looking at you AK-47), then we suggest spraying it with CRC non-chlorinated Brake Cleaner.
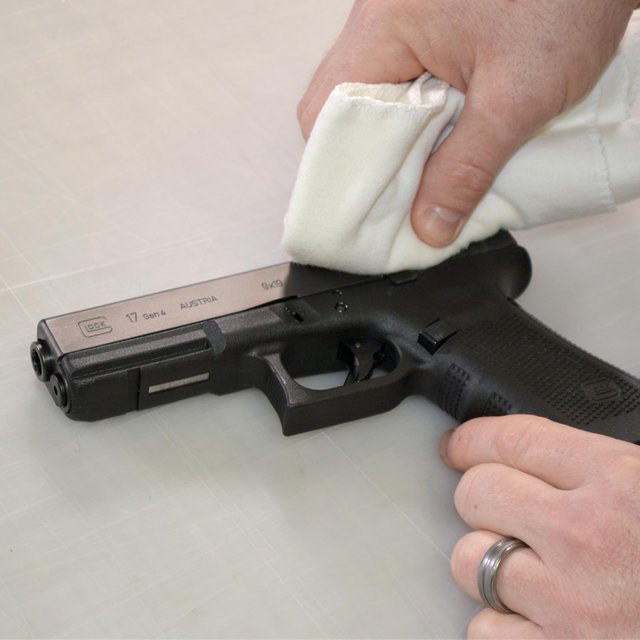
Rubbing alcohol alone isn't strong enough to cut through gun grease. This is a common mistake that first time installers experience and they assume there is a fault in the material for not sticking. Please use a gun degreaser like we mentioned above. It also helps to use a small brush to scrub down into the recessed areas and edges. Lastly, rinse with warm water, air dry, or wipe dry with a lint-free cloth. Once the gun is clean, you are ready to start installing!
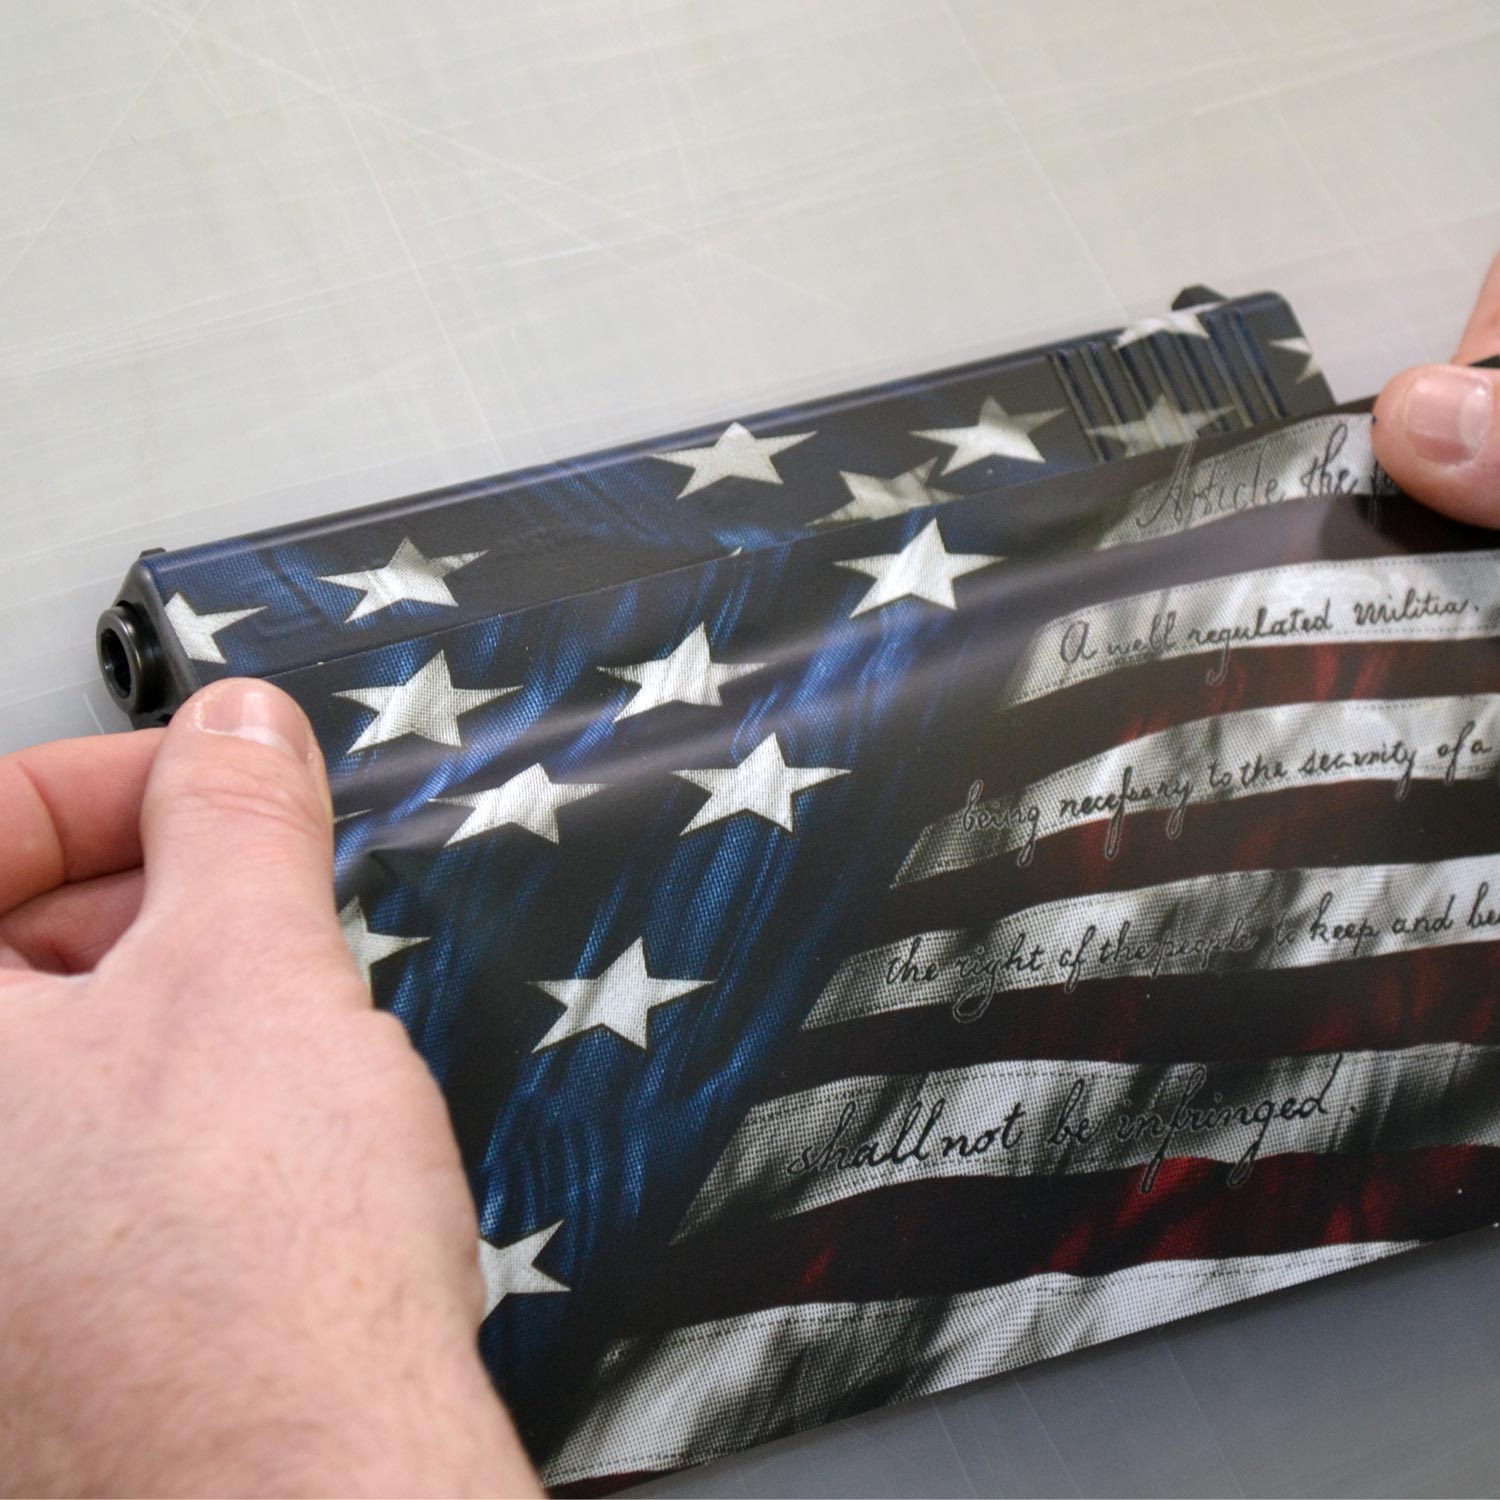
Step 2 - Peel the Vinyl and Position Into Place
GunSkins are made from a high-performance vinyl. Let's start with the slide piece. Peel the vinyl from the backing and position the bottom of the piece along the edge of the slide, it doesn't matter the left or the right. If you don't like where you placed it, you can peel it off and try again. You can reposition the material as often as you need to without worrying about loosing adhesion. Work the material with your fingers from one end to the other, wrapping around the slide to the other side.
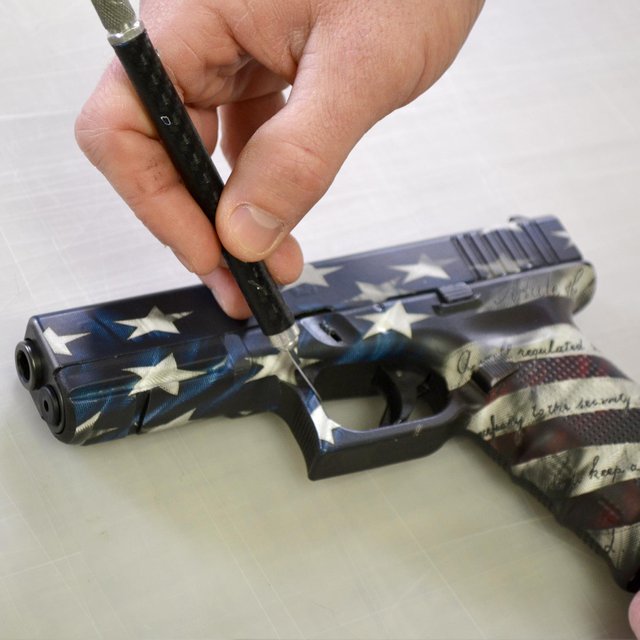
When you get to the rear and front sights you might wonder what do you. It's okay, here's a little tip. Use a sharp hobby knife to make a few relief cuts using the sights as a guide and push the material through so the sights poke through. This will allow you flatten the vinyl on the entire edge and continue until you get to the other side. When you get to the other edge of the slide, use the knife again and trim away the excess material. Run the knife along the bottom edge, angling the sharp edge away from you. Once trimmed, it's already starting to look like it should.
Step 3 - Use Heat
But this is where the magic happens. Using a heat gun or blow dryer, hit the vinyl with heat to soften it and use your fingers to work it into every detail and contoured edge. Use a hand squeegee or piece of foam as this helps work the material into areas that are smaller than your fingers can fit. The vinyl is a heat stretch, not a heat shrink. By using heat, this makes the vinyl hug the surface so well that it looks more like a second skin, rather than a glove or sleeve.
Step 4 - Trim to Fit
When the material is cool again, use your knife to trim away the material to fit. Cut away along the front barrel, the back of the slide, and the ejection port. This is why our pistol kit can't come with pre-cut pieces because every gun will be unique and require that extra DIY attention. No worries, you've got this!
This is especially important when installing the pieces for the frames, both the left and the right side, respectively. The frame pieces will fit any pistol 9" in length or shorter. Line the top under the slide piece and position so the pattern lines up correctly. You will need to work the material into the frame and use heat like before to make it conform to the shape. It's like a blanket and you'll need to press down into the trigger guard and around the grip.
Take your time and carefully trim away the material along the edges of the pistol grip, leaving enough material to wrap around at least halfway. Don't forget to trim the inside of the trigger guard as well. When you do this on the other side, you will create an overlap seam that runs in the middle of the pistol grip, front and back.
Step 5 - Post Heat
Once everything is trimmed up and looking nice, the final and most important step is to hit the entire gun with heat and press down on the vinyl to set it for good. You should spend at least five minutes on this, maybe more. The post heat ensures a strong bond and will help the material stay strong for long. Once cooled, the gun is ready to show off and shoot! On average, it takes 1-2 hours to complete the installation for the first time.
GunSkins are a fraction the cost when compared to other gun finishes, and they are non-permanent. If you need to, you can remove the vinyl on the spot using heat and peeling it off piece by piece. The kit is a one-time use only, but at only $29.99 per pistol kit, it's not going to cost you an arm and a leg to switch out patterns when the season changes. That's protection in camouflage!
Congratulations @gunskins! You have completed some achievement on Steemit and have been rewarded with new badge(s) :
Click on any badge to view your own Board of Honor on SteemitBoard.
For more information about SteemitBoard, click here
If you no longer want to receive notifications, reply to this comment with the word
STOP