Producing music: easy transition effects part1 - tips for beginners (Ableton live 9 ) [Tutorial]
Hello steemains!
In this step by step tutorial series I'll teach you about transition effects, ergo how to lead in your drop or different sections, using very simple techniques.
In this first part I will show you how to create the "whooosh" effect:
We'll be using the "Operator" tool in ableton live 9 suite for today's presentation.
So to get things ready, simply click and drag the operator tool from the instruments tab to one of the empty MIDI tracks and then create an empty clip by double clicking one of the boxes


This is how things should look like after the procedure.
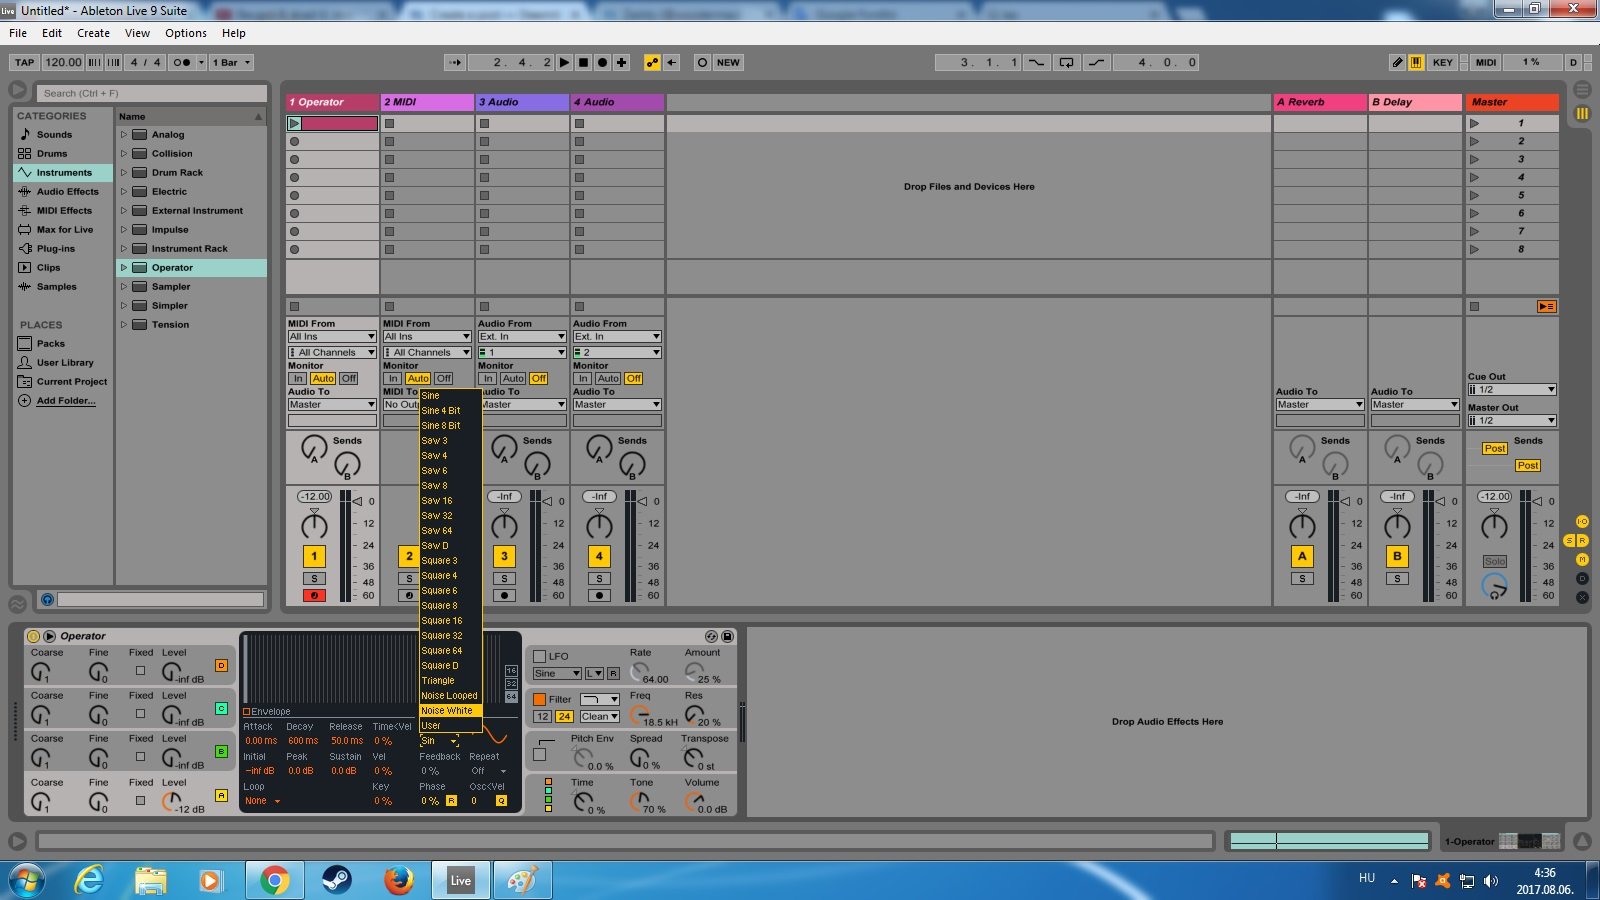
Click on the clip you've just created and press Shift+Tab to enter clip view mode, where u can draw notes, then draw an about 9 bar long note (any note will do), then press Shit+Tab again to return and select the "whitenoise" waveformat in the operator tool. (press B for changing between draw and edit mode)

Now we have a 9 bar long annoying white noise sound, great! To achieve the desired effect we'll have to add the "Autofilter" audioeffect by clicking and dragging it next to the Operator's control panel from the "Audio Effects" tab and depress the high frequency sounds then adding them back starting very slowly and increasing the amount exponencially. You can do this manually while playing the track by dragging the little yellow dot that you can see in the autofilter controller.

You can drag the yellow dot left and right to change the range of frequencies autofilter lets trough or up and down for changing the precentage of the resonance. You can play with it and discover for yourself.
Now to automate the effect first copy your clip, then press tab to enter recording mode and insert your clip there. For an other option you can just start playing your clip and press the record button on the top and it'll do it for you.

Here we can draw the envelope for audio and midi effects, that means if the track is being played, the position of the switches and buttons will be automatically adjusted according to the envelope we drew for it.
So let's make the envelope for the AutoFilter's frequency switch.
I've zoomed in so we can see better what we're doing:

A good whoooshhh builds up slowly and then intensifies. You can see that I pulled the envelope back at the very end, this way it sounds better.
You can curve the line between 2 dots by holding Alt.
You can also use the LFO and Filter functions of the Operator and add more audioeffects like Reverb, Flanger, Overdrive to make things interesting. There are countless ways in which you can customize your unique effects.
Here is an example for this very same whooosh:
That's it for now!
In the next part I'll show you how to create an " intensifying siren" effect.
Tutorial on customization with different audioeffects coming after I've reached 100 subs.
STEEM ON!
Great job my friend!! im work with cubase and reason too!! its a good thing have more colleagues here!! regards
Welcome! U have some really nice hits.
Thanks for lesson! As l use Ableton for My Launchpad but haven't created some light on it. ;(
Everything takes time, be patient,
I'm trying to give as many tips and tricks as I can (: