Mastering - How to Check the Tonal Balance in Reaper with Stock Plugins
In this post, I will explain how to check the tonal balance, while mixing and mastering a song in Reaper.
One important step in the music production process is to check your song against commercially released songs of the same genre or type, in a process called referencing. But how do you this in a systematic way? Here I will share how I approach this, using the free SWS plugin and the stock Reaper ReaFir FFT plugin. The process follows a few simple steps. Assuming you have a song of your own ready, here it goes;
Step 1, find songs that are similar in style to yours, maybe two or three. I typically use three.
Step 2, load all the songs in separate tracks in your DAW, you should now have four tracks where your song is in one of the tracks and your three reference songs below.
Step 3, adjust loudness of all the tracks. This is important, if the loudness is not the same then it is virtually impossible to compare the tracks, as we humans tend to always consider louder as better. Now is when you should use the SWS Loudness extension. If you do not already have it get it here (http://www.sws-extension.org/). It is free to use but if you like it a donation to this open source initiative is highly appreciated. Apply the Loudness analyzer and first analyze the tracks, then adjust the so they are all the same. I normally set the loudness to -14 LUFS (which is the Spotify standard).
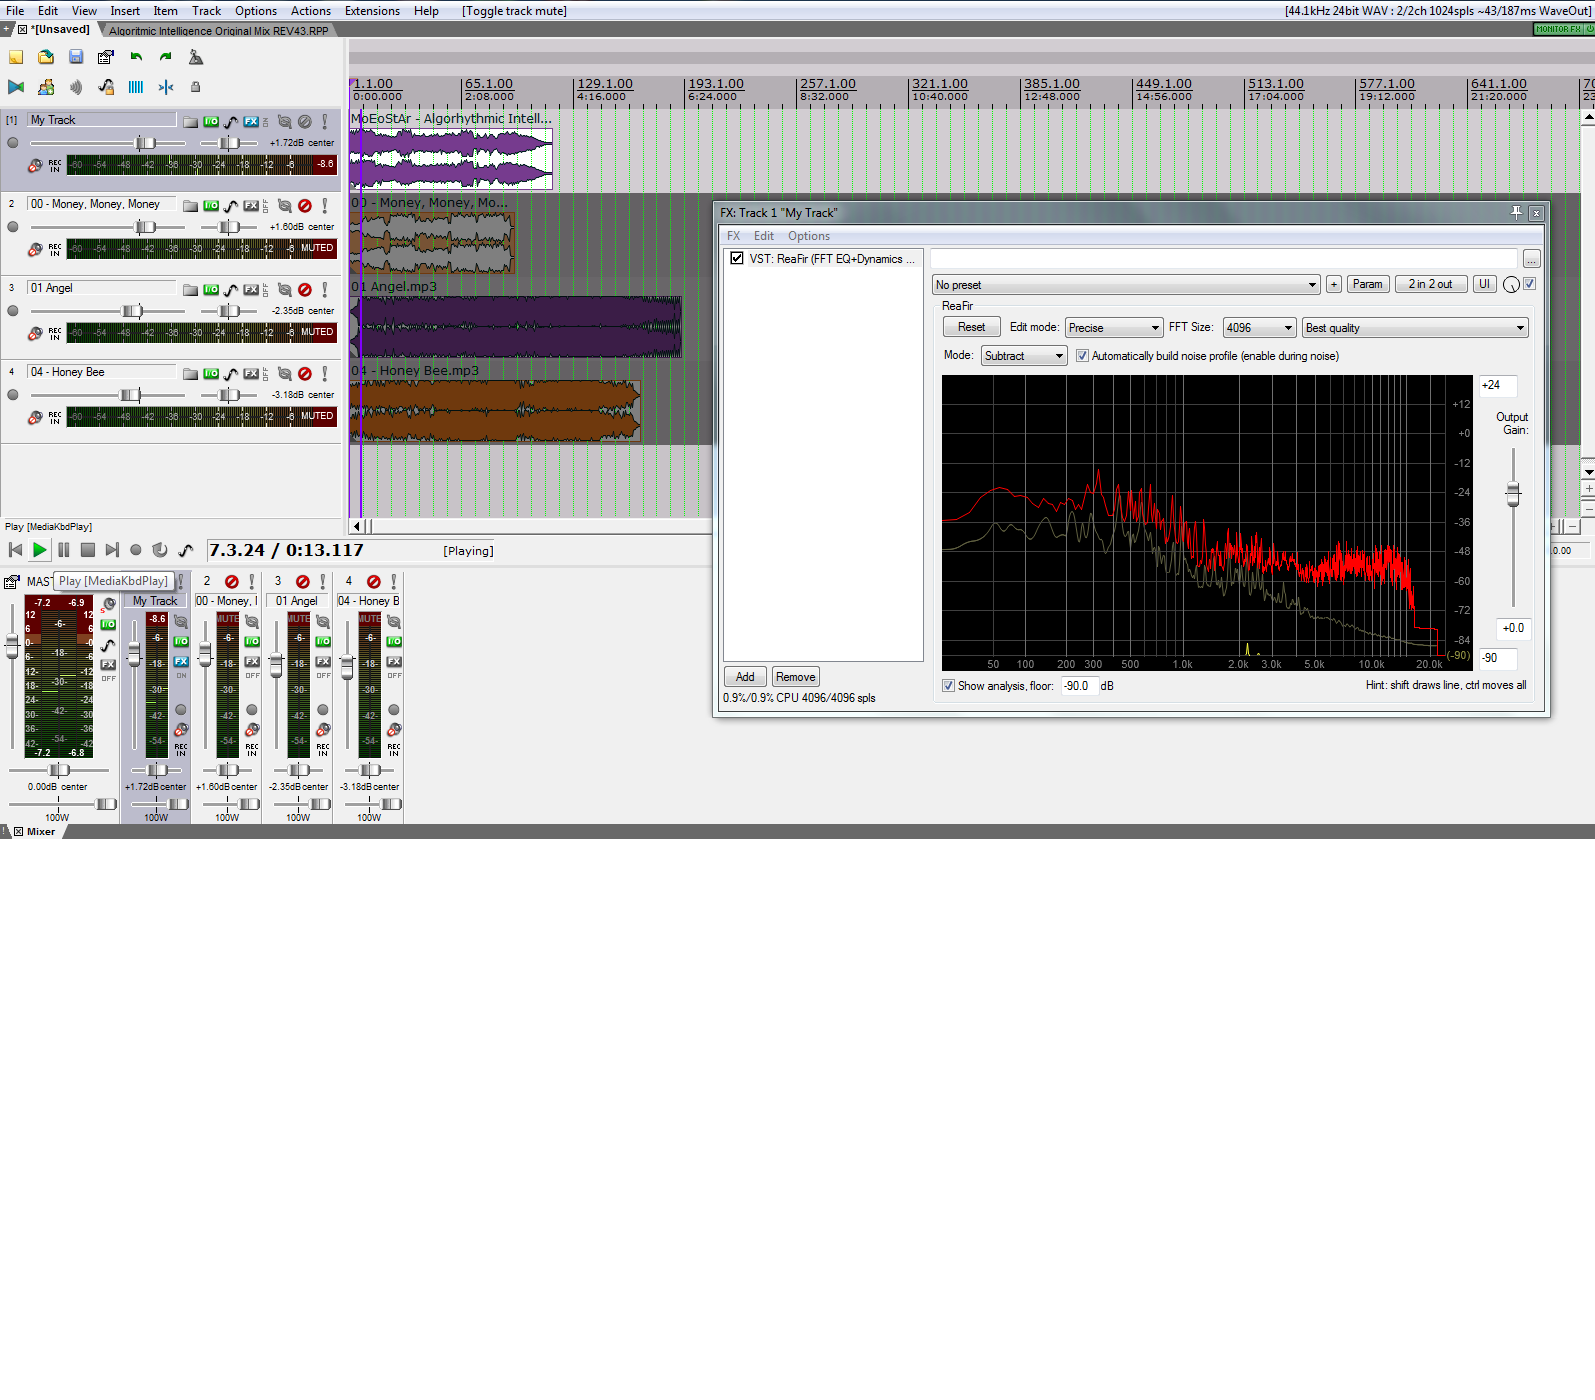
Step 4, Once passed the loudness normalization, you are now set-up to reference the tracks. Now it is time to apply the ReaFir plugin. Insert the plugin on each of the tracks and select the 'Subtract' mode and check the 'Automatically build noise profile (enable during noise)'. Move the cursor to where in the track that you want to start analyze. If it is the first time start from the beginning. Press play and let the DAW playback your song. The audio will sound terrible, but don't worry, it is supposed to when used in this way.
Step 5, Wait until playback has finished and look at the graph in the ReaFir window. This is how the frequency spectrum looks like for my track.
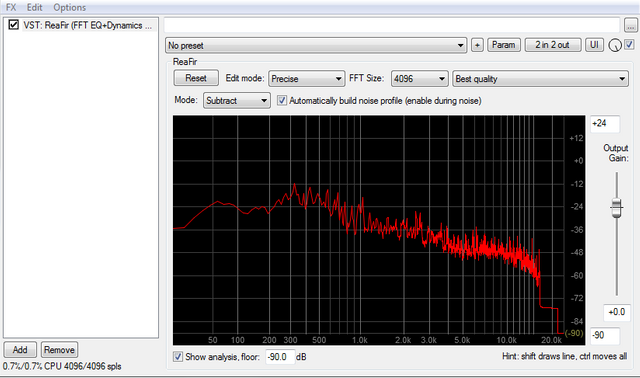
Step 6, Repeat for each of the reference tracks. Below is the spectrum of one of the reference tracks. Do you see the differences?
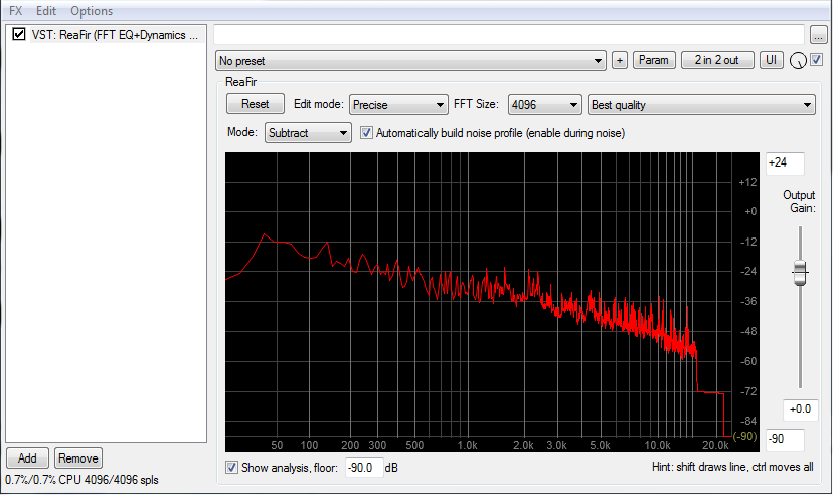
Step 7, Now the fun starts, time to compare your track with the referenced tracks. When I compare 'My Track' to the references I immediately see that mine has a dip around 150 Hz and a peak or a bump around 300 Hz. So, this tells me I might need to turn up the bass fader a tiny bit, or play around with some EQ on the master bus. If you look closer, you will see other things that needs attention and further work.
Step 8, apply changes, render a new version of your track, and repeat until you are satisfied. Now I did this for the entire track, but you can just as well use it for only a portion, the chorus, a break or intro. With this approach, it is easy to check the tonal balance and it can be a great tool to make your songs sound better. And you can do it with free and stock plugins!
But don't let visuals lead you in the blind, remember it should sound good as well.