CUBASE TUTORIAL / THE BASICS OF HOME RECORDING / PART 2
In part I of my Cubase tutorial, I talked about the primary set up one needs to do before the actual recording. I was talking about understanding what Cubase is, how to install it, how to configure it and how to connect it to your sound device so you can start with the basic recording. You can read all about that here:
https://steemit.com/music/@grobens/cubase-tutorial-the-basics-of-home-recording-part-1
Today, I'm going to talk more about the fine tweeks that you can do to your project, depending on what kind of music you want to record. So welcome to PART 2 of the Cubase tutorial.

Let's say you've configured the program and you're about to start your first project. You've added the guitar track and the vocal track, everything is working as it should and you're ready to record. The only thing you want to do before that is set your project up for the specifics of the music you want to record. You have two tracks - a guitar track and a vocal track - and you want to record these things separately so that you can manipulate the sounds any way you like later in the mix.

Your guitar track is linked to your left input and your vocal track is linked to your right input. Before you start, you want to check your metronome settings to make sure the tempo and the rhythm are set for what you want them to. You also want to hear your metronome enough so you can stay in tempo. You want your time signature to be 4/4 and your tempo to be 120 (default option) but you want to be able to change it later. Here's how and where:

For further metronome options, see the screenshot below:


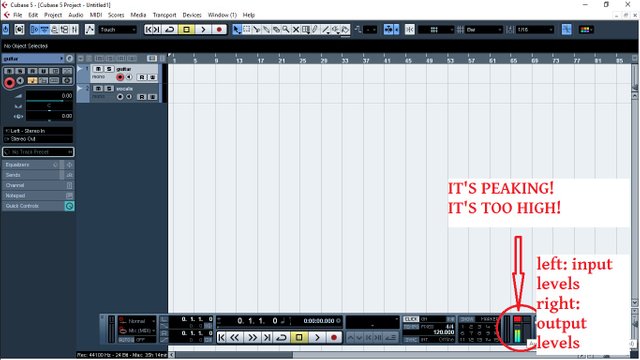
Now that the metronome is all done, you want to check the level of your input signal. This is REALLY IMPORTANT! You want to have a decent clean signal so you can do whatever you want with it later. You don't want it to be too low because increasing the volume later on will result in unwanted noise and you don't want it to be too high because it could go to PEAK and DISTORT the sound so it is unusable later. There's an easy way to check it. The signal level indicators are in the bottom right. IF THEY ARE IN THE GREEN, YOU'RE IN THE CLEAR. If the signal is too high, there will be a RED SQUARE above it, indicating it's PEAKING.
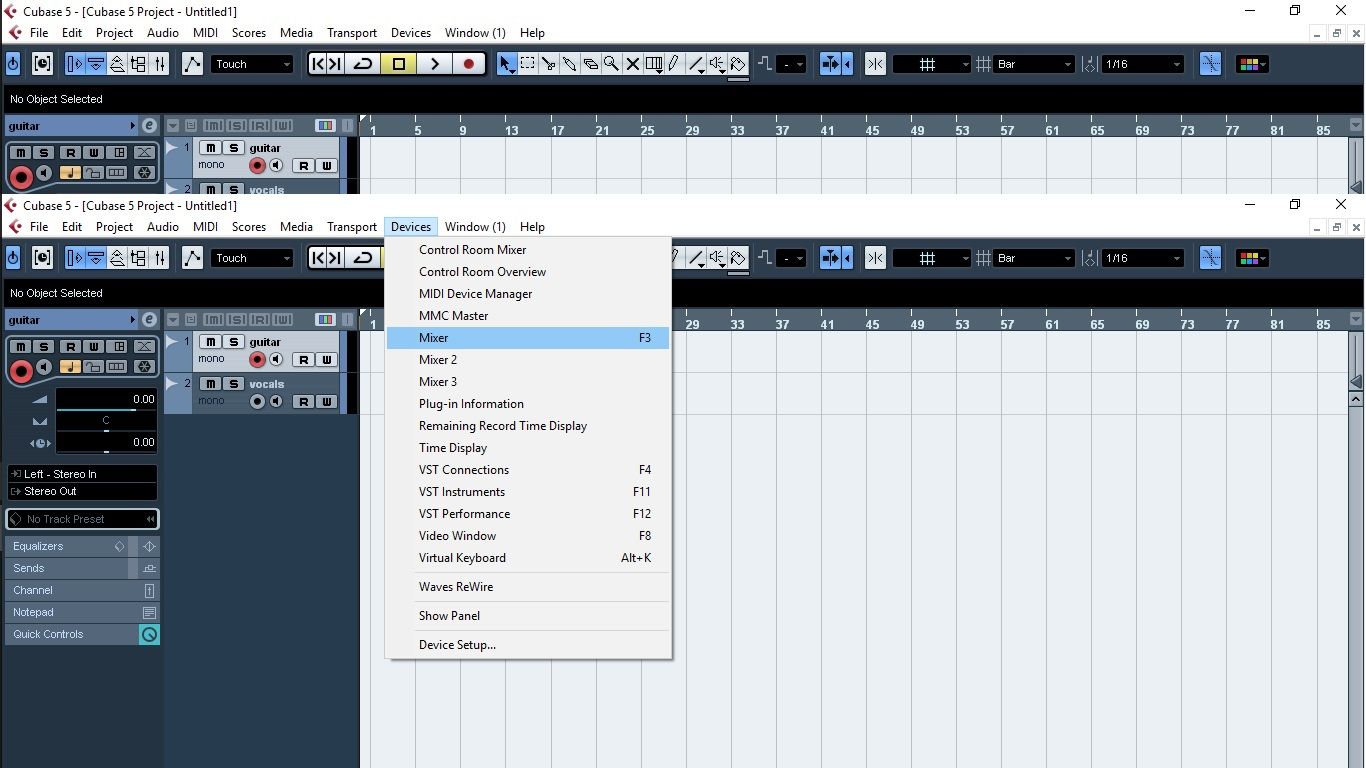
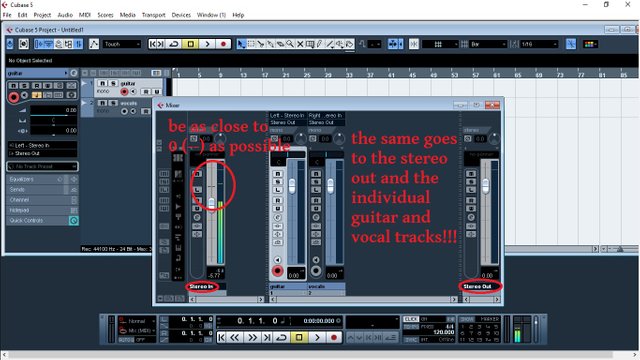
You can also check this in your MAIN MIXER (we'll talk more about the main mixer later):
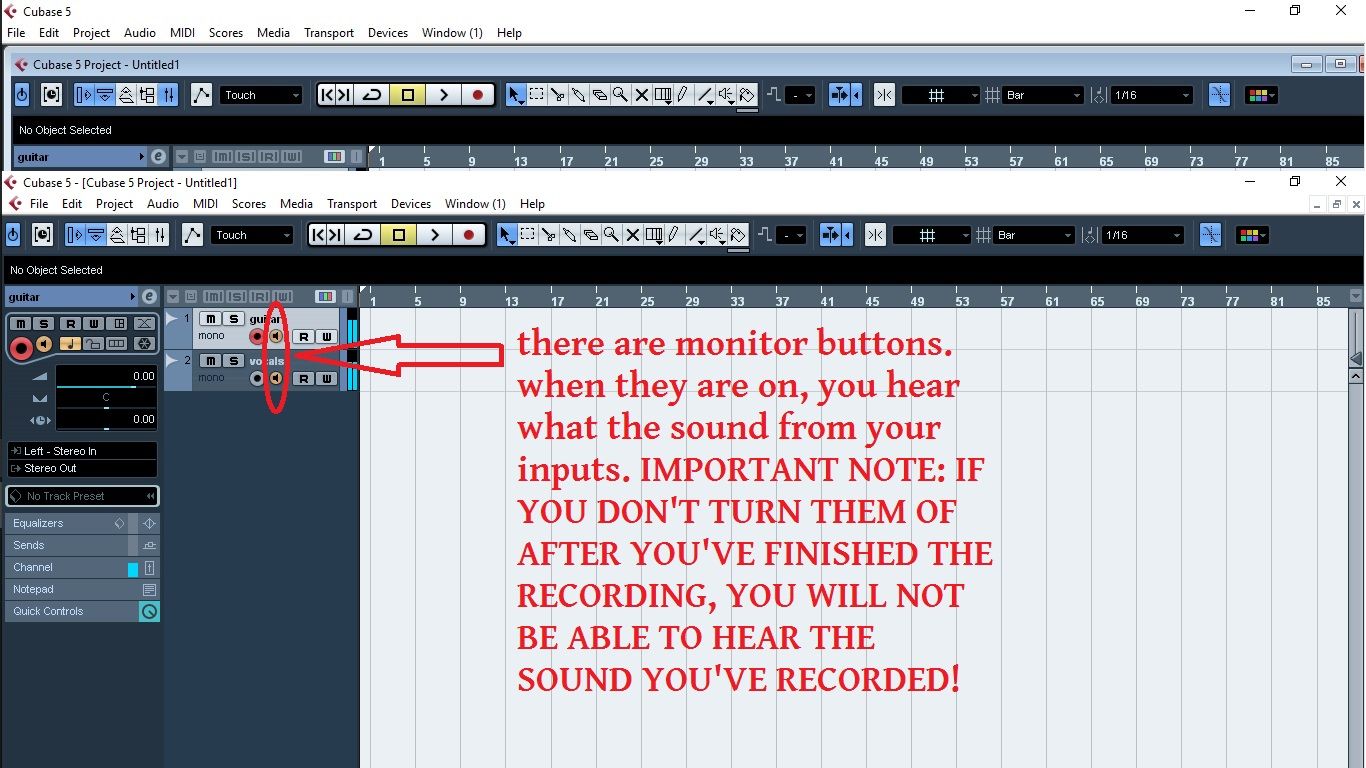
If your signals are right, the tempo and the time signature are fixed, the tracks are linked to their inputs and everything works, you're ALMOST GOOD TO GO. Now, when you record things, you want to hear them in real time. You want to hear what you are playing. There's a button for that!
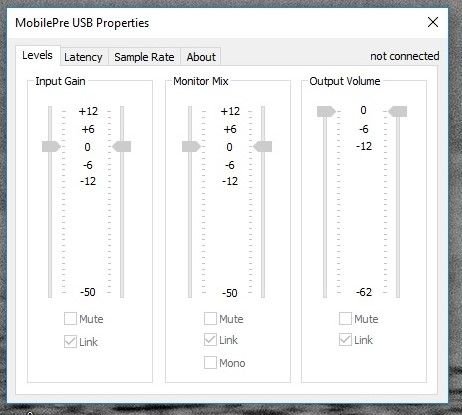
You can adjust your general monitor output levels in your sound device controls that are on your sound device pannel.
And that's it. YOU ARE READY TO GO!
P.S. If you for some reason are UNABLE TO RECORD or you DON'T HEAR A SOUND, make sure to revisit LESSON 1 and check if everything is properly configured in the program and in your computer's device manager. Feel free to leave any questions in the comments, I'll be happy to help!
Talk to you soon in lesson 3, there are more advanced things to come!