Google Authenticator အသံုးျပဳနည္း
အားလံုးမဂၤလာပါ။ ကြ်န္ေတာ္ အခုေျပာျပမွာကေတာ႔ Google Authenticator အသံုးျပဳနည္း ကို https://adpro.futurenet.club
နဲ႔ လက္ေတြ႔ျပသျပီးေရးျပမွာျဖစ္ပါတယ္။ လိုအပ္တာရွိရင္လဲ၀ိုင္းျပီးအၾကံေပးေစခ်င္ပါတယ္။ အခုေျပာျပမဲ႔နည္းလမ္းကေတာ႔
ကြ်န္ေတာ္လက္ေတြ႕စမ္းသပ္ျပီးအသံုးျပဳျပီးျဖစ္ပါတယ္။ ဒီနည္းလမ္းကေတာ႔ ကြ်န္ေတာ္တို႔ ဖုန္းေပ်ာက္သြားခဲ႔ရင္ ကိုယ္အေကာင္႔ကို
ျပန္၀င္လို႔ရတဲ႔နည္းလမ္းေလးလဲျဖစ္ပါတယ္။ပထမဆံုးကြ်န္ေတာ္တို႔ GA key ခံေတာ႔မယ္ဆိုရင္ https://adpro.futurenet.club
ဘက္ကိုအရင္၀င္ပါ။ျပီးရင္ပံု (၁)မွာျပထာတဲ႔အတိုင္း Go to futurenet.club ဘက္ကို၀င္လိုက္ပါ။
ျပီးရင္ Futurenet .club ဘက္ကေန ကိုယ္အေကာင္႔ setting ထဲ၀င္ပါ။ (ပံု ၂) ကိုၾကည္႔ပါ။
Setting ကိုႏွိပ္လိုက္ပါ။ေအာက္ဆံုးမွာ အနီနဲ႔ျပထားတဲ႔ (ပံု -၃ )ကိုၾကည္႔ပါ။
You can configure you two-stept Authenticator here ဆိုတဲ႔ အနီနဲ႔ျပထားတဲ႔ေနရာကိုႏွိပ္လိုက္ပါ။
ျပီးရင္ ေအာက္က (ပံု -၄ )မွာျပထားတဲ႔ေနရာေရာက္လာမယ္။
အဲေနရာမွာ ကြ်န္ေတာ္တို႔က နည္းလမ္း ၂ ခုနဲ႔လုပ္လို႔ရတယ္။ပံုကိုေသခ်ာၾကည္႔ပါ။
scan your QR code ျပထားတဲ႔ ေနရာကို ကိုယ္ဖုန္းကေန cammera နဲ႔ QR corde ဖတ္လို႔ရတယ္။အဲနည္းကိုမသံုးပါ။
(ဖုန္းေပ်ာက္သြားရင္ အေကာင္႔ျပန္မရႏိုင္လို႔ပါ။)
(ပံု - ၄ ) ေဘးမွာ အနီနဲ႔ ၀ိုင္းျပထားတဲ႔ေနရာကိုၾကည္႔ပါ။ ကြ်န္ေတာ္တို႔ future net account name နဲ႔ Account keY
ကို ေသခ်ာ စာအုပ္တစ္ခုထဲမွာ ေရးမွတ္ထားေပးပါ။ ( ဒီအေကာင္ နာမည္နဲ႔ ကီးက အေရးၾကီးလို႔ပါ။)
ျပီးရင္ ကြ်န္ေတာ္တိုဖုန္းထဲကေန Google play store ကေန Google Authenticator ဆိုတဲ႔ app ေလးကို ေဒါင္းလုပ္လုပ္ျပီး
ဖုန္းထဲမွာ install လုပ္လုိက္ပါ။
(ပံု -၅ )မွာ ၾကည္႔ပါ။ Google Authenticator ဆိုတဲ႔ app ပါ။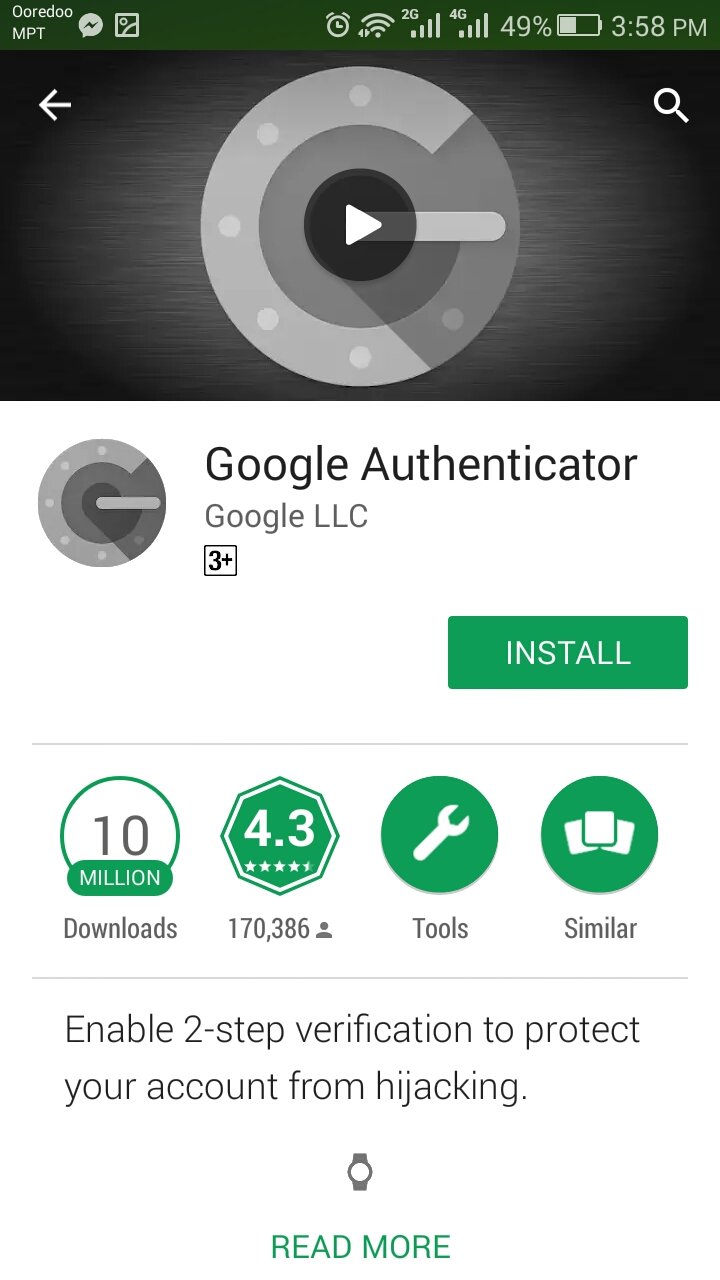
Google Authenticator ဆိုတဲ႔ app ကို install လုပ္ျပီးဖြင္႔လိုက္ပါ။ ပံု ၆ မွာျပထားတဲ႔အတိုင္ပါ။![4.jpeg]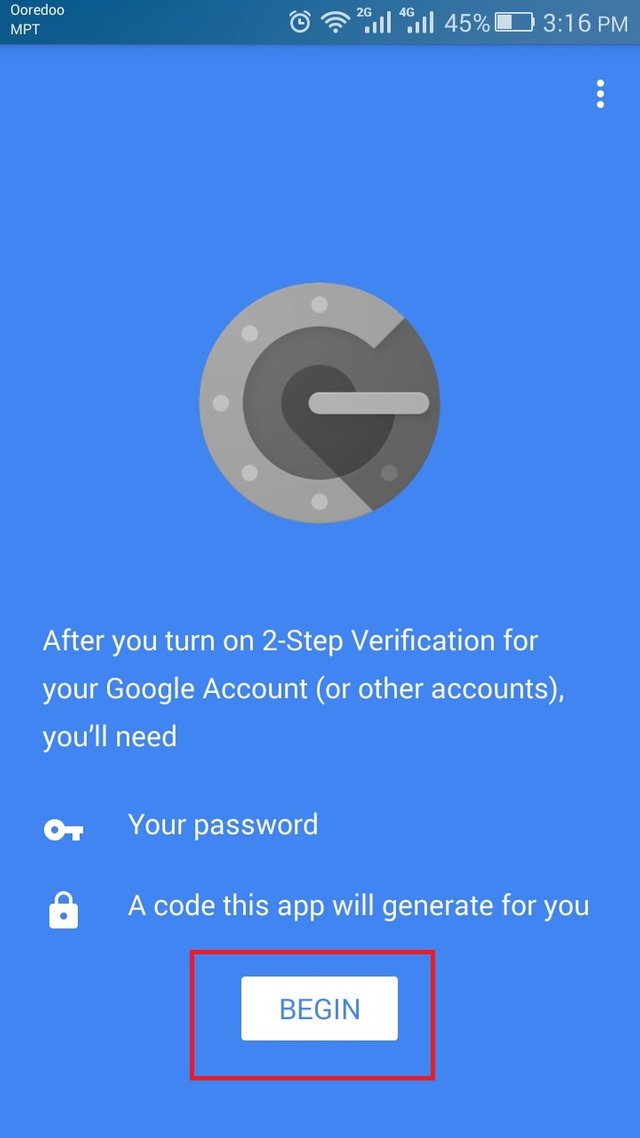
အနီနဲ႔ျပထားတဲ႔ေနရာ Begin ကိုႏွိပ္ပါ။ ျပီးရင္ (ပံု ရ မွာျပထားသလို skip ကို ႏွိပ္ေပးပါ။ )
ျပီးရင္ (ပံု ၈ )မွျပထားတဲ႔ေနရာေရာက္လာမယ္။ အဲမွာ အနီနဲ႔ျပထားတဲ႔ေနရာကို ေရြးေပးပါး။
ျပီးရင္ (ပံု ၉ ) ပံုစံျပထားတဲ႔ေနရာမွာ futurenet ကေပးတဲ႔ ေစာေစာက ေျပာထားတဲ႔ အေကာင္႔နာမည္နဲ႔ ကီးကိုထည္႔ျပီး ADD ကုိႏွိိပ္လိုက္ပါ။
ပံု (၁၀ )မွာ ျပထားသလို ဂဏန္း ၆ လံုးေပၚလာမယ္။ 
အဲ ဂဏန္း ၆ လံုးကို
ေအာက္က ပံုမွာ ျပထားတဲ႔အတိုင္း futurenet အေကာင္ဘက္ ကို ထည္႔ေပးပါ။
ဒါဆိုျပီးပါျပီ။
ေအာက္မွျပထားတဲ႔အတိုင္း ကိုယ္အေကာင္႔ကို ၀င္တိုင္း GA key ေတာင္းလိမ္႔မယ္။ ကိုယ္ဖုန္းကို ဖြင္႔ Google Authenticator app
ကေပးတဲ႔ ဂဏန္း ၆ လံုးကိုထည္႔ေပးလိုက္။
ဒီေနရာမွာေျပာခ်င္တာက ကိုယ္ဖုန္းေပ်ာက္ေပ်ာက္ ။အခိုးခံရခံရ ေနာက္ဖုန္းအသစ္မွာ Google Authenticator app ကို
install လုပ္လိုက္။ ကြ်န္ေတာ္စာအုပ္ထဲမွာ မွတ္ထားခိုင္းတဲ႔ Account name and Account key ကို Google Authenticator app
မွာျပန္႔ထည္႔ေပးလိုက္။ဒါဆိုကိုယ္အေကာင္႔ျပန္၀င္လိုရပါတယ္။
(အေကာင္၀င္တိုင္းေပးတဲ႔ ဂဏန္း ၆လံုးက အျမဲတန္း စကၠန္႔ ၃၀ တစ္ခါေျပာင္းပါတယ္။ )
MSU GROUP -1 043
@aunghtet.mdy
Good Post But You Need-
Don't Tag- dpakyaw
Eg: PLZ Write -
MUS No 043
Group 1
ေကာင္းလိုက္တဲ႕ post ဒီေကာင္သံုးနည္း ကြ်န္ေတာ္သိခ်င္ေနတာ အေတာ္ပဲ ေက်းေက်း
အေတာ္အဆင္ေျပေစတဲ့ပိုစ့္တစ္ခုပါ..
Post for thank
Good knowledge
Congratulations @aunghtet.mdy! You received a personal award!
Click here to view your Board of Honor
Congratulations @aunghtet.mdy! You received a personal award!
You can view your badges on your Steem Board and compare to others on the Steem Ranking
Vote for @Steemitboard as a witness to get one more award and increased upvotes!