How to install Moodle LMS on Ubuntu 20.04, 18.04 with Nginx, LetsEncrypt, MariaDB

This tutorial shows how to install Moodle Learning management system on Ubuntu 20.04 using Nginx lightweight web server.
Moodle is used for blended learning, distance education, flipped classroom and other e-learning projects in schools, universities, workplaces and other sectors. On this Covid pandemic, the popularity of Moodle LMS is increased much. So let’s see how we can install moodle in our own ubuntu server using Nginx.
For more about Moodle, please check their Homepage here.
Prerequisites
- A ssh access to your web server.
- Ubuntu server preinstalled
- A domain/subdomain for your Moodle website
First, you have to log in to your ssh server. You can refer to this article to do it. After you get the access, follow the steps below.
Step 1 : Install Nginx webserver
As any web app, moodle also requires a web server to function. So we will install Nginx, the most popular lightweight web server available today.
To install Nginx on Ubuntu, run the commands below:
sudo apt update
sudo apt install nginx
After installing Nginx, the commands below can be used to stop, start and enable the Nginx service to always start up with the server boots.
sudo systemctl stop nginx.service
sudo systemctl start nginx.service
sudo systemctl enable nginx.service
To test whether Nginx is installed and functioning, open your web browser and browse to the server’s IP address or hostname.
http://ip-address
If you get a webpage like this, then Nginx successfully installed.
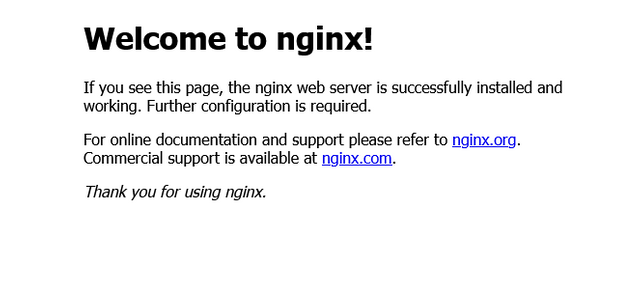
Nginx web server default webpage
Step 2 : Install MariaDB Server
You’ll also need a database server to run Moodle. A database server to store Moodle content.
You can use any of MySQL, MariaDB, Postgres Databases for Moodle installation. Here we install MariaDB, A true open source database server that you can use with Moodle. It is fast, secure and the default server for almost all Linux servers.
To install MariaDB, run the commands below:
sudo apt-get install mariadb-server mariadb-client
After installing MariaDB, the commands below can be used to stop, start and enable MariaDB service to always start up when the server boots.
sudo systemctl stop mariadb.service
sudo systemctl start mariadb.service
sudo systemctl enable mariadb.service
Next, run the commands below to secure the database server with a root password if you were not prompted to do so during the installation.
sudo mysql_secure_installation
When prompted, answer the questions below by following the guide.
Enter current password for root (enter for none): Just press the **Enter
   Set root password? [Y/n]: Y
   New password: Enter password for Database root
   Re-enter new password: Repeat password
   Remove anonymous users? [Y/n]: Y
   Disallow root login remotely? [Y/n]: Y
   Remove test database and access to it? [Y/n]: Y
   Reload privilege tables now? [Y/n]: Y
To verify and validate that MariaDB is installed and working, login to the database console using the commands below:
sudo mysql -u root -p
type the root password when prompted.
If you see a similar screen as shown above, then the server was successfully installed.
Next, run the commands below to open MariaDB default config file…
sudo nano /etc/mysql/mariadb.conf.d/50-server.cnf
Then add the following lines below #skip-external-locking line and save.
Tip:- To save on nano editor Ctrl + O and press Enter, to close Ctrl + X and press Enter
    #skip-external-locking
    innodb_file_format = Barracuda
    innodb_file_per_table = 1
    innodb_large_prefix = ON
Now restart MariaDB.
sudo systemctl restart mariadb.service
Step 3 : Install PHP 7.4 and other Modules
Moodle is a PHP-based application, and PHP is required to run it. Since some versions of Ubuntu don’t have the latest versions of PHP, you can add a third-party PPA repository to install PHP from there.
The command below will add a third-party PPA to Ubuntu.
  sudo apt-get install software-properties-common
  sudo add-apt-repository ppa:ondrej/php
  sudo apt update
Next, run the commands below to install PHP 7.4 and related modules.
sudo apt install php7.4-fpm php7.4-common php7.4-mysql php7.4-gmp php7.4-curl php7.4-intl php7.4-mbstring php7.4-soap php7.4-xmlrpc php7.4-gd php7.4-xml php7.4-cli php7.4-zip
After installing PHP 7.4, go and configure some basic settings that may be required for Moodle to function properly.
Run the commands below to open PHP
sudo nano /etc/php/7.4/fpm/php.ini
Below are good settings to configure for most Moodle websites.
  file_uploads = On
  allow_url_fopen = On
  short_open_tag = On
  memory_limit = 256M
  cgi.fix_pathinfo = 0
  upload_max_filesize = 100M
  max_input_vars = 5000
  max_execution_time = 360
  post_max_size = 100M
  date.timezone = Asia/Kolkata
That should get PHP 7.4 installed with some basic settings to allow Moodle to function.
Step 4: Create Moodle Database
When all the servers are installed above, it’s now time to begin setting up Moodle environment. First, run the steps below to create a blank database for Moodle to use.
Logon to MariaDB database console using the commands below:
sudo mysql -u root -p
Then create a database called moodle
CREATE DATABASE **moodle**;
Next, create a database user called moodleuser and set password
CREATE USER '**moodleuser**'@'localhost' IDENTIFIED BY 'new_password_here';
Then grant the user full access to the database.
GRANT ALL ON **moodle**.* TO '**moodleuser**'@'localhost' WITH GRANT OPTION;
Finally, save your changes and exit.
  FLUSH PRIVILEGES;
  EXIT;
Step 5: Download Moodle
At this point, Moodle is ready to be downloaded and installed. Use the commands below to download the latest version of Moodle. At the time of this writing, the latest version is 3.11.
To view Moodle releases, see this page.
sudo apt install git curl
After installing git and curl above, change into the Nginx root directory and download Moodle packages from Github. Always replace the branch number with the latest branch.
 cd /var/www/
 sudo git clone -b MOODLE_311_STABLE git://git.moodle.org/moodle.git moodle
Then run the commands below to set the correct permissions for Moodle to function.
sudo mkdir -p /var/www/moodledata
sudo chown -R www-data:www-data /var/www/
sudo chmod -R 755 /var/www/
sudo chown www-data:www-data /var/www/moodledata
Step 6: Configure Nginx
Below is where you configure the Nginx VirtualHost file for the Moodle site you’re creating. This file defines how client requests are handled and processed.
Run the commands below to create a new VirtualHost file called moodle in the /etc/nginx/sites-available/ directory.
sudo nano /etc/nginx/sites-available/moodle
A very good configuration setting for most Moodle sites on the Nginx servers is below. This configuration should work great.
Copy the content below and save it into the file created above. ( Replace example.com with your moodle domain. If you have multiple domains, then put it there with a space. You also need to add an A record on your DNS pointing to the server IP)
server {
    listen 80;
    listen [::]:80;
    root /var/www/moodle;
    index  index.php index.html index.htm;
    server_name  example.com www.example.com;

    client_max_body_size 100M;
    autoindex off;
    location / {
        try_files $uri $uri/ =404;
    }

    location /dataroot/ {
      internal;
      alias /var/www/moodledata/;
    }

    location ~ [^/].php(/|$) {
        include snippets/fastcgi-php.conf;
        fastcgi_pass unix:/run/php/php7.4-fpm.sock;
        fastcgi_param SCRIPT_FILENAME $document_root$fastcgi_script_name;
        include fastcgi_params;
    }
}
Save the file and exit.
After saving the file above, run the commands below to enable the new site, then restart the Nginx server.
sudo ln -s /etc/nginx/sites-available/moodle /etc/nginx/sites-enabled/
sudo systemctl restart nginx.service
At this stage, Moodle is ready and can be launched by going to the server’s IP or hostname. If you added A record on your DNS, then you can access it with your domain/subdomain.
http://<yourdomain.com>
However, if you want to enable SSL or accept web traffic over HTTPS, then you can continue below to install and configure Let’s Encrypt free SSL certificates.
Step 7: Install Let’s Encrypt Wildcard Certificates
The first step to using Let’s Encrypt to obtain an SSL certificate is to install the Certbot software on your server.
Let’s begin by updating the package lists installing Certbot for Nginx on Ubuntu. Type y and enter if prompted
sudo apt update && sudo apt install certbot python3-certbot-nginx
We will now obtain a cert for our test domain example.com. Certbot has an Nginx plugin for Ubuntu, which automates the certificate installation.
sudo certbot --nginx
You will get this response
Enter email address (used for urgent renewal and security notices) (Enter 'c' to
cancel):

Enter an email address where you can be contacted in case of urgent renewal and security notices.

Please read the Terms of Service at
https://letsencrypt.org/documents/LE-SA-v1.2-November-15-2017.pdf. You must
agree in order to register with the ACME server at
https://acme-v02.api.letsencrypt.org/directory
-------------------------------------------------------------------------------
(A)gree/(C)ancel:
Press a and ENTER to agree to the Terms of Service.
Would you be willing to share your email address with the Electronic Frontier
Foundation, a founding partner of the Let's Encrypt project and the non-profit
organization that develops Certbot? We'd like to send you email about EFF and
our work to encrypt the web, protect its users and defend digital rights.
-------------------------------------------------------------------------------
(Y)es/(N)o:
Press n and ENTER to not share your email address with EFF.
Which names would you like to activate HTTPS for?
- - - - - - - - - - - - - - - - - - - - - - - - - - - - - - - - -
1: example.com
2: www.example.com
- - - - - - - - - - - - - - - - - - - - - - - - - - - - - - - - -
Select the appropriate numbers separated by commas and/or spaces, or leave input
blank to select all options shown (Enter 'c' to cancel):
If you have multiple domains already configured on your server, you will see a list of them here. In this example, we only have one domain example.com and its www. prefix.
Select option 1 if you don’t want to use the www. prefix in your website address, otherwise select option 2.
Obtaining a new certificate
Performing the following challenges:
http-01 challenge for example.com
Waiting for verification...
Cleaning up challenges
Created an SSL vhost at /etc/nginx/sites-available/example.com-le-ssl.conf
Enabled Nginx socache_shmcb module
Enabled Nginx ssl module
Deploying Certificate to VirtualHost /etc/nginx/sites-available/example.com-le-ssl.conf
Enabling available site: /etc/nginx/sites-available/example.com-le-ssl.conf

Please choose whether or not to redirect HTTP traffic to HTTPS, removing HTTP access.
- - - - - - - - - - - - - - - - - - - - - - - - - - - - - - - - - - - - - - - -
1: No redirect - Make no further changes to the webserver configuration.
2: Redirect - Make all requests redirect to secure HTTPS access. Choose this for
new sites, or if you're confident your site works on HTTPS. You can undo this
change by editing your web server's configuration.
- - - - - - - - - - - - - - - - - - - - - - - - - - - - - - - - - - - - - - - -
Select the appropriate number [1-2] then [enter] (press 'c' to cancel):
Press 2 and ENTER to redirect all traffic to HTTPS.
Redirecting vhost in /etc/nginx/sites-enabled/example.com.conf to ssl vhost in /etc/apache2/sites-available/example.com-le-ssl.conf

- - - - - - - - - - - - - - - - - - - - - - - - - - - - - - - - - -
Congratulations! You have successfully enabled https://example.com

You should test your configuration at:
https://www.ssllabs.com/ssltest/analyze.html?d=example.com
- - - - - - - - - - - - - - - - - - - - - - - - - - - - - - - - - -
You installed SSL Certificate for your domain now.
Now let’s restart Nginx and PHP 7.4-FPM
Next, open your browser and browse to the server domain name. You should see Moodle setup wizard to complete. Please follow the wizard carefully.
Go to : https://<your-moodle-domain.com>/
Then follow the on-screen instructions.
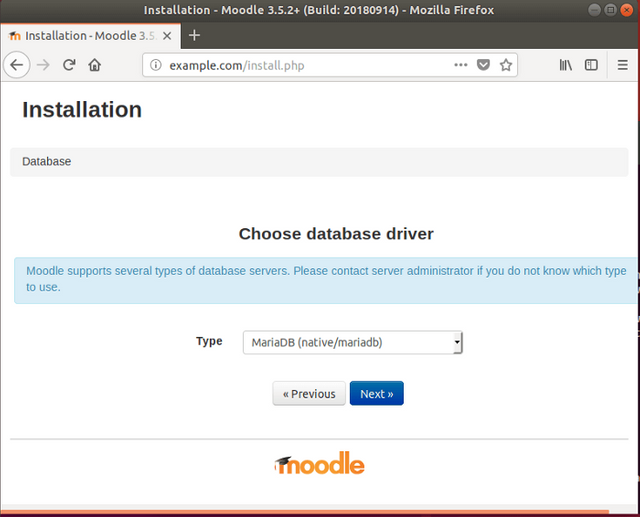
Select the installation language, then click Next to continue.

On the next screen, choose a database drive [MariaDB] and click Next to continue.
On this screen, type in the database info you created above, including the database name, username, and password.
Then click Next to continue.

Here is where you type in the admin username, create a password, and other details.
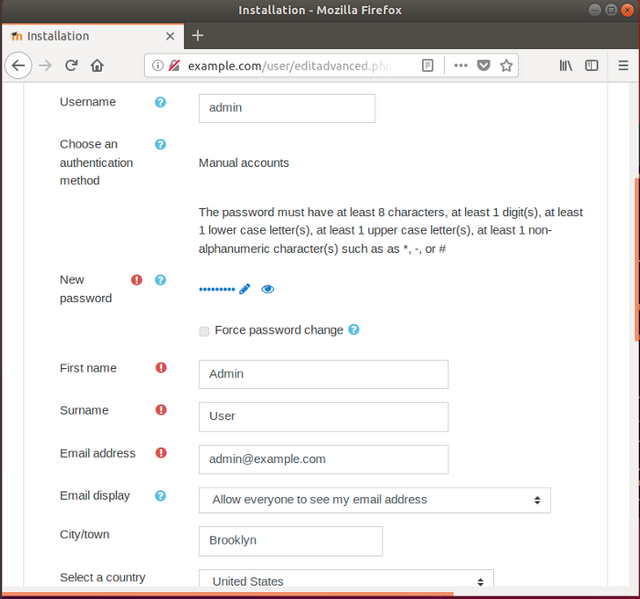
When you’re done, Moodle should be installed and ready to use. Login as admin and begin configuring your site.
That’s it!
Congratulation! You have successfully installed Moodle CMS on Ubuntu 18.04 | 20.04.