Monoeci Masternode Set Up
Hi, I would like to show you guys how to set up remote vps masternode for Monoeci. Just follow my guide you guys will able to set up a masternode less than 30 minutes! :)
Let's get started.
First you guys need create vps server. I will use vultr for this guide. Here is the link to start https://www.vultr.com/?ref=7188571
Required Operating System: Ubuntu 14.04
Setting Up a Server
After creating Vultr Account click on the big plus sign

It will take you to the creating server page.
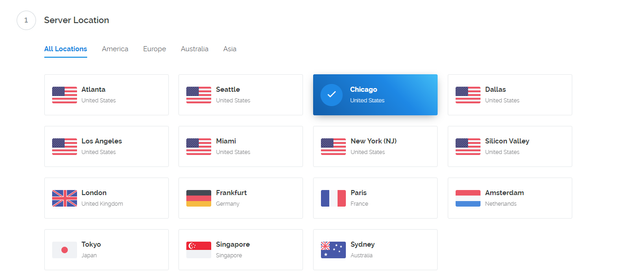
1.First choose your server location. Which means choose the closest place to you. In my case Chicago.
2.Choose Server Type.
We would like to choose Ubuntu 14.04

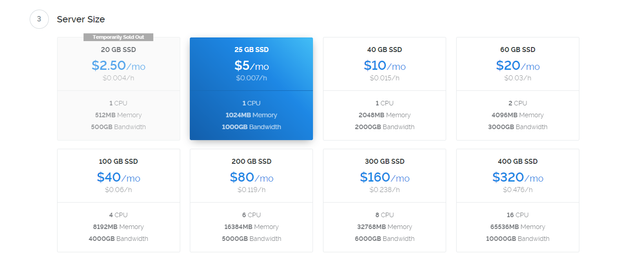
3.Choose Cheapest Server Size :)
4.Give it a server name. I named simple monoeci-1

5.Press Huge button Deploy Now and done. Let's wait until server is finished.
Setting up a control wallet with a masternode conf
After we have finished setting up a server. We are going to click on the manage
Download Putty In order to access to the server. Here is the link.
https://the.earth.li/~sgtatham/putty/latest/w64/putty-64bit-0.70-installer.msi
After downloading putty go to your windows search bar and search for the putty word it should show up. Now open up your putty in order to access to the server
Now go back to your web browser. You should see this page.

Copy your server ip address put it in the putty.
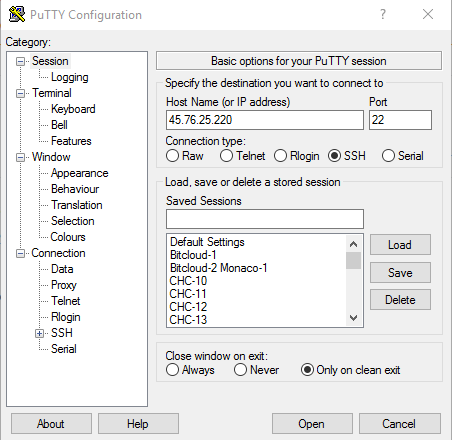
Press Open and press Yes. You should see a terminal looks something like this.
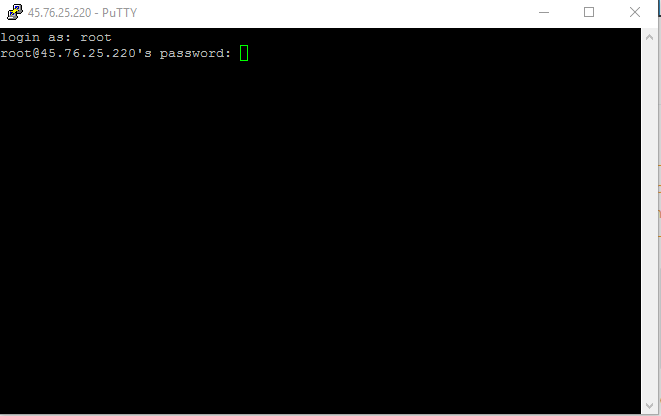
Now type the username:root
press enter
after that copy or type the password. Copy the password from vultr and paste to the terminal simply right click on mouse will paste to the terminal. Password will be hidden.
It is just simply copy paste from now on. Just copy what I have and paste to the terminal :).
- Let's update and upgrade the server
apt-get update -y
apt-get upgrade -y
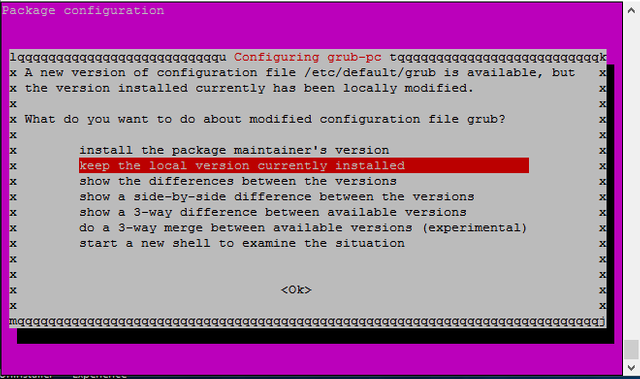
Note: when you see the this thing just press enter inside terminal.
2.Let's install essentials
apt-get install -y libboost-system-dev libboost-filesystem-dev libboost-chrono-dev
apt-get install -y libboost-program-options-dev libboost-test-dev libboost-thread-dev
apt-get install -y unzip libminiupnpc-dev python-virtualenv libboost-all-dev
apt-get install -y build-essential libtool autotools-dev automake pkg-config libssl-dev libevent-dev bsdmainutils
apt-get install libevent-pthreads-2.0-5
3.Install Berkeley 4.8
apt-get install -y software-properties-common && add-apt-repository -y ppa:bitcoin/bitcoin
apt-get update -y
apt-get install -y libdb4.8-dev libdb4.8++-dev
apt-get install -y git virtualenv
Note some parts is credited to elkmar@discord
Adding User
adduser monacouserusermod -aG sudo monacousersu - monacouser
Installing Control Wallet
1.Let's install Wallet
wget https://github.com/monacocoin-net/monoeci-core/releases/download/0.12.2/monoeciCore-0.12.2-linux64-cli.Ubuntu14.04.tar.gz
tar xvf monoeciCore-0.12.2-linux64-cli.Ubuntu14.04.tar.gz
2.Command and Running monoecid
sudo cp monoecid /usr/bin/
sudo cp monoeci-cli /usr/bin/
monoecid &
Wait 5-10 second and do this
monoeci-cli stop
pkill -9 monoecid
Note some parts is credited to Caboosethevehicledestroyer@discord
1.Setting up your local wallet for receiving the initial 1000 XMCC Capital required.
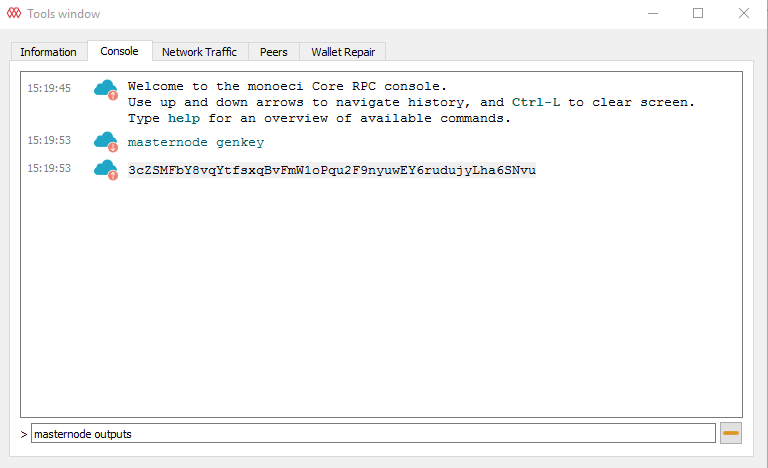
Firstly install the latest Monoeci wallet found Here, next start up the wallet and navigate to Tools and open the “Debug Console” as shown below.
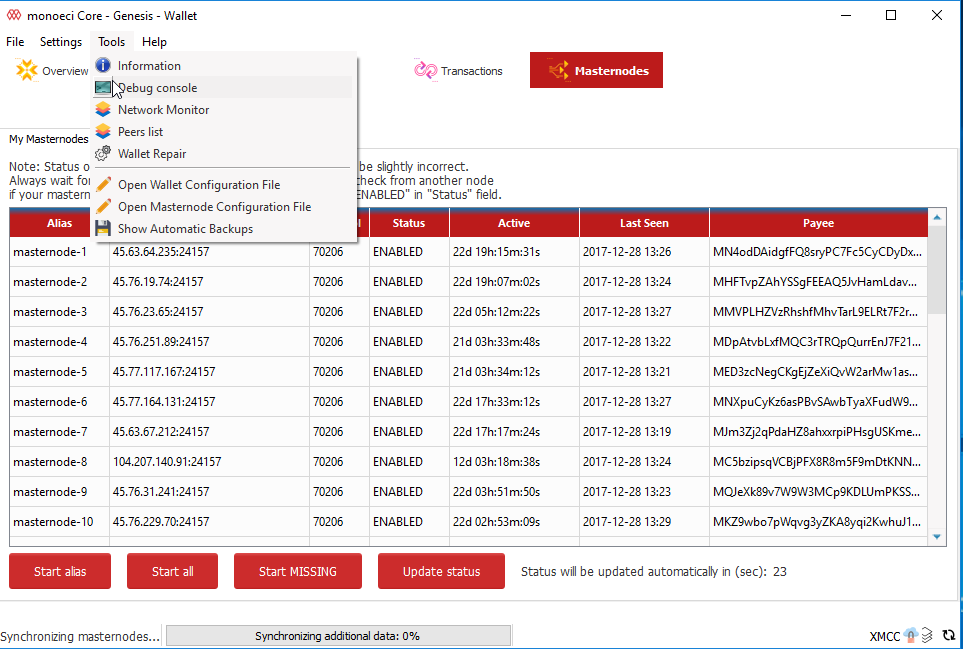
In the command box type the following command:
masternode genkey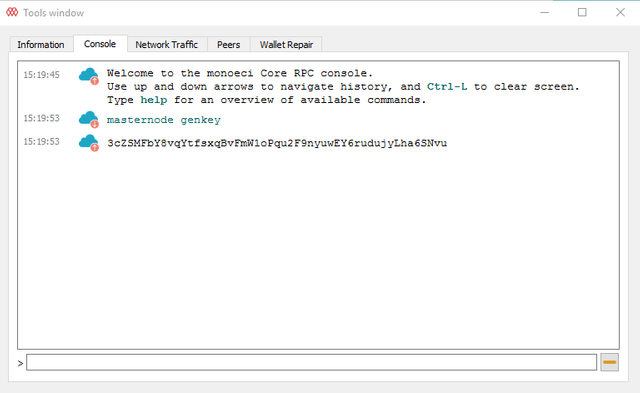
You should see output this is going to be your masternode private key copy it and save it somewhere
1.Configure the monoeci file
Now we going to use nano. Nano is linux notepad
nano ~/.monoeciCore/monoeci.conf
Copy and paste this
rpcuser=putanyworkyoulike
rpcpassword=putanyworkyoulike
rpcallowip=127.0.0.1
port=24157
server=1
listen=1
daemon=1
maxconnections=24
masternode=1
masternodeprivkey=[your masternode private key my is 3cZSMFbY8vqYtfsxqBvFmW1oPqu2F9nyuwEY6rudujyLha6SNvu]
externalip=[your-server-ip-address-here my is 45.76.25.220]
logtimestamps=1
mnconflock=1
PressCTRL-X > PressY> Press [ENTER]
We are done configuring the masternode now let's started monoeci masternode!
nohup monoecid &
1.Getting sentinel
git clone https://github.com/monacocoin-net/sentinel.git
cd ~/sentinel/
virtualenv ./venv
./venv/bin/pip install -r requirements.txt
2.Configuring sentinel
echo "monoeci_conf=/home/monacouser/.monoeciCore/monoeci.conf" >> ~/sentinel/sentinel.conf
3.Adding sentinel on crontab
crontab -l > mycron
echo "* * * * * cd /home/monacouser/sentinel/ && ./venv/bin/python bin/sentinel.py >/dev/null 2>&1" >> mycron
crontab mycron
rm mycron
Great we are almost finished!
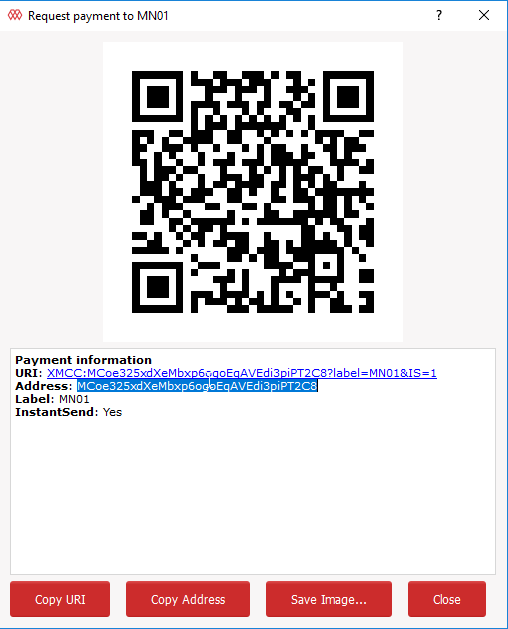
Go to Receive > Label MN01 > Press
Request Payment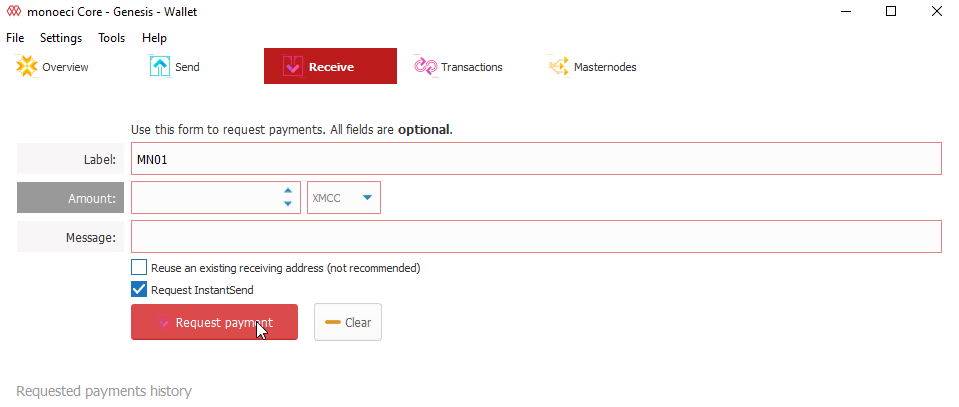
Go to send and put address on Pay To: Label. Put exactly 1000 XMCC coins and press send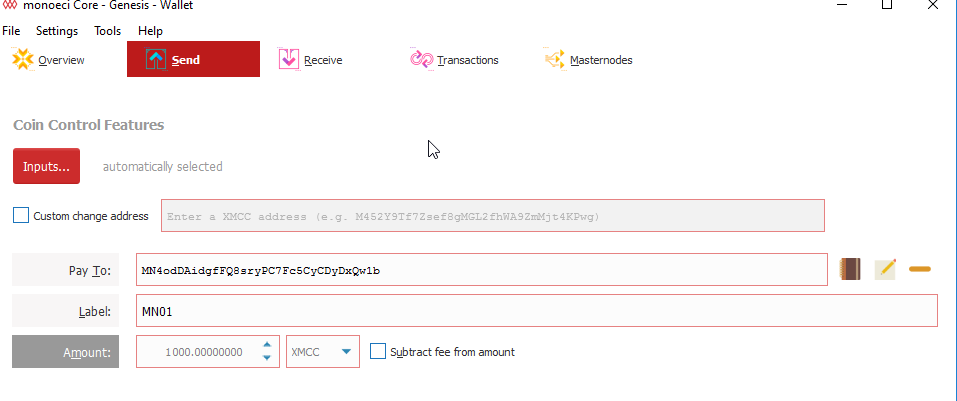
Now wait for 15 confirmations which will take 30 minutes
Let's navigate to Tools and open the “Debug Console” as shown below.

and type masternode outputs
you will see output something like this
{
    "1e665c23487ec14a147170ee4b4e24255ed1f9d032a49bb16df7b8c1f9fasdf8" : "0",
}
TxHash: 1e665c23487ec14a147170ee4b4e24255ed1f9d032a49bb16df7b8c1f9fasdf8
TxIndex: 0
Now save this output somewhere
Go to windows search bar type this ```%appdata% > go to folder > find monoeciCore folder > edit masternode.conf and fill out like this but with your own data
Save it conf and close your wallet and open it again
Go to your wallet > Settings > Options > Wallet > Check Mark Show Masternodes Tab
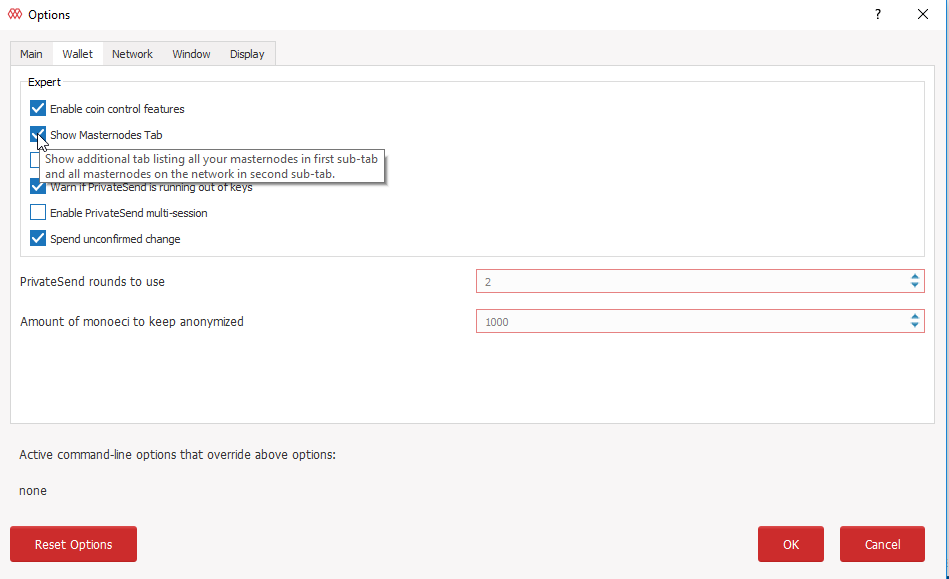
Press Ok > Close your wallet and open up again
Note this part credited to Jin@discord
Now go to Masternodes > Press Update Status you will see masternode and press Start-alias
That's it you are done :) Rewards will start to come within 1-2 days
Note All below parts credited to Caboosethevehicledestroyer@discord locikll@steem
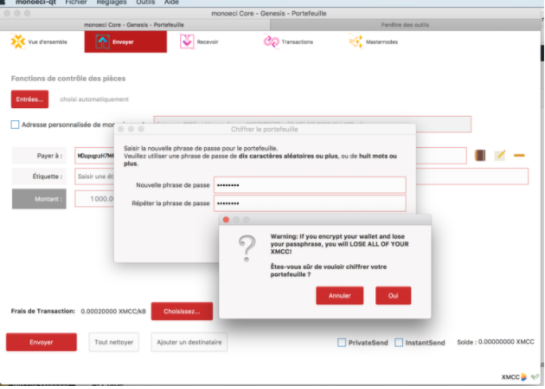
This is a simple step, but we highly advise you encrypt your wallet such that it becomes much less susceptible to theft.
In order to do this, go to Settings -> Encrypt Wallet.
You will then be asked to type in a passphrase which will be used to unlock your wallet, make sure it is something of decent length, non-personal and ideally longer than 16-24 characters (Remember this is to protect it once the wallet has been stolen, thus the password must be long enough such that it is difficult to brute force).
%20-%20Google%20Docs.png)
Depending on the processing power of your computer, this may take several minutes, do not panic, have some coffee/tea/soda instead!
The wallet will need to be restarted once this is complete.
Once you have restarted the wallet, go to File -> Backup Wallet, this will give you a backup of your wallet data (Which includes all of your public/private keys), and I highly recommend storing this on a secure USB or some other device, which Will NEVER be connected to a PC/Laptop, other than the purposes of restoring your wallet. This essentially gives you a safe storage of your keys (And money) in case of computer failure, or in the event of a crisis.
Add this lines
sudo ufw allow from [put your pc ip]sudo ufw allow 24157sudo ufw default deny incomingsudo ufw default allow outgoingsudo ufw enable
.txt%20-%20Notepad.png)
.txt%20-%20Notepad.png)
.txt%20-%20Notepad.png)
Congratulations @aziz199505! You have completed some achievement on Steemit and have been rewarded with new badge(s) :
Click on any badge to view your own Board of Honor on SteemitBoard.
For more information about SteemitBoard, click here
If you no longer want to receive notifications, reply to this comment with the word
STOPHow many MN's can you run on one VPS? I've been doing only one per VPS, but I'm assuming I can do more than one as long as its not the same coin?
You can only do 1 MN per VPS. In old dash masternodes you could have chance doing that but not for Monoeci since it is using news dash
Awesome, thanks for confirming.
I do not get this view after doing the updates, and I followed these instructions to a T.
It is okay if you don't get it. I put note if people get it don't freak out just press OK that's why :)
Great guide! Thank you.
It will be work for Virtus masternodes too!
https://bitcointalk.org/index.php?topic=2983251
Every time I set up this masternode I get WATCHDOG_EXPIRED. I have two other mns and this is the only one that gives me this problem. Any assistance? TYSM!
me too. you solved the problem?