The path to freedom. Part 3, My first mining rig (a beginners guide), Firmware.
How to get the most out of your fresh, new and shiny GPU's

Firmware: I should point out at this stage YOU MUST FACTOR YOUR ELECTRICITY AND HARDWARE COST IN EVERY CALCULATION. Your hardware, once paid for will then generate your income minus electricity. This will take some time, this is not a way to get rich quick or slowly, it is a way to generate passive income. You are may even better off in spending your cash on a coin and HODLing. I do this my way because of my interest in blockchain tech and I believe in a decentralized future away from our current structures. There are excellent, far more advanced posts on mining and how to work out the best coin for your hardware etc. As I say this is a BEGINNER post. With that in mind I hope you find the information contained to be useful.

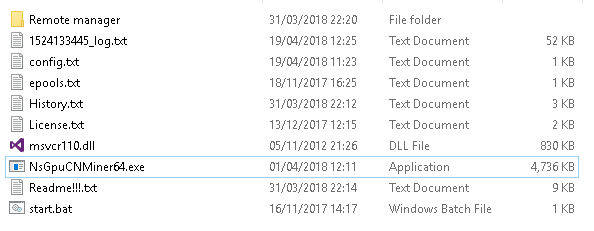
First thing to do is get a reading on your card to see what it is going to give you in H/s or hashes per second. To do this you can start one of your GUI miner programs or a command line miner like Claymore. I have recently updated my rig to Claymore 11.3 which has the POW 7 switch for monero. WOW! OK, hold on a second there, that's a lot of information in one short sentence. So lets break that down for you. Claymore is a programmer who has written a miner program that enables non technical people to mine for crypto coins, in this scenario Monero (XMR). So in order to run the claymore miner you will need to download it! you can do that here. Once you download it you can extract the compressed file to your computers hard drive. You will get a file structure similar to the one below.
Get your config right
There is one file here that you must modify unless you want to mine to a wallet that belongs to someone else. I.E. you pick up the tab for their gain. So first thing to modify is the wallet address, this is located in the config.txt file. I have broken this file out below
- -o stratum+tcp://xmr-eu.dwarfpool.com:8005
- -u 464Xtf5Au89eNvPAp63bbPC5Dq2qUPPibYAMZ73ZvQ3jbuoU6h73eHsWbwaVe4vUMveKAzAiA4j8xgUi29TpKXpm3x1QjtP
- -p x
- -pow7 1
"-u" is the wallet address that you are mining too. This is where you must insert you own address.
"-p" is the password you have applied (if you have)
and -pow7 is the POW7 Algorythm now applied to the Monero blockchain in order to fend off ASCI miners unlike bitcoin.
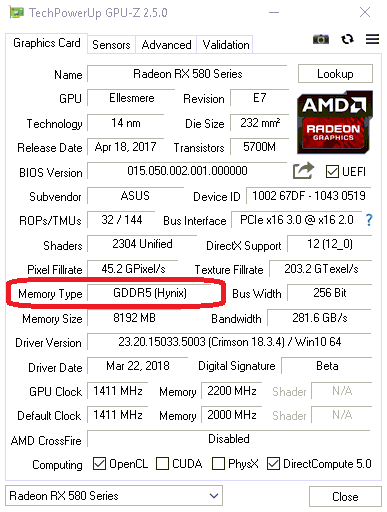
You should now be able to start your mining software and get a base reading for your card. As I say you can do this in a GUI version (minergate etc) but the command line miner will give you a true reading and not a reading minus the "stolen hashes" discussed in earlier posts of the series. The card I have installed is a ASUS ROG-STRIX-RX580-T8G-GAMING. To be honest the hash rates out of the box on this card were disappointing. This card had the Hynix ram which runs slower than the Samsung ram on another card I have in my rig. As far as I remember the standard Samsung ram card ran at 800+ Mhz bus speed which I have managed to get to in and around 1040mhz with mods.
Lets get modding!
There are 2 ways to modify the bios on your GPU, 1: you can buy a bios from many different sellers on line or 2: do it yourself. I want to do it myself as I want to understand the reasons and methods in modify in the bios and then applying it. If you want to DIY is you will need some tools in order to modify your bios.
The first tool you will need is polaris bios modification tool. You can find this HERE..
You will also need to have a copy of the AMD / ATI flash tool. This retrieves and also programs back to the bios after we make our modifications. You can download the AMD/ ATI flash tool HERE
You will also need the TechPowerup GPU-z. The GPU-Z is a lightweight system utility designed to provide vital information about your video card and graphics processor. You can download that HERE.
Firlstly you need to open the AMD / ATI flash tool, I have 2 cards installed in my rig with a third on the way. You will only see one card listed here. You need to save the current bios to your local machine so you can modify it and keep a copy safe incase something goes wrong.
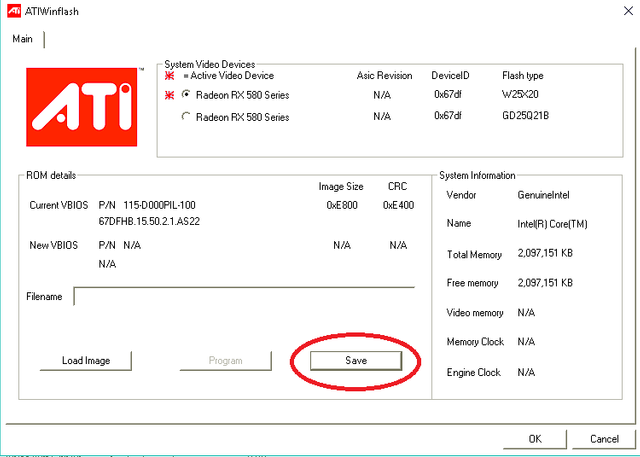
You will have to create a folder to keep your bios safe and assign a file name to allow. I STRONGLY RECOMMEND MAKING 2 BACKUPS OF THIS BIOS. We can then load one into our bios editor to modify and have a safe copy at all times.
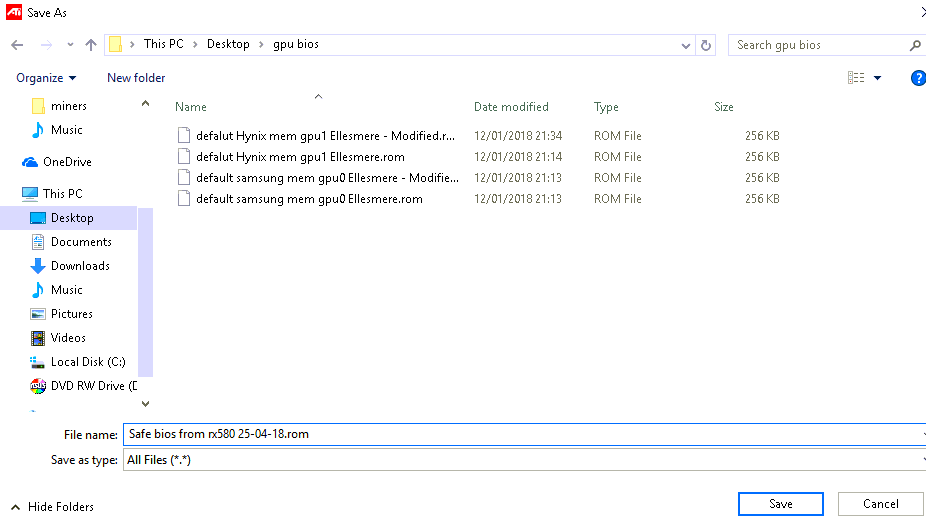
You can see from the image above that I have 2 different bios saved for each card in my own rig. 1 is the SAFE bios and 1 is the MODIFIED bios. I also define my bios backups by memory types, this stops me applying the wrong bios to the cards. I will show how to ascertain the memory type below.

So Many memories
When we run the tech powerup GPU-z program we downloaded earlier we get a whole load of information about our video cards. The information we are looking for in this tutorial is our memory type. The card I have selected has Hylinx memory chips. What we are going to do with this bios is called "Bootstrapping". Now I have no intention of getting into the detailed reasons why we bootstrap or how indeed it works, just know this, a properly bootstrapped bios can boost performance by as much as 30 - 40% over stock. You can, if you like have a look at the Iowa state university lecture series starting here.The link to the whole series is at the bottom of the last slide in the series.
Pull up them bootstraps BOY!
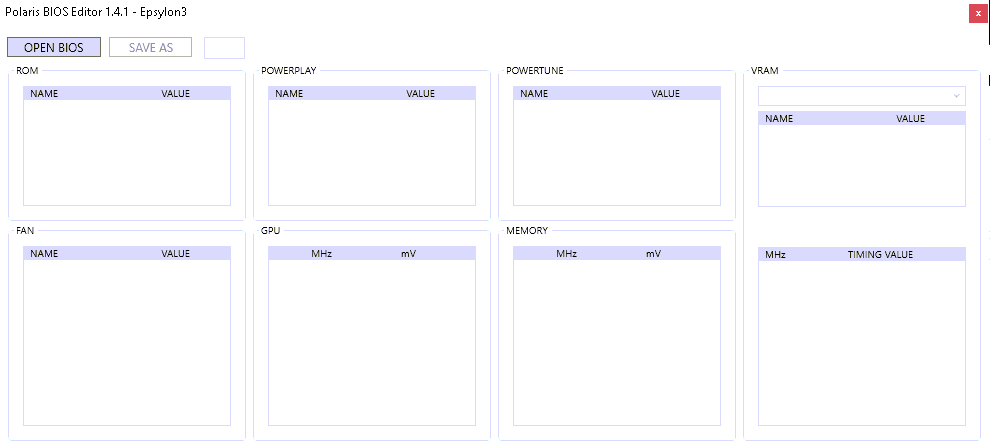
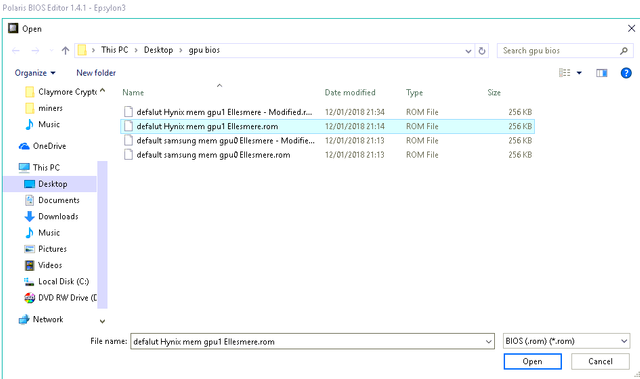
Ok, now we know the memory type and we have saved the bios to our local machine we can actually carry out the bootstrapping process. This is a relatively simple thing to do,Great we are just moving some memory timings around, or copy and paste. That doesn't sound too hard now does it? So start up the Polaris Bios editor by running "PolarisBiosEditor.exe", pay heed to the disclaimer!! What you are doing "can" cause irreversible damage to your GPU. If you are not happy to take the risk then do not do this! If you are a happy bunny lets proceed. When we open the bios editior software it looks like there is nothing going on, that is because there is not. We must load the bios into the program in order to read and edit the settings.
Now that we have loaded the bios into the editor we can see all the different settings that we can change. The section that we are after is the VRAM memory timing value, this is outlined in the image below.
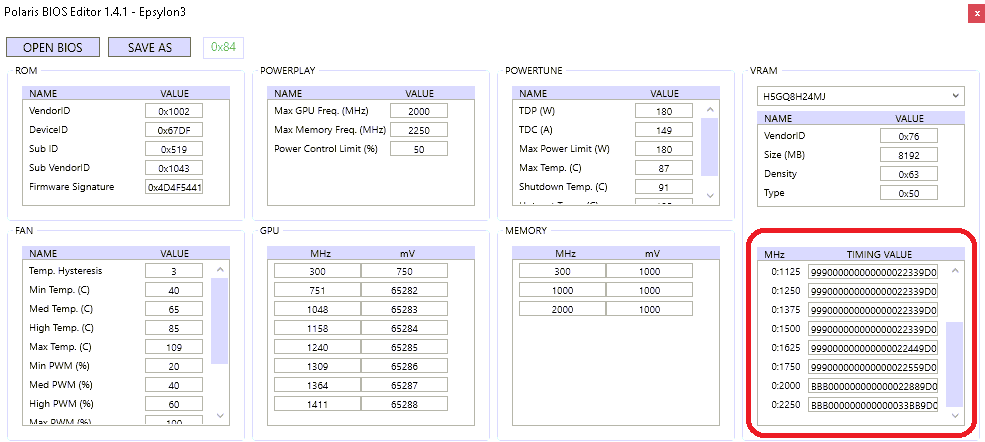
What we want to do is to copy the 0:1750 timing to the 0:2000 and 0:2250, you do this by selecting the entire field of 0:1750 by clicking into it then pressing CTRL and A this will select all the information in the cell for you to paste it into the next cell. you can then press CTRL and C to copy or use right click on your mouse. Then we go to the 0:2000 timing section and again click into the cell and press CTRL and A this will select all the information in the cell for you, then hit delete. Once the cell is empty you can press CTRL and V, this will paste the copied information from the 0:1750 timing cell into the 0:2000 cell. You need to repeat the past section into the 0:2250 timing section too.
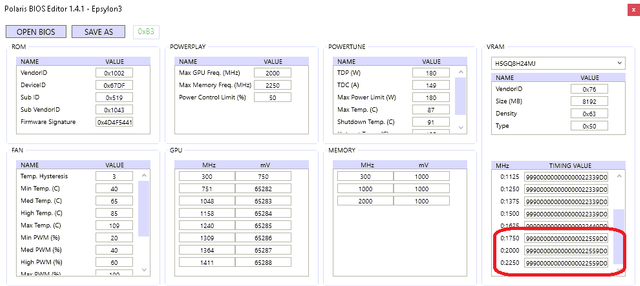
Now you will have to save the bios back to your computer so that you can upload or "flash" the bios on the card. to do this just hit save and give the bios file a modified tag before saving. This cuts out any confusion you could have as to what is the stock and what is the modified one at a later stage.
Yahoo, you have now modified a bios!
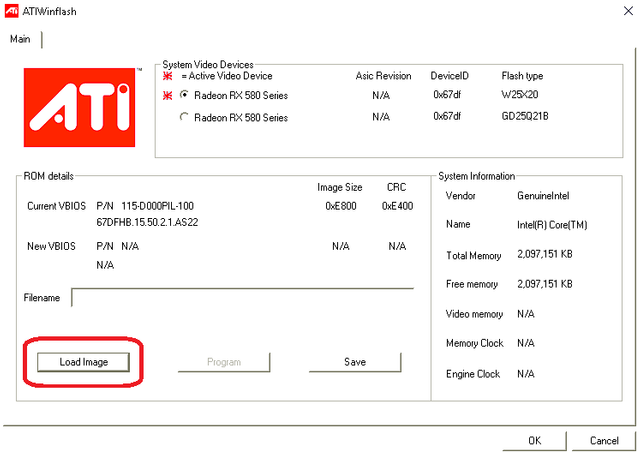
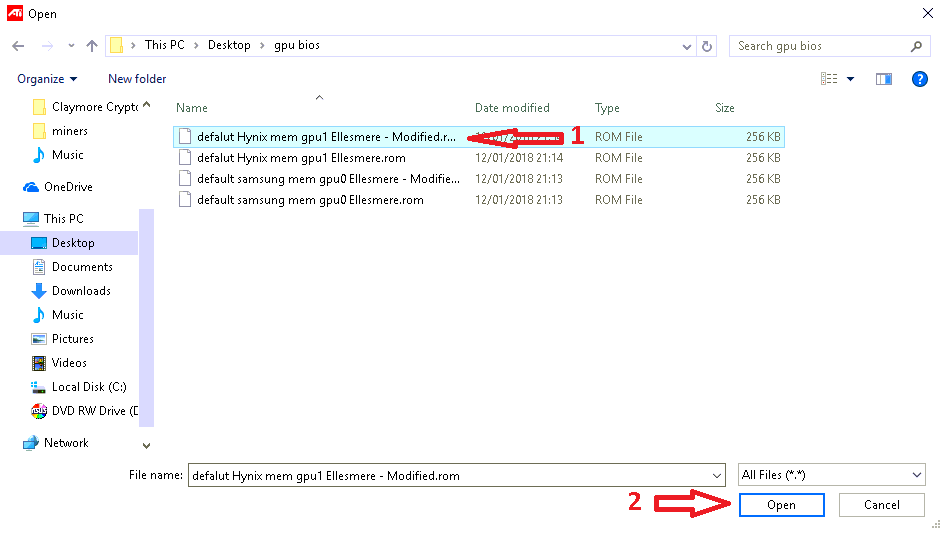
Now we have to flash the modified bios back on to the video card. we use the AMD / ATI flash tool for this job. You need to start the ATI winflash tool again and select "load image" and then selecting the MODIFIED bios that we just completed above.
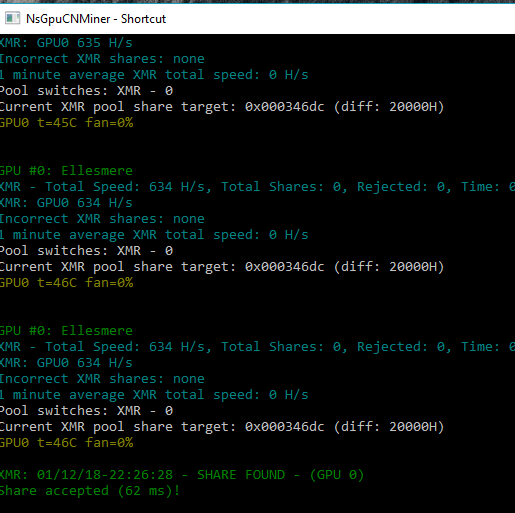
Now we have applied the modified bios with the updated bootstraps we need to start the mining software again and have a look at what we have achieved.
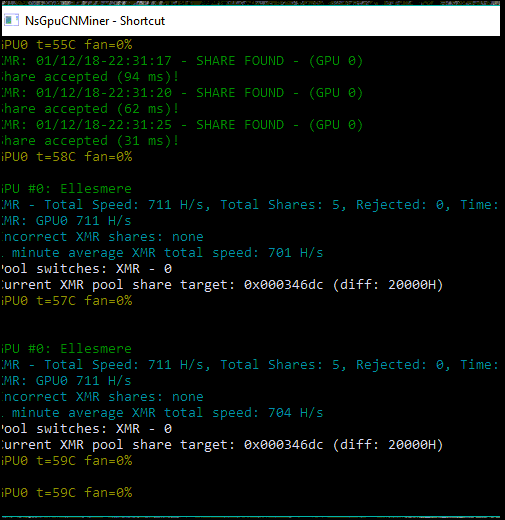
Ok so 70 H/s isn't a huge gain but a gain is a gain. I have managed to get this card even higher by using other tweaks. I will go through that in my next post in the series, which I think is now turning into an EPIC!
LIKE WHAT YOU SEE?

Fantastic guide! Newbies....take note....you need this. Don't fry your GPU...not that I've ever done that LOL!
Hey hey @sequentialvibe thanks a million for checking it out. These posts take an age to write up properly. I hope you enjoyed reading.😁
Also fried GPU is no fun!! 😂😂
Congratulations! This post has been upvoted from the communal account, @minnowsupport, by Moonunit from the Minnow Support Project. It's a witness project run by aggroed, ausbitbank, teamsteem, theprophet0, someguy123, neoxian, followbtcnews, and netuoso. The goal is to help Steemit grow by supporting Minnows. Please find us at the Peace, Abundance, and Liberty Network (PALnet) Discord Channel. It's a completely public and open space to all members of the Steemit community who voluntarily choose to be there.
If you would like to delegate to the Minnow Support Project you can do so by clicking on the following links: 50SP, 100SP, 250SP, 500SP, 1000SP, 5000SP.
Be sure to leave at least 50SP undelegated on your account.