How to build a NAS using nas4free(XigmaNAS)
Alright, so I haven't posted in a few months due to a new baby and a new job, but I am back with some cool shit to post over the next few days. Today, I am going to teach you some of the cool stuff you can do with a NAS or, Network Attached Storage. I upgraded mine over the last few days, and decided to share the process, because once you have a NAS, you'll question why you never had one before. It basically becomes your own personal cloud server that you have total control over.
So first, here is my parts list.
Rexgear Micro ATX Cube - $49.99
Patriot Viper 3 Series, Black Mamba, DDR3 8GB (2 x 4GB) 1600MHz Dual Channel Kit - $62.99
MSI AMD FM2+ A68H DDR3 SATA 6Gb/s USB 3.0 HDMI Micro ATX Motherboard - $46.99
ARCTIC Alpine 64 Plus - 90 Watts Low Noise CPU Cooler for AMD AM4 Sockets - $13.77
AMD AMD A6-7400K Dual-Core 3.5 GHz - $49.79
Hitachi 1TB (1 tb) SATA II 7200 RPM 32MB (Quantity: 3) - $34.58 x 3.
APEVIA ATX-VS450W Venus 450W ATX Power Supply - $21.99
So, I got all of this for under $350, but all you really need is a cpu, power supply, motherboard, ram, case, and a hard drive. You can do this in any combination, and chances are, you have some shitty old PC laying in a closet somewhere that you could easily use.
You will also need two flash drives. They both should be empty. You need to put the nas4free installation media on one, and the OS will go on another.
So, now that you have your PC built, let's get started.
First, go here.
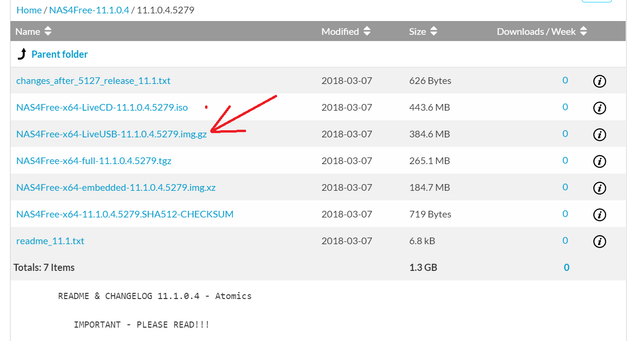
Make sure to click on the link with the latest date. Since we're using USB, we will be selecting this.
It will begin downloading. This could take fifteen minutes or so. Once that is completed, head over and download rufus.
Once that is finished, you have everything you need to install nas4free.
Turn on your freshly built PC. It will lead you straight to the BIOS, and you'll need to switch the boot order to make booting from USB first priority. There are a million tutorials on how to do this, but it's pretty straight forward. Find boot order, move everything related to USB to the top. It might be smart to make it reboot upon power loss as well. Save and exit.
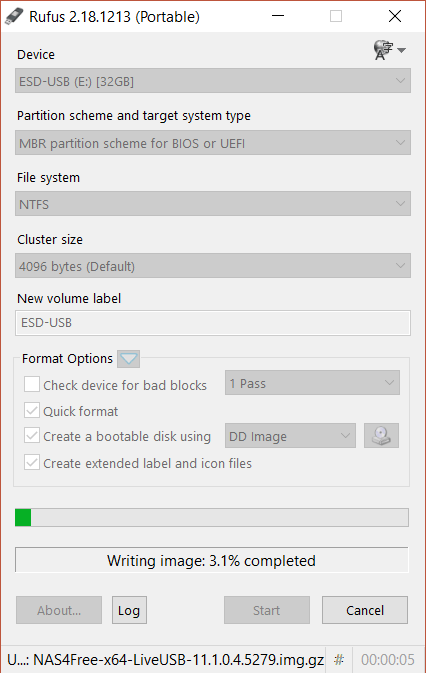
Now, you need to plug a USB into the computer you are used to using. Open rufus, then select this usb. After, go down to where it says ISO, and change to DD. Find the nas4free image that you downloaded earlier.
Make yours look like mine, other than the very top option. It will be whatever your USB is called.Next to DD, where that CD looking icon is, that's what you'll click to browse and find the nas4free you downloaded earlier.
After you hit start, it will begin installing nas4free onto the USB. Once it completes, you'll take the USB, along with the other blank one, and put those into the new PC. Then, reboot that PC.
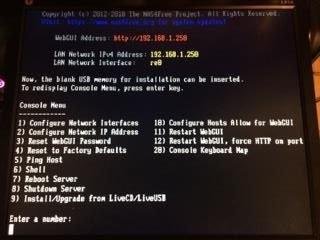
Once you reboot, it will begin loading the new OS. Once it's finished, you will come to a screen that looks like this.
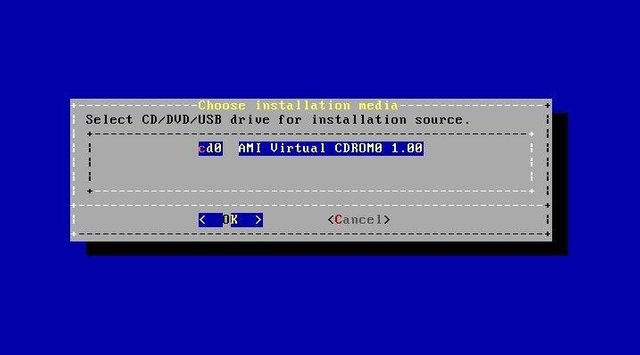
Select option 9. Then you can begin installing the OS onto the other USB that will stay permanently in the PC. The next screen, pick the preferred option. Then it will guide you through. Once it comes to selecting the device to install on, pick the blank USB.
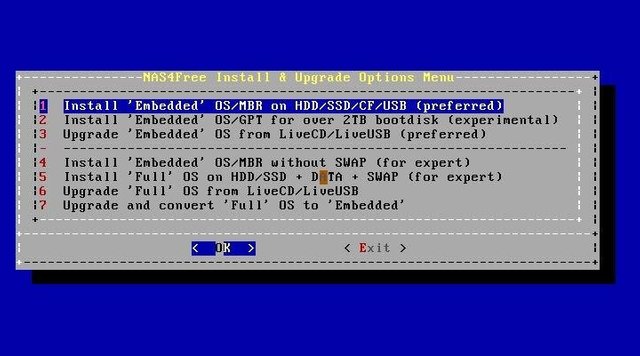
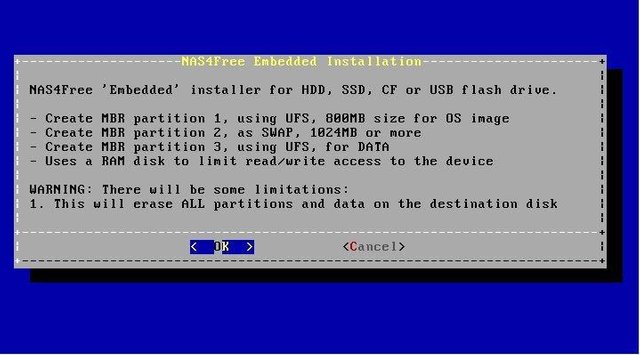
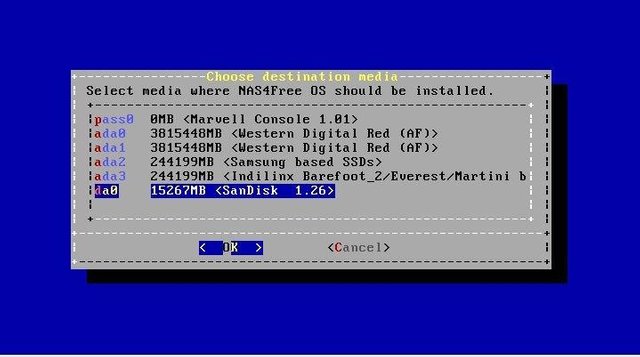
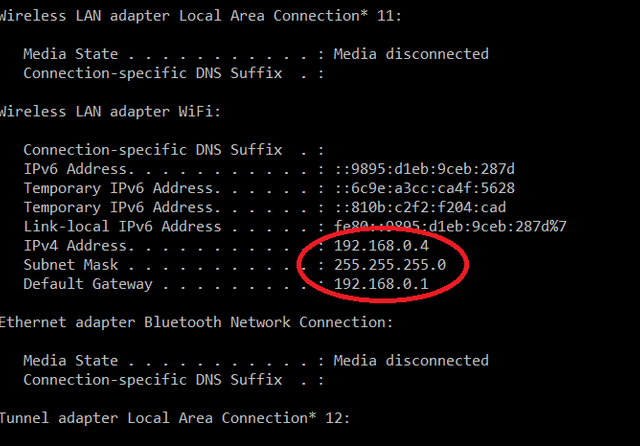
Now, it will ask you about how much swap space you need. Basically, you want however much ram you have in the system, times 1.5. So, if you have 8gb ram, you need 12gb swap. A 32gb flash drive would work great in this scenario and give you extra room for OS updates. Once finished, you'll be back to the first screen. You'll need to configure a network IP. Go to your normal computer, and run command. (either windows key+ r, then type cmd.exe then hit okay, or type command in cortana or search in start menu). Once it's open, type in ipconfig and hit enter. It will bring up important information about your network, but you're looking for information on the gateway.
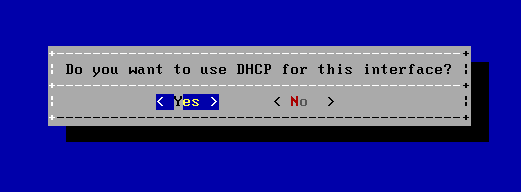
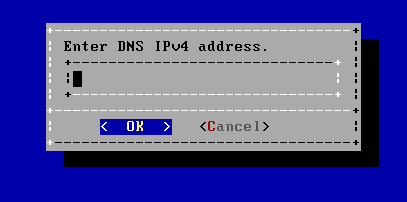
Now, you'll know your gateway. So, back to the new PC, go select option 2. Then, it will bring you to these prompts.
For this option, select no. I know it is highlighted on yes, but select no.
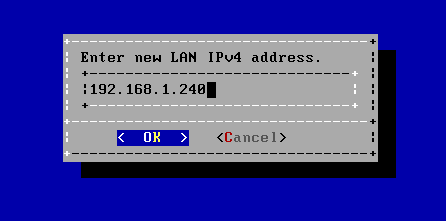
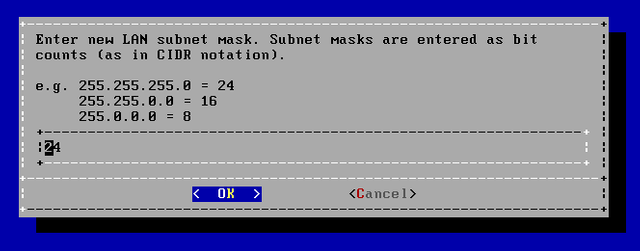
For this, you'll put whatever your gateway is. Usually 192.168.0.1 or 192.168.1.1, but you'll change the last one to something over 20. So, 192.168.0.21 or 192.168.1.56 etc.
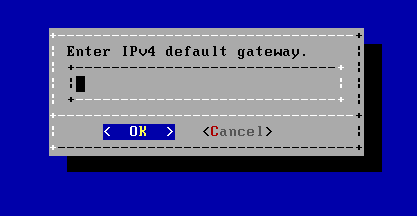
Now, you'll put your gateway that we found in command earlier.
For DNS, let's use google's. Just type 8.8.8.8
Finally for this, select no.
Now you will have a GUI login, or a way to log in from your normal computer. You can now unplug monitor and keyboard from new pc. You won't need them anymore.
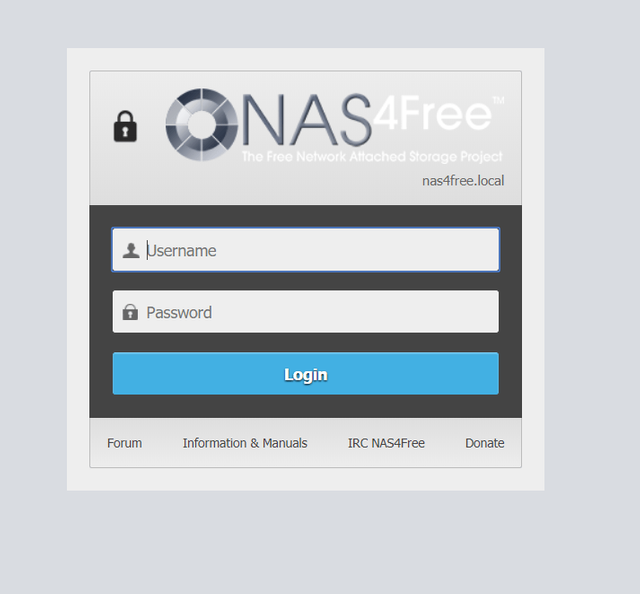
So, in your browser, go to the ip address you set up for your NAS. Whether it was the 192.168.0.21 or 192.168.1.56, or whatever you chose. This will bring you to..
Username will be admin and pw will be nas4free
You can change these later.
Now you have a fully functioning NAS. But, you want to be able to store things on it easily on your computer right? Well, first we need it to recognize your hard drives. So, go to the disks tab.
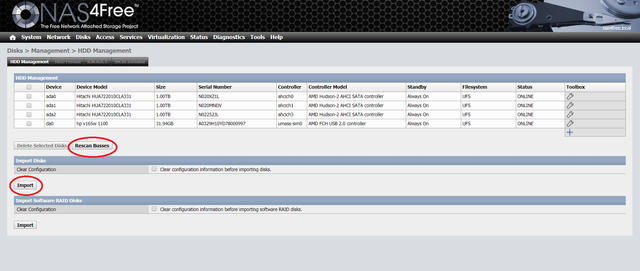
Then, it will drop down, go to management.
Hit import and you'll see your disk, or disks. After this, click the HDD format tab.
Select UFS, then click all of your disks(aside from USB where OS is installed. Then hit next and go through prompts.
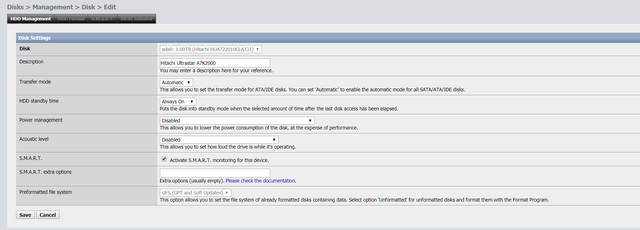
Then, return to HDD management. Click the little wrench next to each disk and make it look like this.
With everything we do, we will save, save and restart, or apply. It will give you one of these options. You must select them.
Now, we need a mount point on the disks. You get there from the disks tab>mount point.
When you get there, hit the + button.
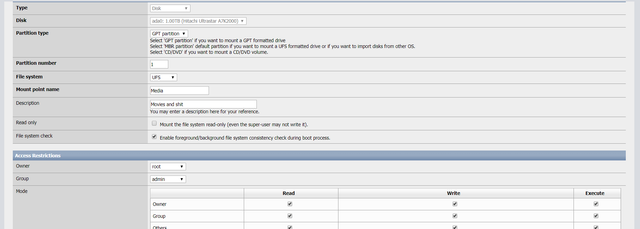
You'll want to select each disk, then make each of them look like this.
Naturally changing media to what you'll be storing on the particular disk, and change the description to reflect it.
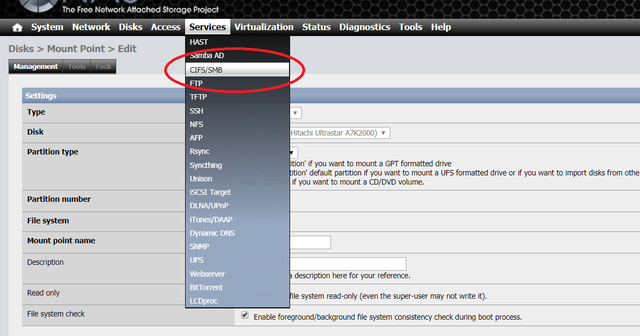
Once that's done, you're disks are complete and ready to store. Problem is, windows can't see them. Let's fix that.
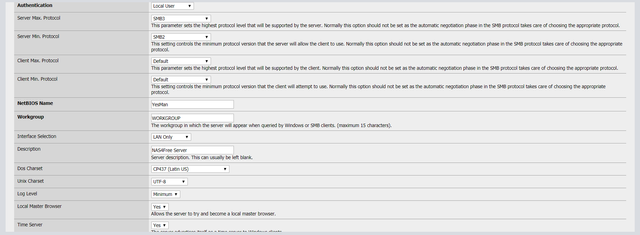
Once you're in there, make it look like this.
Then go to the shares tab.
Once you've hit the plus button, change your to look like this.
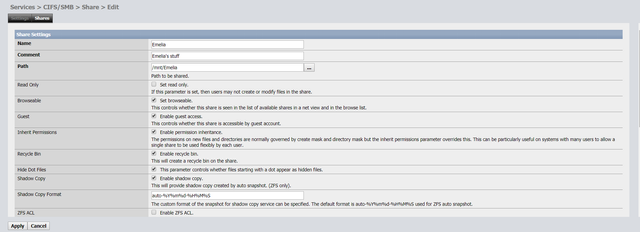
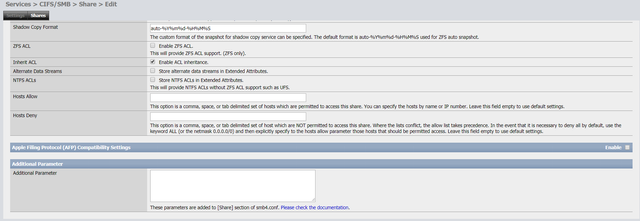
Of course, change the emelia to whatever you want the folder to appear as in windows. On the path, click the three little dots, then go to the mnt and shares that you created earlier. You can create as many as you'd like. One for each disk, or use all three disks as one. If you only have one disk, just go to mnt and hit okay.
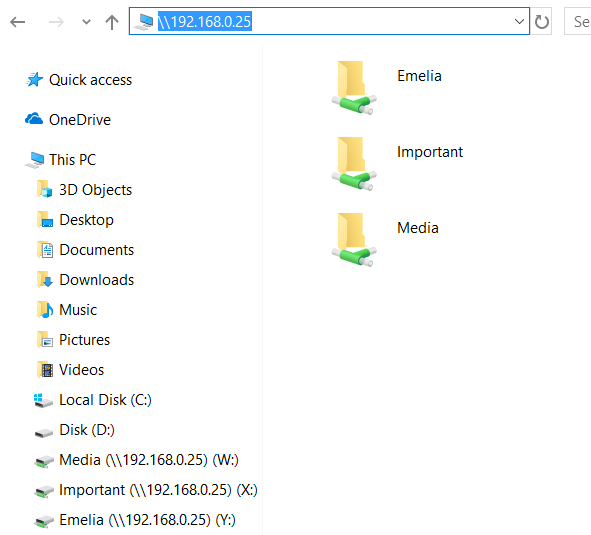
Now, you are sharing with windows. So, open up your explorer and at the top, type in whatever ip address you use to login to nas from web browser. So, \192.168.1.25 or so on.
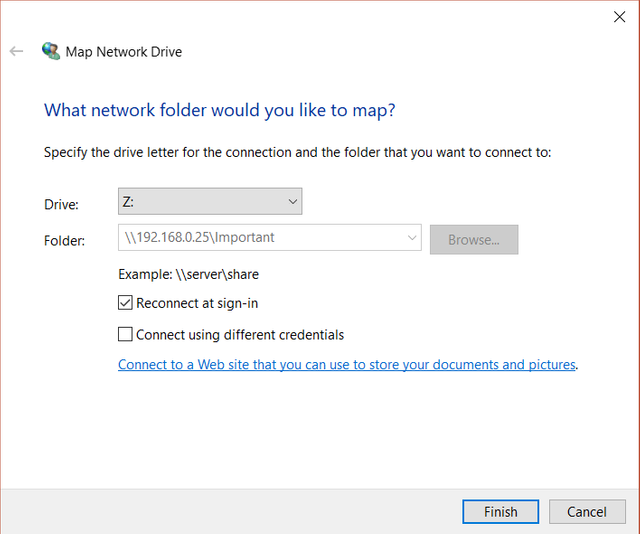
Now, right click each folder, and click map network drive.
Now, you can use your entire new NAS as a network folder on your computer. You can save documents, photos, movies, games, etc all in the folder and it will store it externally, outside of your computer. Now, everyone in your network(everyone using your modem or router), can use these folders. It will work as a community hub for anything you want to save or share.
But, that's only on your network, and you're limited as a guest. If you want to use this as a cloud server, where you can use this even outside of your network(say you travel to the other side of the planet and want to save something in the NAS sitting on your desk)), well, we need to create users and enable ftp.
So, go to access tab, then users & groups.
Like always, you'll click the plus button.
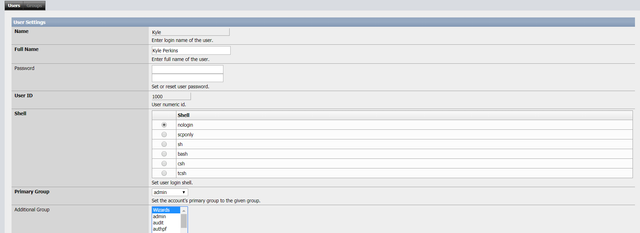
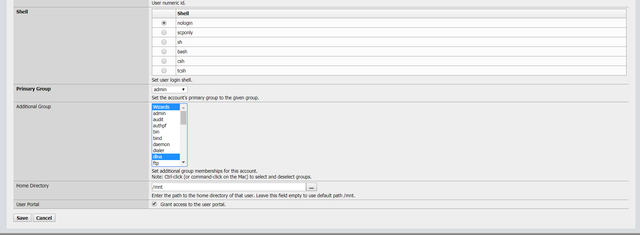
Then make yours look like mine.
Pay special attention to the additional groups section. Make sure that ftp, dlna, and wheel are all highlighted. Then save. Repeat for every user in your house.
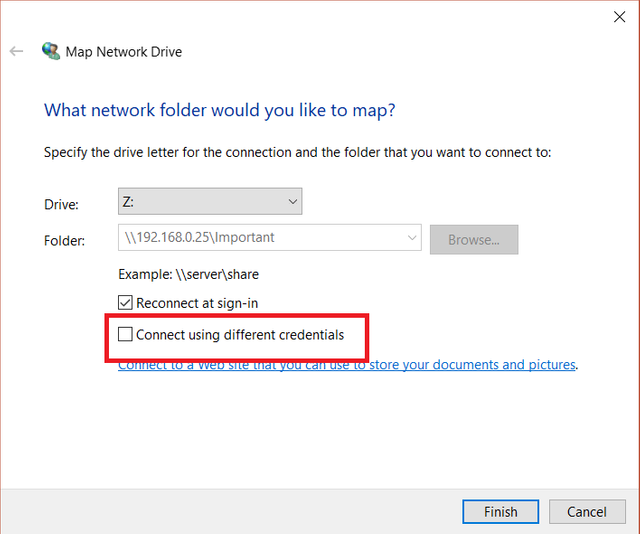
Now, go back to network shares in windows. You can right click them and disconnect. Go back to your \ipaddressyousetup and remap the network drives, but this time, sign in with user credentials.
And now put in your user credentials, and have everyone use theirs on their computers.
Now you're secure. But to access from outside of the network, we need to enable ftp.
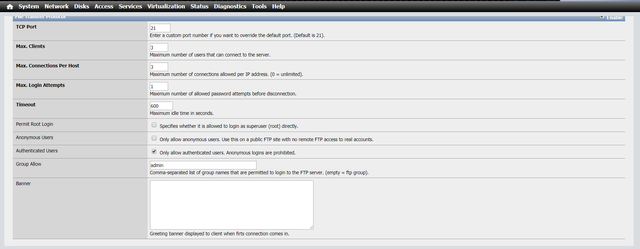
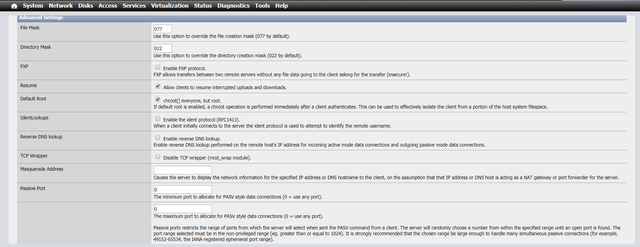
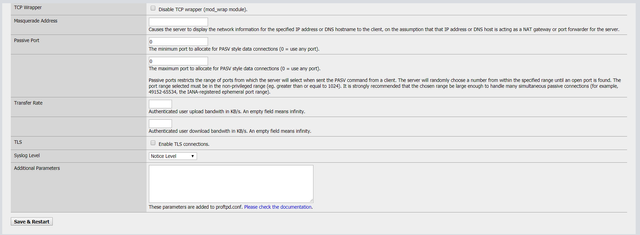
So, go to services tab>ftp
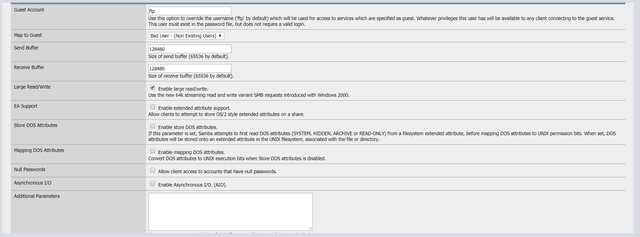
Make yours look like mine, then save and restart.
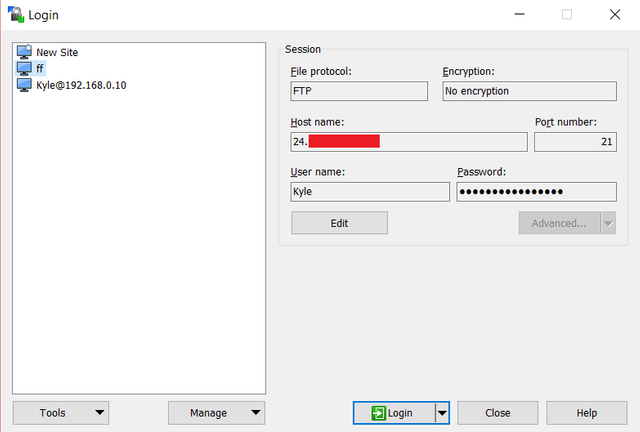
Now, download winscp.
Once you're done, you'll open it to a screen like this.
But you'll have no idea what to put here. Well, you'll want to put port 21 and your nas user name and pw that you set up earlier, but as for ip address? We need to get your public one. So, click here. Now, hit login after you save. (So that you won't need to do this every time. Now, if it won't let you log in, it just means that your modem/router is being a pain in the ass and the port needs opened. (port 21).
There are so many variations of routers and modems that we couldn't possibly go through every one, but your model number should be written on the modem or router itself. Put that into google with a "open port" or "port forwarding" for a tutorial on how to do this. Once that port is open, you'll be good to login.
Now, you can send files to your humble little NAS from across the world.
BUT, you also want your media to play on your TV from the NAS. I got you, fam.
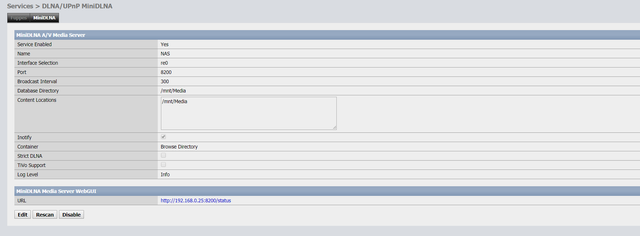
Go to services>DLNA/UPnP MiniDLNA>MiniDLNA then make your screen look like mine, selecting your mount point obviously.
Now, your smart TVs can pick it up and you can stream directly to it.
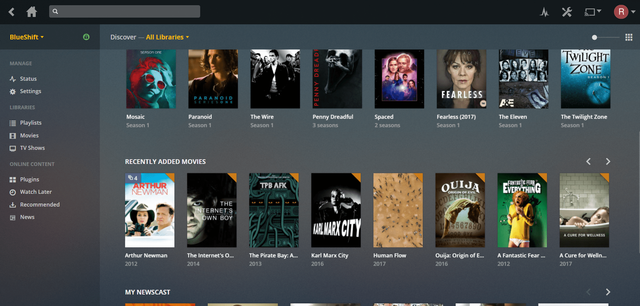
To make things easier, you can also download Plex.
Sign up, and then you will get a server. Make sure to do this on the strongest computer in your house. When it prompts you to pick your media directory, make sure to select the mnt point on the NAS that we made earlier.
Then, once it's downloaded, go to your settings and enable remote access and DLNA. This will make sure that your smart TV can receive it, and you can also watch anywhere in the world on any device.
More info here:
Well, I hope you enjoyed this long and thorough tutorial. lol. Bonus: If you did everything correctly, you should be able to torrent directly to your NAS or network folder. Then, it will update automatically to plex(and everyone in your family can watch what you have, no matter where in the world they are).
Enjoy your new NAS, you can thank me later.
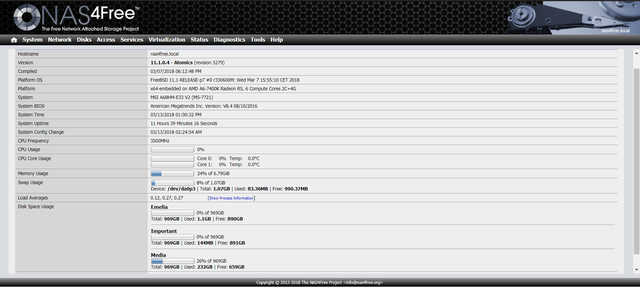
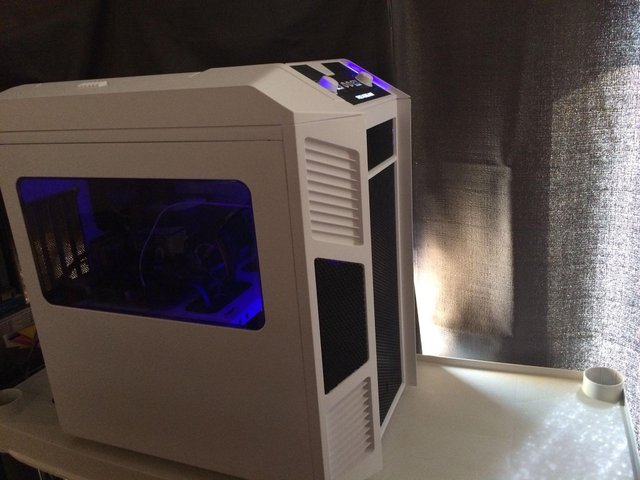
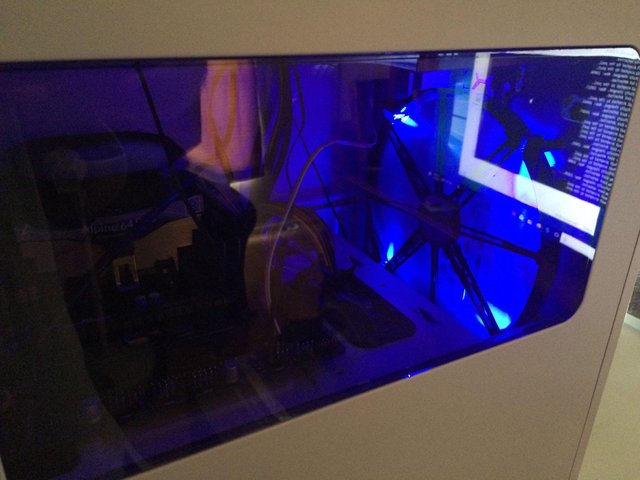
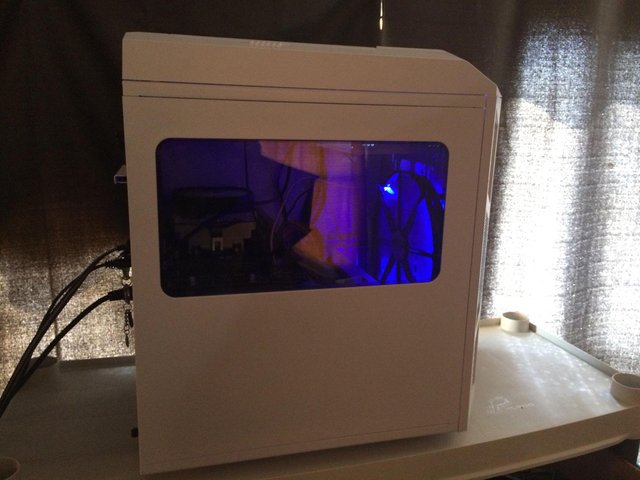
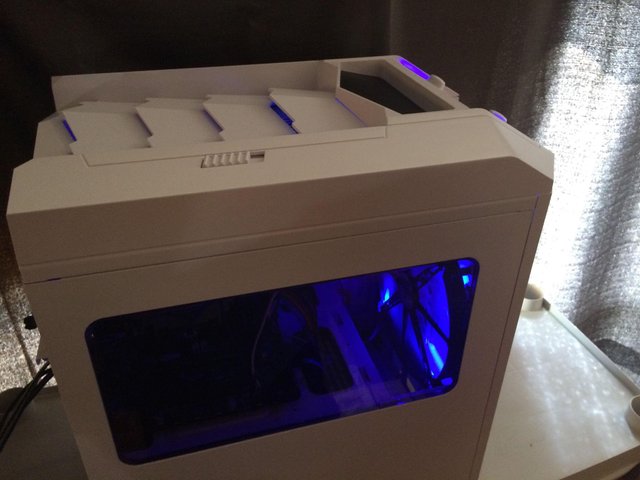
Final product for me?
Posted from my blog with SteemPress : https://kyleperkinsauthor.com/how-to-build-a-nas/
