Construction - Using a protractor - Lesson 1
As a math teacher of 13 years, one thing I find that learners tend to struggle with is using protractor.
For this reason I have decided years ago how to make it easier for them and myself. For grownups like us it isn’t always easy to understand that learners may find it difficult to use a protractor. For learners on the other hand we have to remember that the use of a simple thing like a protractor, is a first. So as a teacher you have to start at the very beginning.
For the learners it would benefit to first understand the basics about geometry of lines.
Learners should have prior knowledge about the following:
Line segments
In geometry, a line segment is a part of a line that is bounded by two distinct end points, and contains every point on the line between its endpoints. A closed line segment includes both endpoints, while an open line segment excludes both endpoints; a half-open line segment includes exactly one of the endpoints.
Vertex
In geometry, a vertex (plural: vertices or vertexes) is a point where two or more curves, lines, or edges meet. As a consequence of this definition, the point where two lines meet to form an angle and the corners of polygons and polyhedra are vertices.
An angle
In planar geometry, an angle is the figure formed by two rays, called the sides of the angle, sharing a common endpoint, called the vertex of the angle
For the first activity the teacher should do the following with the learners:
- · Draw line segment AS
- · Rotate the ruler about point A and draw AP. The ruler can be rotated clockwise or anti-clockwise.
- · Draw a curved arrow to indicate the direction of the rotation.
Your diagram must look similar to the one below:
Parts of an angle
- Two line segments AS and AP are also called the arms of the angle.
- Point A is called the vertex.
Naming the angle
- The arms or line segments and the vertex are used to name the angle.
- The angle drawn above is called “angle PAS or SAP The angle may also be referred to as “angle A”
Note that the angle is written in the middle, as “A” is the angle to be measured.
Measuring angles:
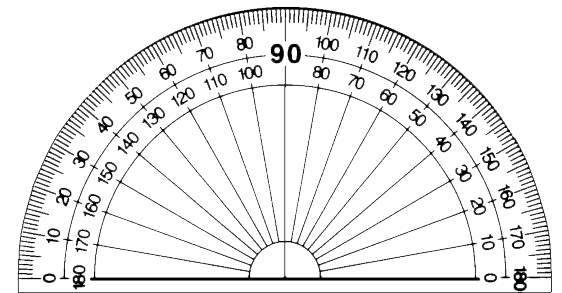
A protractor is used to measure the size of an angle. The unit measured in is called degrees.
This specific protractor can measure from 0 to 180 degrees.
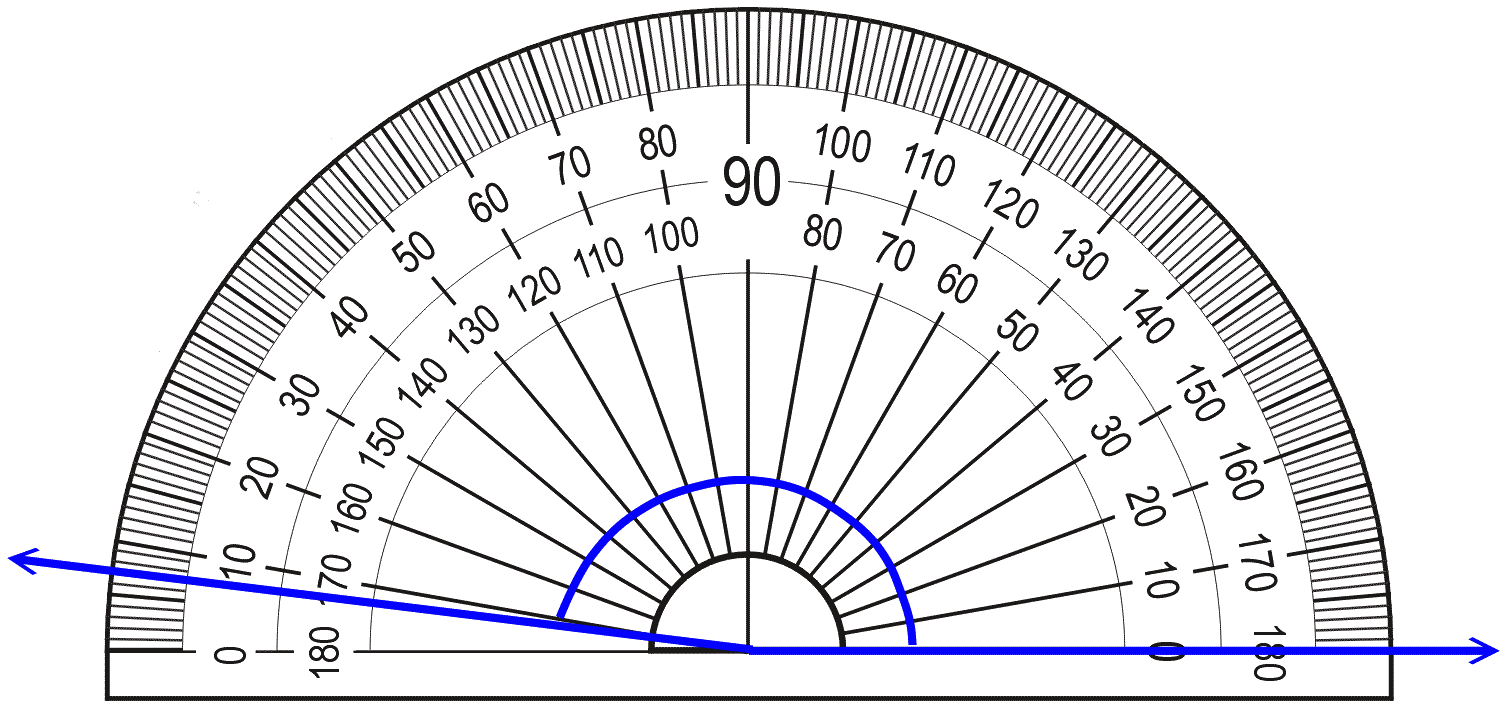
You will see on the left hand side of the protractor, 0 is on the outside. Depending on the angle measured, always make sure that the cross of the protractor is on the angle and that the base of the angle is going in the direction of 0 degrees.
The angle above is 18 degrees.
On the right hand side of the protractor, 0 degree is numbered on the inside.
The same with the example above, make sure that learners put the cross of the protractor on the angle and that the base goes in the direction of the 0 degree.
In this case, the base goes to the right hand side, we start measuring on the inside from 0 degrees. This angle will be measured at 173 degrees.
Common mistakes made by learners when measuring angles:
Prior knowledge learners should know:
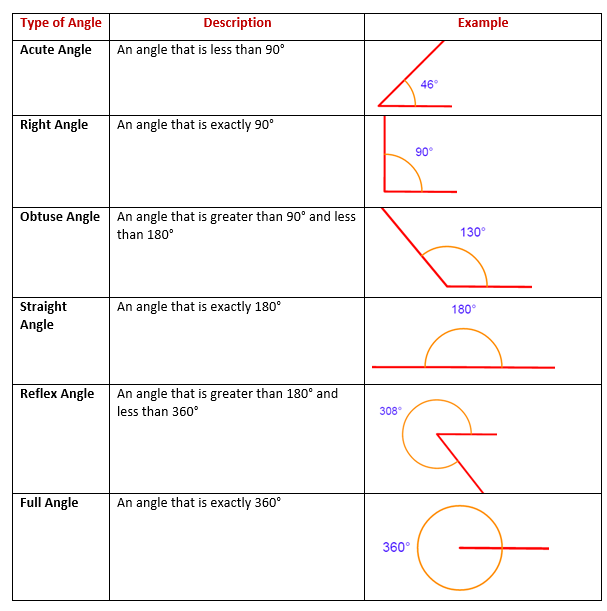
When learners measure angles, they must know what the different kinds of angles look like and also the size.
Let's take the example we used above:
One of the most common mistakes are made with this angle.
When measuring, learners will follow all steps shown and explained to them. When they have to write the answer, they will say that this is an obtuse angle (an angle bigger than 90 degrees and smaller than 180 degrees).
Writing the size of the angle they often forget that they've started at 0 degrees on the inside of the protractor. They will say that this obtuse angle is 7 degrees.
Learners can see that this is an obtuse angle but as soon as they have to go from the inside of the protractor to the outside numbers, they forget that the degree lines on the outside are all equal to 1 degree.
Another common mistake:
Learners get confused putting the protractor on the angle:
Teachers often draw all their lines horizontal on the board. Learners get so used to this that the only way they know how to use the protractor, is like the example above. Forgetting all about the direction of the base and that it has to go in the direction of 0 degrees. Measuring this angle they will give the answer as 140 degrees or 40 degrees.
Conclusion:
This work is repetition, repetition and repetition.
I know time in class is limited, but try to help each learner individually too. Even learners who understands the work faster than other learners can help those still struggling.
Try to give different exercises of angles, not all angles horizontal, turn them upside down or sideways.
Let it be a challenge for your learners!
Every teacher teaches in their own unique way
This helped me, seeing which mistakes were made by learners using a protractor and how to work from that.


wow it is really informative about protecter.
This is very interesting ... so useful to me who is a math teacher .. so I better understand for this ..
Construction plays a vital role in shaping modern infrastructure, whether for residential, commercial, or industrial purposes. It involves a range of processes from planning and design to execution and final inspection. One growing area within the field is remodeling services which focus on updating or improving existing structures. These services can include kitchen renovations, bathroom upgrades, or complete home makeovers. Remodeling not only enhances aesthetic appeal but also increases property value. Skilled professionals in the construction industry ensure that all remodeling services meet safety standards and client expectations. Overall, construction continues to evolve with new technologies and sustainable practices.