[HOWTO] Creating a multiboot linux flash that boots right from ISO files [MANUAL] & my first post on steemit :)
Greetings dear Steemit! =) My name is Den Ivanov and I am Linux fan since 2008 (approx). I am well-known linux specialist in my small city of 1.5 million population. Let's know each other!
It's been a month since I tried to register here, but neither of my 4 Russian phone numbers (SIM cards) worked, so I asked a friend and he helped... Thanks alot, @smailer! :)
Let's move on to my today's topic.
One of my main hobbies is distrohopping. I am hungry of testing new releases, alpha, beta, developer snapshots of different OSes, including Linux, FreeBSD, and more rare ones like Kolibri, Solaris, etc. I'm visiting distrowatch daily, in a search for the New Ideal Distro. I know I'd better LFS and make my own, but it's interesting to see different developer's approach sometimes.
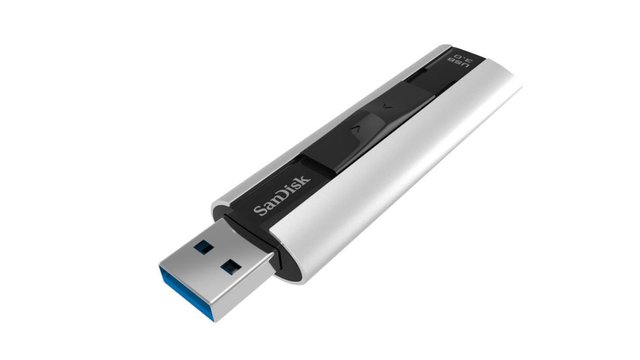
In 2014 I was testing few distros and though - it would be great to simplify process of writing ISO images to flash drive for testing. Approx at the same time, I've tested my first high-speed USB 3.0 Flash Drive (which look more like SSD for me) which name was SanDisk Cruzer Extreme Pro. I would recommend it, by the way, - it comes in both 32 and 64 gb versions (and maybe even larger), the price is affordable on eBay (~20$). You can buy refurbished unit, it works nicely, too.
At some moment of time, I found interesting small distro - Super Grub 2 Disk, which could use Grub2 to scan directory and search for ISO files, than it could boot them without any additional work such as unpacking or whatever. So I've started to search for the script itself, that does this job, and I found it! It was in github repo!
https://github.com/infinity0/uberimg
This repo actually has the code taken out from Super Grub Disk that searches for ISO files that supports loopback.cfg booting (I'll explain this later). Another advantage of using this method is that you don't have to format USB flash at all, only drop ISO files at special directory, and viola!
So how can you create this pretty flash drive that can boot directly from ISOs? It's easy! You need the following:
- Flash drive itself. I'd recommend SanDisk Cruzer Extreme Pro - it's reading speed is approx 250 mb, while writing is good enough too (100+ mb). You would go even with 512 or 1 gb flash, but most of modern distros weight more, so it's better to obrain 16 or 32 gb flash drive to test multiple distros at the same time and save some data to drive, too.
- Install git if you don't have it (examples are for ubuntu/debian)
sudo apt install git - Clone the following repo to your current or home directory:
git clone https://github.com/infinity0/uberimg - Enter the cloned folder
cd uberimg - Now we can install grub2 to flash drive. Please issue the following command, but don't forget to change the flash drive directory at the end. When terminal will ask you about installation - press y, and enter password. Press enter again :) This step could take few minutes to complete. During this time, you'll see a sign Installing for i386-pc platform.
./imgctl install /media/user/yourflash - If there are no errors in the terminal output after finishing, you'll see a sign Installation finished. No error reported.. The last thing you need to do is to get into the flash drive and create a special directory for ISO files. You should name it img (grub 2 will recognize files there and ISOs will not mix up with your other files on flash drive). You can do it via GUI or just issue this command:
cd /media/user/yourflash && mkdir img - USB drive is ready to accept ISOs. Just copy them into img directory on the drive, reboot your PC and choose to boot from USB. Also you can check that everything is alright by reviewing that drive has "grub" folder in its root (and some files inside). Let's say, you would like to download Ubuntu Desktop to your newly modern USB Grub2 auto flash drive (careful, 1+ gb of traffic - and maybe you don't want to download file from internet directly to flash)
cd img && wget http://mirror.yandex.ru/ubuntu-releases/16.10/ubuntu-16.10-desktop-amd64.iso
And now about bad moments :) At this current time, we have a few disadvantages of this method:
Not all distros know how to boot from ISO loopback mode (It's name of the method that what we actually use here). To boot from ISO loopback mode, distro must have loopback.cfg file that developers had put inside the image. This file helps grub2 to find, where are the kernel, initrd, and all the stuff. I did wrote a letter to more than 30 distros about this issue, some of distros did actually added support of Loopback, some didn't. If you are a distro maintainer or know somene, please think about adding small loopback.cfg file to distro here you can read info on how to do it actually. This would take only 2 kb additionally in your distro but will make it easier for everybody to try. Also, you can adopt any distro to boot manually via isodetect.cfg script, which is on the project's github.
Which distros do actually work?

I would be glad to answer any of your questions in comment section below. Also please send this article to anyone who asked about comfortable multiboot usb drive (your girlfriend, maybe?;).
I hope this mini-howto guide was helpful and you'll vote for it. If you did, I will continue my work on writing something interesting on Linux topic here, and on Golos (yep, I did translated this article - but it is mine :). Maybe you would like to hear about Linux distros for presentations or about another mini-project of selling ready to use USB flash drives with clever and comfortable printed usage instructions... Or any other of my tonn of microprojects ;)Thanks a lot for your interest.
See you in the next article,
Good bye,
Den Ivanov aka sxiii / Linux geek


This post has been ranked within the top 50 most undervalued posts in the first half of Mar 01. We estimate that this post is undervalued by $4.14 as compared to a scenario in which every voter had an equal say.
See the full rankings and details in The Daily Tribune: Mar 01 - Part I. You can also read about some of our methodology, data analysis and technical details in our initial post.
If you are the author and would prefer not to receive these comments, simply reply "Stop" to this comment.
Welcome on the Steem.
Thank you for your posting. If you need help, please feel free to ask. No one is shouting out „RTFM!“. Steemians always helping each other.Use this Steemit FAQ too. It is a very helpful collection. Steemit development is in Beta stage. Some things may seem to be strange. Just ask!
For editors the Markdown Styling Guide is an important source.
Below every editor window (comments, postings), you will get the Preview.
Including Images in Your Post
Happy steemin.