How to fix Auxiliary Lights (Extra LED's) on KTM Duke 200 Motorcycle | DIY #1
This article may not be of much use to majority of Steemers since you guys don't own this motorcycle.
But, majority of Indians own a KTM Duke 200 because, well, it's an amazing machine! :D
Many of them will be trying to find a way to fix these extra LED's since the stock bulbs aren't sufficient on the highways.
Hoping this article will drive a majority of people from my country to sign up on Steemit as well.
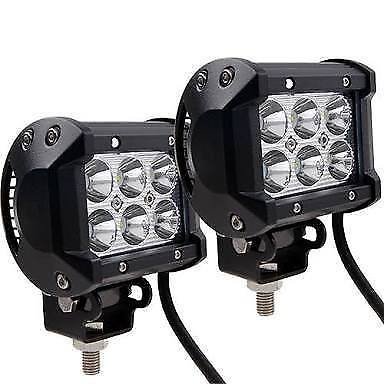
These are the lights I'm talking about!

Things Required:
1. LED Lights.
Where can you buy it from?
Ebay.com is the best source. Only some of the sellers sell original ones.
You'll find fake ones most of the times which don't last more than six months.
The link that I have provided is one of the originals, that I've been using on my bike for a year without any issues.
Before placing an order, ping me, I can try to get you a good deal on them.
BONUS: You also get a switch free now!
Back then when I got it, it wasn't available with the lights, so I had to buy separately.
2. Stainless Steel Metal Strip.
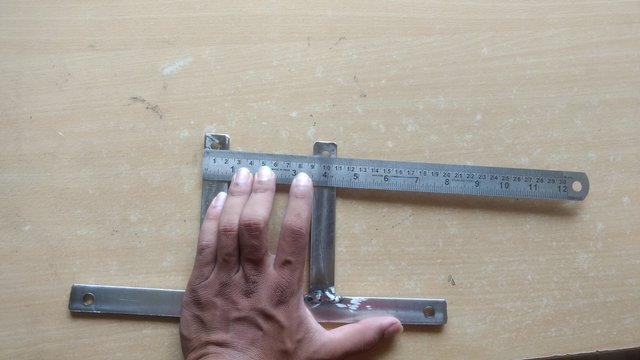
Buy 3 mm thickness Stainless Steel metal strip of 85 cm length and 2 cm width as shown below.
The final clamp after cutting, welding and drilling holes should look something like this.
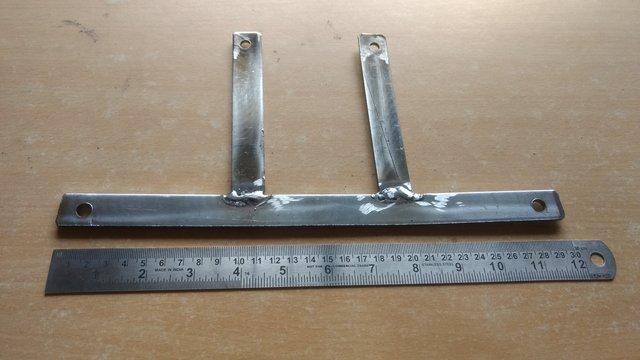
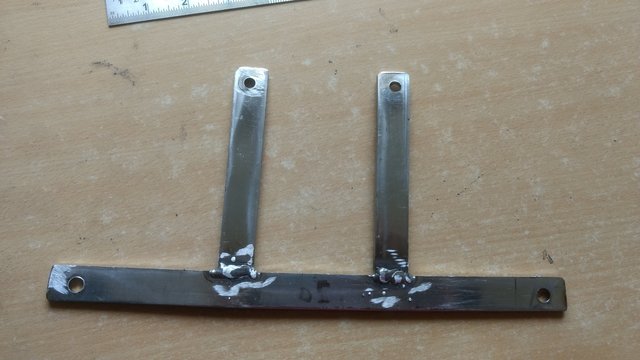
Cut the 85 mm metal strip into three pieces of below dimensions.
One strip of 30 cm and the other two holder strips of 12.5 cm each.
Now that you have 3 strips, it's time to weld them.
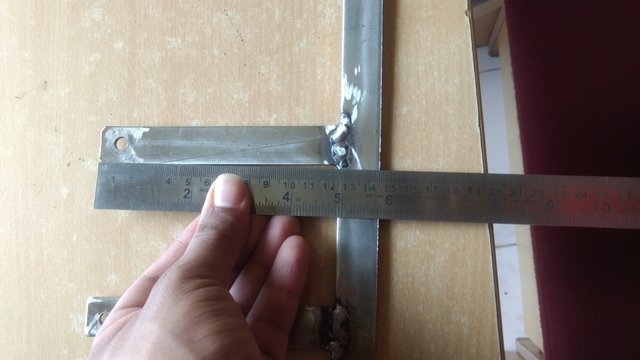
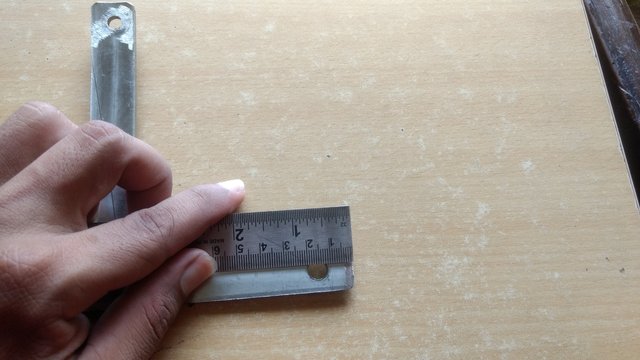
As you can see the image below, you've to weld them at 9.4 cm from the outer edge of long strip on both the sides.
You'll have to be very careful. The measurements may vary according to your clamp.
So, hold it under your bike's headlight, do trial and error to get proper measurements.
The measurements I'm giving are for your understanding and reference.
Here's the distance between the two holder strips for your reference.
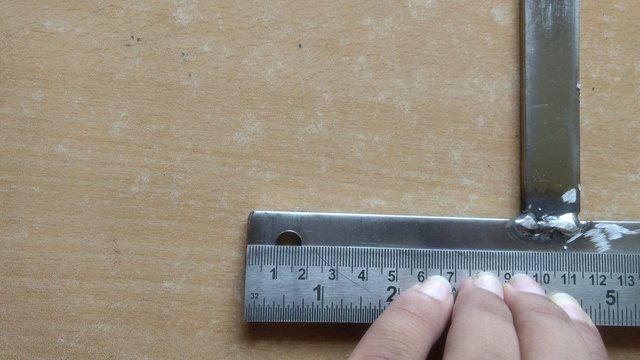
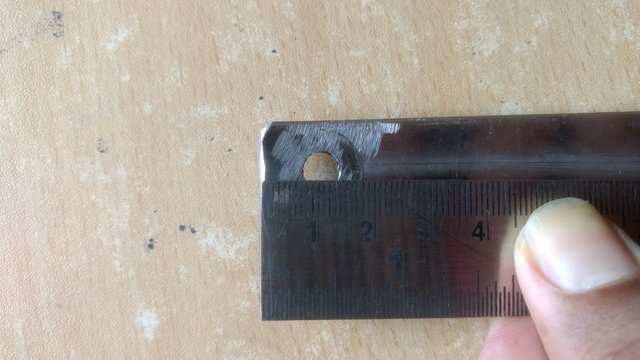
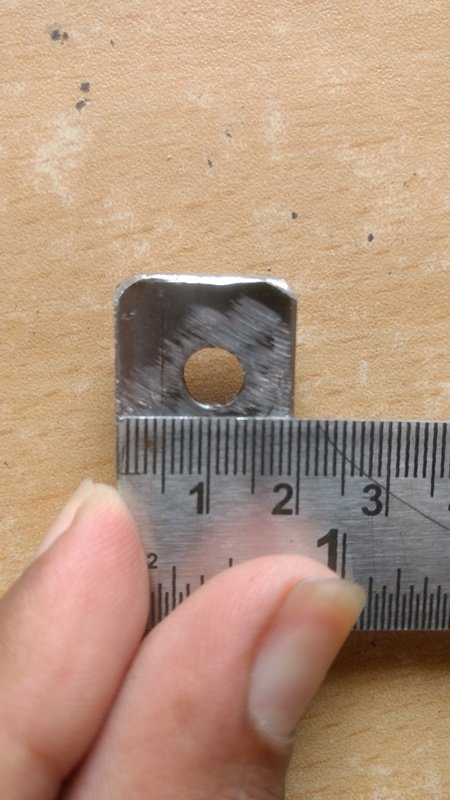
The holes on the longest strip are of 8.5 mm diameter approx and the distance of hole center from the edge of strip is 1.35 cm on the left side.

And 1.6 cm on the right side. (Again just to give you an idea)
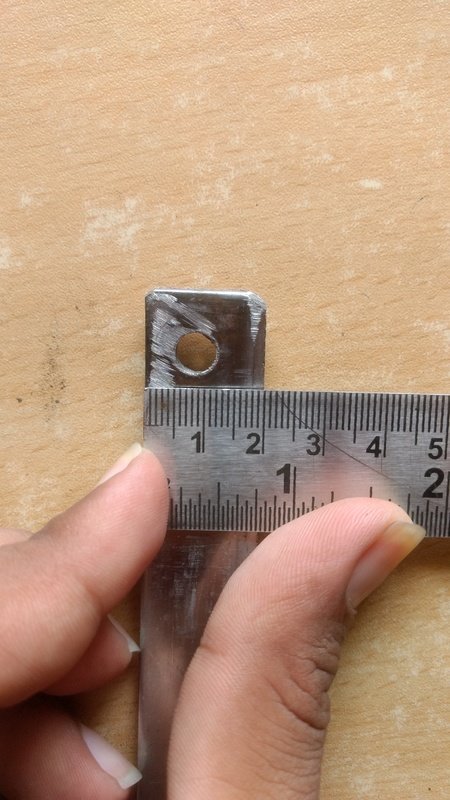
The hole on the smaller strips are around 6.5 mm in diameter and the centre of the hole is 1.05 cm from the edge.
And try to keep it in the center from both the sides. Mine has gone a little off.
(Left side strip)
(Right side strip)
Once it's complete, you'll get something like this:
If you fix them like this, it'll shine and look odd.
What can be done to make it appear better?
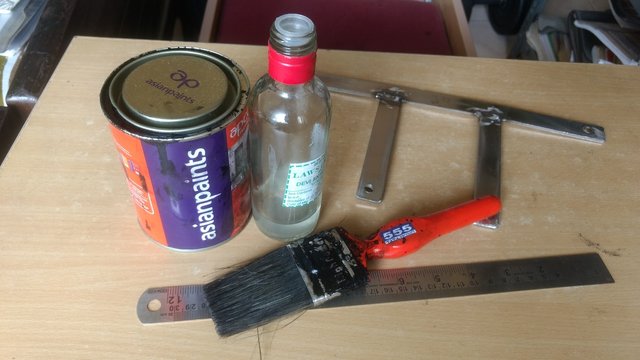
3. Paint
Get a black paint that's used for metal. I used Asian Paints as they are one of the best.
Then you'll require thinner, paint brush
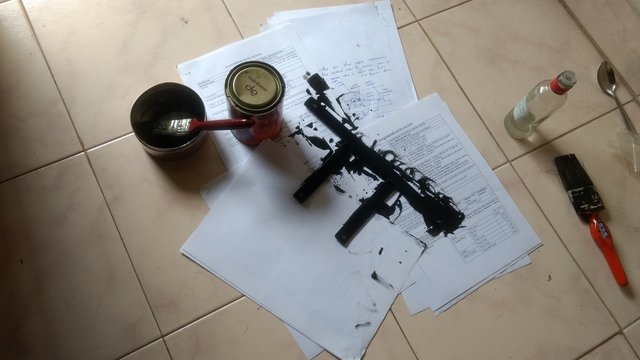
Once it's painted, you'll get this.
Looks neat now, doesn't it?
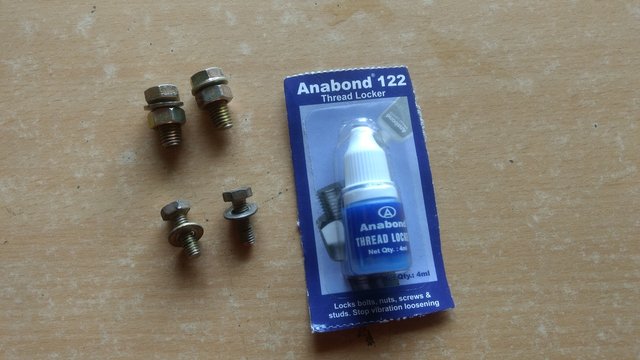
4. Nuts, bolts and thread locker.
To fix everything in place, you'll need to get nuts and bolts of 3/4 inch length.
The diameter of the threads varies depending on the hole you drill in the clamp.
Buy it in a hardware shop by checking which size fits perfectly.
Apply thread locker on the thread of the bolt before fixing it.
It helps in retaining the nut on the bolt in case of vibrations. It's for safety.
Now that you have everything ready, let's see where to fix them, shall we?
If you look carefully under your bike's headlights, you can see these two threaded holes.
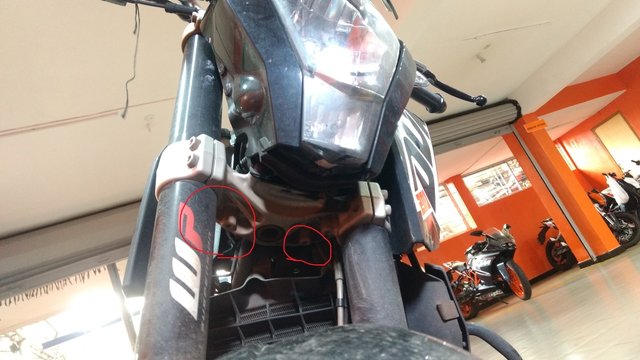
Thats' where the holder strips of the clamp that we just made come in place.
Hold it in position and fix the bolts.
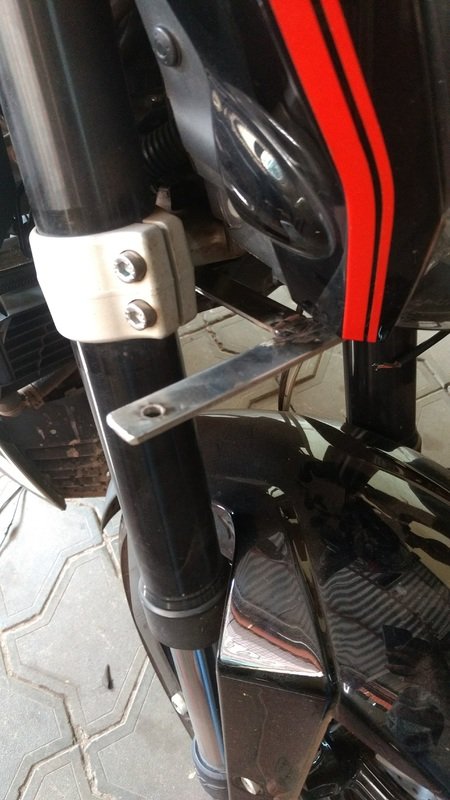
Clamp is fixed on the bike now.
Now you've to fix the LED's on the remaining two holes on the longest strip.
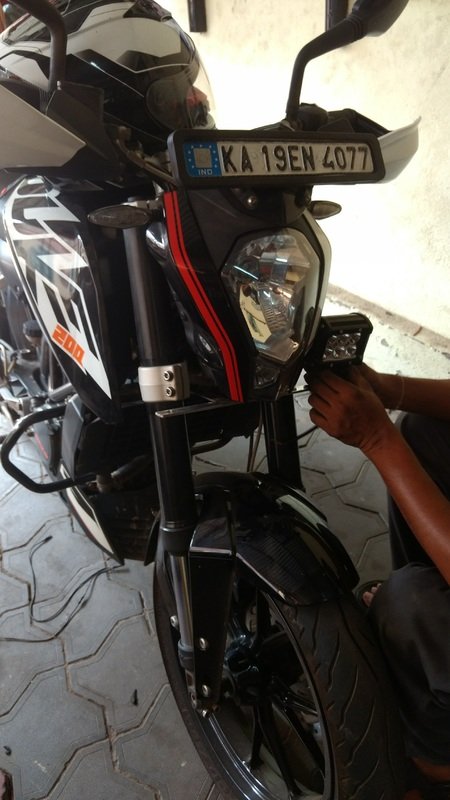
Once both the lights are fixed, electrical connections are done.
Take it to a known and reliable automobile electrical shop near your place.
They will do the connections to the lights from the ignition.
Always ask them to connect it to the ignition, otherwise if forget to switch it off when you're away and it may end up draining the battery.
Opening the headlight cluster to do the connections.
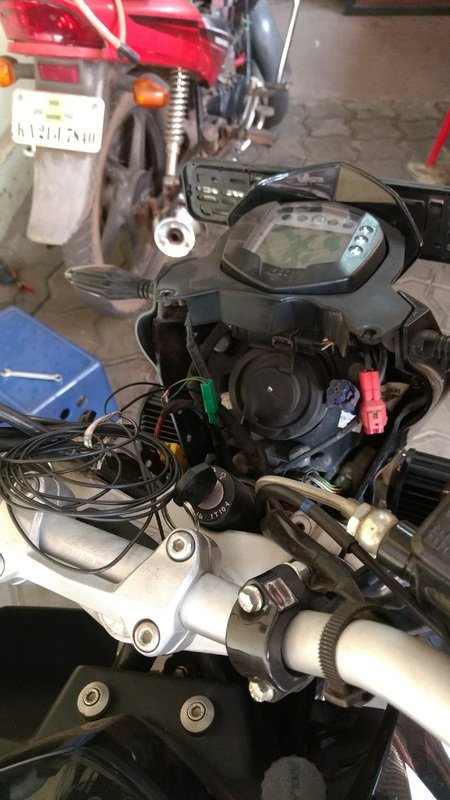
Connections complete.
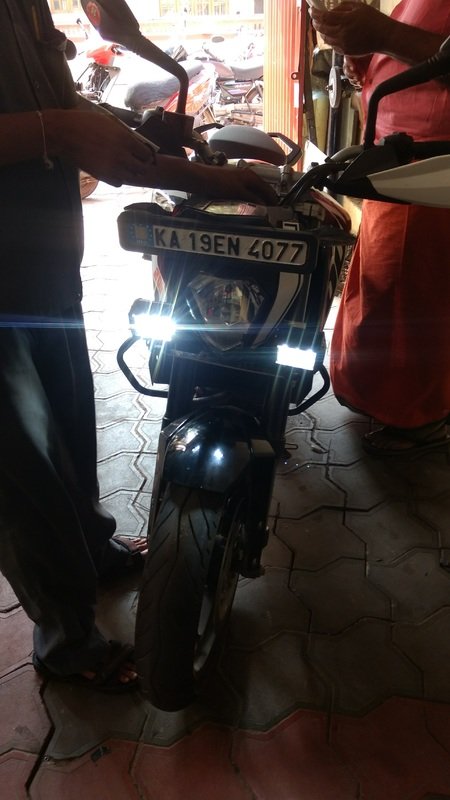
Using it for the first time! :D
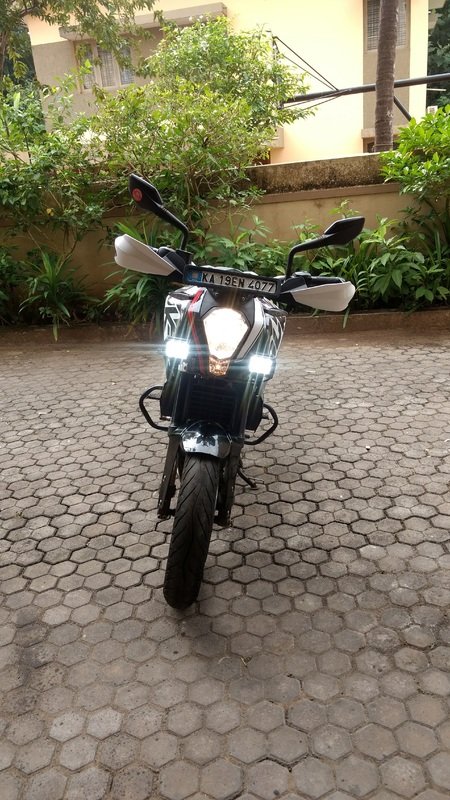
That's how beautiful it looks after the setup.
Gives the bike a beefy look as well.

Another angle.
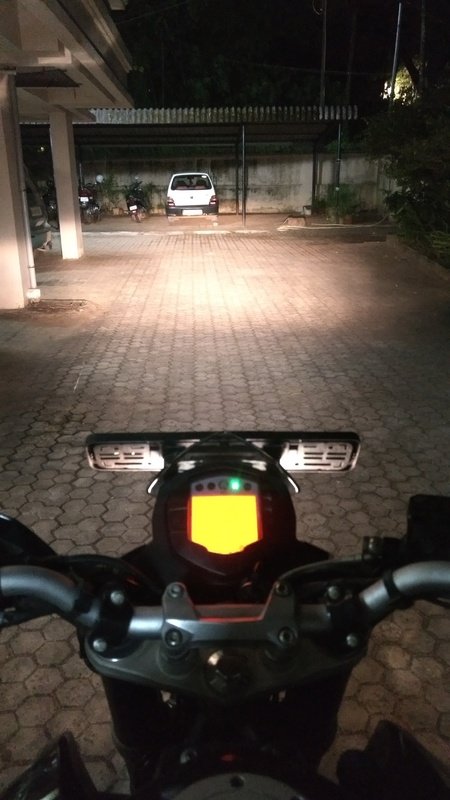
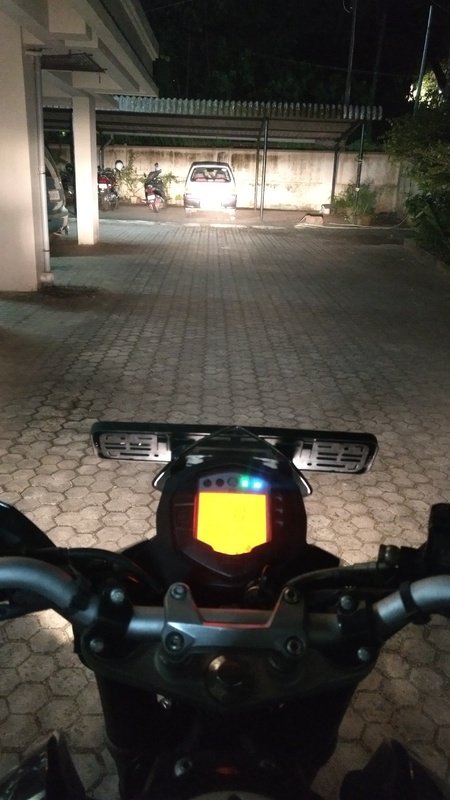
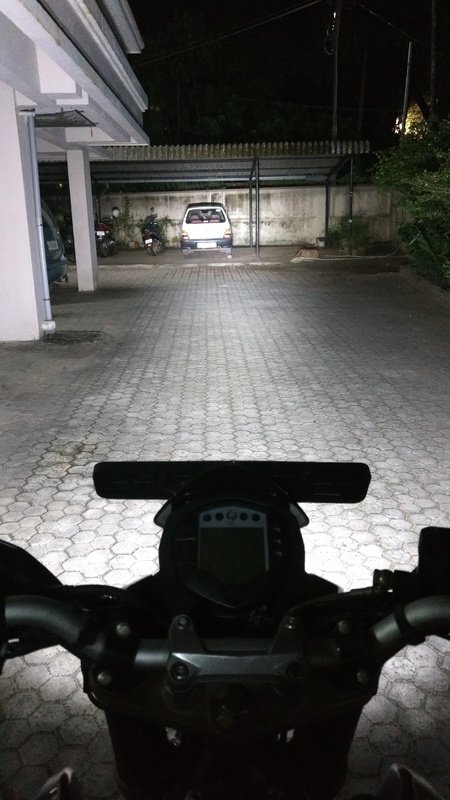
That's how it looks in the night.
Low beam (Main Headlight)
High Beam (Main Headlight)
LED Lights.
And finally, here's a video for better understanding of the visibility.
Hope you found my post helpful.
Cheers!
If you like my content, please do upvote and follow me @wandereronwheels to support me.
Please Resteem my post to help me reach a wider audience.
You might be interested in some of my other posts:
- KTM Duke 200 Service after 30,000 Kms: Problems, Service Costs and Details
- We built a Trike that RUNS ON AIR! | WandererOnWheels Project #1
Cool stuff :)
All the best. I love it! <3 @wandereronwheels
Thank you so much! :)
Very cool bit of DIY, what is it like to ride in India? I am assuming you added these lights for safety reasons right? Definitely makes you more visible and hopefully a bit more piece of mind.
Hey @munchell! I added them for visibility on the highways and ghat sections where there are a lot of curves. The light spreads out and helps a lot in cornering during the night.
It's crazy to ride in India. Traffic is just mad here. Hardly anybody follows rules.
But once you ride here, you get used to it and your reflexes become a lot better compared to riders in other countries.
Cheers! :)
Nice article :) But whats the take on yellow lights instead of white??
Those would work well in the fog, compared to white! :D