Building my own $3,000 Desk

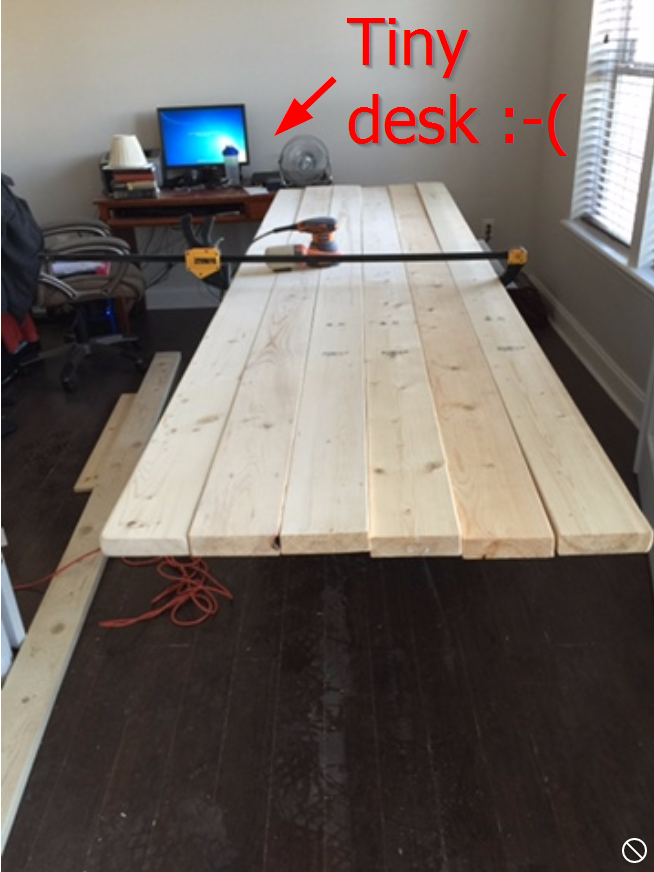
The Problem
Our department at work was given the option to work from home half the week and I decided I was going to buy a really cool long table as a desk. One that would fit 3 large monitors. Well, turns out that I have really expensive "wants". After researching all over the Internet and local shops, the best deal anyone could find me was about $3,000. Most of that was just in the delivery/shipping of the desk.
The Solution
Build it myself! For that amount, I figured I could just make it myself and buy some tools that I can use on other projects...and thus began this journey.
Once I had decided I was going to do this, I started looking for lumber...and the easiest place for me was simply Home Depot.
Why spend $3,000 for a desk when I can do it for $300 and then buy $700 of tools...that is a better deal!!! :smiley:
The beginning
Staring is always the hardest part. Don't know why, but just getting the first step in the process takes forever after making up my mind that it's what I want to do. But alas, once you take those first steps everything else seems to fall into place.

The Measurements and Rough Ideas

After I got the "main idea" I was ready to start with the next phase.

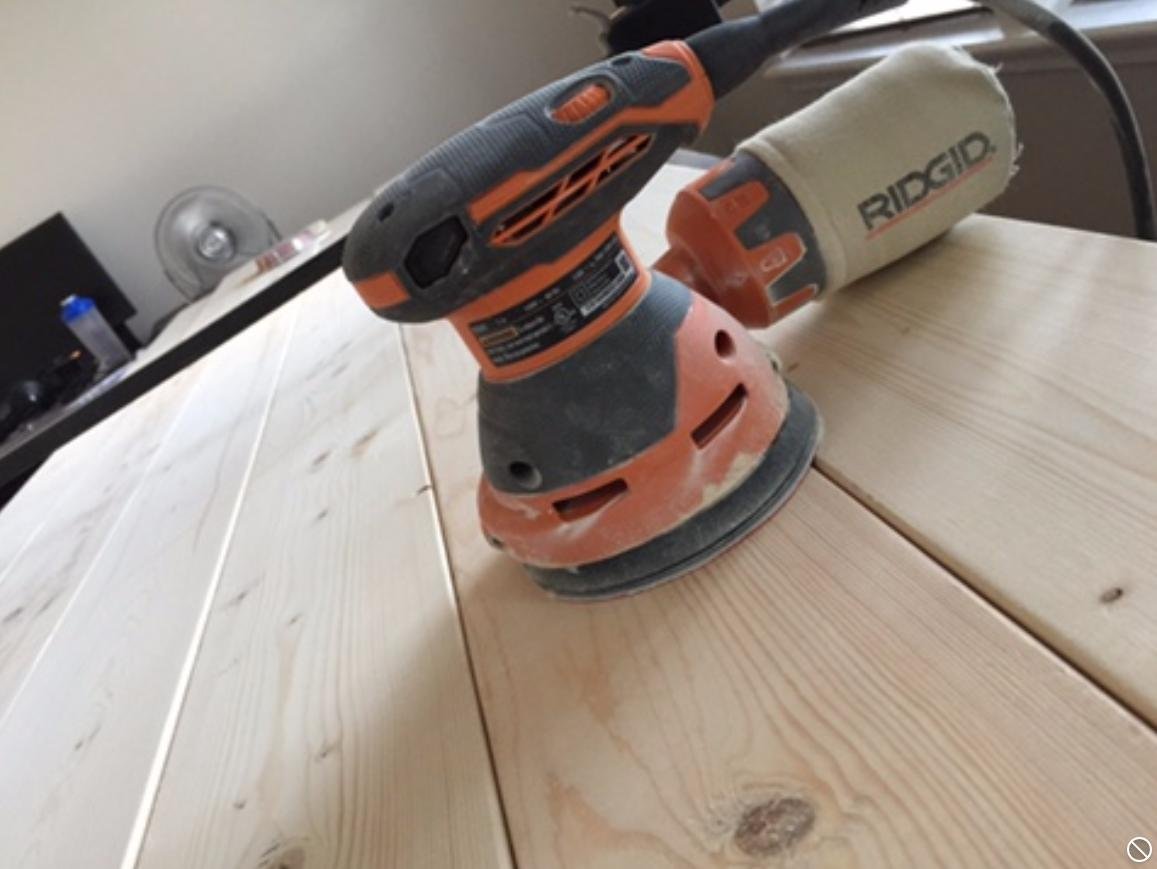
The Sanding
Realized how sanding in my office is a pretty bad idea. I had wood dust (glitter) all over the place...even inside my computer!!!! Only took me one day of sanding to figure it out...fortunately. It also got me to invest in other toy...a "shop vac" to suck up the dust. It connects to whatever device you have...this way you don't have to rely on their little "baggy" that fills up in a few minutes.
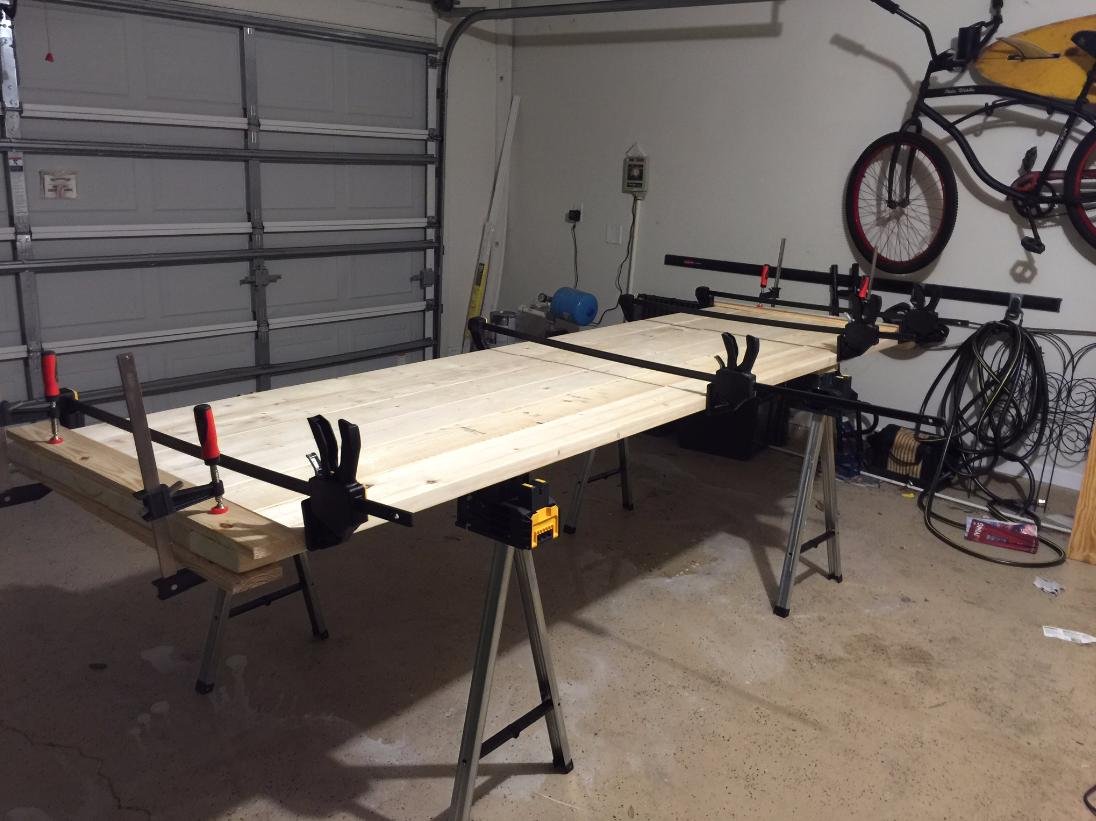
The Glue
This was a rather nasty part of the project. Only because I'm not very careful and it was my first time. I had to make sure to clean up the dripping glue on the floor. I learned a neat little trick by writing a big "V" to keep your boards perfectly aligned. And yes, I'd have to sand it again to remove that...but more on that later.

After putting the glue, now it's time to make sure to press all the boards together. I put boards at the end to make sure they are straight as they dry.

The Legs
Once dried, now comes the industrial pipes and the crossing boards!!! At this point, I still haven't drilled anything in. I'm just getting a feel for where things are going to land. This is where I get to position the crossing boards where I think they should land, based on the pipe legs. You want to measure well to ensure each side looks even and so you know where to drill into to secure everything so it's in sync with the table top and the legs.

"Pilot holes"


The Color
Now came the time to figure out what color I wanted on this. What you'll want to do is grab a piece of a board, sand it a bit and then mark it as seen below...then paint on it. Pretty simple. This will show you a preview of what it will look like before you start brushing away with your new Shellac or whatever stain/poly mix you want to use.


Commercial Break: 1
It was kinda last minute, but I saw this in the hardware store while looking for other parts and thought this would look cool! So I did it.

Attach The Legs

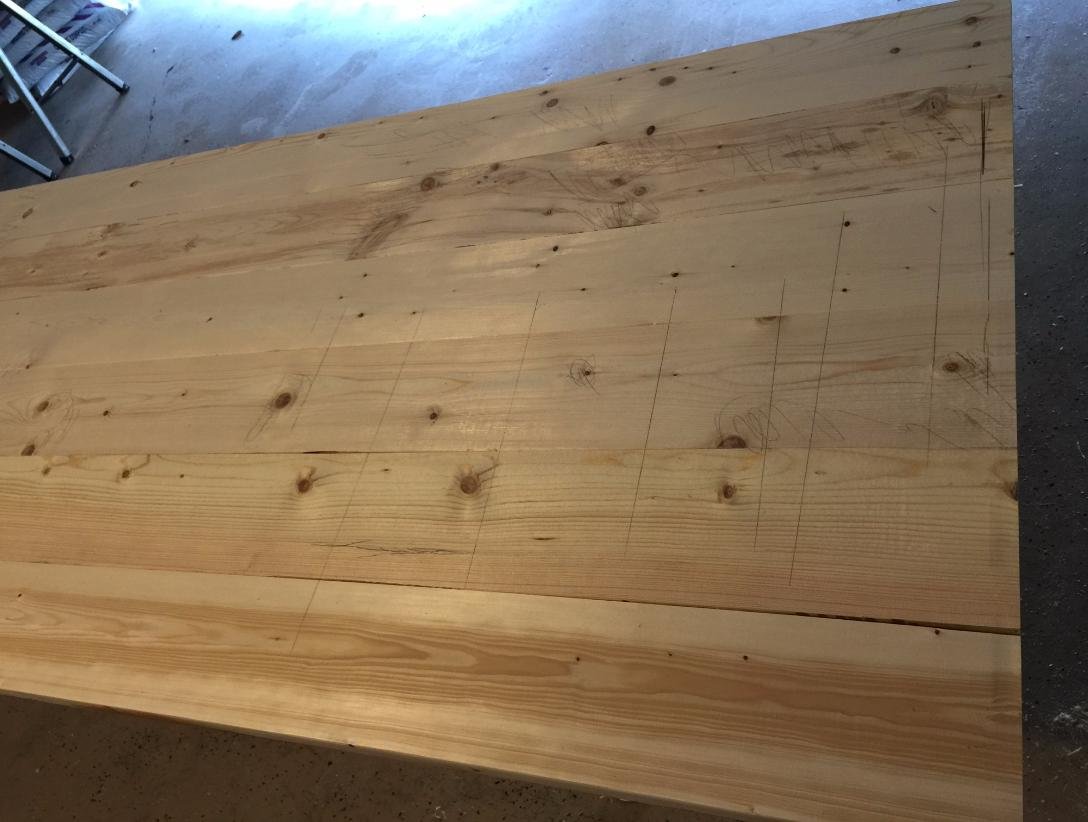
Look for Uneven Planes
I used a ruler to look for areas where the boards were not perfectly even and flat.

A nice straight edge can show you where you have gaps...

Using the ruler, mark up the spots that are popping out too much so you know where you have to plane some more.

The Filler
Wood filler is almost impossible to not use. There's always some small imperfections but fortunately they are easy to fix.


After that's nice and dry, sand down carefully so as not to pull out the filler in the cracks.
Commercial Break: 2
This was not part of the original plan, but I saw this on a table on Etsy, and I knew I wanted that. This would also make it much easier to move around for later, since this table is pretty heavy.

The Paint (Shellac)

Now that all the sanding is done I had to add the shellac...but I wanted to do this inside the house since there was just way too much dust in the garage. And I wanted to get the extra moisture that was being sucked into the wood from the humid air outside (FL). I let my table sit indoors for about a week...was enough time for me.


Gave it a quick round of very light sanding on a fine sand paper. Then gave it another light layer of shellac.


Before and After


As you can see, this was a rather easy thing to do. Literally anyone can make their own desk/table. If you wanted to make it even cheaper, you could just avoid using the industrial pipes and make all of it out of wood. Then you're literally talking about under $100 for a table.
What I Learned
The first thing this taught me was to not be afraid of "trying." I've always seen videos of others making stuff, but always thought, "I'm just an IT computer guy. What do I know of this..."Second, this experience has taught me to do more "making" and less buying of things. Now I look at stuff and think, "Huh, I can make that." The third and final thing I learned is the level of satisfaction in knowing I made something cool and EXTREMELY durable. I mean, this puppy isn't going to break anytime soon.
If you liked this post, please share the love and Upvote, Resteem, follow me and share with a friend! :smiley:
If you liked this post you may like my other one on building a simple Stepping Stool.
That is quite a nice desk you made, and quite a nice, very well written post! I believe you could sell thoes if you wanted. I know people in my area (Pacific Northwest) would be all over them! I love how it fills that back wall space very well, I think you will be super productive! Nice wheels too!
Thanks, it was a nice personal project for me...a challenge to myself to see if I could pull it off. Now I've kinda got the builders bug.
This post has received a 7.32 % upvote from @booster thanks to: @truth-be-told.