Dad Renovations - Part 2 - You should probably get an Engineer to look at that...

Hi everybody!
Where ever I look there are things to be done around the house. In my head I have these jobs sorted into;
- One day, when we win the lottery
- One day, when we have some spare cash
- Things my wife wants me to do...
- Oh shit I need to fix that now
- One day when I can be bothered.
Part 2 goes in the category of 'things my wife wants me to do...' which normally is a pretty boring job, But on this job I got to buy some cool new toys and test out googling abilities, my high school woodwork skills & see how far I push the guys expert knowledge at the local hardware store.
The objective, build a veranda over the clothes line that keeps the clothes dry in winter and stops the summer sun from fading our clothes. The budget for this project was set at ~$500 AUD and the estimated time until completion was ~ 3 days.
Step 1:
Now, at school I was taught by my teachers to plan, plan, plan, and we'd often spend half of the term planning before we were able to get into mucking around with the power tools. I have now learnt, that this is to prevent a million trips to the hardware store, so plan I did.

My father in law, who featured in my Part 1 Renovation post, 'Honey I flooded the garden' is a real stickler for detail. We make a good balance between, doing things over the top and just getting the job done. He brings the detail and I bring the google research.
We made our selections based on what we thought we needed in regards to wood, brackets, how we were going to attach it to the wall & what sort of roof sheets etc.
Step 2:
Off to the hardware store, We speak with a young bloke, who we showed these beautifully crafted plans to and his response was... "Do you have council approval? because this sort of thing should have an engineer look over it". Great start... I finally convinced him to talk to me in hypothetical situations and we eventually got the information we needed. He saved us a bit of time though. He pointed out how heavy tin sheeting is, and how that would add additional weight to the structure overall. He suggested an alternative product, alsynite sheeting, which will keep the weight down as well as let the natural light in to dry the clothes still. We got all the wood & gear back to base and moved onto step 2.
Pencil, paper & google - $0
Budget remaining: $500
Step 3:
Measure, cut, measure... or is that measure, measure again then cut?
See this is why i get my father in law to help, im the kind of guy that will fire from the hip when it comes to measuring and cutting. I was lucky enough to get this new Mitre saw for my birthday, which was perfect timing for my second renovation.

So after I got the hang of measuring twice and then cutting, we got the cutting part out of the way on day one. The plan was to do all of our cuts, assemble it on the ground, take it apart, then put it together in the final location.

Materials (wood, screws etc): $420
You beaut birthday present: Mitre saw - $0
Project so far: $420
Budget remaining: $80
Step 4:
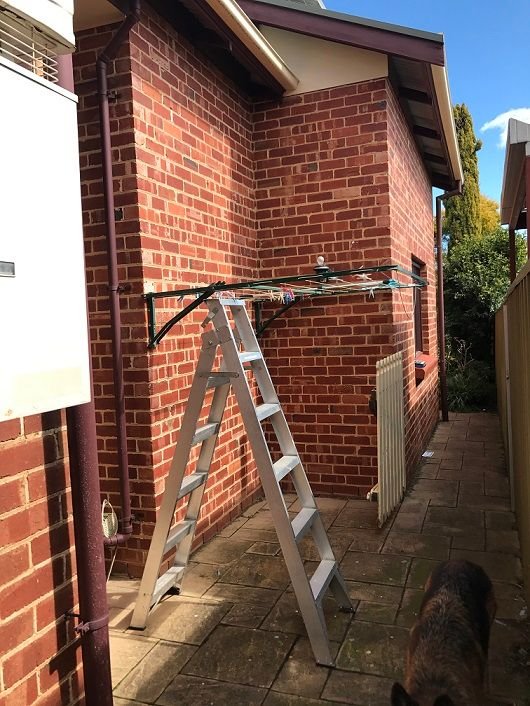
We're onto day two of a three day project, today we take the structure apart and move into location. This part went off without a hitch. However at the end of day 1, We decided that we weren't going to be able to do the next steps safely using two ladders, juggling long heavy lengths of wood & manage power tools. We prepped the site and paused the project until next weekend.
Step 5:
During the week my father in law found a company based in Port Adelaide that sold Scaffolding at a reasonable price, which he purchased for $490 dollars. Now this purchase alone blew the budget I had set, so he kindly offered to buy and we could chip in what we could. I chipped in $245... A: I kind of had to considering it was my project and B: you cant put a price on safety.
Pencil, paper, google: $0
Materials (wood, screws etc): $420
You beaut birthday present: Mitre saw - $0
50% of Scaffolding: $245
Project so far: $665
Over budget by: $-165
Step 6:
We're now on day three of what we thought was going to be a three day project.. maybe we were too ambitious. So we start by putting the side pieces into place using our new Scaffolding. First the back length was attached to the wall using a screw called a concrete anchor. The a pilot hole was drilled in both the brick and the wood a size too small, and the screw was then drilled into the wall fastening the wood to the wall.
We managed to get the back piece of the frame and the two sides fastened to the walls. End of day 3.

Step 7:
Bring together the remainder of the framing... End of Day 4.


Step 8:
It's now Day 5 of the projected 3. Initially we bought most of the materials needed, but the alsynite & guttering needed to be ordered to the specific measurements of the veranda. This means it was time to pay up again... The budget was well blown, but the progress was worth it, as we were able to knock out the roofing sheets and the guttering in one go.
Step 9:
I was able to recycle some paint that we had used for another part of the house, and is the colour we intend to paint the exterior eventually.
.JPG)
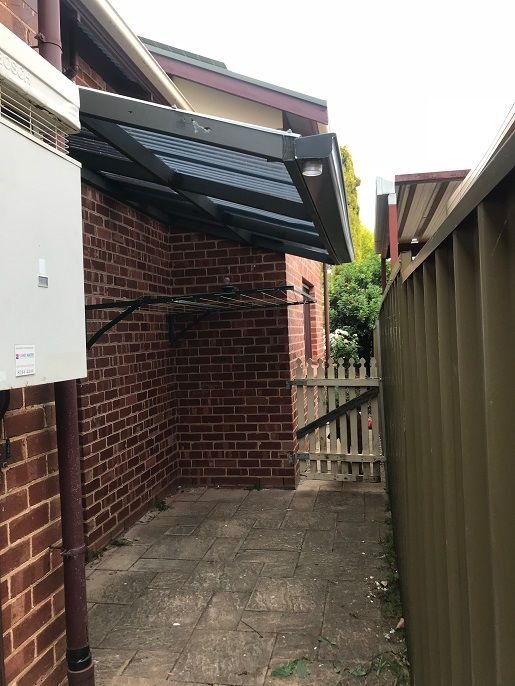
Unfortunately I didn't get a picture with the down pipe connected, so you'll have to use your imagination! It connects from the end of the guttering to the red downpipe on the left. My Dad plumber skills came in hand that i learnt in Part 1
So the final product absolutely blew the budget, but I got to test out some old skills & learn some new ones.
Dad renovator skills achieved: Carpenter & roofer.
Budget: BLOWN
Pencil, paper, google: $0
Materials (wood, screws etc): $420
You beaut birthday present: Mitre saw - $0
50% of Scaffolding: $245
Guttering, Roof sheeting & down pipes: $170
Project so far: $835
Over budget by: $-335
If you've got some of your own renovations and plan to post I'd love to see some of your own progress - Use #DadRenovations
Until the next project....XAG.
My avocado tree was burnt in this recent heatwave, so I've dragged the trampoline over, and moved some legs around to make it tall enough to act as a frame for a sheet or something to keep the sun off the tree for a while.
Since I put up my clothesline ten years ago, I think that's about it.
Avocados getting burnt on your tree... you may as well get a $50 dollar note and set it alight.
Congratulations! This post has been upvoted from the communal account, @minnowsupport, by LowF1ux from the Minnow Support Project. It's a witness project run by aggroed, ausbitbank, teamsteem, theprophet0, someguy123, neoxian, followbtcnews, and netuoso. The goal is to help Steemit grow by supporting Minnows. Please find us at the Peace, Abundance, and Liberty Network (PALnet) Discord Channel. It's a completely public and open space to all members of the Steemit community who voluntarily choose to be there.
If you would like to delegate to the Minnow Support Project you can do so by clicking on the following links: 50SP, 100SP, 250SP, 500SP, 1000SP, 5000SP.
Be sure to leave at least 50SP undelegated on your account.
Well after seeing that...
I’m going to call you when I’m lost during our home renovation next year :)
Advantage of this blog series is I get a real persons view not some edited tv version.
Also I loved the show with Tim Allen, Tool Time what a classic!
It was an awesome show. Biggest lesson from my adventures so far is to allow ~20% for budget blowouts and unforeseen costs.
One more question, how are the sausage sizzles at Bunnings these days? #memories
You’ve got to support your local mitre10! Family owned!
This post has been voted on from MSP3K courtesy of @buggedout from the Minnow Support Project ( @minnowsupport ).
Bots Information:
Join the P.A.L. Discord | Check out MSPSteem | Listen to MSP-Waves