How to Live Off-Grid Cheaply: The Solar Panel - Wiring Addendum
Written for Steemit: A guide to how I built my own system and live off-grid because there is no other alternative where I live using wind and solar green energy ©Jeff 2017 All Rights Reserved.
How to Live Off-Grid Cheaply: The Solar Panel - Wiring Addendum
The problem is almost always the batteries!
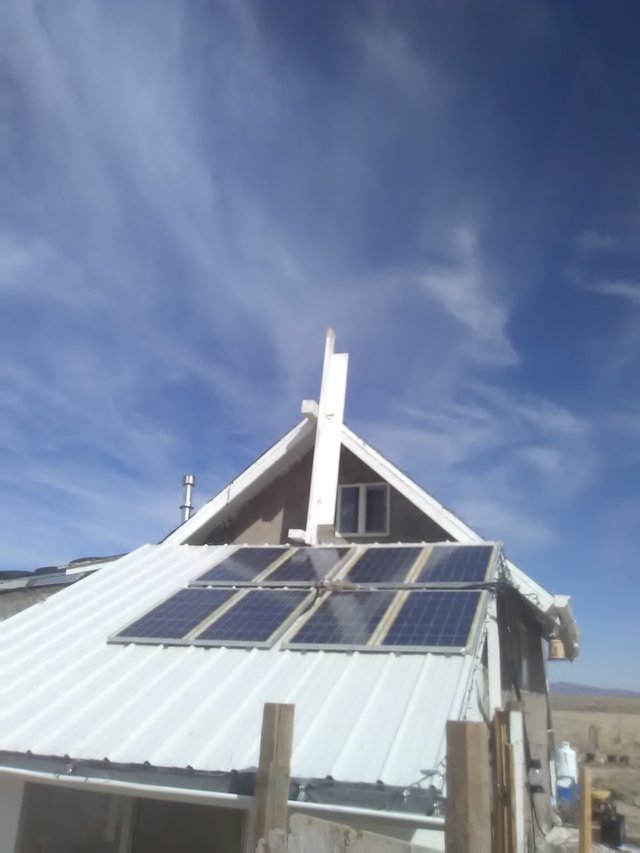
As you can see from this picture, the way the solar panels are wired into the 2/0 stranded copper wire is so hokey and redneck that I am actually proud of it because it lasted eight years but I would not suggest you do this. Oh by the way, I am among 43 other things a retired electrician and I did this, thinking that I would fix it as soon as I got the parts, eight years later.
Yes, see that the connections for the positive and negative are in separate 1 1/2" electrical PVC pipe about a foot long. Well, here is something I did this morning and it is a lot better after eight years and a short or two.
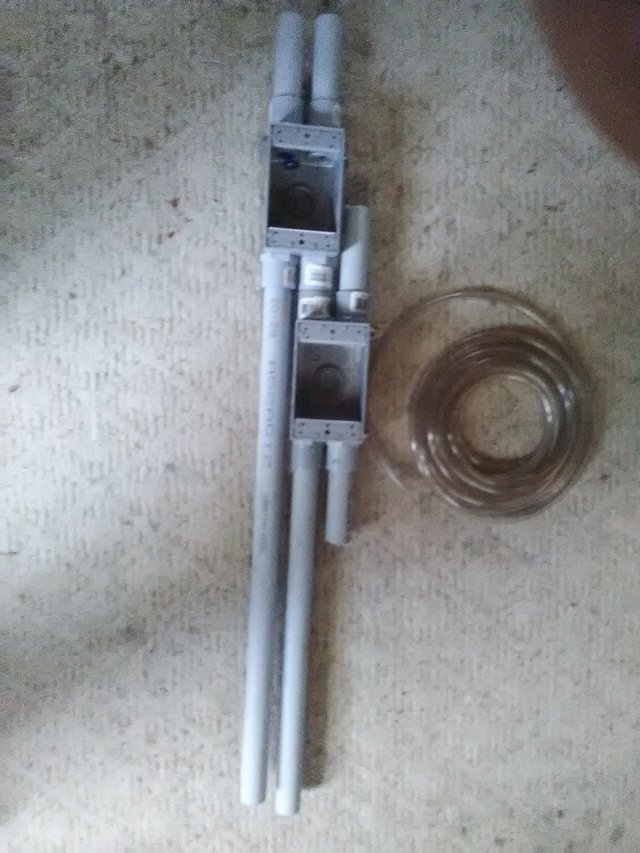
That is two single gang weather proof boxes. I wanted to use double gang but they were $12.00 a piece at Home Depot, without the covers. So, single gang it was. I also used one 10' stick of electrical PVC and eight 3/4" connectors. Believe me, this is still hokey and it took two and half hours to rewire it this morning. The nice part, no water, frost, snow, or ice will get inside this and short it. True, it would be better to use double gangs or even the recommended boxes for solar only but those are expensive, oh are they.
Notice the tubing. I slipped the wires into 3/16" tubing from the solar panels to the larger 1/2" irrigation tubing to protect them. Why? the insulation was degrading even though it is outdoor all-weather wire insulation from UV exposure. The tubing will keep those wires absolutely perfect for the rest of the life of the solar panels. I should have bought 1/4" tubing trying to slide the wires in almost gave me a hernia but when the sun hits them, they will be shrink wrapped.
So, here is what it looks like finished:
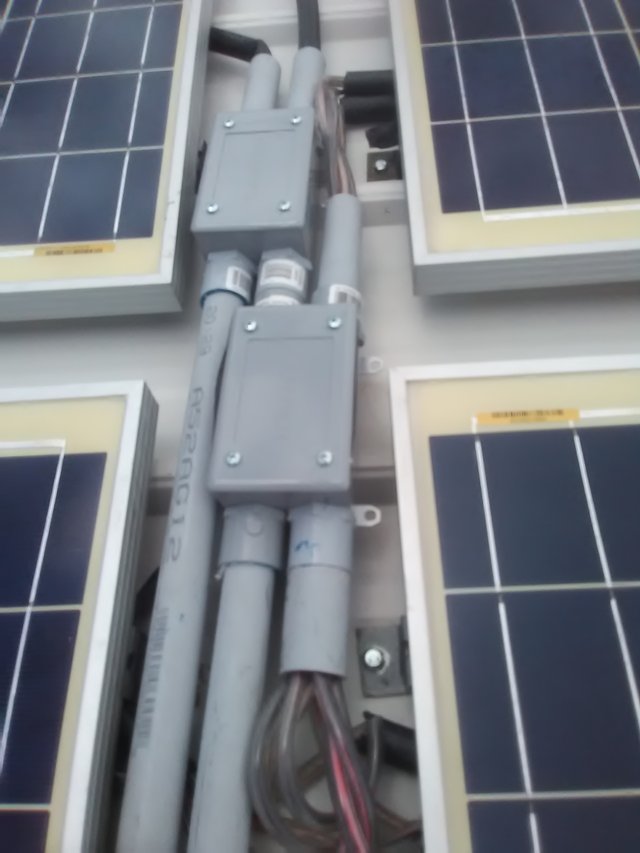
The total cost on this little setup was about $20.00 with the tubing, pipe, boxes, connectors, and covers and that is cheap!
Yes, I realize I need to slide some boards underneath and mount the boxes permanently and so on and in about eight years, I will likely do it.
Have Fun! Save Money! Be Safe -Follow and upvote ;-P
Table of Contents for other Chapters: TOC
Image Credits - Me!
Great stuff!
Thanks
This looks really great
Thanks
Good job! Thanks for sharing. I love solar and wind power as a hobby.
Glad you enjoyed it