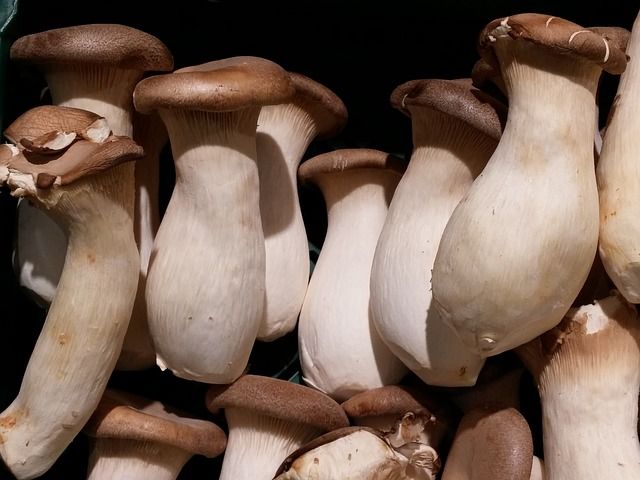
King Oyster Mushroom Cultivation For Beginners
I am writing this guide in the hopes that more people discover the wonders that is indoor mushroom cultivation. I personally grow king oyster mushrooms for local restaurants, and have found it to be a fun, cheap to start, and even profitable hobby. If you like this guide please feel free to follow and resteem. I will be releasing more guides in the future on both wild mushroom foraging and indoor cultivation.
WHAT YOU WILL NEED
Spores- You can order these online. You will want to get a liquid spore culture for easier handling. For your first run you won't need more than a syringe full.
4x jars with the metal lids (I suggest half pint, but any jar with a metal lid will work)
Pressure cooker- You can buy these for cheap at your local supermarket. I think I paid $20 for mine.
Organic Brown Rice Flower- Available at almost any grocery store.
Vermiculite- Check your local indoor gardening store.
12x 5-gallon buckets- you will be drilling holes along the sides of 4 of these (as in not on the bottom or the top). Use a 1/2 inch drill bit, and drill 4 holes below the lip at the top of the bucket, and four about 2 inches from the bottom, all evenly spaced.
4x lids for 5-gallon buckets (I use paint bucket lids)
Straw pellets- I get mine at my local feed store, but any country market will be able to point you in the right direction.
Micropore- This is a medical tape available online or at your local pharmacy.
Aluminum Foil
Bleach
Rubbing Alcohol
BBQ lighter (you know the long-necked ones?)
COLONIZING YOUR SUBSTRATE
This is the part most people seem to have a problem with, but really it's not as complicated as people think. We are just creating a as close to perfect growing medium as possible inside the jars, which will be sterilized in the pressure cooker, and letting the mold do its thing.
Step One
Mix 2 parts vermiculite to one part distilled water and one part brown rice flower. You will need enough of this mixture to fill your jars.
Punch four small holes in the metal lids of your jars using a small nail and hammer. Evenly spaced.
Fill your jars to within half an inch of the top with your substrate mixture (do not pack it in, keep it light and airy), and then wipe the lip of the jars and the insides of the lids thoroughly with a bleach or isopropyl alcohol-soaked rag, quickly putting on the lids after each one is wiped. Put a small piece of micropore over each hole in the lid, and cover the tops of the jars with aluminum foil (just like saving leftovers). Put the jars inside your pressure cooker sitting in 1 and 1/2 inches of distilled water. Secure the lid, and put on the stove for 90 minutes on medium-high heat.
Remove from the heat and let sit for at least 5 hours. They will be cool to the touch, but leave them in the pressure cooker with the lid on.
Take the pressure cooker into your bathroom, along with your rubber gloves, lighter, spores, and rubbing alcohol, and start cleaning! You are trying to sterilize your bathroom, so every surface will need to get hit with a rag soaked in bleach-water or rubbing alcohol. Don't wear the rubber gloves you plan on using later for this. The cleaner this room is, the better your chances of all four jars making it through the process!
Now that your bathroom is clean (let's face it, it needed it anyways), close the door and turn of any fans that might be blowing. While we wait for anything that might be in the air to settle, go ahead and suit up! Put on your rubber gloves and wipe the outsides of them, and your forearms, with rubbing alcohol. Can't be too careful. Take out your syringe and, using your lighter, heat the metal part until it glows red. Wait about 30 seconds for it to cool, and then remove the tinfoil from the first jar, setting it aside. Wipe the needle part of your syringe with rubbing alcohol and immediately stick it through the tape into the substrate, squirting a quarter of the liquid into the substrate mixture. Cover the jar again with the tinfoil, and set aside. Do this for all four jars, including reheating the needle and wiping with rubbing alcohol.
These jars will sit somewhere cool and dark for a 2-3 weeks. I use my closet. At this point they are pretty stable, so don't worry too much about it.
Check every few days as the time approaches. You will know they are done because a white mold will have taken over the entire jar. If you start to see what look like almost-microscopic mushrooms (called "pins"), it is time to go to the next step!
FRUITING
Take one of the buckets you drilled holes into, and using a Razer or knife, clean up your drill holes (removing any jagged bits that may be sticking out). Put that bucket inside another bucket, using a piece of tissue wedged in between them to ensure that there is a gap between the two (airflow is important) and set them aside.
Take your straw pellets and put them in your pressure cooker with just enough distilled water to cover them. Put the lid on and cook for 90 minutes. Remove from heat and let cool until they are safe to touch. Pull them out of the water using your rubber gloves hit once again with rubbing alcohol, and toss them inside your bucket-in-a-bucket. Your bucket will probably take several runs of this to fill up, but don't do it quite yet!
Open one of your jars of substrate, and crumbling the mixture with your gloves once again cleaned with rubbing alcohol, evenly spread a layer on top of the straw pellets.
Put the lid on the bucket, since you are heading back to the stove!
Once again put some straw pellets in the pressure cooker and sterilize them. Let cool.
Crumble more substrate!
...And probably some more pellets.
Repeat this process to fill all four of your buckets with holes in them.
Put all four of your now-closed bucket-in-a-bucket somewhere for a week or two. You will know it is time when you lift up your buckets and see white mold through your drill-holes (and maybe even some tiny mushrooms!).
When you see they are ready, take one of your buckets out, and flip the empty one upside-down, placing the one with the holes in it on top of it. Although the odds of contamination at this point is pretty slim, spores settle towards the ground, and why risk it?
Do this with all four buckets.
Once a day take a spray-bottle of distilled water and spray the drilled holes to keep them moist.
You will have oyster mushrooms sprouting within a week!
If you liked this guide, please follow and resteem!
<3
nice post @jamesebissonette
Thanks. A lot of the people who started following me did so because they told me they were interested in mushroom cultivation, so I wanted to give them something they could easily use.
Nice Post
Totally cool! Photos would make it off the chain!
What is your pricing on the mushrooms?
Awesome! I want to try this, and hopefully move on to outdoor mushroom cultivation as well :)