How-To: OpenLDAP Server Installation, in 15 Minutes or Less
Basic instructions for setting up an OpenLDAP instance using AWS, Ubuntu, OpenLDAP (slapd), Apache, and phpLDAPadmin
This is a no-nonsense quick-start guide for a person with some basic familiarity and comfort with command-line usage and access to AWS. The Ubuntu instance is free, as is the rest of the software suggested here. This gets you a basic, vanilla OpenLDAP instance that you will be able to admin via a web browser. Additional security hardening and configuration will/may be necessary for your particular needs.
Hardware
Spin up an AWS EC2 Ubuntu instance.

Server Prep
SSH into your server and issue this command:
sudo apt-get update
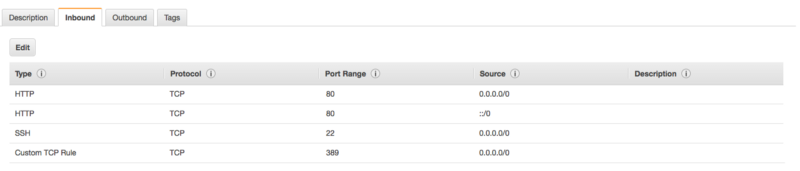
Server Security
Enable Port 80 and 389 for Apache and LDAP via the AWS console.
Install Apache
Execute this command via SSH:
sudo apt-get install apache2
Access your instance’s IP address via a web browser and verify the default Apache page is visible. You can find your instance’s address via the AWS console.
Install LDAP Server & Utilities
Execute this command via SSH:
sudo apt-get install slapd ldap-utils
You will be prompted to enter a password, so do so.
LDAP Configuration
Execute this command via SSH:
sudo dpkg-reconfigure slapd
You will be faced with anther set of prompts you must answer in order to configure OpenLDAP.
Omit OpenLDAP server configuration?
No
DNS domain name?
example.com
Organization name?
EXAMPLE
Administration Password?
Same as previous, or a new one
Database backend to use?
HDB
Remove the database when slapd is purged?
No
Move old database?
Yes
Allow LDAPv2 Protocol?
No
Install phpLDAPadmin Package
Execute this command via SSH:
sudo apt-get install phpldapadmin
Configure phpLDAPadmin
Execute this command via SSH:
sudo nano /etc/phpldapadmin/config.php
Look for the line that starts with:
$servers->setValue('server','name'
In nano you can search for a string by typing CTRL-W, then the string, then ENTER. Your cursor will be placed on the correct line.
This line is a display name for your LDAP server, which the web interface uses for headers and messages about the server. Choose anything appropriate for your instance here:
$servers->setValue('server','name','My Sample LDAP Instance');
Next, move down to the $servers->setValue(‘server’,’base’ line. This config tells phpLDAPadmin what the root of the LDAP hierarchy is. This example is based on the assumption you typed in example.com when reconfiguring the slapd package.
$servers->setValue('server','base', array('dc=example,dc=com'));
Now find the login bind_id configuration line. Edit similarly:
$servers->setValue('login','bind_id','cn=admin,dc=example,dc=com');
This option pre-populates the admin login details in the web interface. This is information we shouldn’t share if our phpLDAPadmin page is publicly accessible. You may want to later comment out this line with # and manually enter every time you login.
Finished
Point your browser to http://your.ip.address.here/phpldapadmin
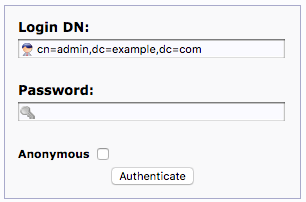
Click login.
You should see the Login DN populated correctly with the values you just applied to config.php above.
Now enter the password you entered during the LDAP configuration.
And you’re done.
Congratulations @phillywebguy! You have received a personal award!
Click on the badge to view your Board of Honor.
Congratulations @phillywebguy! You received a personal award!
You can view your badges on your Steem Board and compare to others on the Steem Ranking
Vote for @Steemitboard as a witness to get one more award and increased upvotes!