iOS 앱개발에 사용하는 Swift언어 기반의 CloudKit에 대한 간단한 튜토리얼입니다.
클라우드킷 사용법
자료를 찾아보아도 오래된 자료들만 있어서 xCode 9.4기반의 Swift 4.1기반으로 다시 작성한 간단한 클라우드킷 사용 튜토리얼입니다. 저도 기록을 위해서 남겨 둡니다. 기본적인 아이폰 앱을 만들 수 있는 개발자들을 대상으로 한 튜토리얼입니다.
Saving to the Cloud 라는 이름으로 앱을 싱글뷰 템플릿으로 생성합니다.
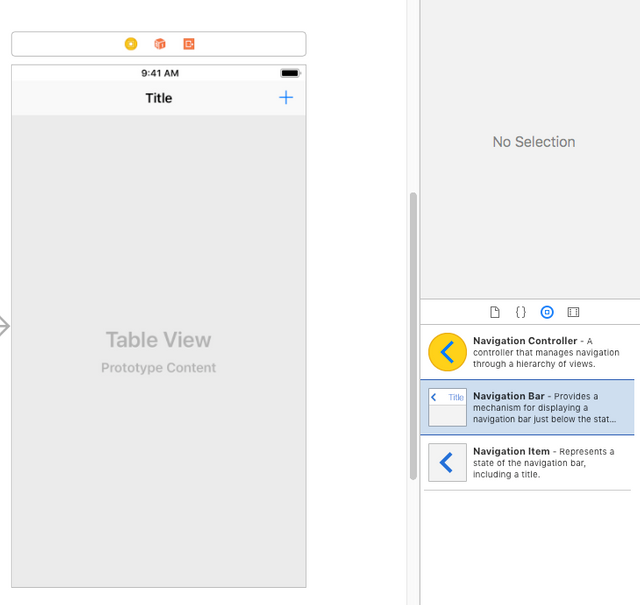
상단에 네비게이션바를 올려 놓고 오른쪽에 바버튼아이템을 추가해서 +로 변경합니다. 하단에 UITableView를 올려둡니다. 오토레이아웃으로 네비바는 리딩 0, 탑 0, 트레일링 0, 높이 44를 지정합니다. 테이블뷰는 0, 0, 0, 0을 지정하면 고정됩니다.
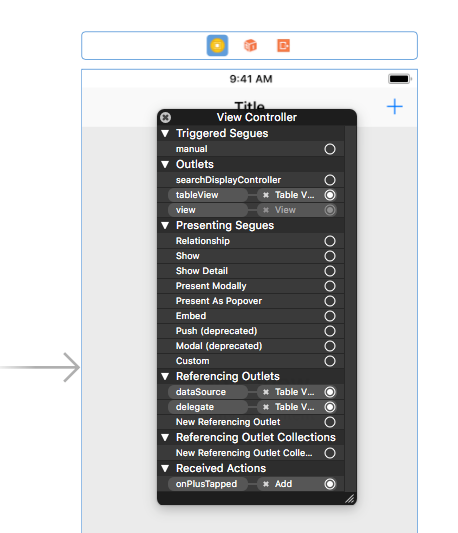
아래와 같이 코드를 추가하고 테이블뷰와 연결(UITableViewDatasource, UITableViewDelegate)를 합니다.
//
//  ViewController.swift
//  Saving to the Cloud
//
//  Created by papasmf on 2018. 7. 13..
//  Copyright © 2018년 multicampus. All rights reserved.
//

import UIKit
import CloudKit

class ViewController: UIViewController {

    @IBOutlet weak var tableView:UITableView!


    override func viewDidLoad() {
        super.viewDidLoad()


    }

    @IBAction func onPlusTapped() {

}

}

extension ViewController : UITableViewDataSource
{
    func numberOfSections(in tableView: UITableView) -> Int {
        return 1
    }
    func tableView(_ tableView: UITableView, numberOfRowsInSection section: Int) -> Int {
        //처음에는 0으로 셋팅
        return 0
}
    func tableView(_ tableView: UITableView, cellForRowAt indexPath: IndexPath) -> UITableViewCell {

        let cell = UITableViewCell()
cell.textLabel?.text = ""

        return cell

    }
}
독에서 뷰컨트롤러 버튼을 오른쪽 버튼 클릭해서 tableView를 연결하고, datasource, delegate를 연결하고, onPlusTapped를 오른쪽 상단의 +(Add)바버튼아이템에 연결합니다.
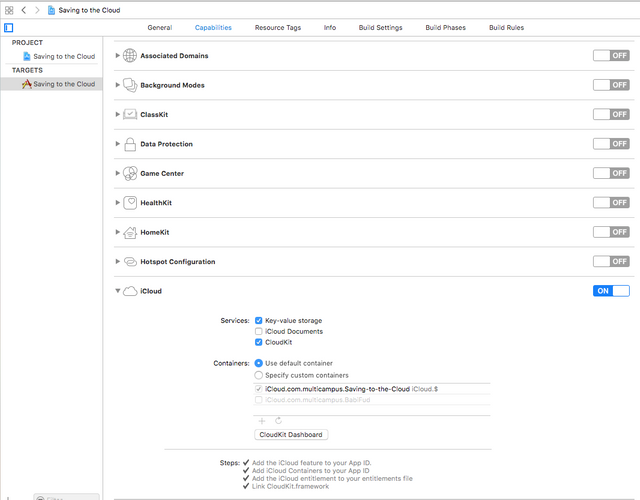
프로젝트의 Targets에서 Capabilities를 클릭하고 아래와 같이 체크합니다.
Key-value storage는 미리 체크되어 있고, CloudKit을 체크합니다.
Use default container를 사용하고 하단에 있는 "CloudKit Dashboard"를 클릭합니다.
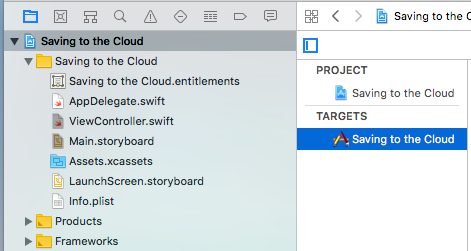
프로젝트에 보면 Saving to the Cloud.entitlements라는 파일이 생성됩니다.
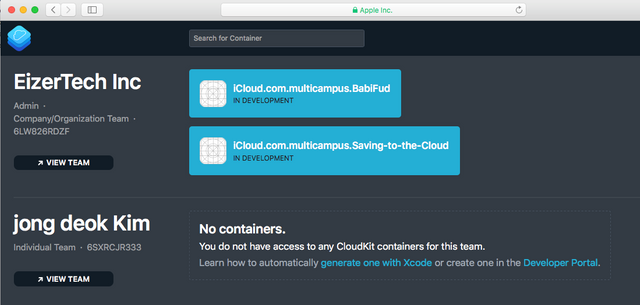
대시보드에 접속해서 보면 해당 계정이나 회사 소속으로 이름이 생성된 부분이 보입니다.
iCloud.com.multicampus.Saving-to-the-Cloud라는 부분을 클릭하면 된다. 혹시 아직 앱이 이름이 보이지 않으면 아래의 코드를 한번 실행해서 앱의 저장소가 생성되도록 해야 합니다.
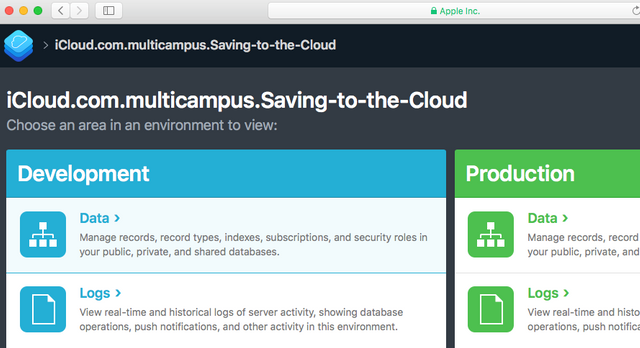
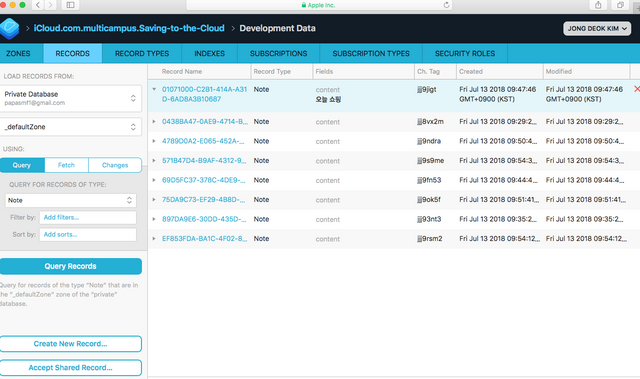
Development의 Data를 클릭합니다.
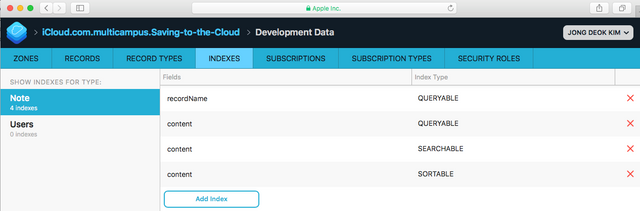
처음에는 RECORDS에 데이터가 보이지 않는다. INDEXES탭을 클릭해서 하단의 "Add Index"를 클릭해서
"content"에 "SORTABLE"을 추가해 주면 해결됩니다.
아래는 완성된 전체 코드입니다.
//
//  ViewController.swift
//  Saving to the Cloud
//
//  Created by papasmf on 2018. 7. 13..
//  Copyright © 2018년 multicampus. All rights reserved.
//

import UIKit
import CloudKit

class ViewController: UIViewController {

    @IBOutlet weak var tableView:UITableView!

    //전체에 공유할 경우는 publicCloudDatabase
    //개인만 사용할 경우는 privateCloudDatabase
    let database = CKContainer.default().privateCloudDatabase

    //저장한 내용을 받아서 배열로 처리
    var notes = [CKRecord]()

    override func viewDidLoad() {
        super.viewDidLoad()

        //저장하고 약간의 시간차가 발생하기 때문에 리프레시를 해야 한다.
        let refreshControl = UIRefreshControl()
        refreshControl.attributedTitle =
            NSAttributedString(string: "Pull to refresh")
        refreshControl.addTarget(self,
            action: #selector(queryDatabase), for: .valueChanged)
        self.tableView.refreshControl = refreshControl
        queryDatabase()
    }

    @IBAction func onPlusTapped() {
        //상단 +를 터치해서 새로운 레코드를 클라우드킷에 저장한다.
        let alert = UIAlertController(title: "Type something", message: "what note?", preferredStyle: .alert)
        alert.addTextField { (textField) in
            textField.placeholder = "Type note here"
        }
        let cancel = UIAlertAction(title: "Cancel", style: .cancel, handler: nil)
        let post = UIAlertAction(title: "Post", style: .default) { (_) in
            guard let text = alert.textFields?.first?.text else { return }
            //여기서 호출해서 저장한다.
            self.saveToCloud(note: text)
        }
        alert.addAction(cancel)
        alert.addAction(post)
        present(alert, animated: true, completion: nil)
    }
    func saveToCloud(note: String) {
        //클라우드 킷에 새로운 레코드를 저장한다.
        let newNote = CKRecord(recordType: "Note")
        newNote.setValue(note, forKey: "content")

        database.save(newNote) { (record, _) in
            guard record != nil else { return }
            print("saved record")
            self.queryDatabase()
        }

    }
    @objc func queryDatabase() {
        //저장된 데이터를 로딩한다.
        let query = CKQuery(recordType: "Note",
            predicate: NSPredicate(value: true))
        database.perform(query, inZoneWith: nil) { (records, _) in
            guard let records = records else { return }
            //정렬을 해서 가져오도록 한다.
            let sortedRecords = records.sorted(by: {
                $0.creationDate! > $1.creationDate! })
            self.notes = sortedRecords
            DispatchQueue.main.async {
                self.tableView.refreshControl?.endRefreshing()
                self.tableView.reloadData()
            }
        }
    }
}

extension ViewController : UITableViewDataSource
{
    func numberOfSections(in tableView: UITableView) -> Int {
        return 1
    }
    func tableView(_ tableView: UITableView, numberOfRowsInSection section: Int) -> Int {
        //처음에는 0으로 셋팅
        //return 0

        //나중에 값이 있으면 아래와 같이 변경한다.
        return notes.count
    }
    func tableView(_ tableView: UITableView, cellForRowAt indexPath: IndexPath) -> UITableViewCell {

        let cell = UITableViewCell()
        let note = notes[indexPath.row].value(forKey: "content") as! String
        cell.textLabel?.text = note

        return cell

    }
}
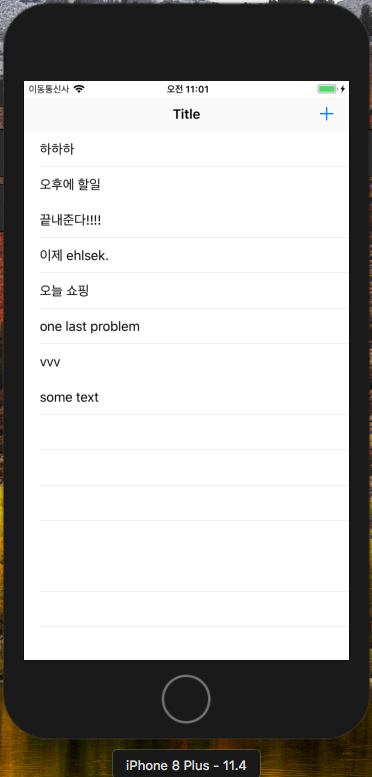
결과를 확인해 보면 다음과 같이 보입니다.
(jjangjjangman 태그 사용시 댓글을 남깁니다.)
[제 0회 짱짱맨배 42일장]3주차 보상글추천, 1,2주차 보상지급을 발표합니다.(계속 리스팅 할 예정)
https://steemit.com/kr/@virus707/0-42-3-1-2
3주차에 도전하세요
그리고 즐거운 스티밋하세요!
오치님 고맙습니다^^
와 ㅎㅎ 머가먼지 너무 어려워보여요 대단하시네요!!
항상느끼지만 나중에 e북으로 편찬하셔도 될거 같아요!!
심지어 최근 업데이트를 직접하셔서 이렇게 하시다니... 대단합니다 :)