[React Native] FlatList으로 Infinite Scroll와 Pull Down Refresh 구현하기
microcode님의 리액트 네이티브 강의입니다. 이분은 말 한마디 없이 코딩만 하네요.
React Native에서 제공하는 FlatList를 사용하여 무한 스크롤(Infinite Scroll)과 Pull Down Refresh 기능을 구현합니다. FlatList에 대한 자세한 내용은 공식 문서에서 확인하세요.
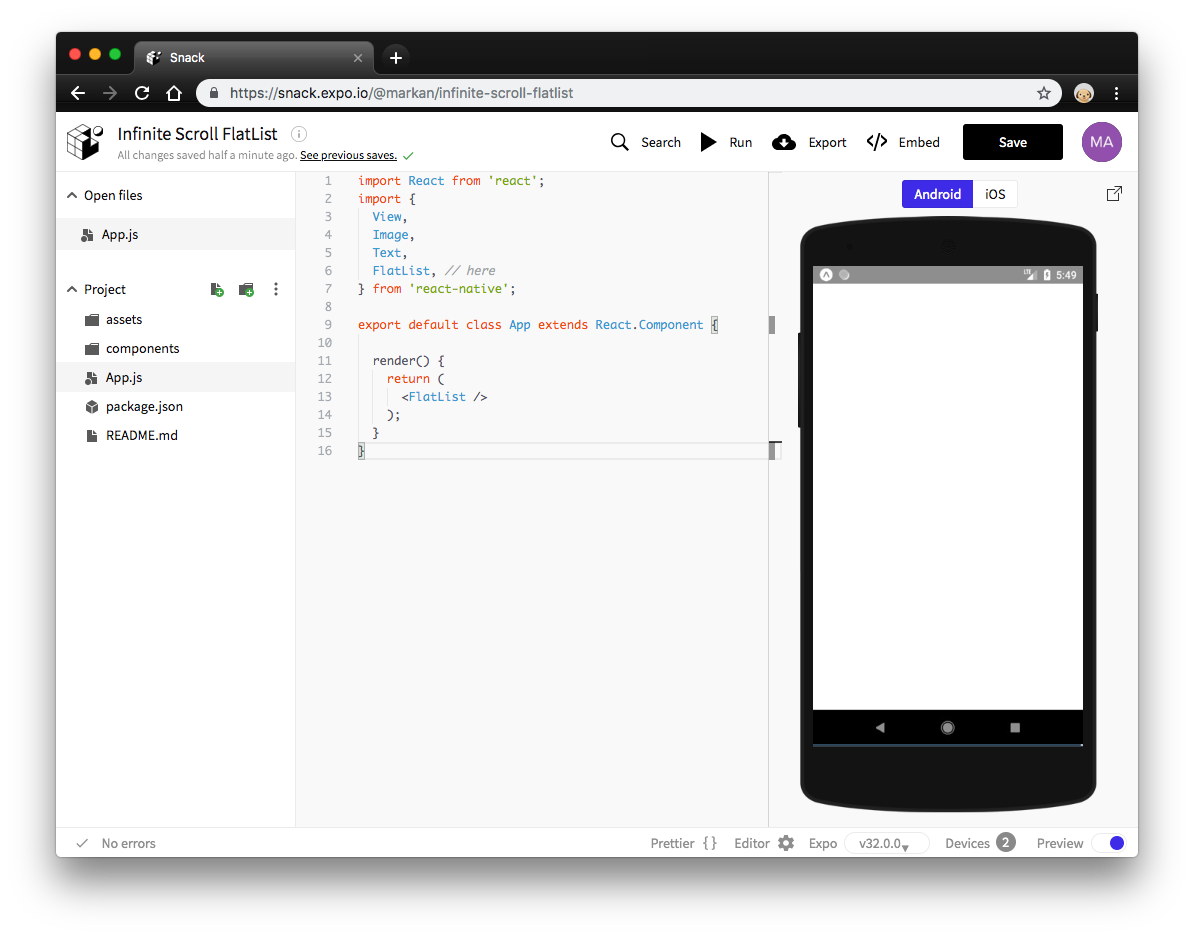
이번 예제를 위해서 snack를 이용하였습니다. 아래 화면처럼 브라우저에서 코딩하고 결과를 바로 확인 할 수 있습니다. 간단한 코딩 연습을 하기에 좋은 플랫폼입니다.
샘플 컴포넌트 생성하기
App.js 파일을 수정합니다. FlatList의 data 속성에는 배열 데이터를 입력합니다. 그리고 renderItem 속성에는 렌더링 함수를 입력합니다.
import React from 'react';
import {
  View,
  Image,
  Text,
    FlatList, // here
} from 'react-native';

export default class App extends React.Component {

  state = {
    data: [1, 2, 3]
  }

  _renderItem = ({item}) => (
    <Text>{item}</Text>
  );

  render() {
    return (
      <FlatList
        data={this.state.data}
        renderItem={this._renderItem}
      />
    );
  }
}
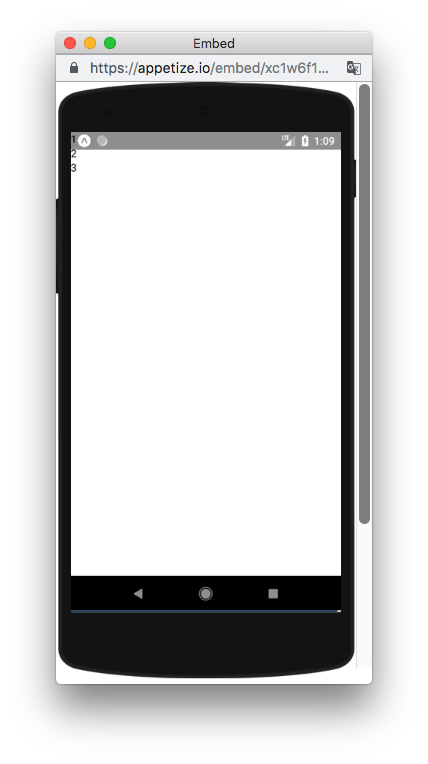
아래는 결과화면입니다.
Fake Online REST API
우리는 이번 예제를 위해서 JSONPlaceholder에서 제공하는 Fake Online REST API를 사용할 것입니다. JSONPlaceholder에서는 아래와 같이 다양한 샘플 API를 제공하고 있습니다.
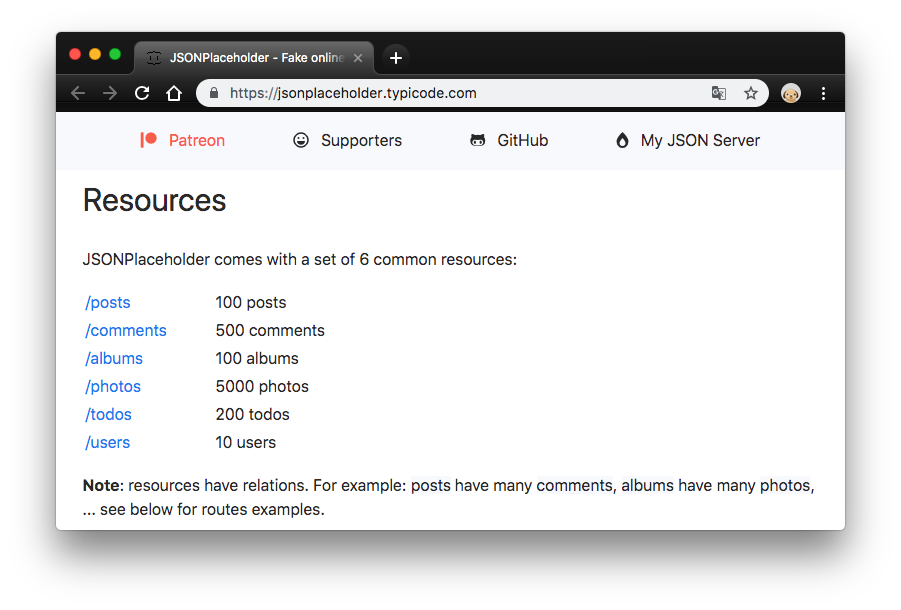
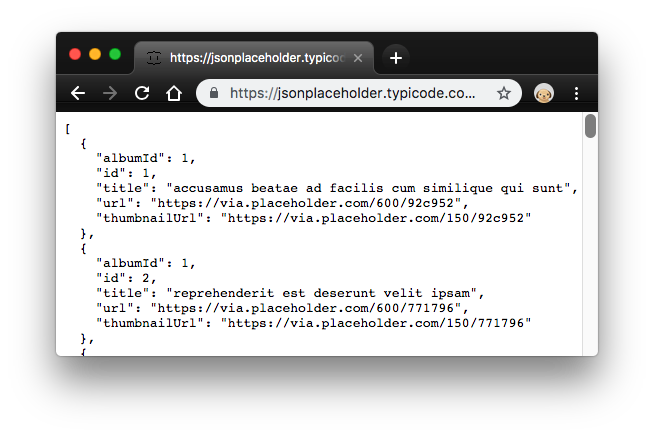
이중에서 /photos API를 사용해 보겠습니다. JSON 데이터 형태는 아래와 같습니다.
서버에서 데이터 가져와서 출력하기
REST API에서 데이터를 가져오는 함수를 입력합니다. 한번에 10개씩 가져옵니다.
  _getData = async () => {
    const url = 'https://jsonplaceholder.typicode.com/photos?_limit=10';
    fetch(url)
      .then(res => res.json())
      .then(json => {
        this.setState({
          data: json
        });
      });
  }
그리고 컴포넌트가 마운트되고 나서 호출되도록 합니다.
  componentDidMount() {
    this._getData();
  }
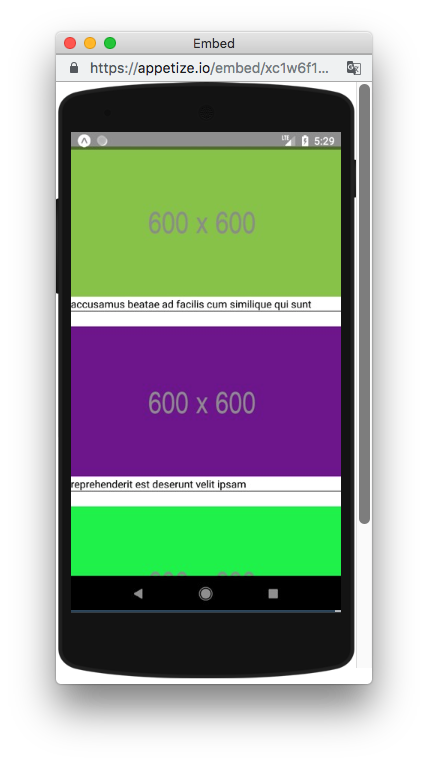
마지막으로 _renderItem 함수를 수정합니다.
  _renderItem = ({item}) => (
    <View style={{borderBottomWidth:1, marginTop: 20}}>
      <Image source={{ uri: item.url }} style={{ height: 200}} />
      <Text>{item.title}</Text>
    </View>
  );
여기까지 작업한 전체 코드입니다.
import React from 'react';
import {
  View,
  Image,
  Text,
    FlatList, // here
} from 'react-native';

export default class App extends React.Component {

  state = {
    data: [1, 2, 3]
  }

  _getData = async () => {
    const url = 'https://jsonplaceholder.typicode.com/photos?_limit=10';
    fetch(url)
      .then(res => res.json())
      .then(json => {
        this.setState({
          data: json
        });
      });
  }

  componentDidMount() {
    this._getData();
  }

  _renderItem = ({item}) => (
    <View style={{borderBottomWidth:1, marginTop: 20}}>
      <Image source={{ uri: item.url }} style={{ height: 200}} />
      <Text>{item.title}</Text>
    </View>
  );

  render() {
    return (
      <FlatList
        data={this.state.data}
        renderItem={this._renderItem}
        keyExtractor={(item, index) => item.id}
      />
    );
  }
}
그리고 결과 화면입니다.
무한 스크롤 구현하기
맨 아래 항목까지 스크롤되면, 다음 데이터를 자동으로 가져와서 목록에 추가하는 기능을 구현할 것입니다.. 이 기능을 Infinite Scroll 또는 무한 스크롤이라고 합니다.
state에 page 변수를 추가합니다.
  state = {
    data: [],
    page: 1 // here
  }
그리고 _getData 함수를 수정합니다. 데이터를 가져올때마다 _page 번호를 증가합니다. 이렇게 하면 다음 요청에서는 다음 페이지의 데이터를 가져올 것입니다. 그리고 가져온 데이터를 기존 data에 추가(concat)합니다.
  _getData = () => {
    const url = 'https://jsonplaceholder.typicode.com/photos?_limit=10&_page=' + this.state.page;
    fetch(url)
      .then(r => r.json())
      .then(data => {
        this.setState({
          data: this.state.data.concat(data), // 기존 data에 추가.
          page: this.state.page + 1
        })
      });
  }
그리고 _handleLoadMore 함수를 입력합니다. 이 함수는 스크롤이 끝까지 도달했을때 호출됩니다.
  _handleLoadMore = () => {
    this._getData();
  }
마지막으로 render 함수를 수정합니다.
  render() {
    return (
      <FlatList
        data={this.state.data}
        renderItem={this._renderItem}
        keyExtractor={(item, index) => item.id}
        onEndReached={this._handleLoadMore}
        onEndReachedThreshold={1}
      />
    );
  }
다음은 전체 코드입니다.
import React from 'react';
import {
  View,
  Image,
  Text,
    FlatList, // here
} from 'react-native';

export default class App extends React.Component {

  state = {
    data: [],
    page: 1 // here
  }

  _renderItem = ({item}) => (
    <View style={{borderBottomWidth:1, marginTop: 20}}>
      <Image source={{ uri: item.url }} style={{ height: 200}} />
      <Text>{item.title}</Text>
      <Text>{item.id}</Text>
    </View>
  );

  // _getData 함수 수정
  _getData = () => {
    const url = 'https://jsonplaceholder.typicode.com/photos?_limit=10&_page=' + this.state.page;
    fetch(url)
      .then(r => r.json())
      .then(data => {
        this.setState({
          data: this.state.data.concat(data),
          page: this.state.page + 1
        })
      });
  }

  componentDidMount() {
    this._getData();
  }

  // here
  _handleLoadMore = () => {
    this._getData();
  }

  render() {
    return (
      <FlatList
        data={this.state.data}
        renderItem={this._renderItem}
        keyExtractor={(item, index) => item.id}
        onEndReached={this._handleLoadMore}
        onEndReachedThreshold={1}
      />
    );
  }
}
다음은 결과 화면입니다. 스크롤이 끊임없이 됩니다.

Pull Down Refresh 구현하기
이제 마지막입니다.
state에 refreshing 변수를 추가합니다. refreshing 는 데이터를 가져오는 중인지를 판단합니다.
  state = {
    data: [],
    page: 1,
    refreshing: false // here
  }
_handleRefresh 함수를 입력합니다. 이 함수는 화면을 Pull Down하면 호출될 것입니다. 데이터를 새로 가져올 것이기 때문에, page 번호를 1로 초기화해 줍니다.
  _handleRefresh = () => {
    this.setState({
      refreshing: true,
      page: 1,
    }, this._getData);
  }
render 함수를 수정합니다. refreshing 속성과 onRefresh 속성을 추가하였습니다.
  render() {
    return (
      <FlatList
        data={this.state.data}
        renderItem={this._renderItem}
        keyExtractor={(item, index) => item.id}
        onEndReached={this._handleLoadMore}
        onEndReachedThreshold={1}
        refreshing={this.state.refreshing}
        onRefresh={this._handleRefresh}
      />
    );
  }
마지막으로 _getData 함수를 수정합니다. refreshing가 true 일때는 가져온 데이터를 기존 데이터에 추가(concat)하지 않습니다.
  _getData = () => {
    const url = 'https://jsonplaceholder.typicode.com/photos?_limit=10&_page=' + this.state.page;
    fetch(url)
      .then(r => r.json())
      .then(data => {
        this.setState({
          data: this.state.refreshing?data:this.state.data.concat(data),
          page: this.state.page + 1,
          refreshing: false
        })
      });
  }
다음은 결과 화면입니다. 화면을 아래로 당기면 onRefresh 이벤트가 발생합니다. 새로고침 해도 같은 데이터를 가져오기 때문에 화면의 변화는 없네요.
예제에 사용한 코드는 여기에서 확인할 수 있습니다.
감사합니다.
Sponsored ( Powered by dclick )
DCLICK: 광고 기능을 소개 합니다
지난주에 dclick 에서 Advertise 기능이 오픈 되었습니다. Advertise 메뉴 ...
아무 말도 없이 코딩만 하는 분이 사실 ㅇ_ㅇ;;; 프로그래머의 정석이신듯 ㅋㅋㅋㅋ 노마드 형님이 비정상이심 ㅋㅋㅋ 프로그래머 치고 너무 말 잘 함. ㅋㅋㅋㅋ
곰돌이가 @urobotics님의 소중한 댓글에 $0.014을 보팅해서 $0.009을 살려드리고 가요. 곰돌이가 지금까지 총 3881번 $45.918을 보팅해서 $48.028을 구했습니다. @gomdory 곰도뤼~
말잘하는 개발자가 많이 없죠. 그런데 유 로보틱스님은 말을 잘하실 것 같아요. ㅎㅎ
저도 아무말 없이 코딩만 하는 영상으로 코딩 ASMR 을 만들어봐야겠어요. ㅋ
노마드 형님도 그렇지만, 안피곤님도 말 잘 하실 것 같습니다. ㅎㅎㅎ 아. 예 저는 맘 내킬 때는 달변입니다. ㅎㅎㅎ 그냥 코딩 ASMR도 괜찮을 것 같긴 한데 안피곤님은 설명을 되게 친절하게 잘 하실 것 같아서 말 하는 게 더 어울릴 것 같습니다. ㅎㅎㅎㅎ 개발자라고 꼭 말 못 해야되는 건 아닌듯요. ㅋㅋㅋㅋ
곰돌이가 @urobotics님의 소중한 댓글에 $0.014을 보팅해서 $0.009을 살려드리고 가요. 곰돌이가 지금까지 총 3897번 $46.037을 보팅해서 $48.277을 구했습니다. @gomdory 곰도뤼~
오늘도 열심히 하시능 안피곤님!!+_+
항상 스팀잇 이벤트를 준비하시는 뉴비존님 감사합니다.
스팀잇에는 항상 즐거운 일만 가득합니다. ㅎㅎ
곰돌이가 @newbijohn님의 소중한 댓글에 $0.015을 보팅해서 $0.008을 살려드리고 가요. 곰돌이가 지금까지 총 3878번 $45.876을 보팅해서 $48.001을 구했습니다. @gomdory 곰도뤼~
재미있네요.
재미있게 읽어주셔서 감사합니다.
react-native도 해야하는데..!!! ㅠㅠ 너무 할게 많아요!!
저는 일단 vue 부터 열공해봅니다!! ㅋㅋ
저도 처음에 Vue.js 부터 시작했습니다. 하다보니깐 React.js 로 자연스럽게 넘어왔습니다. 해피베리보이님도 아마도 곧 React.js 로 넘어오실꺼에요. ㅎㅎ
그리고 보니 그게 제가 안피곤님한테 처음 댓글 남긴거 아니었나요? react를 더 많이 쓰는 듯한데 vue로 하시길래 장점 여쭤봤던 것 같은 기억이ㅎㅎ
기억납니다. 그랬었죠. 그때는 React 학습전이라서 더 쉬워보였던 Vue를 선택했었죠. ㅎㅎ 각각 장단점이 있는 것 같습니다. 지금은 React Native 에 푹 빠져서 이것만 보고있네요. ㅎㅎ
곰돌이가 @blockchainstudio님의 소중한 댓글에 $0.016을 보팅해서 $0.007을 살려드리고 가요. 곰돌이가 지금까지 총 3944번 $46.507을 보팅해서 $48.888을 구했습니다. @gomdory 곰도뤼~
으흠 그런가요..?? 지금 열심히 vue 책을 오늘 하루동안만 140페이지째 읽으면서 열공하고 있는데 말이지요.. 지금 이 순간에도..!!
react로 프로그램을 개발해본적은 없지만 대충 훑어보니 vue랑 비슷한것 같던데, react로 넘어가시게 된 결정적인이유라도 있을까요?? ㅎㅎ
일단 저는 vue로 뭔가 하나 만들생각이긴 합니다만.. ㅋㅋ
제가 공부할때는 vue 책이 없었어요. 그래서 저는 vue 공식 사이트를 보고 공부했어요. 한글화가 정말 잘되어있어서 배우기 정말 쉬웠습니다.
그런데 샘플 자료와 강의 동영상은 react가 압도적으로 많습니다. 그래서 react로 넘어왔어요. ㅎㅎ
Vue로 일단 하나 만들어 보길 추천해요. vue를 하고 나면 React도 금방 익숙해질꺼에요.
nTOPAZ 소개 및 간단한 퀴즈 ( $1 👍 )
퀴즈 참여 감사합니다 😊
최근에 작성한 글에 보상이 이미 진행되어 댓글에 보팅합니다.
nTOPAZ 생태계에 참여하기 ② ( $ ? 👍 )
nTOPAZ 계정에 스팀 파워 임대 감사합니다 😊
최근에 작성한 글에 보상이 이미 진행되어 댓글에 보팅합니다.
토파즈님 감사합니다.
또 난피곤!! ㅎㅎ 뭔지 모르겠지만 수고하셨습니다!
즐거운 불금 가즈아~~~~~~~~~~~~~~~~~~~~~
오늘은 즐거운 불금~ 내일은 신나는 토요일입니다.
주말 즐겁게 잘 보내세요~!
Hi @anpigon!
Your post was upvoted by @steem-ua, new Steem dApp, using UserAuthority for algorithmic post curation!
Your UA account score is currently 3.005 which ranks you at #10838 across all Steem accounts.
Your rank has not changed in the last three days.
In our last Algorithmic Curation Round, consisting of 190 contributions, your post is ranked at #129.
Evaluation of your UA score:
Feel free to join our @steem-ua Discord server
umkin님의 YES TOKEN 가치고정기간입니다. (04/01~04/06)
@anpigon님 곰돌이가 1.6배로 보팅해드리고 가요~! 영차~
Congratulations @anpigon! You have completed the following achievement on the Steem blockchain and have been rewarded with new badge(s) :
You can view your badges on your Steem Board and compare to others on the Steem Ranking
If you no longer want to receive notifications, reply to this comment with the word
STOPVote for @Steemitboard as a witness to get one more award and increased upvotes!
nTOPAZ 생태계에 참여하기 ⑪ ( 최대 $2 👍)
리스팀 감사합니다 😊