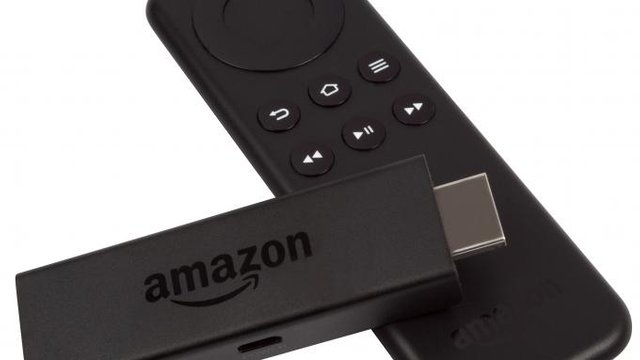
- Plug your Amazon Fire TV stick into your TV and plug the USB power cable into a spare USB port or use the power adaptor. Change to the appropriate input and familiarise yourself with the remote. This has a four-way directional control, with a select button in the middle, I'll also be using the Back and Home buttons on the top row. If you haven't done so already use the setup process to get a Wi-Fi connection.
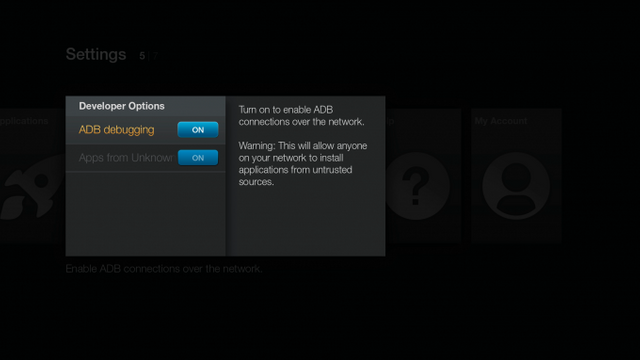
2. First you’ll need to allow the installation of apps from unknown sources. You can do this by going to Settings, System, Developer options. Find ‘Apps from unknown sources’, which should be switched OFF, and turn it ON, then say yes in the pop-up box. I recommend you go back and turn this security setting back to OFF after you’re done with this tutorial. If you want an easy way to launch Kodi also turn ON ADB Debugging while you’re here.

3. Next you want to install ES File Explorer. You can find this via the Fire TV Stick’s search function (at the top of the main menu)
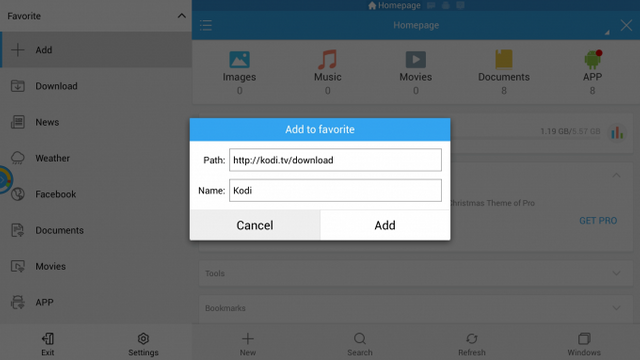
4. Open ES File Explorer under Apps, select Favorite and then select Add. In the pop-up box select the first field to bring up the onscreen keyboard.
Type:
http://www.htpcbeginner.com/aftv and then select Next.
The text you’ve entered will disappear but don’t worry, now type ‘Kodi’ into the next box and hit Next again. Press right to select Add and click Select.

- You’ve just added a web link to ES File Explorer for the Kodi downloads page. Scroll down the menu on the left-hand side of ES File Explorer to the bottom, where your Kodi link has appeared and select it. Press right on the cursor pad to move to the website and then, using the direction control on the remote, you can then browse around the webpage, with every movement of the cursor pad finding the next link.
You will now have options to install different Kodi versions.
Once you've selected the right version press Select. ES File Explorer will then download the latest version of the app to the stick. This can take a little while to do, so be patient: you can see that ES File Explorer is doing something, because you'll getting a spinning circle at the top-right of the image. After a short wait a Download dialog box will appear. It’s worth making a note of the name of your Kodi release version for future reference, the current version at time of writing this is Jarvis (version 16.1)
Once Kodi has downloaded, select the Open File option and then select Install. A dialog box will open with app permissions, press down on the remote until the options at the bottom highlight and then select Install again.
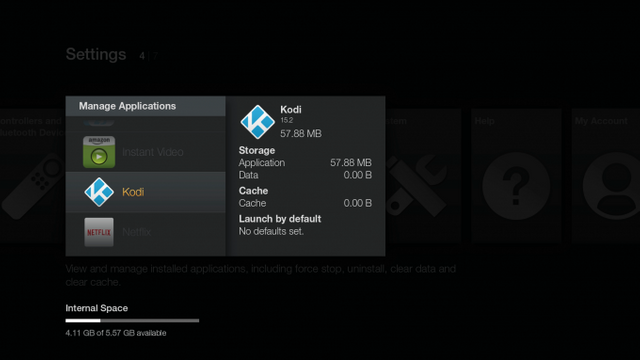
6. Once done, Kodi has been installed to your Fire TV Stick. You can launch it immediately after install but it’s not easy to launch it from the main interface as you have to go to Settings/Applications/Manage Installed Applications and then scroll down and select Kodi.

Tomorrow I will write how to add all the important addons to watch anything you ever wanted!!

 3. Next you want to install ES File Explorer. You can find this via the Fire TV Stick’s search function (at the top of the main menu)
4. Open ES File Explorer under Apps, select Favorite and then select Add. In the pop-up box select the first field to bring up the onscreen keyboard.
Type: http://www.htpcbeginner.com/aftv and then select Next.
The text you’ve entered will disappear but don’t worry, now type ‘Kodi’ into the next box and hit Next again. Press right to select Add and click Select.

 Tomorrow I will write how to add all the important addons to watch anything you ever wanted!!
This is a direct copy/paste from an article written by Seth Barton, on 30 Jun 2016. Please consider either properly attributing your sources in the future or writing original content of your own. #doyourpart
Added to the top for visibility didn't think about that.
Upvoted
Upvoted
Upvoted
Nice @modogg187
Shot you an Upvote :)
Nice @modogg187
Shot you an Upvote :)
Nice @modogg187
Shot you an Upvote :)
Nice @modogg187
Shot you an Upvote :)
Nice @modogg187
Shot you an Upvote :)
Nice @modogg187
Shot you an Upvote :)