How to get rid of PST archives
At one of our clients, they were ready for a migration to the Cloud. What ultimately meant was to outsource its own IT infrastructure to an IT service provider that would provide for all their IT needs. This meant, among other things, that there was no place for PST files.
PST is an abbreviation for Personal Storage Table. PST files are used in Microsoft Outlook and are mainly used to store mails, contacts and calendar items. This information will also be accessible offline. This way of saving / archiving in Outlook was useful because it relieved the Exchange environment and the size of the PST does not count on the mailbox itself. Thus you can build your own archive. However, there is a danger that as soon as this exceeds 2Gb, the risk of corruption increases significantly.
One of my tasks was to ensure that the current environment was relieved of PST files so that the migration of the Exchange environment could be more smooth / clearer.
When migrating to another Exchange environment, it is important that none of these files are lost. Therefore, a solution had to be found for this. In advance, we have mapped out the issues that might be possible. Think about; Corrupt PST files, PSTs that are not stored on the network, PSTs that were not known to exist, etc. To get rid of this, we have dealt with the following tools.
Case
Prior to migration, map all PST files within the organization and collect them in one place.
All PST files directly available in the mailbox
Tools
Robocopy
Microsoft Exchange PST Capture
To ensure that we could map all PSTs in the organization, it was first communicated that everyone had to make his or her PST available on his Home drive. The whole of the organization had already done so, but in this way we could exclude the possibility of missing PSTs that might be linked locally. Then, with a Robocopy script, we made sure that all files with the * .pst extension were copied to a share. And because we had carried out this action well in advance, this script was running for a week in a mirror action so we would be up to date.
Example of robocopy script used;
Copy PST:
Robocopy (SHARE 1) (SHARE 2) * .pst / s / r: 1 / w: 1 / log: e: \ (SHARE * .Log) / ts
Mirror Commando:
Robocopy (SHARE 1) (SHARE 2) * .pst / mir / s / r: 1 / w: 1 / log: e: \ (SHARE * .Log) / ts
Now that we had collected all PSTs, we could import them directly into the user's mailbox. Before we could do this, we had to remove the set limit (size) from the mailboxes and move it to a new / other store on the Exchange environment so that it was actually removed (this is a bug in Exchange 2010). The mailboxes are now ready to receive PSTs.
To import the PSTs, we used Microsoft Exchange PST Capture. This tool collects all PSTs and then imports them into the user mailbox. Of course, it can be specified in advance where the PST should be imported. A very useful tool that I will now show the installation and will describe its ins and outs.
The installation is fairly basic. There are two installers: PSTcapture.msi & PSTCaptureAgent.msi.
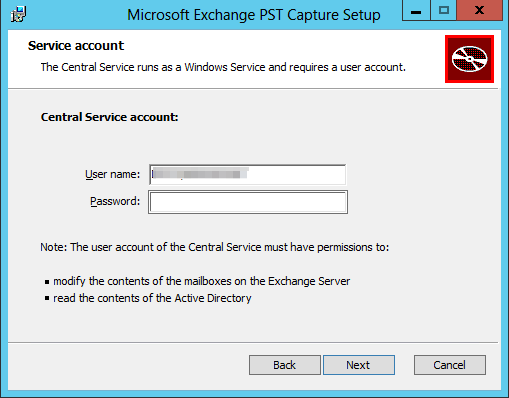
The PSTcapture.msi should take into account the need for a service account to connect to the Exchange environment. Because in this scenario we are dealing with an on-premise situation, the service account must have the following rights;
Local Administrator;
Mailbox enabled account;
Member of the Public Management Role (Exchange).
After installing both installers, the application can be started and the next screen will be displayed.
What I can recommend to you is to change the following settings in Settings: (Tools> Settings).

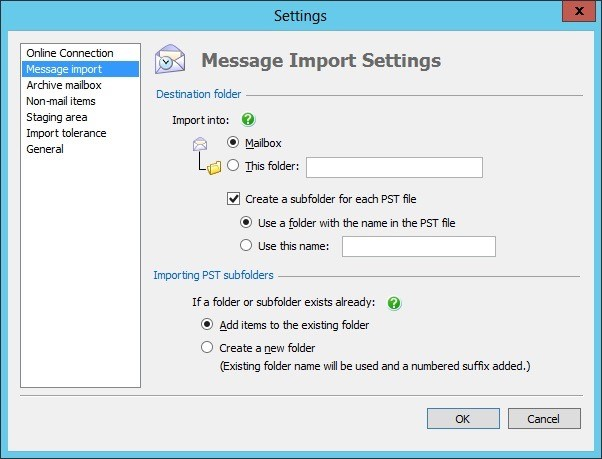
Message Import: So what the PST file should be called in the mailbox.
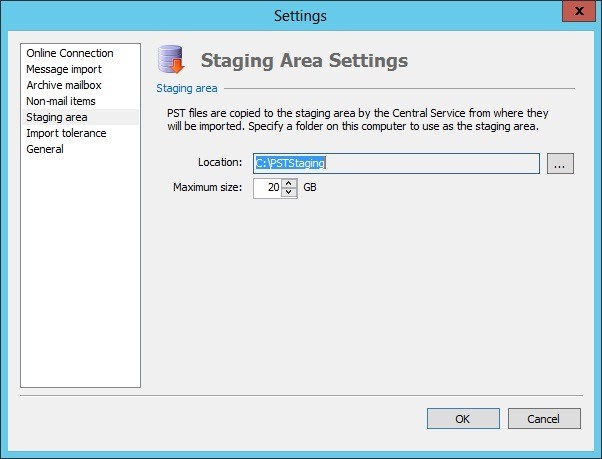
Staging Area: How many PSTs should be passed to size in the Exchange environment.
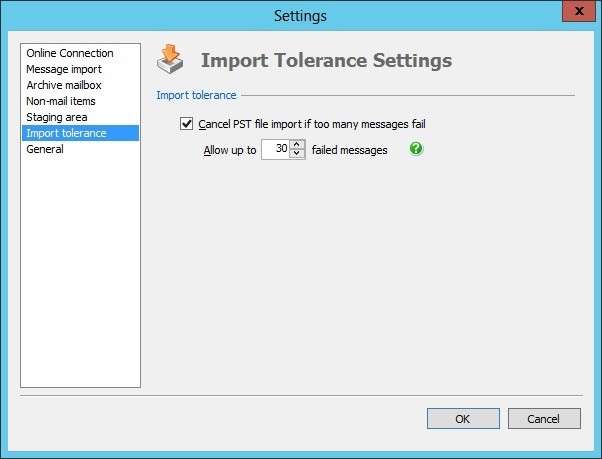
Import Tollerance: A convenient option to indicate when an import may stop (with an X number of corrupt items in the PST).
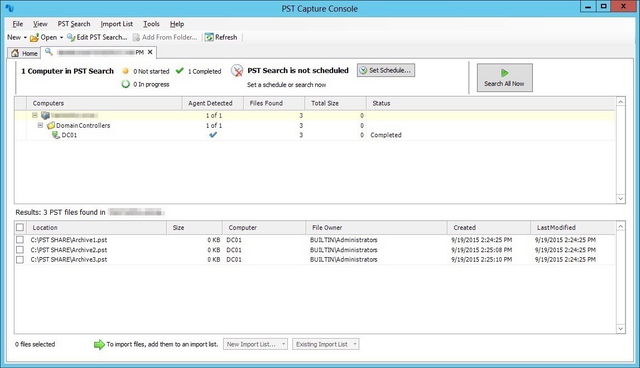
If everything is set to your liking, the adjustments can be saved and return to the home screen. The PSTs can be searched by clicking on "New PST Search".
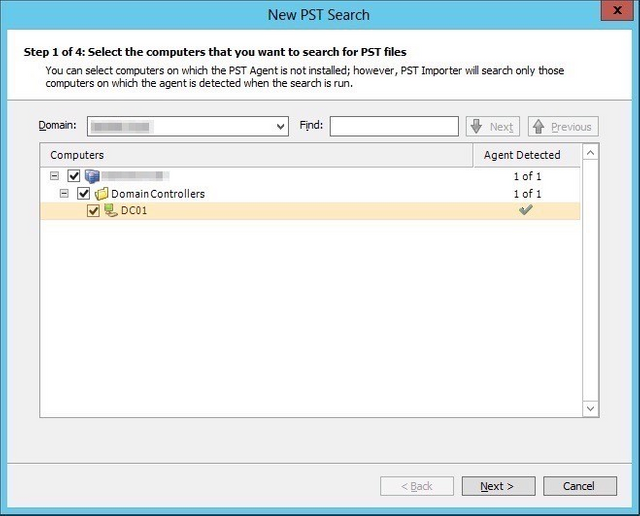
The following screen indicates which machine can be searched for PSTs. This must be the machine where the agent is installed.
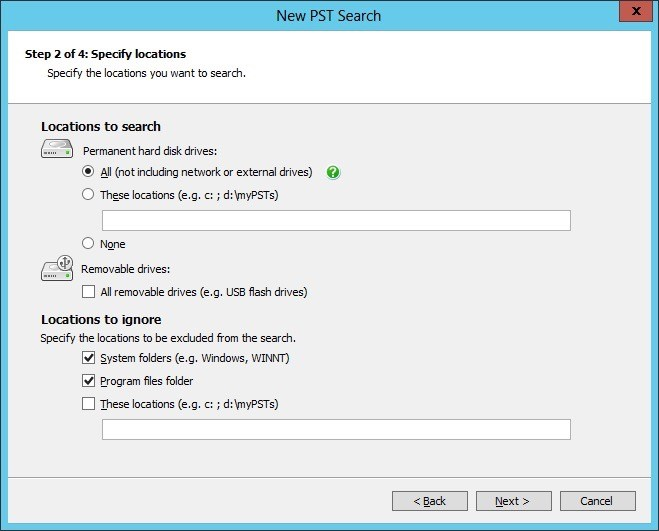
Please specify specific locations:
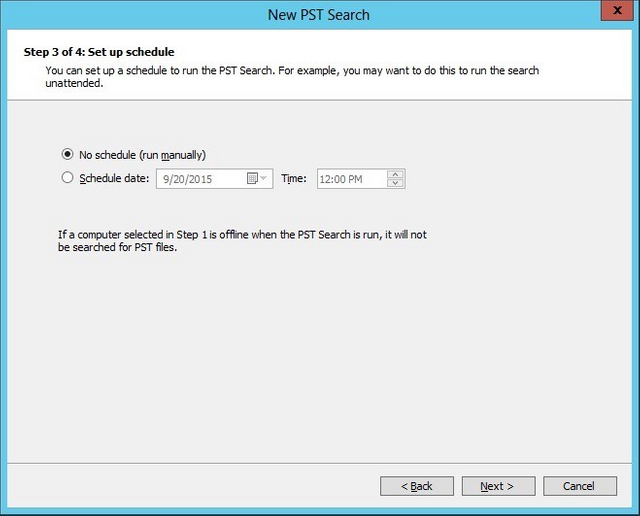
The job may also be planned:
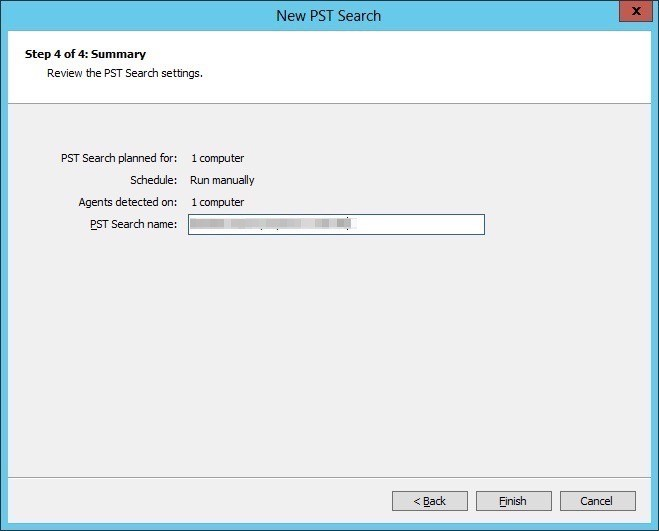
Click Finish.
Now PST Capture will search for PST files at the specified locations. When this is done, the results are shown.
Then select the PST files to be migrated. At the bottom (next to the green arrow) you can choose whether to import into a Cloud solution or on-premise.
After this choice is made, the PST files must be linked to the Mailbox. Then click on "Set Mailbox". In the wizard, locate the appropriate Mailbox. After you do this you can start importing. The duration of import depends, of course, on the size of the PST itself.

Now that all PST files are imported, the overall migration of the Exchange environment can be started.
I have noticed the following:
-The process itself requires a lot of resources from the machine as well as the Exchange environment. Therefore, I recommend that you run this out of production. The users themselves do not need to perform any extra action and see the PST themselves in their mailbox.
-After you start a new import, you can save it separately and you can always fall back on this session to continue where you've stayed.
-You do not have to choose between .pst files in size. The tool will itself prioritize the PST and will process it from small to large files. The tool starts itself with up to 10 threads.
The tool is stable and works fine.