Arduino Remote Home #12
As a minor follow up to my last post, I’ve decided to move the two relays that get energized by, the GDO motor running, and GDO light, into the control box. The primary reason for this is I have stumbled across two wiring harnesses that weren’t at my disposal at the time of the original design. The second reason is that since the Left GDO is still something in the future, I wanted to plan for a theoretically smaller unit, that would not have the space for the relays, that the current one does.
As I was collecting the parts necessary for connecting the second floor rooms, I realized how much space is going to be needed. My intention is to build the control box similar to the one in the basement, so that they will look and function the same. However I’m going to have to down size because I don’t have the luxury of an entire closet to contain everything. Ah! I love a challenge.
At present, the plan is to install an Uno somewhere upstairs, that will monitor the twelve switches. Then, just like the Input Mega in the basement, send data over serial to the Output Mega in the basement. I’ll use the remaining pins on the Uno to control five of the twelve Altronix RB-5’s. Haven’t even thought about how to write that code, but i’m sure I’ll figure it out. The remaining areas will be controlled by a cable from the spare outputs from the basement output board. That part will be super simple, as I already know both, how to get the cable between the two points and the code will just be extending that which already works. After I met all the design considerations I still had one pin left over, so I plan to install a DS18B20 digital temperature sensor in the attic. I’m thinking I may be able to extend the “one wire” network up to the roof for the future solar water heating system. We’ll see about that.
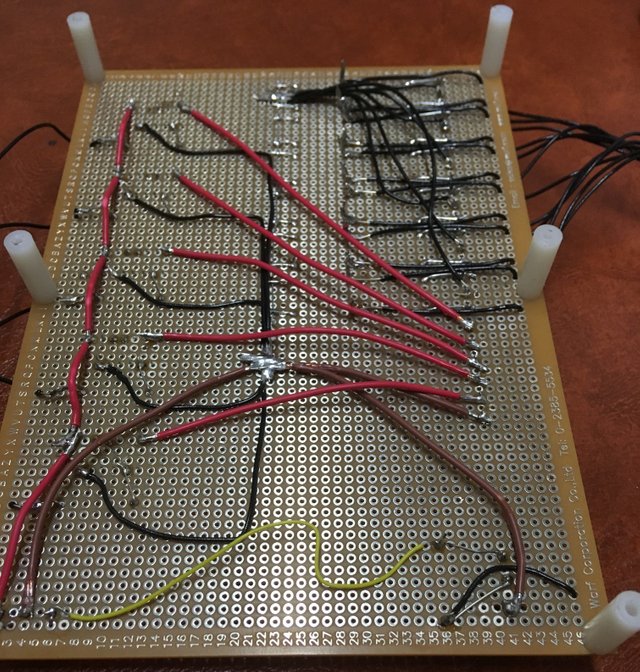
This picture is the back side of the I/O board that will work with the Uno.
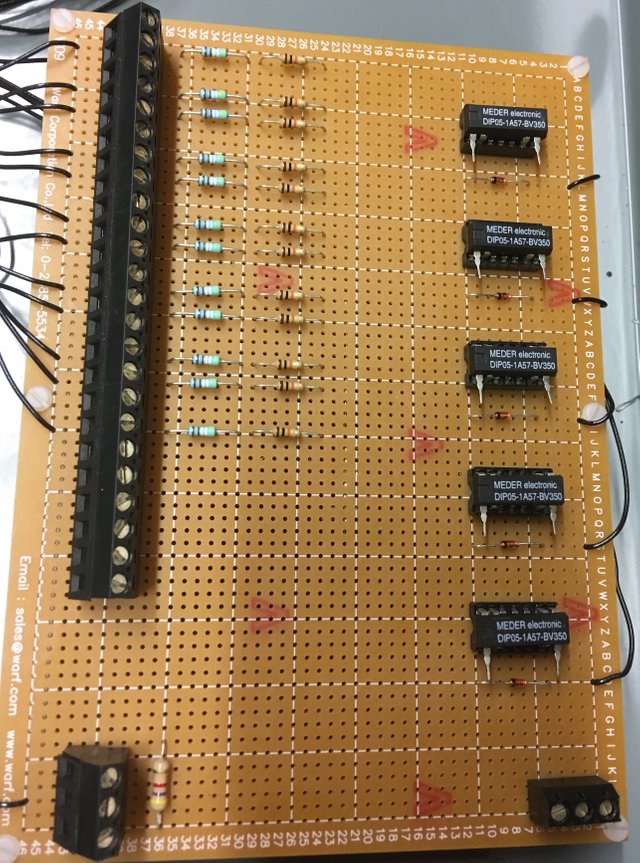
Here is the top side.
Look familiar? Hope so! In the lower left corner there is 3-position terminal block where the “one wire” digital temperature sensor network will originate. Just to the right of that is the 4.7k resistor soldered in parallel as recommended. The 3 position terminal block in the right corner is +5Vdc, 0Vdc and +12Vdc respectively. The plan is to get a 12Vdc 800ma wallwart connected to that block and then from there connect the Arduino Unos power input barrel connector. Then bring the 5v pin back out to the terminal strip.
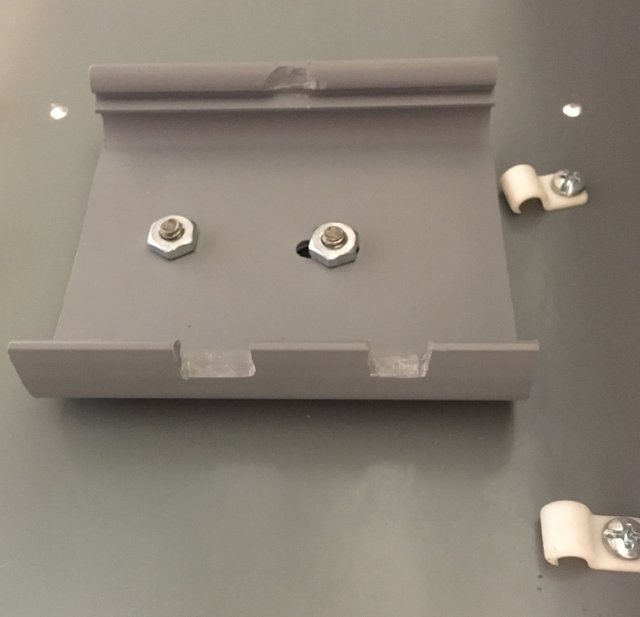
When I first started out with the Uno I discovered that there isn’t much room for mounting hardware so I came up with this as a way to mount it. I’ll include a picture with the Uno in my next post.
Since this is my second go-round with building, I’ll post as progress is made, rather than when it’s complete.
As always, questions and comments are welcome. If you prefer, you can dm me on discord.
electricswine#9066
Join our Discord Channel to connect with us and nominate your own or somebody else's posts in our review channel.
Help us to reward you for making it ! Join our voting trail or delegate steem power to the community account.
Your post is also presented on the community website www.steemmakers.com where you can find other selected content.
If you like our work, please consider upvoting this comment to support the growth of our community. Thank you.
Hi @electricswine!
Your post was upvoted by utopian.io in cooperation with steemmakers - supporting knowledge, innovation and technological advancement on the Steem Blockchain.
Contribute to Open Source with utopian.io
Learn how to contribute on our website and join the new open source economy.
Want to chat? Join the Utopian Community on Discord https://discord.gg/h52nFrV
Hello, electricswine, I'm @ArtTurtle, an upvote bot run by @Artopium. I just upvoted this post and resteemed it because I'm following you and, well, that's just what I do. Reciprocation is always appreciated! If you no longer wish to have @ArtTurtle follow you please reply to this comment with 'STOP'.
Really excited to see how this turns out.
Thanks!
Hey @valued-customer it’s nice to read that you’re excited. If you haven’t yet seen my previous posts let me encourage you to. Particularly #3, near the end there is a video showing some of the completed parts in action. Now it may not qualify as exciting, but it does qualify for cool.
Thanks for your upvote and interest.