Starting a handstand practice

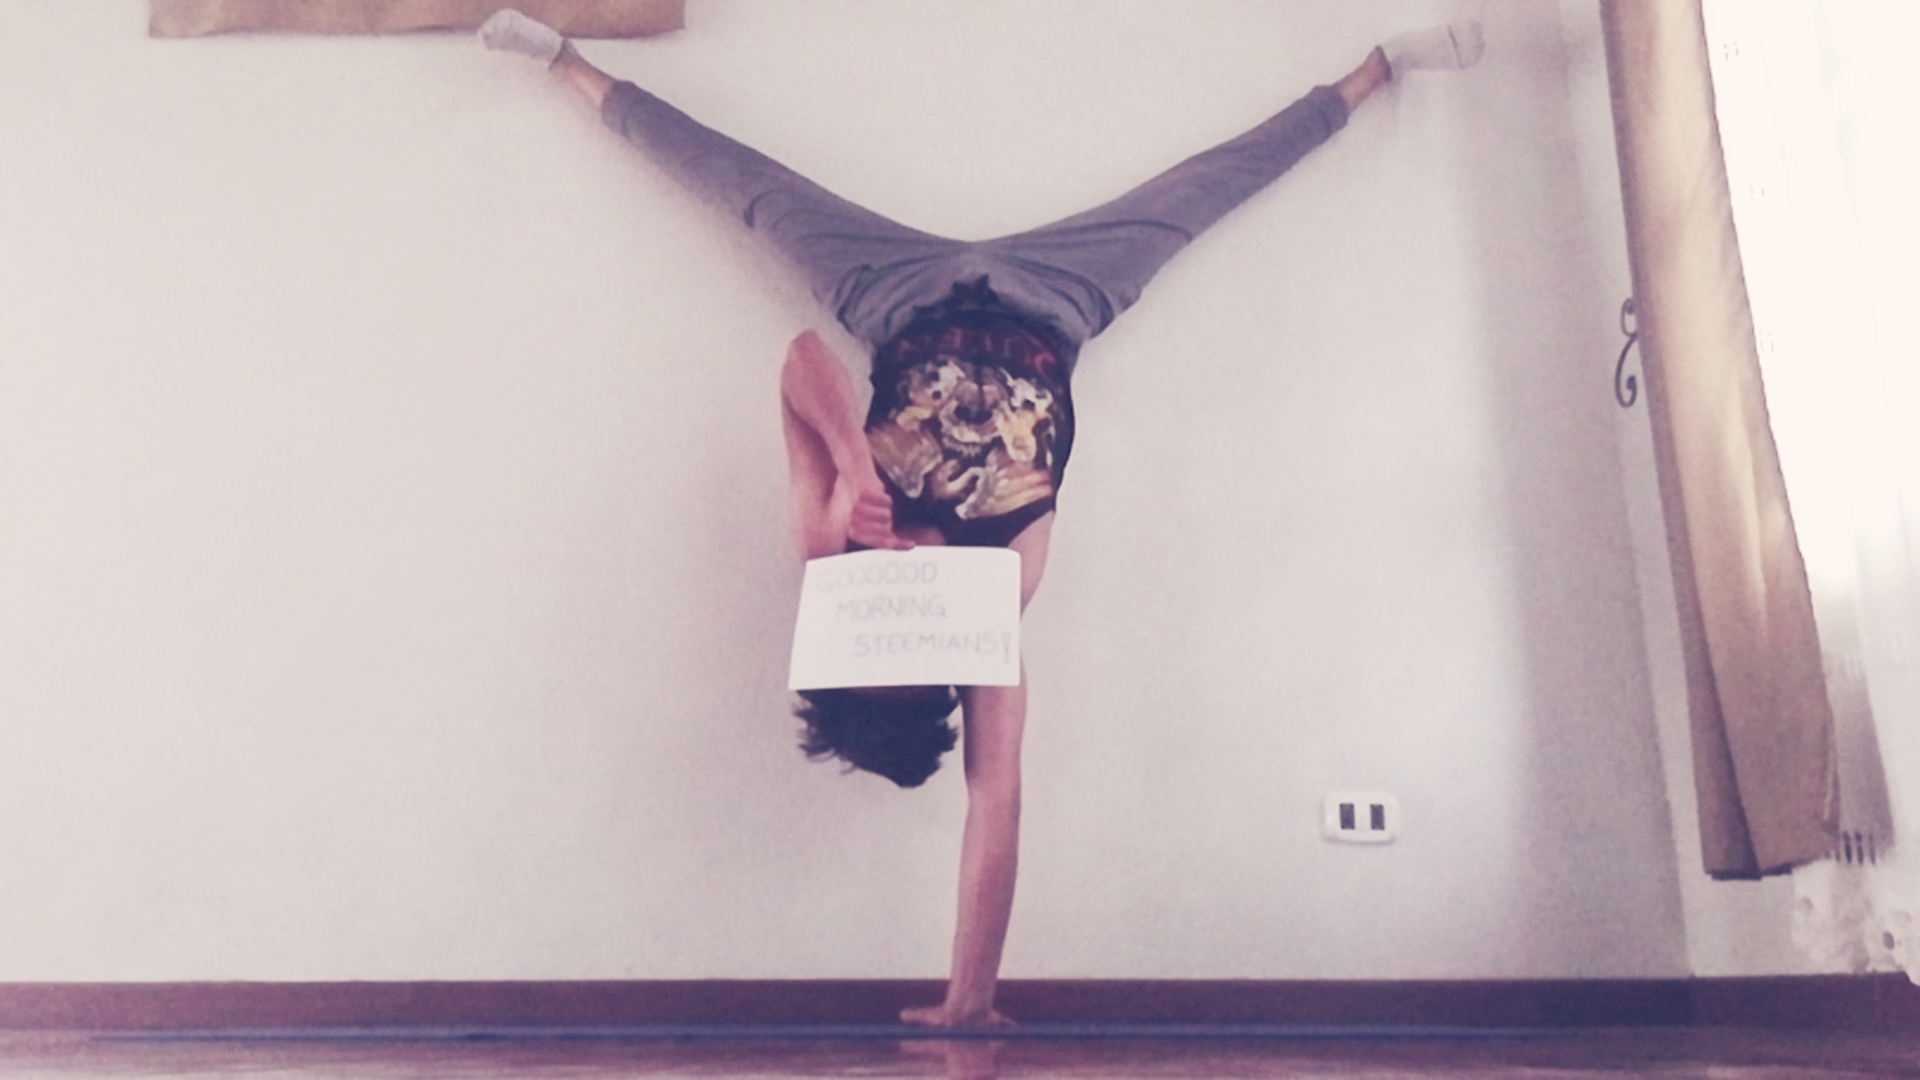
I really hope you can read that because it was a moment of inspiration, and maaan it’s not as easy as it looks
Don’t be fooled, even if you can’t see my face I promised it looked something like this

And just in case you really can’t read it
GOOOOOD MORNING STEEMIANS!

Today I wanted to share with you the basics of a handstand practice so you can start in the amazing world of hand balancing.
In this first post I wanted to start with the absolute basics of a handstand practice to start preparing your body to effortlessly stand on your hands and that starts with the wrists.
This is often one of the most under looked aspects, however it is also one the most important ones.
I’ll break the wrists down into 2 parts:
1)Their preparation for the handstand: It is unusual to all of a sudden have our bodyweight being pushed through our ankles to then being inverted and pushed through a much smaller joint like our wrists, that’s why it is very important to prepare them properly to avoid injuries and ensure their longevity not only for handstand but for everyday activities. Don’t be afraid to try different routines and ad/remove/modify stretches to better suit your needs.
Having said that here’s a link to one of the best videos you’ll EVER find on this topic, it’s short, easy to understand and it covers all the stretches you really need and more, in the future I’ll try to upload videos to Dtube to share my progress as well as for some tips and tricks, but in the meantime I’ll leave you with Mr.Daniel Vadnal
2)Their importance for BALANCING the handstand (You need strong wrists and forearms to improve the control and stability of your handstand, but you also need to understand how to use them)
The same principles that apply to your hands apply to your feet, when you stand up and lean forward you put more pressure through your toes to counteract that forward movement, and when you lean backwards you put more pressure through your heels.


Likewise when we are in a handstand and we are starting to lean forward we should push more weight through our fingertips to counteract that forward movement and when we move backwards we should try to put more weight on our palms, this are really the basics of hand balancing (obviously the elbows, shoulders and the rest of the body also play a big role in this but for now let’s just focus on the wrists).
The first hand balancing exercise you are going to do to test this is The Frog Stand (or crow pose in yoga) this exercise is great to help build that initial awareness of how to balance on your hands
Unlike the handstand this position allows any beginner to get a feel of what it feels to balance on your hands while still allowing you to put all the weight in your hands and balance your entire body.
To perform this movement you need to start in a squat with your hands in front of you on the floor at a shoulder width distance

Next tuck your elbows into your thighs and simply lean forward until you find that balancing point, then try to hold it for as long as possible

Try to be aware of how you are putting your weight through your hands and how that is affecting your balance.

You should aim to hold this pose from anywhere from 20 to 60 seconds before moving to more advanced progressions but don’t get discouraged if you only manage to get sets of 5 seconds in the beginning ;)
Now that you know a little bit more about hand balancing and are ready to start practicing you might be wondering about the frequency and sets and reps etc.

I would recommend practicing every day, do your wrist warm up and then spend 5 to 15 minutes practicing your crow pose and that’s it. The handstand itself is a skill and just like any other skill you should practice it frequently, don’t treat it like a workout, you shouldn’t be going to failure every attempt, that will just leave you too tired to practice the next day, at the beginning you might need to take a day in between each session but try to increase the frequency fast so you also build the habit, the most important thing for learning a handstand is consistency, don’t forget that.
That’s it for this post, but I hope you learned something from it and I motivated you to start your handstand practice, please make sure to go back to this post in a few days and share your progress or make a post and use handstand as a tag so we can all see it and build a handstand community here on steemit.

Welcome to steemit
Thanks :)
welcome to steemit . i enjoyed to reading your post . thanks
Thank you ;)
welcome to steemit , your a good dancer you'll be more sucessful in the future. i hope i can make that handstand hahha or maybe if ill do that i will wake up facing a nurse in the hospital.
kidding aside. just focus bro and steem On Always.
@khenbee
Thanks man, will do ;)
I really wish I could do one free standing. I can do them against the wall but it's not pretty. I'm still trying to lose some extra poundage too.
Believe me man, you are closer than you think, at the beginning I was so afraid of getting upside down I couldn’t even do one against the wall, 1)work on your hs line against the wall 2)learn how to fall so you can practice freestanding without fear (forward roll or cartwheel) 3)enjoy your hs ;)
Lol I love that first meme! With the guys crazy head lol
Nice to meet you :)
Nice to meet you to max :)
Congratulations @earthling-saul! You have completed some achievement on Steemit and have been rewarded with new badge(s) :
Click on any badge to view your own Board of Honor on SteemitBoard.
For more information about SteemitBoard, click here
If you no longer want to receive notifications, reply to this comment with the word
STOP