Step by step with MightyMon6 - Windows 10 Pro x64/VMware Fusion

What's up guys MightyMon6 here, and today I will be discussing the various basic steps to organization a functioning VM or "Virtual Machine". For VM's running on a windows based platform, your going to want to either purchase the full edition of WMware software or download the free trial edition, and it is called VMware Workstation. The trial edition I believe still gives you the full functions. For those of us using a Linux distribution such as macOS High Sierra, or other Linux platforms we will be using VMware Fusion. I will also be leaving a link to some of the software I am using somewhere at the bottom, but first I want to express that this is an informational piece, one that I am very proud of, I am in no way affiliated with any of the software companies that I am using, I am not being paid by any of these companies, I am simply putting information that I enjoy out there for you all, and I hope you all enjoy it as well.


Very well without any further delay, lets get into it.
So the first pic I have up here is a screen shot that I just took a few moments ago of the application you are going to need to download. Wether you are using Windows or Linux it doesn't matter, I will point you were you need to go. :)
So the very first thing is you need to go to https://www.vmware.com, and navigate to the downloads tab from the main page. Once you get to the main page the downloads section is going to be on the left side of the page, and it will look like this.


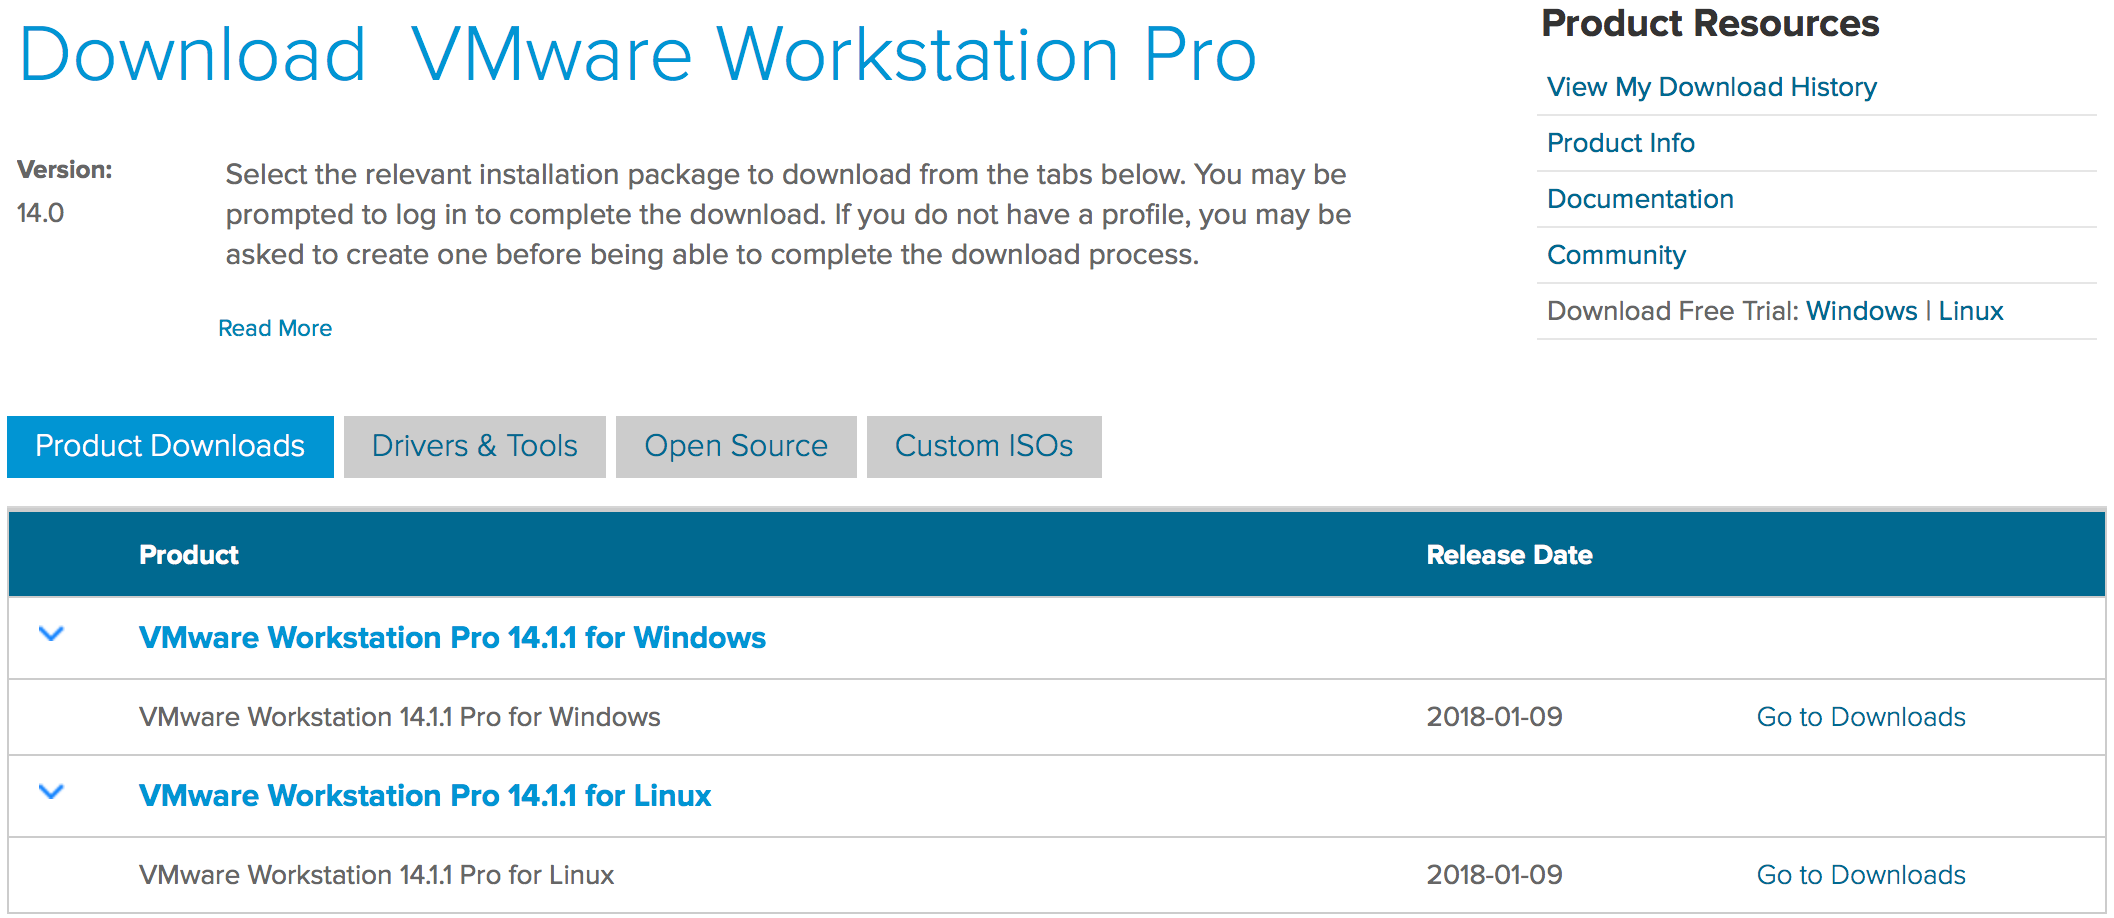
For the Windows Operating Systems you will go to the Workstation Pro Downloads, for the Linux distributions you will navigate to the Fusion Pro link and it will look like this,

Once your downloads have been completed and your installation finalized, we can proceed to our VMware implementations. You will now need a .iso to be able to boot the Operating System of your choosing. Here are a list of direct links to those .iso bootables. A nice top three to get you started.
1: (Windows 10) https://www.microsoft.com/en-us/software-download/windows10ISO (has come along way)
2: (Windows 7) https://www.microsoft.com/en-us/software-download/windows7 (very much enjoyed)
3: (Windows 8) https://www.microsoft.com/en-us/software-download/windows8ISO (was not a fan of)
(FYI a .iso is a virtualized copy of the OS disc image, if you are my age, which I will not disclose, but maybe you can guess, remember when back in the day if you bought a computer they used to issue you the physical copies of the disc images which later became your best friend if you needed to recover or re-image your computer it was there?.... yea well they don't do that anymore hahaha it's ok though I got your 6 no worries.)
So hopefuly during the installation of VMware and the download of your .iso's you followed the prompts that came up, if you need further assistance, I will be more than happy to help, just let me know in the comment section. So you are now ready to move on. All right so we are now going to open up our VMware software, for those doing this on a Mac it will look like this at first launch:
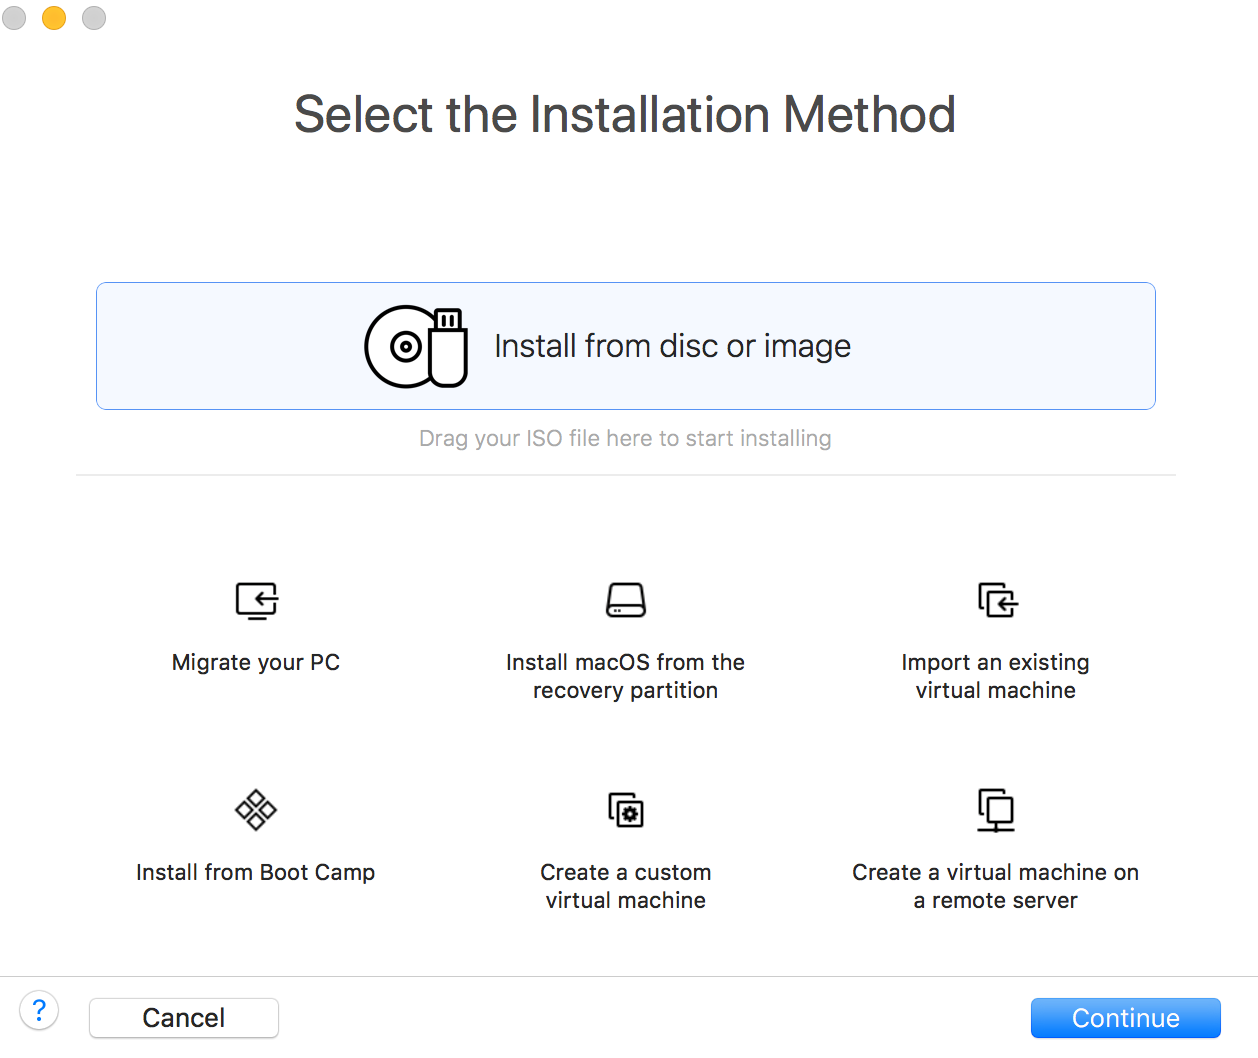
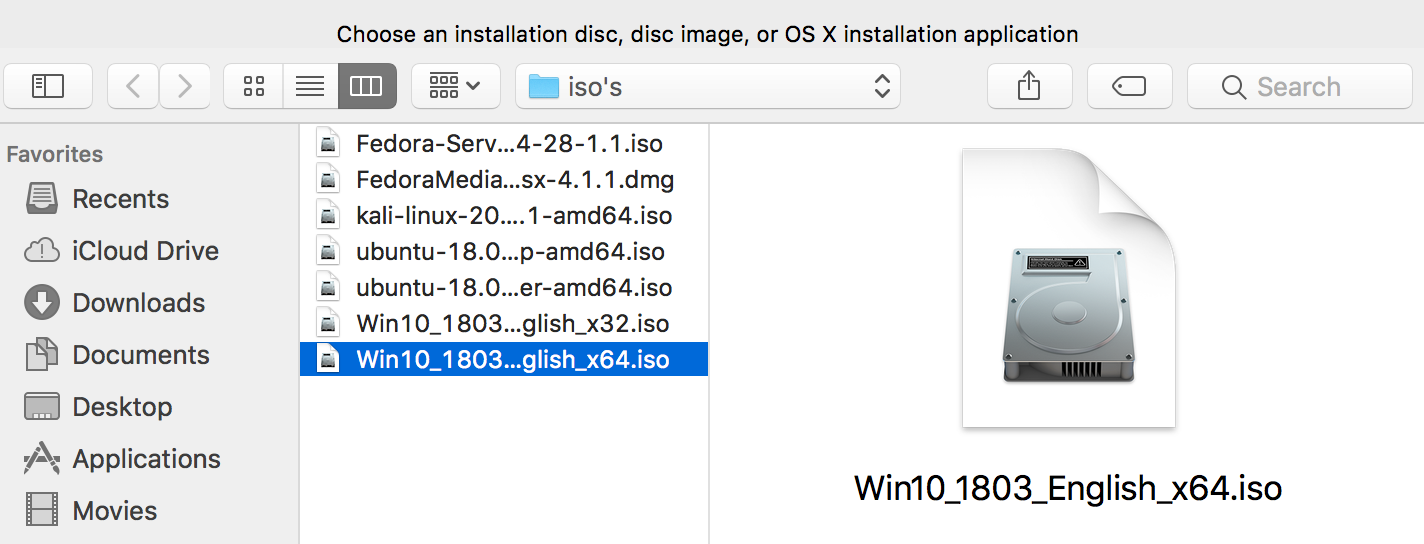
By default, you are going to click on continue, and now it should be asking you to choose a(n) .iso image. If yours is blank and does not display a(n) .iso image file right away as mine does, no worries, simply you will follow this next step. You will navigate to the bottom of the prompt and click on where it says, "Use another disc or disc image". After doing so you will be prompted to select the operating system of you choosing. For this project, we are going to use the Windows Pro x64bit image file.
You will now select ok, and on the next prompt, you will be asked what version of operating system you would like to use. We are going to go ahead and select the Windows Pro x64 for this project.

For the next prompt, we will select in which manner do we wish to boot our operating system. We will go ahead and select legacy boot. On the finishing prompt, we may need to allocate another processor other than the one it is assigned by default, we only need to give it enough operational reasources to be able to maintain a decent amount of functionality between your host operating system and your virtualized operating system.


In my case for instructional purposes, I went ahead and alotted it 2 cores (cpu) and as far as memory is concerned I left my defualt selection of 2048 MB. (Mega Bytes) As soon as your virtual machine has loaded you should see the first setup stage as if you were installing Windows for the first time on a new phsyical or virtual machine.

Here we are going to leave the defualt settings that it displays, you may adjust them for your personal prefrence and accomidation varying on where you are geologicly located. I'm in the US so I will leave it US default. On the next phase you will see the prompt to "Install Now". You will click on that. After doing so you will be prompted to implement a authentication key for the operating system. Do not be alarmed we are simply testing the product Windows 10 Pro, we can skip this step and it will allow us to use the OS as a trial. Simply select "I don't have a product key at the very bottom".

Now you will be prompted to select the version of Windows we would like to try. In our case, we will utilize Windows 10 Pro x64. After selecting the desired option we must select "next". We will then be prompted to accept the terms and conditions to be able to continue. So we must agree, then select "next". Now we will be asked if we are upgrading from a(n) older OS or if this is a custom install.


Since we are doing this as if it were a "fresh install" we are going to select Custom install. We will leave the defualts and proceed to select "next". Your system should now being installing. (for those us with no patience or at least very little patience, this may take a little bit hahaha it's ok though we are in this together."
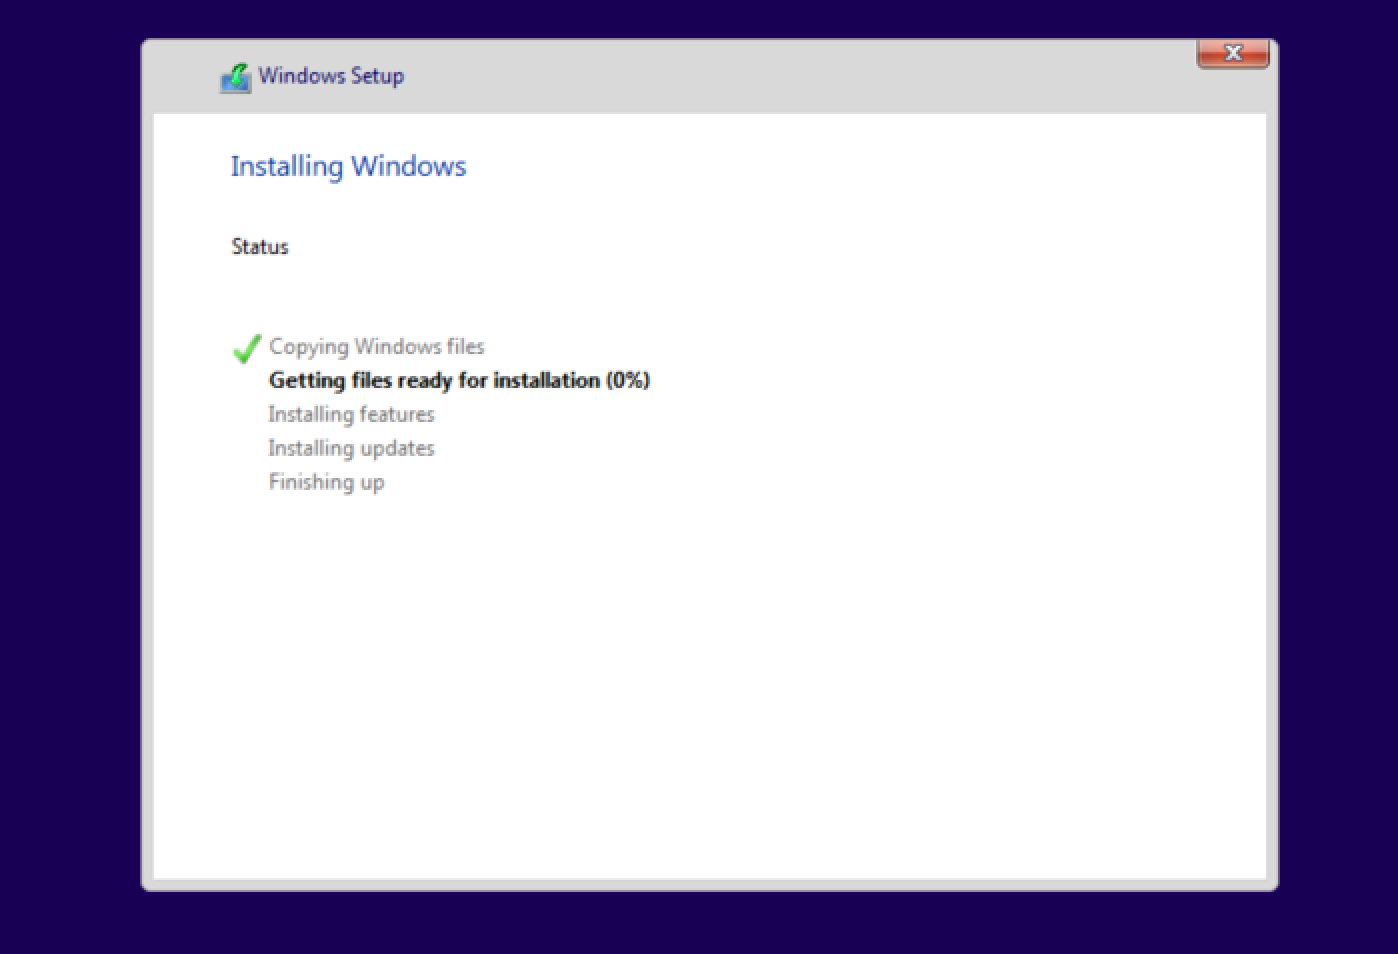
After a little bit, we now see ever familiar Windows icon with a dark back drop and a looping notice letting us know that they are getting things ready for us. After a little bit, Cortana greets us with a small intro, we can turn off Cortana later, we select our prospective region, again in my case I am in the US so I will select that one, then click next. In my case as well I will leave the keyboard in the US layout as well. If you have a secondary keyboard layout you may add one in the next prompt, but in my case, I will skip this. We are now going to be asked as to whom this computer belongs to. (virtual computer) I went ahead and selected Personal with an offline account, as I will not be using this particular vm as a dedicated vm. Next, we will name our offline acount, in my case I will name it after myself.

We must then inplement a decent password, then after confirming our password by re-entering it. Word of warning all the while we are doing this setup Cortana will be assisting you. You may silence her by turning off voice mode. Anywho after the password has been set up, we must select three account recovery questions. After doing so we may allow Cortana to use the minimal information we gave her or deny her. I usually deny any request like that. Normally also I like to configure the inital privacy settings for security reasons, but for instructional purposes, I will leave these defualt.

After accepting the configurations you made or didn't make, Windows will now finalize and luanch for the first time on your own virtual machine. This may also take awhile. While I am waiting for the setup to complete, I want to expand a little as to the benefits I have found to using VMware as a means to implementing dual operating systems. Mainly two major reasons for me.
1: It has allowed me to be more flexible in the type of enviornment I not only want to be able to work in, but also the ability it has given me, to be able to choose that platform I need at the specific moment.
2: This freedom to choose as to what OS I need or what distribution type I need, also works really well when I am mobile or not in my normal network setting. So there it is, flexiblity, and ease in convinence.
After finalization of the setup, we are now brought to our main page. We have successfully created a fully functional Windows based virtual machine with our main physical host machine.
Cool huh ? hahaha, Thanks for reading folks I do apprciate any feed back as it would be greatly appreciated. I am new to Steemit and would like to grow along side all of you, as well as to learn from all of you what ever it is that have to share. I f you all need any help what so ever with this setup feel free to leave me a question in the comment section. Thanks so much again guys hope to hearing from you all. :))