Easy Way Tutorial Using One Strobe Light on Photography
Assalamualaikum wr wb.
Hari ini saya akan berbagi tutorial singkat dalam mempelajari teknik dasar menggunakan satu strobe light.
Today I will share a brief tutorial in learning the basic techniques of using a strobe light.
Cara yang baik untuk mulai belajar lighting fotografi dengan hanya satu strobe light yaitu dengan menyesuaikan ukuran cahaya dengan subjek, baik dengan menyebarkan cahaya atau mengubah jarak cahaya untuk subjek, kita dapat membuat banyak perbedaan hasilnya.
- A good way to start learning photography lighting with only one strobe light that is to adjust the size of the light to the subject, good by spreading the light or change the distance of the light to the subject, we can make a lot of difference result. *
Tutorial penggunaan:
The Tutorial :
Sebagai sebuah latihan sederhana, ajak teman anda foto secara close up dengan menggunakan satu lighting yang di pasang pada softbox. Posisi teman anda di tengah sebuah ruangan dengan background gelap.
As a simple exercise, invite your friend to take an portrait photos using one lighting are in pairs on the softbox. The position of your friend in the middle of a room with a dark background.
Tempatkan strobo dengan sudut 45 derajat dari depan objek. Objek di sini yaitu teman anda.
Posisi anda sebagai fotografer harus berada lurus di depan objek.
Tinggi kamera harus sejajar dengan mata objek agar tidak terjadi gambar yang tidak perspektif.
Atur Apperture di atas F/5.6 – F/22
Atur Exposure Time atau speed 1/200, jika kamera anda belum di dukung Flash Syncronize 1/250.
Pengaturan ISO di sarankan antara 200 – 640 agar gambar menjadi detil dan tidak menimbulkan bintik noise.
Setelah pengaturan kamera selesai, atur ukuran power strobe lighting kalian hingga mendapatkan cahaya yang kalian inginkan.
Jika strobe lighting kalian memiliki mode modeling flash, gunakan lampu tersebut agar lebih mudah mendapatkan dan menentukan titik focus serta menghindari miss focus atau gambar tidak fokus.
- place the angle of 45 degrees with the strobe from the front of the object. The object here that is your friend.
- Position you as the photographer must be straight in front of the object.
- the camera should be parallel with the edge of the object to keep it from going on an image that is not perspective.
- set the Apperture above F/5.6 – F/22
- set the Exposure Time or speed 1/200, if your camera is not yet supported Flash Syncronize 1/250.
- ISO Settings in between 200 – suggest 640 images into detail and not cause noise. specks
- once the camera settings are finished, set the size of the power strobe lighting until you guys get the light you want.
- If the strobe lighting you have modeling flash modes, use the light to make it easier to obtain and determine the point of focus and avoid miss focus or image out of focus.
Secara pribadi ketika memotret #portraitphotography, saya lebih suka menempatkan strobe lighting dengan jarak hanya 50cm dari objek agar mendapatkan gambar yang sangat detil. Berikut contoh foto – foto hasil dari penerapan tutorial di atas :
Personally when shooting #portraitphotography, I prefer to place the strobe lighting at a distance of only 50 cm of the object in order to obtain very detailed images. The following example of the photo – photo results from application of the above tutorial:
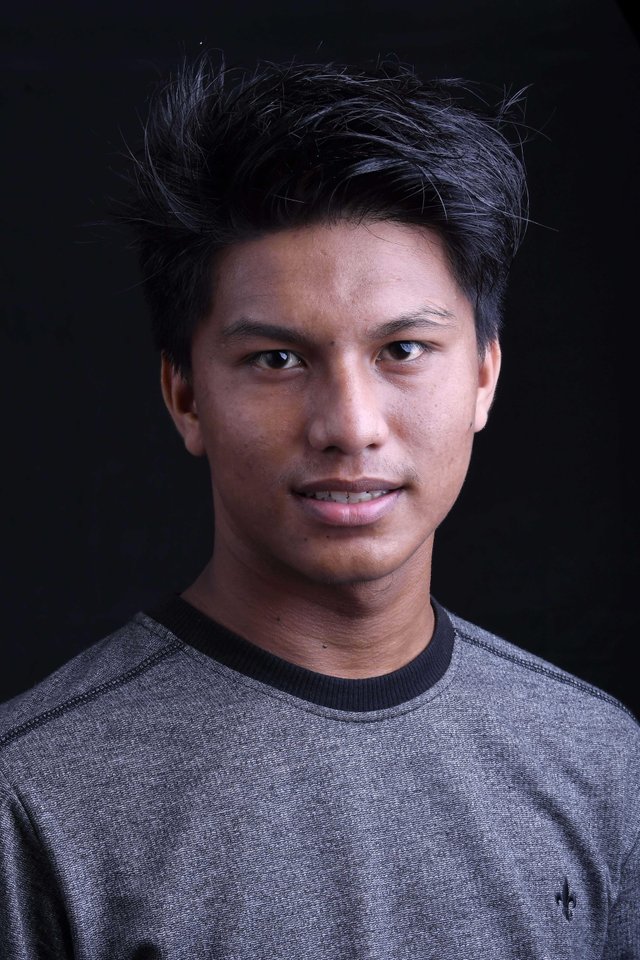
| Camera | Nikon D500 |
|---|---|
| Apperture | F/16 |
| Iso | 200 |
| Exposure | 1/250 |
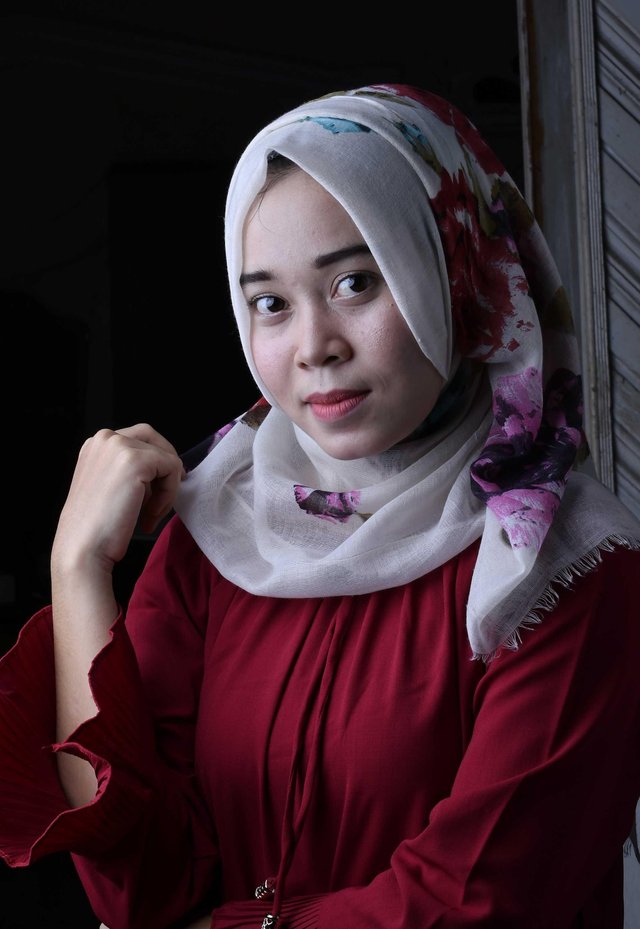
| Camera | Nikon D500 |
|---|---|
| Apperture | F/16 |
| Iso | 200 |
| Exposure | 1/250 |
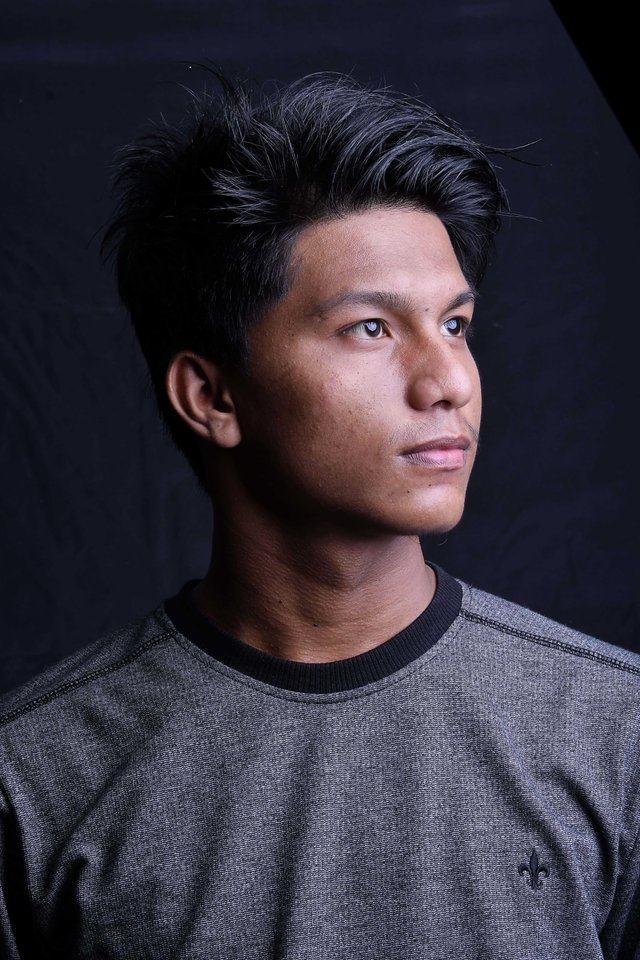
| Camera | Nikon D500 |
|---|---|
| Apperture | F/16 |
| Iso | 160 |
| Exposure | 1/250 |
semua foto di atas adalah original file tanpa ada sentuhan editing sama sekali
- all photos above are the original file without any touch of editing at all *
Cukup mudah bukan. Yang paling penting dalam mempelajari teknik dasar fotografi menggunakan satu light strobe yaitu paham sudut jatuh cahaya dan besarnya kekuatan cahaya itu sendiri.
Pretty easy isn't it. The most important thing in learning the basic techniques of photography using a single light strobe i.e. understand angle fall light and the magnitude of the forces of light itself.
Belajarlah sejak sekarang dan jangan malu untuk bertanya. Semakin anda sering bertanya maka semakin besar kesempatan anda untuk mempelajari tekniknya. Malu bertanya sesat di jalan, begitu kata pepatah. Hehehe
Learn from now and don't be shy to ask. The more you often ask then the greater your chance to learn the technique. Embarrassed to ask wayward on the street, as saying. Hehehe

*.GIF by @myaceh
Helo, apa kabar @razipelangi? Keren ini postingnya dan sudah kami upvote dan resteem ke 7262 follower yah.. 8-) (Segelintir kontribusi kami sebagai witness di komunitas Steemit bahasa Indonesia.)
terima kasih banyak @puncakbukit sudah meresteem postingan ini, semoga dapat membantu banyak pemula yang ingin mencoba teknik ini.
Wah terima kasih ilmunya bang @razipelangi.
Meskipun komen seperti ini tidak dibutuhkan tapi saya benar-benar berterima kasih dengan penjelasan di atas.
Alhamdulillah bertambah lagi pengetahuan.
Terima kasih kembali mbak, semoga bisa bermanfaat bagi kita semua.. Hehe
Berarti kelihatan setiap inci dari yang kita potret
Iya kk, hehehe
I just want to dismantle the rotten games and lies that happen here. The contest is unprofessional because the winner is a duplicate account of the @razipelangi contest maker.
He uses some fake accounts as SBD sending terminals to be sent to the bot services so that the contest he performs looks like a contest at the usual.
If what you express is seen as cheating, you can check the flow of SBDs sent in the wallet in a chain.
This is evidence of the game and the lies being made @razipelangi
Jangan lupa kirimkan SBD nya, biar kita kirim ke bot seperti biasa.